


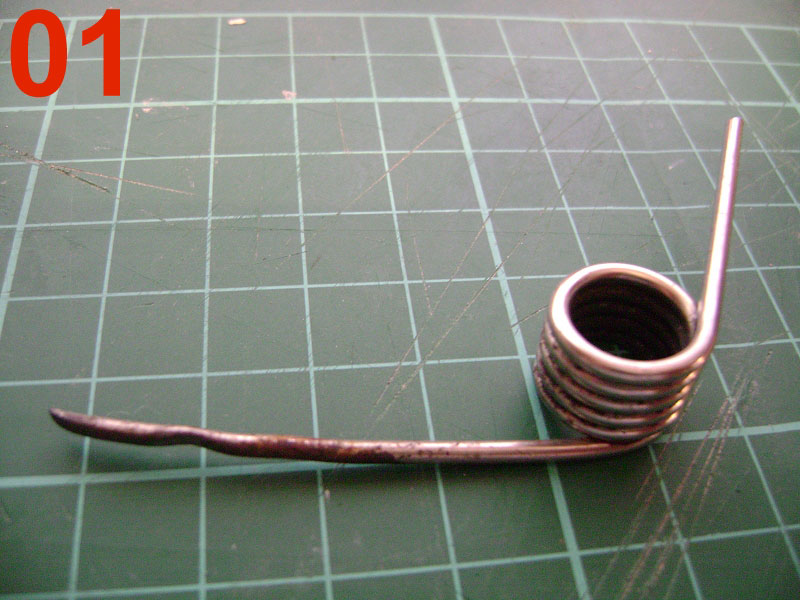
If you’ve bought a used Tamiya Willy – the 58035 Wild Willy M38 (short or long ... wheelbase that is ;) ) or 58039 Willy’s Wheeler, you may have found that the wheelie springs – officially the “Wheelie Bar”s – may have got quite badly worn if the car has been used on tarmac. If that use was quite extensive, then the ring at the end may have worn away completely – see pic 01.
While these springs are not completely unobtainable, the price may seem a little hard to swallow, especially for a car you intend to run. Fear not – there is a cheap alternative.
Pic 02 shows what you’ll need – a bench vice, a 10mm former (I used a posh parallel punch), a decent pair of cutters, and at least one wire clothes hanger. The pliers turned out to be unnecessary, btw. Some eye protection would be a Good Thing.

I bought my hangers on eBay, but the wardrobes in cheap hotels & rental properties are also an excellent source ;)
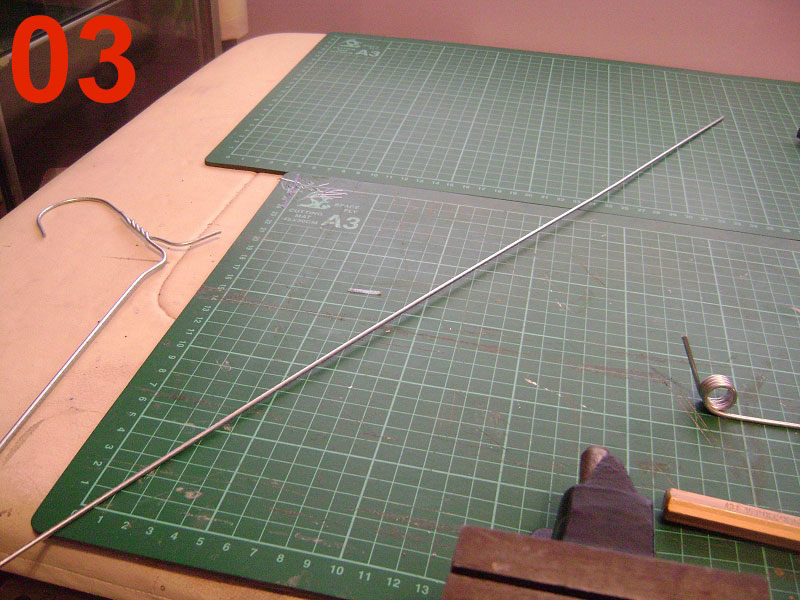
Chop the hanger near the neck, then use the vice to carefully straighten the bend on that side – see pic 03 for an example.
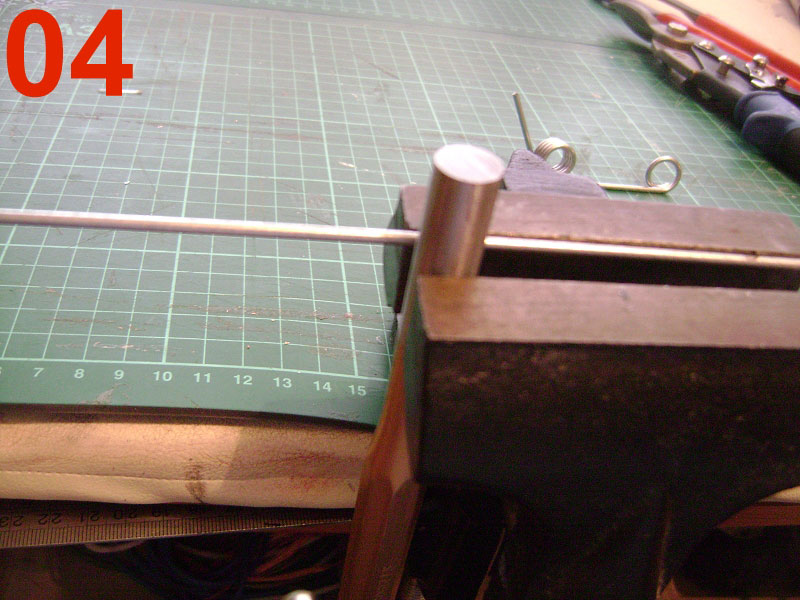
Put the hanger in your vice along with the former, leaving approx. 75mm sticking out one side, and the wire as close to the top of the jaws as possible – see pic 04. This needs three hands, or a bit of patience.
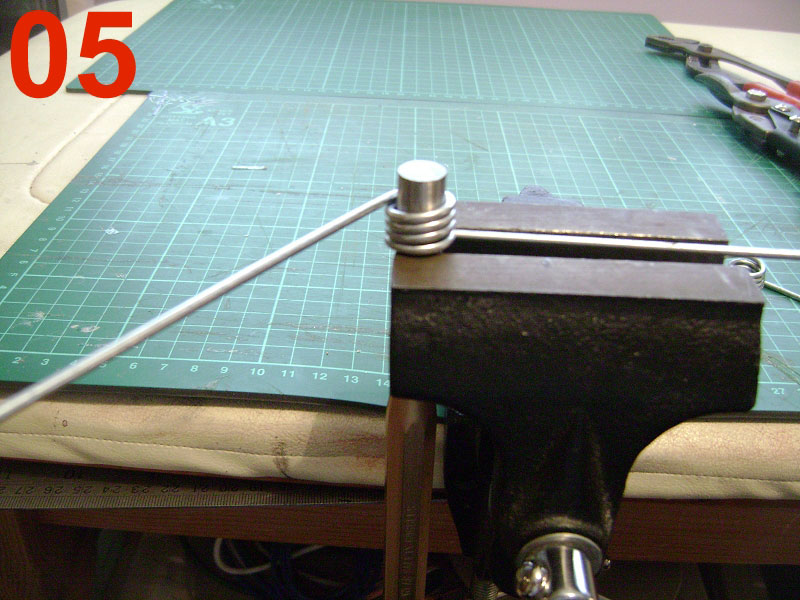
Being careful to make sure the hanger & former don’t escape from the vice, and that the free end of the hanger doesn’t damage anything, or you, wrap the wire around the former, keeping the coils as close together as possible. The total width is important – the genuine parts have five and a bit turns, but I found my hangar was a bit thick, so only did four and a half. Note the direction the wire has to turn in.
Set up for the second stage is similar, but use a genuine Willy spring to get the distance between centres correct – too short & your Willy will fall over backwards, too long and your Willy will attain only an unimpressive angle. See pic 06.
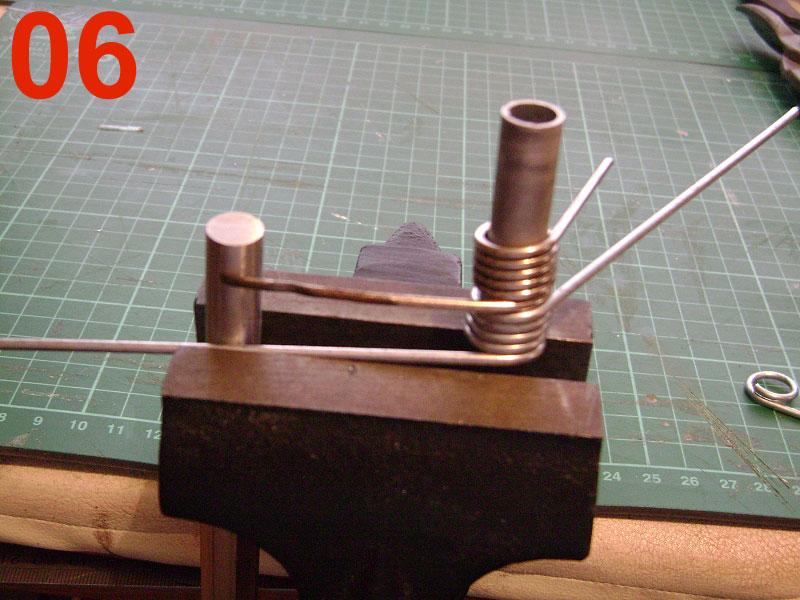
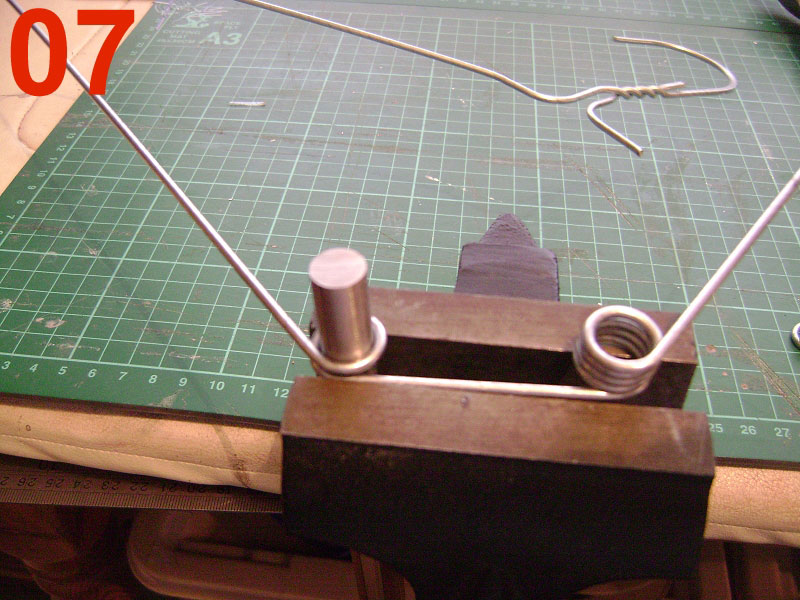
The end that’s in contact with the road is only a single turn, but go a little further, you shouldn’t run out of wire here. See pic 07.
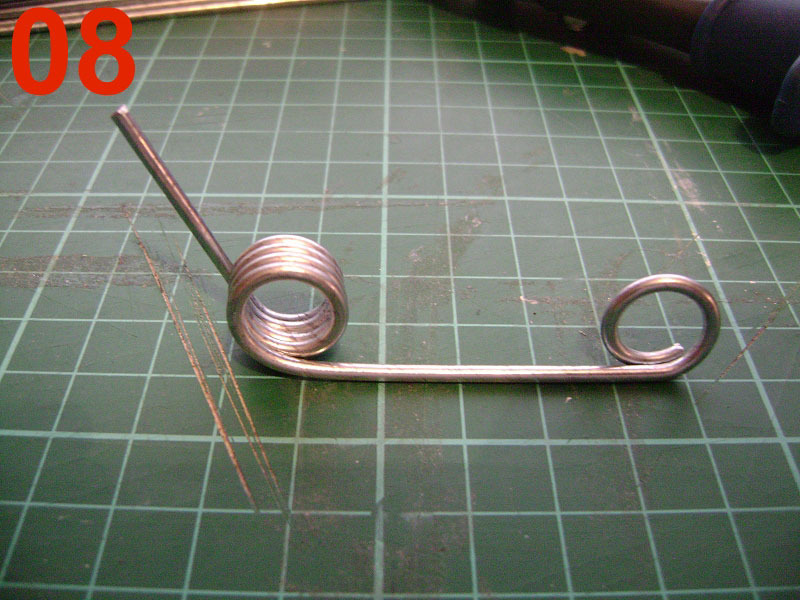
Trim the excess wire off (see pic 08) – my cutters went through the straight bit ok, but only nicked the wire on the road end, and I had to fatigue the rest off. If you’ve got a pair of cutters that will cut wire like this right at the tips, please let me know – I wouldn’t mind buying some.
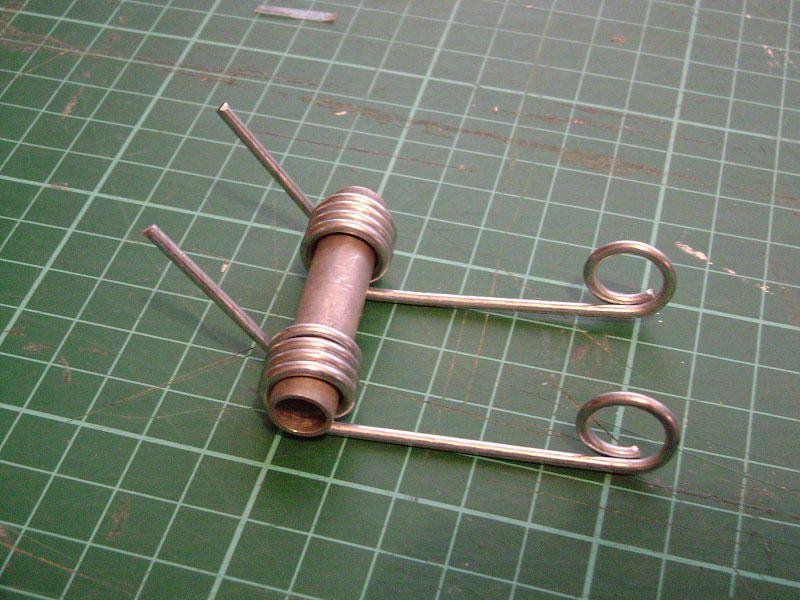
If you’re doing this for a Wheeler, you can stop right there, but for the Wild Willy you’ll need a second spring. Note that the springs are not handed – they are all the same.
________________________
Written by TB member Jonny Retro