

In previous parts we've covered materials & tools, and in the last two, building basic structures & adding details to make them into 1:10 versions of real things. This time we'll cover a couple of paint techniques to make scale objects look a bit more realistic.
Jars of Tamiya paint seemed to be 99p for a couple of decades, but have jumped over the last couple of years to 1.60 GBP - I mention this because though not individually expensive, the painting described here does need quite a few different colours of model paint and it does add up.
Unfortunately, I don't see any way around it other than to get the best deal you can. I've recently been buying from emodels.co.uk, they sell Tamiya 10ml jars at a bit below the RRP & the postage cost isn't too bad when you buy a load of pots at once.
You will need:
- Palette (or improvise - Lids off takeaway boxes are ideal);
- Cocktail sticks, syringe;
- Brushes;
- Aerosol acrylic clearcoat (aka clear lacquer);
- 1200+ grit wet & dry paper, Fairy liquid;
- Tamiya 6mm masking tape, 3M 1/8th blue vinyl tape;
- Superglue (Cyanoacrylate);
- Model Paints:
- Tamiya X-19 Smoke
- X-21 Flat Base
- X-24 Clear Yellow
- X-26 Clear Orange
- XF-16 Flat Aluminum
- XF-20 Medium Grey
- XF-22 RML Grey
- XF-50 Field Blue
- XF-52 Flat Earth
- XF-57 Buff
- XF-67 NATO Green
- XF-68 NATO Brown
- XF-69 NATO Black
- Humbrol acrylic # 113 Rust*
Note *: there doesn't seem to be a direct equivalent to this in the Tamiya range (although there are of course the weathering kits) - at a guess I'd say mixing XF-9 Hull Red with a light grey/blue such as XF-25 Light Sea Grey would make a decent enough paint-on rust.
Washes
A "wash" is simply thinned down paint, brushed on. This can be done for a number of reasons - to define details, for a weathered/dirty look, for subtlety (to make a wood effect appear part of the substance of the thing rather than just paint on the surface, for example), to lighten or darken the apparent colour - or a combination of reasons.
It works best on matt finishes, less so on satin paints. It's only really of use at the edge of gloss painted areas, due to the finish shunning the water - experimenting with surfactants such as tiny dab of Fairy liquid is really beyond the remit of this article.
Washes work because not only do you get a general layer of "dirt", but surface tension makes the thinned paint form a meniscus at details, so as it dries, more paint gets left there.
Being very thin, the paint can build up to an unexpected degree at "low" points, so do be prepared to dab any excess off.
Note on "drops": I use cocktail sticks for stirring and measurement of drops of paint, and small syringes (2ml ones are fine) for measuring drops of water. The two drop sizes aren't necessarily the same size, but at least it makes things repeatable.
A 1:4 ratio, i.e. one drop of paint to four drops of water is generally about right, with 1:5 being very light (often to the point marginal effectiveness, depending on colour), and 1:3 usually being too heavy. It's better to start with a wash that's too light, as the process can be repeated with a slightly heavier ratio wash - this is a lot easier than trying to cover up a wash that was too dark to start.
You can vary the shade of the result by dabbing off washed areas with a cloth before the area dries - do use something decent like a bit of old 100% cotton shirt though, not toilet tissue as it will leave fibres behind.
Washes should generally just be a shade or two darker than the base colour, rather than doing everything with black - although that can be very effective on silver-ish engine parts. Adding a tiny bit of black to the base colour on your palette before adding the water can be very effective, but I seem to have unintentionally accumulated a lot of shades of military looking colours, and using them does take out the guesswork.
A hair dryer can be used to speed the process of drying - just don't get it too hot, or get to close & blow the paint around.
Brushes: generally a "real" hair type brush in a medium to large size (e.g. 3 to 6) seem to work best.
Dry Brushing
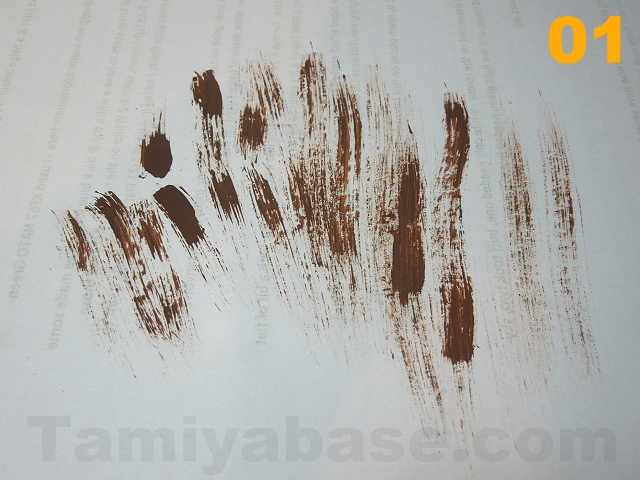
This is a bit of a misnomer - the brush shouldn't be entirely dry otherwise no paint will get laid down. The basic technique is to dip the very end of the brush in the paint, squeeze out as much as you can on the side of the jar, then dry the bristles with a few strokes on a scrap bit of paper (image 01), then make light strokes on the thing you want to dry brush. A bit of experience will tell you how much paint to leave on the brush and how hard to press - but at the beginning it's far better to have too little paint on the brush & end up doing it twice than to put too much paint on.
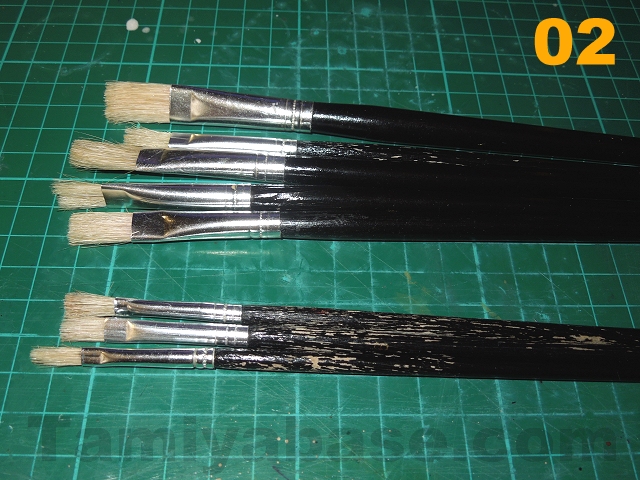
Unlike the brushes needed for "washing", an ideal tool for dry brushing is one with the nastiest, roughest artificial bristles you can find (image 02) - really just one step up from fingerpainting ... searching for "nylon brush set" in the crafts section on eBay & sorting on lowest price first should provide some options, the alternative being to search on "dry brushing" - that will bring some excellent but expensive brushes. Or it might bring up a load of stuff on skincare if you don't restrict your search.
The dry brushing technique is principally used in modelmaking to highlight details at smaller scales or to add dirt/weathering effects, here we'll be using it principally as a way of creating faux wood grain, and to also create fake scrapes and rust.
 |
 |
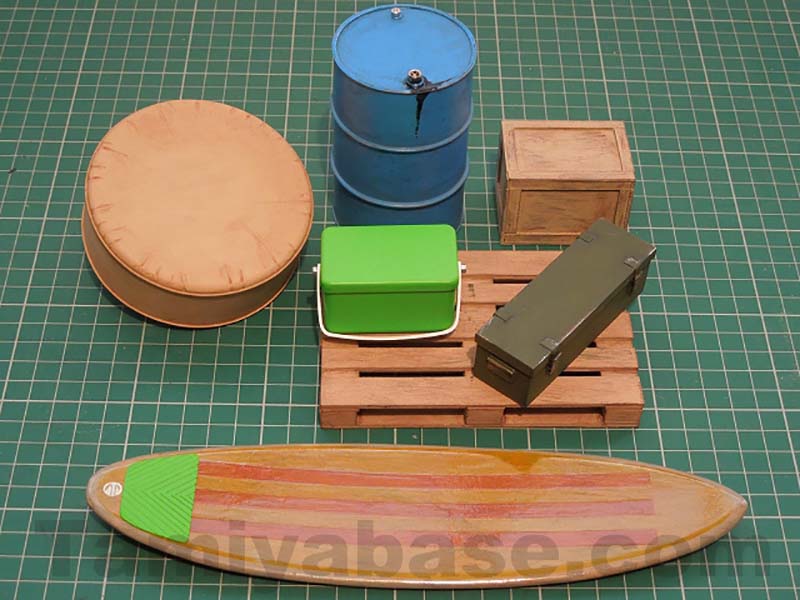
Moving on - how these techniques can be applied to each of our seven scale objects:
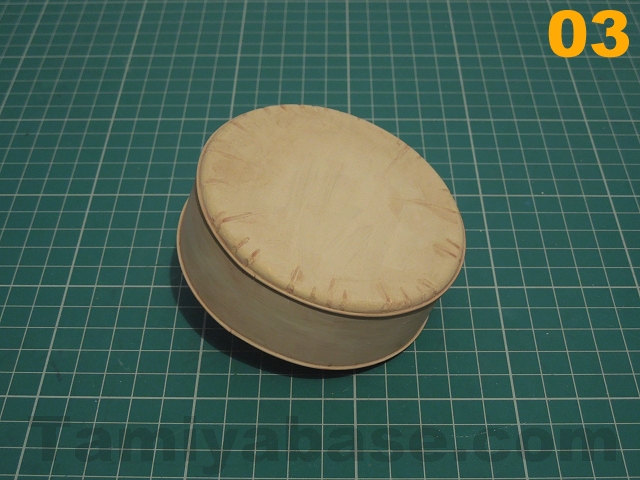
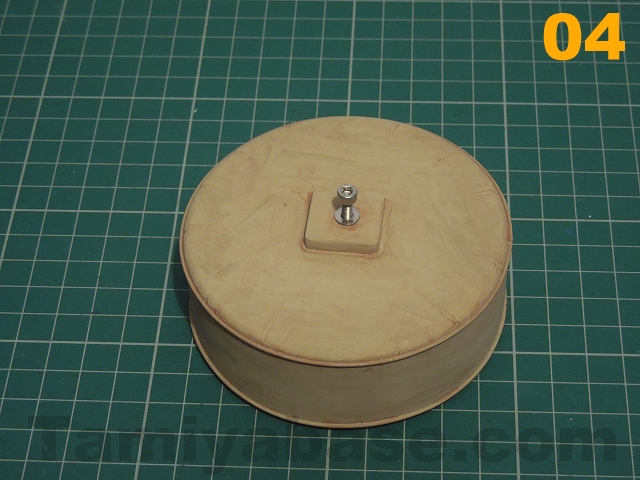
Spare Wheel Cover
Apply a wash with a darker brown colour at a ratio of 1:4, e.g. 5 drops of XF-68 NATO Brown + 20 drops of water. Dab off a bit from the middle of the larger areas. Apply a bit extra in the filed grooves & allow to dry ... remove the long screw/wire hook arrangement and replace the shorter M3 fitting screw.
 |
 |
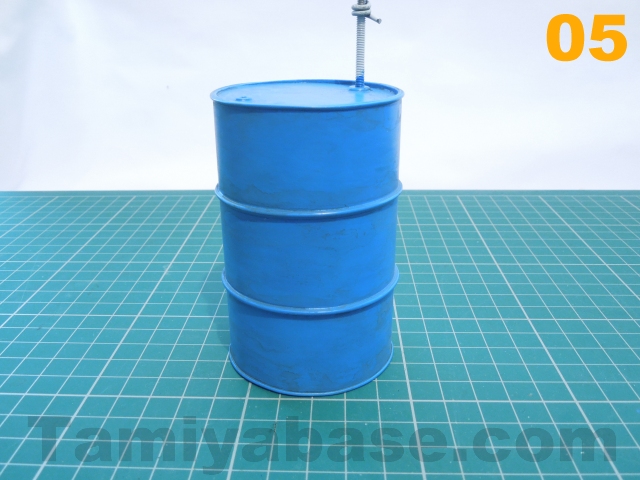
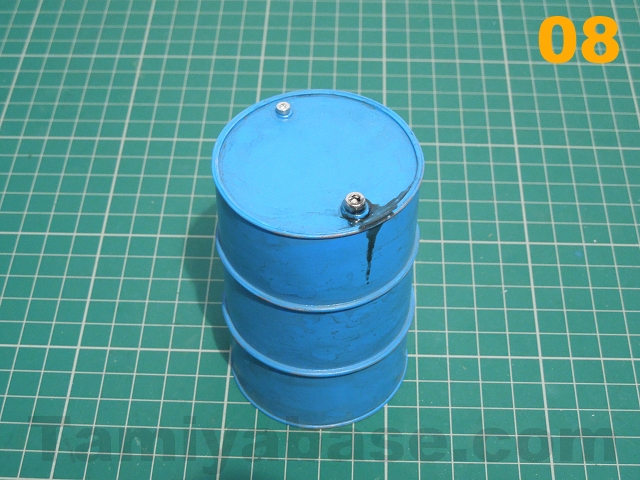
Barrel
Apply a wash of a darker blue (image 05) e.g. XF-50 Field Blue at a 1:3 ratio, e.g. 4 drops of paint & 12 drops of water. Be aware that the satin finish may shun the wash a little in places.
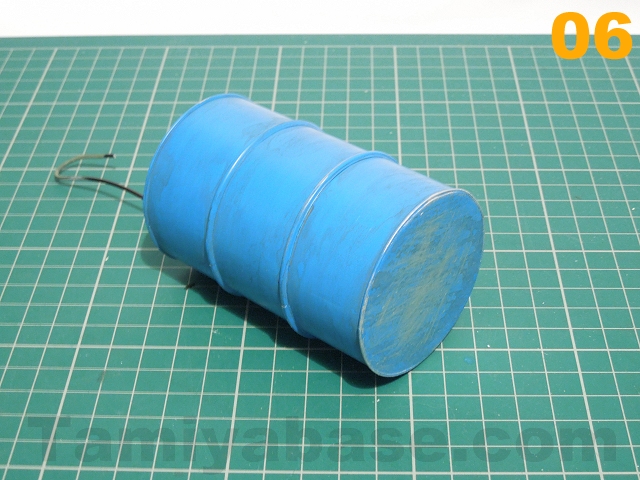
Once dry, dry brush a little silvery colour (image 06) (e.g. XF-16 Flat Aluminum) to the areas most likely to get scraped/worn (e.g. the chines, especially the bottom one, and the base).
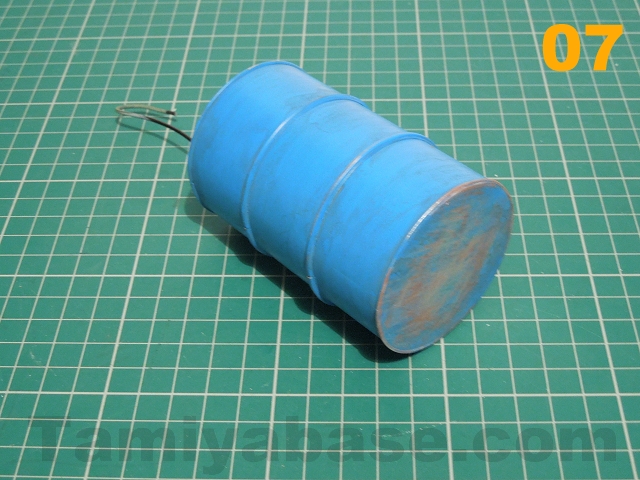
Once that's cured, dry brush a little "rust" colour to the silver areas most likely to rust rather than get re-scraped/worn - the edges of the silvery areas I guess (image 07). You might also want to fake a little oil too - a little bit of X-19 Smoke around part of the recessed top, a little dribble down the front, etc). Or maybe not, it's very easy to be heavy handed.
Note: the bare metal & rust dry brushing can be done at the same time as the Ammo box.
Remove the hanging screw & refit the decorative cap head screws (image 08) - a little fake oil on the larger of those wouldn't look out of place .
 |
 |
 |
 |
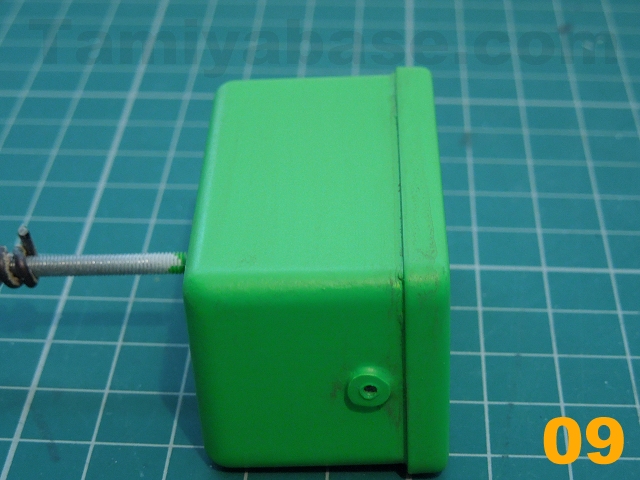
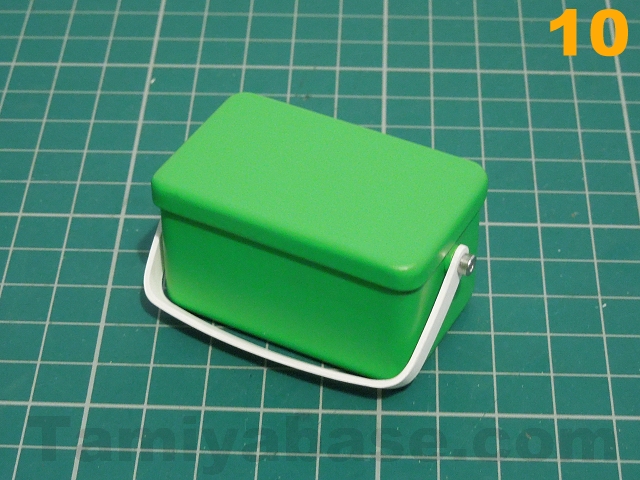
Cooler
Apply a very light wash of XF-67 NATO Green (this can be done at the same time as the surfboard grip pad), ratio should be about 1 to 5 - e.g. 2 drops of paint to 10 drops of water. Apply everywhere but wipe off except around under the lid.
Once that's dry, remove the long M3 screw & refit the handle with the M2 screws.
The top looks a little on the bare side now it's finished, I'll try to find an appropriate sticker or make a transfer for it.
 |
 |
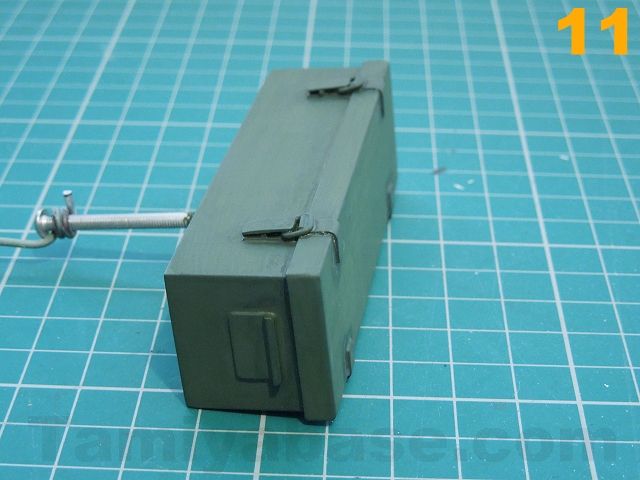
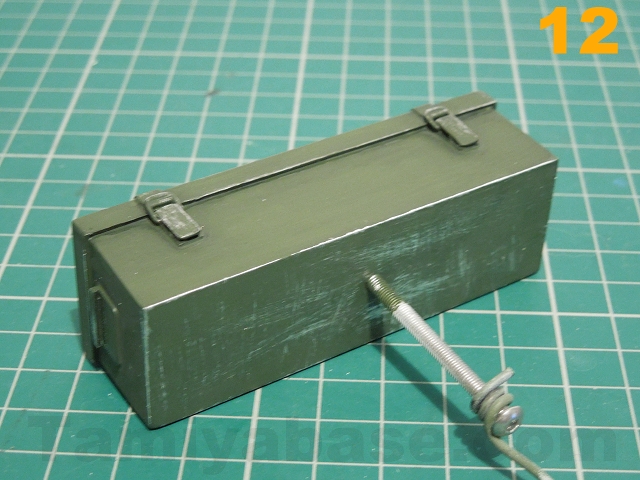
Ammo Box
There aren't really any shades of green darker than that used for the base colour, so I'd suggest a light wash (about a 1:4 ratio) of XF-69 NATO Black (image 11).
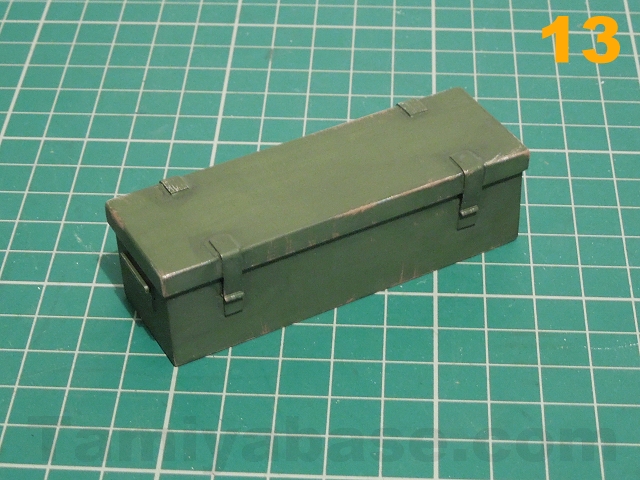
Once that's dry, bare metal & rust effect dry brushing can be done something like the barrel. Remove the long M3 screw & we can call it done. Some yellow stencilling on the box would look great, but is beyond the scope of this article.
 |
 |
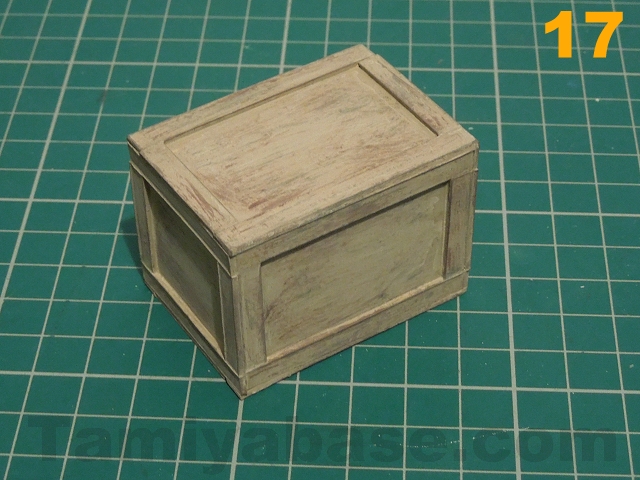
Crate
The grain effect on all three of the faux wood items starts the same way, so I'd suggest the crate is done at the same as the pallet & surfboard.
Dry brush a medium brown colour (e.g. XF-68 NATO Brown) - don't aim to get it all over each piece /panel of "wood", leave a few gaps. Go broadly in one direction, but there should be a little waviness (image 14).
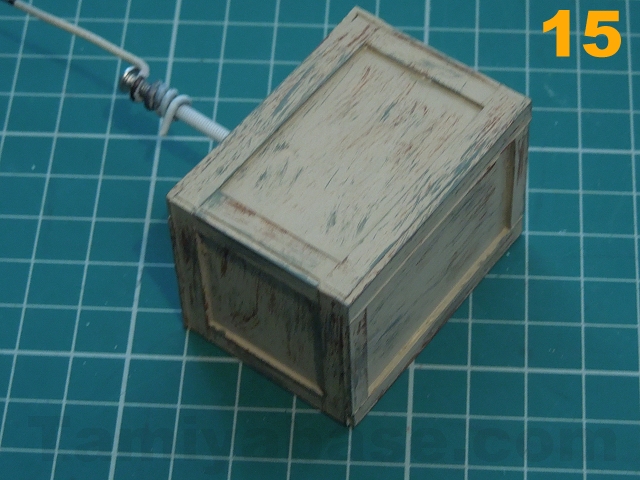
Once that's dry, repeat with a medium grey, such as XF-22 RLM Grey. Try to get the paint roughly in the areas left free of graining in the previous pass (image 15). Again a bit of a wave is a good thing.
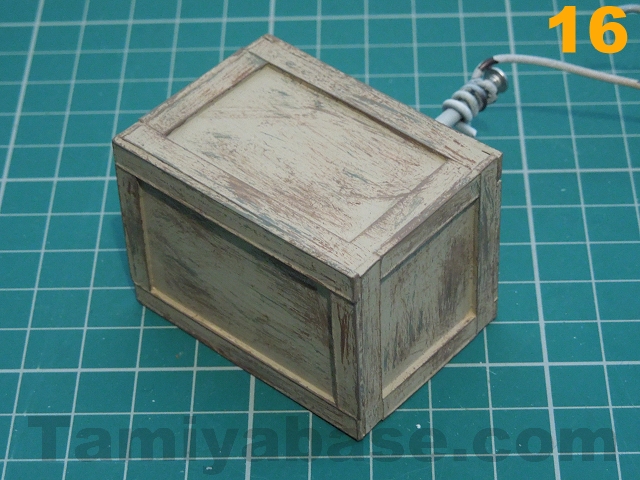
Once dry, dry brush with a slightly lighter brown, e.g. XF-52 Flat Earth (image 16). On this pass you should aim to fill in any gaps left.
At this point the three "wood" items diverge, the next step for the crate being a heavy (1 part paint to 2 parts water) wash with XF-57 Buff to add some depth to and lighten the shade of the overall effect.
Once the final wash is dry, remove the long M3 screw & the crate is ready to go.
 |
 |
 |
 |
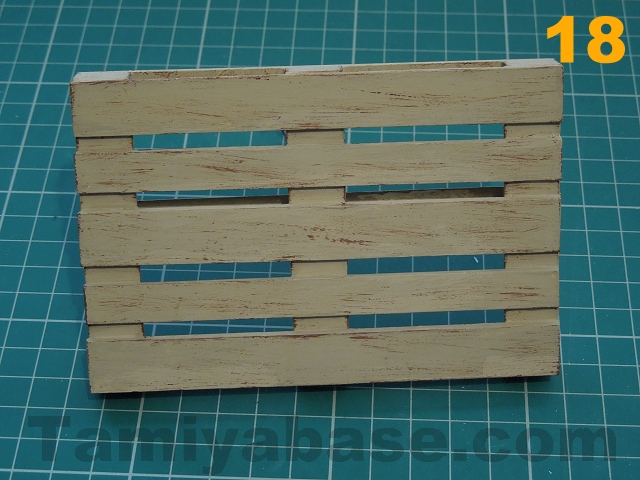
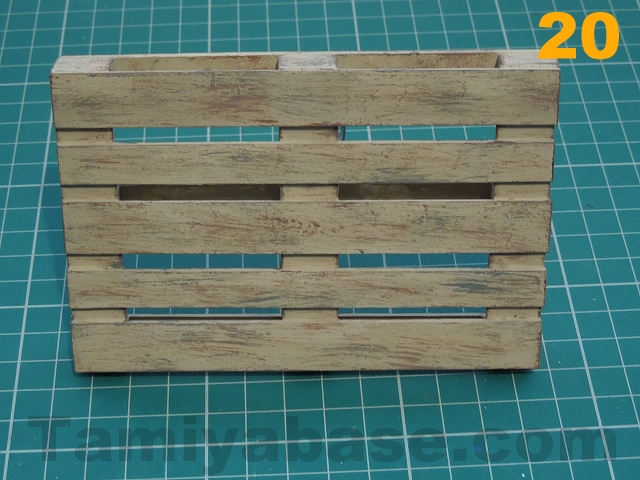
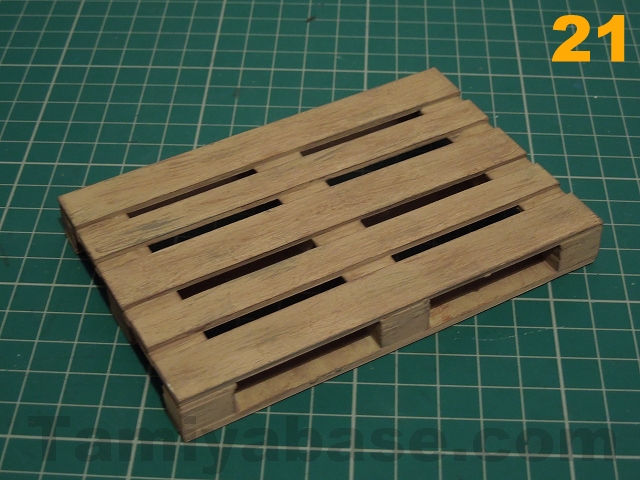
Pallet
Build up a grain effect (in the same way as on the crate and surfboard) by dry brushing XF-68 NATO Brown, XF-22 RLM Grey and XF-52 Flat Earth in turn (images 18, 19 & 20).
To finish, a heavy wash (15 drops paint to 30 drops water) of XF-52 Flat Earth will add depth and darken the overall colour (image 21). The final task is to remove the long M3 screw.
 |
 |
 |
 |
Surfboard
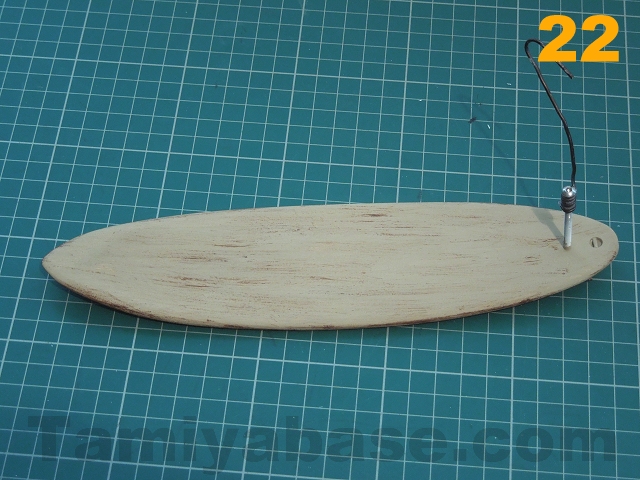
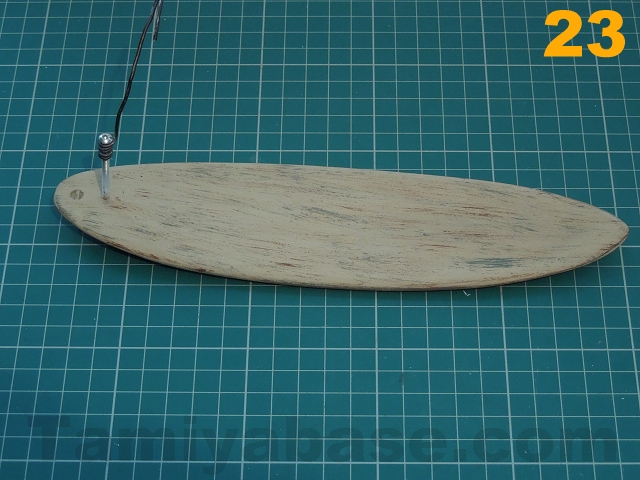
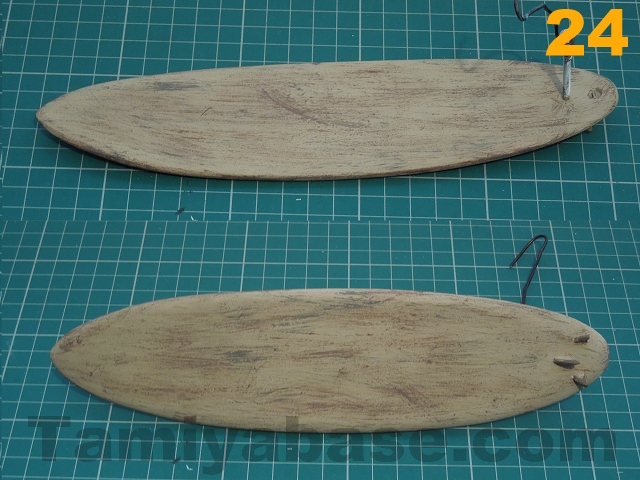
As with the crate and pallet, the grain effect should be built up by dry brushing XF-68 NATO Brown, XF-22 RLM Grey and XF-52 Flat Earth in turn (see images 22, 23 & 24).
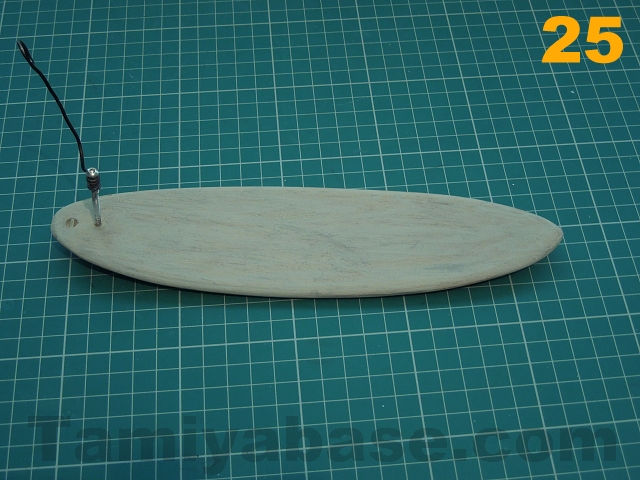
To improve depth & lighten the colour, apply a heavy wash (10 drops paint to 15 drops water) of XF-20 Medium Grey (see image 25).
 |
 |
 |
 |
Once that's dry, give the board a very light rub down with 1200 grit paper, and seal with clearcoat (I used Halfords acrylic "Clear Lacquer") - this will give a good surface for masking off the next steps.
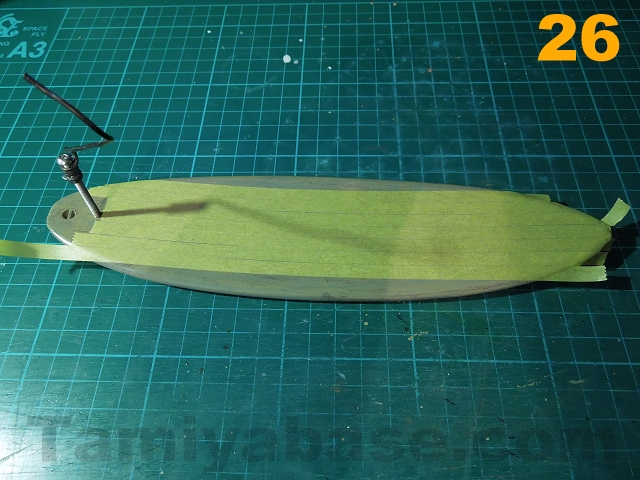
Use Tamiya 6mm masking tape to mask up for the stringers (reinforcing strips of a tougher wood build lengthways into the board: starting with a central length of tape, work outwards for a total of seven strips. Each should be as close together as possible without overlapping (see image 26). Remove the central strip of tape and one each side one strip in from the outer edge so three bare strips are revealed. Press down the edges, and put short lengths of tape either end - make sure these are well pressed down to conform to the tape underneath (see image 27).
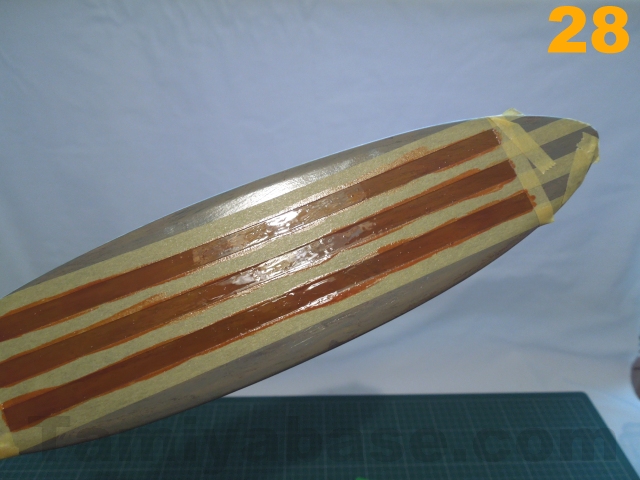
Repeat for the underside, and paint the stripes both sides with at least two coats of Tamiya X-26 Clear Orange (see image 28).
 |
 |
 |
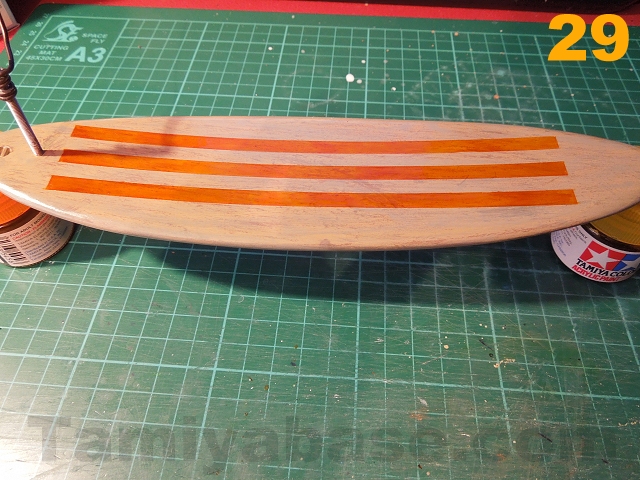 |
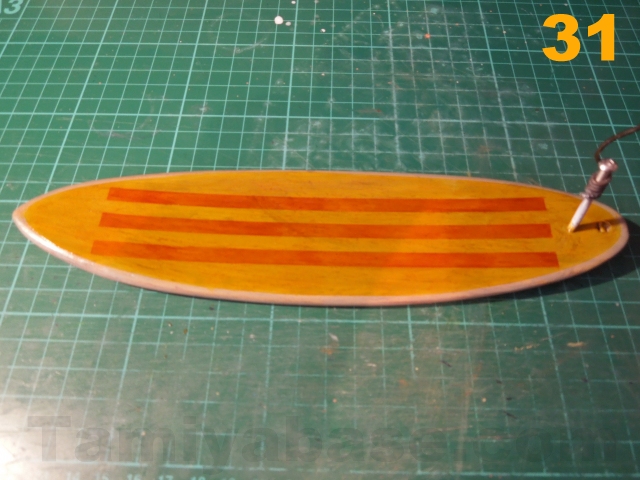
Allow to dry for a couple of hours, then carefully remove the masking tape.
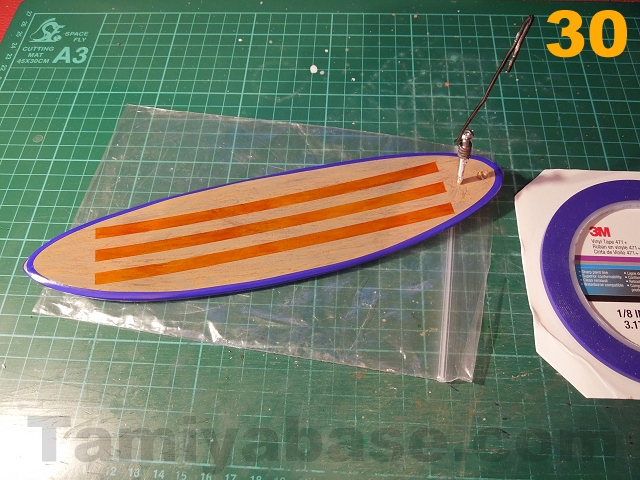
Mask off the edges of the board using 3M 1/8" (3.17mm) blue vinyl tape (or you could try tamiya 6mm tape cut down the middle to make it 3mm wide) - put one strip on the very edge & use that as guide to place a strip either side. Be careful in handling the board as although the paint will be fairly dry, the clear orange will take more like a week to cure to the point where it doesn't take fingerprints.
Paint the whole inboard areas on both sides of the board with Tamiya X-24 Clear Yellow - two coats should suffice. Allow to dry for a couple of hours then carefully remove the masking.
 |
 |
Once the clear colours have cured, rub the board down lightly with 1200 grit wet & dry paper in soapy water.
Paint the leash cup (e.g. Tamiya X-2 White & XF-16 Flat Aluminum) & once dry, spray on more clearcoat. Depending on how well the finish comes out, you might want to "rub out" the finish - there's already an article up on doing this but fundamentally it's very careful wet sanding the finish with fine wet & dry paper, then polishing it back to a full shine.
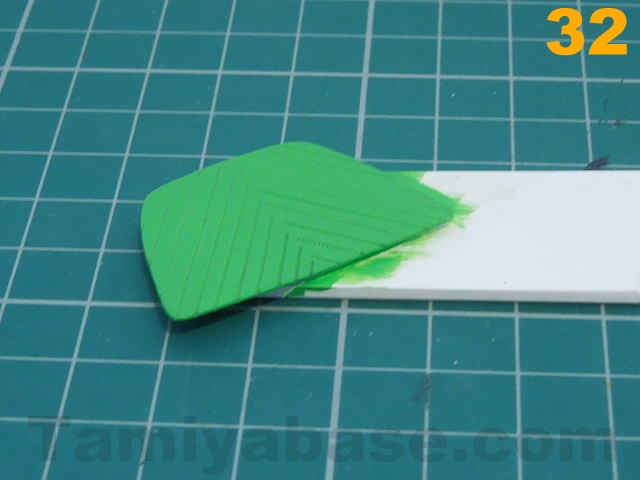
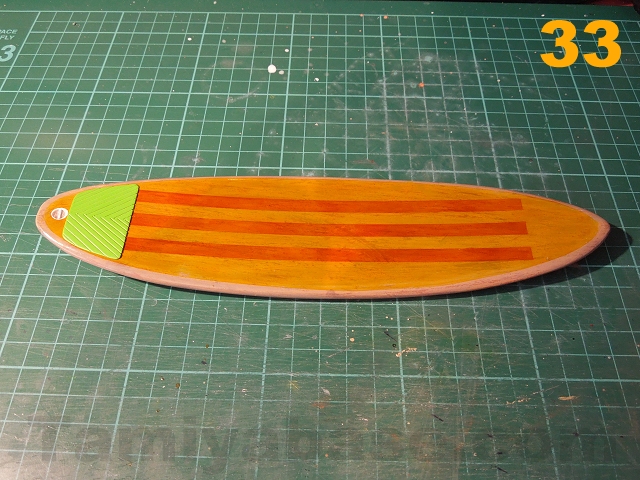
For the grip pad: use a very light wash of XF-67 NATO Green (3 drops paint to 15 water; this can be done at the same time as the Cooler Box) & wipe off the surface. Once everything is dry, remove the long M3 screw from the board & glue the pad on with a few dabs of superglue.
 |
 |
I did think about adding some fake wax to the top of the board (mixing X-21 Flat Base + X-22 Clear for a slightly translucent look, and applying it with a sponge to get the texture), maybe that's something I'll do in the future.
Next Time...
In the next instalment we'll be taking everything we've learned so far and crank it up a couple of notches to build a basic scale V8 engine.
________________________
Written by TB member Jonny Retro