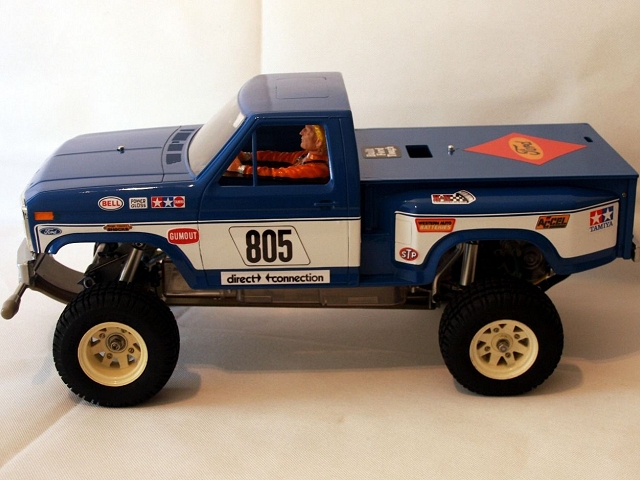
OK, here it is - I stripped down the Ranger chassis, and didn't find anything unexpected or nasty (although I got the distinct impression that parts from several cars have been slapped together to make a barely rolling chassis) ... until I got to the gearbox, where I found some, let's say "unique" engineering had gone on

:
Basic problem: builder has lost (or used in the wrong place) two of the M3 10mm cap head screws used to hold the spur gear cover on. This itself takes some talent as there are 16 (I think) that size in the kit, and fitting the spur gear cover is really early in the manual.
Correct solution: locate & use correct length screws. Alternatively, cut some longer ones down, or maybe buy some.
Actually, we can probably rule out the alternatives there, most peoples' toolkits would preclude anything like neatly sawing & filing small screws, consisting as they do of an 18" long screwdriver with a coach painted wooden handle, and a tip blunted by years of opening paint cans, a set of rusty drill bits with all the useful smaller sizes bent, broken, blunted or missing, some poorly made Allen keys left over from building flat pack furniture, a clapped out tenon saw, and a hammer with one of the nail pulling prongs snapped off.
As for fasteners, If you've ever bought a used RC car that has had to have a "repair" at any point in its previous life, then you could be forgiven for thinking that the only fasteners available for sale,
ever, were inch and half number eight wood screws with pozidrive countersunk heads. Well, those and the occasional screw from a Meccano kit, and of course the ever-popular coach bolt and wing nut taken from a gate made before threads became standardised.
In this case though, I think the previous owner had enough tools (or access to them) to be dangerous - but s/he also had what I refer to as "knowbetteritis". This is an untreatable disease where stupid people - because they don't understand why something has been done - assume that there can't have been any valid reason why it has been done, and because they "know better", undo it.
Perfect example - at work, someone starts a process that produces some fumes that give people a headache and/or set the fire alarm off - so I turn the extraction on. A bit later, one of the patients with knowbetteritis turns the extraction off because they "couldn't smell anything". Pointing out that they couldn't smell anything because I'd put the extraction on was a was pretty much fruitless.
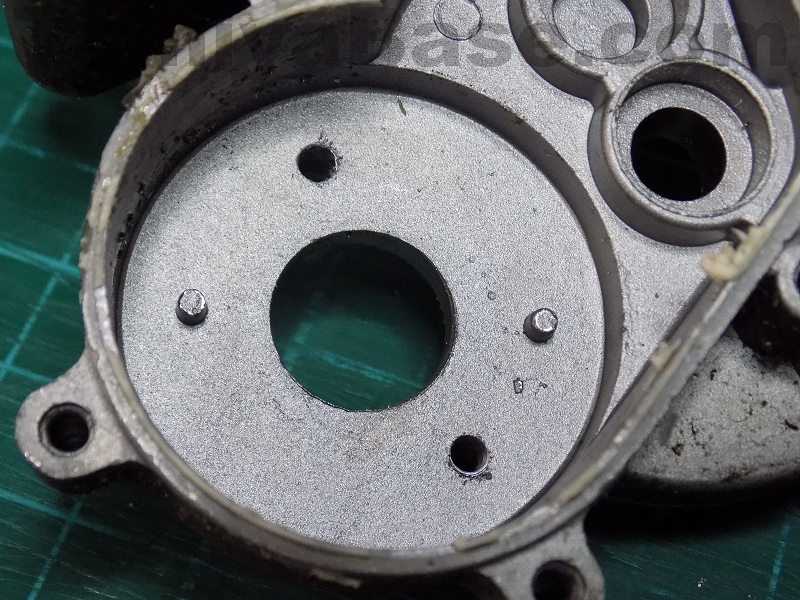
And back on topic - it appears that someone decided that the Ranger manual was wrong (or they knew better) and M3 x 15mm screws should be used instead of 10mm, and because those didn't fit, then "Tamiya must have made the right gearbox side incorrectly" - "and Mabuchi also made the motor wrong". There is an alternative interpretation - that the builder "knew better" than Tamiya & thought the motor should be screwed down instead of stopped from rotating by the cast in pips. Either is stupid.
Thinking about it, there is a factor that has to be present for a bodge to be truly world class - the bodge must involve knock on consequences rendering the bodge as a whole far more difficult and time consuming than doing it properly would have been.
In this case, using the wrong screws meant that, initially, the gearbox half had to have the blind holes drilled out and tapped.
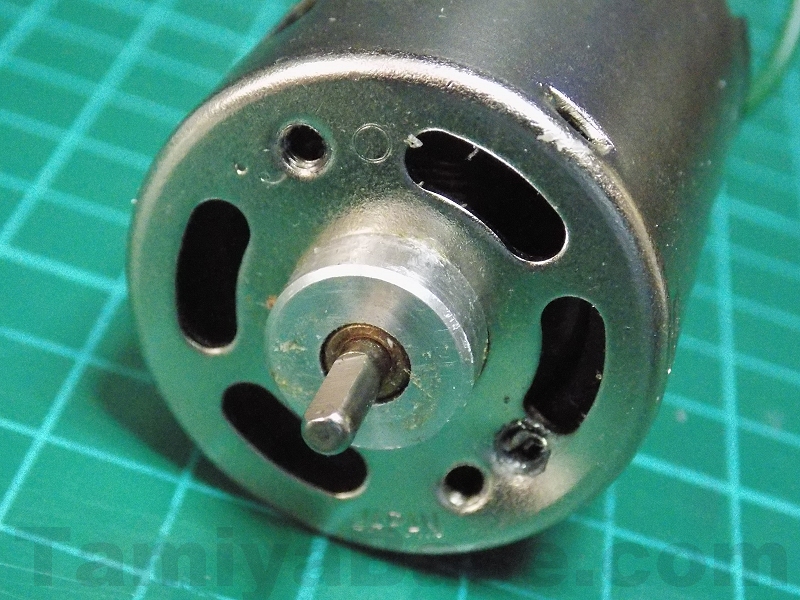
Now, because those screws protrude into the motor space - and because they are asymmetric - there's another problem: the holes in the motor are in the "wrong" place.
Rather than rethink what they were doing, have a cup of tea and have another look at the manual, or maybe get someone a bit smarter than they were to look at it for them (clue: anyone with glasses would be a good start), our bodger has pressed on.
Normal people, when they have to drill & tap a hole in a bit of metal, would mark it, check it, centre punch it, drill it, then tap it. If you're a bodger though, you have to follow the creed
"If in doubt, gi'e it a clout". They've "centrepunched" the motor so enthusiastically that not only has is crumpled the end face, it's bent & sqaushed the whole can, turning an otherwise very clean motor into scrap.
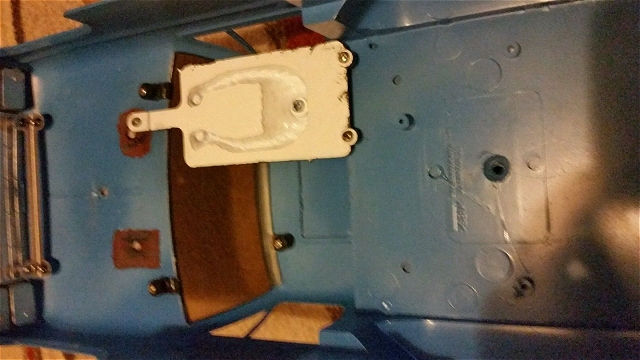
Step three - because the motor is in at the wrong angle, the motor cover can't go on the left side of the gearbox correctly (see previous chassis pics - I admit I didn't pick up on it earlier

).
I guess I'm just lucky that there was a permutation where all three screws could go it with the wires coming out the correct holes so that no further "correction" of Tamiya's "mistakes" was deemed necessary


 You traps a competition builder Jonny. Keep them for the museum... I had several wood screws but here... He can win the championship
")
")