|
I'd also have to drill & tap for the extra M3 holes & remove the bump stops, doing that (plus the cost) doesn't look that attractive compared to making a couple of collars, which is just one more step and "free", other than time.
Still cheaper than buying an NIB one ... though not a re-re one. Or two. |
Please Log in to join the conversation. |
|
& on that note - my 6 NOS ball ends arrived ... mmmm, expensive |
Please Log in to join the conversation. |
|
0.5mm Glace cotton thread (note price in Rupees), woven & superglued into window netting, I'll give it a puff over with satin black later):
Machining rear arm spacers from 1/4" al. bar was a little fiddly: Body details painted: I know I still need to clean up the round aluminium parts, but after that I think it's probably just a case of needing to make sure I have the right fasteners & nothing else is missing, then i can start putting it together. Actually no I can't, I have to make some servo blocks.... |
Please Log in to join the conversation. |
|
The following user(s) Liked this: AndyAus
|
Please Log in to join the conversation. |
|
|
Please Log in to join the conversation. |
|
Spotted some Pargu one piece Scorcher "Type B" wheels on eBay ...
... Which meant the original ones were surplus to requirements ... ... so after a bit of raiding the spares box & mental juggling ... ... Froggy got an upgrade, the new wheels got correctly shod, and the spares box got a downgrade, but who cares: Starting on the chassis build, not quite following the manual steps exactly ... ... and a bit more: This photo is more of a mental place holder for me than one that can impart any useful info (I blame the autofocus sensor being so off to one side that unless the subject is in the top right corner, it doesn't get focussed on ) - the m3 threads on the two left side front arms stripped. This never happens when you're dismantling or checking the threads, only at reassembly ... the end around one hole has crumbled & the thread rung off, the other developed a bit of a crack & felt like it was on the cusp of stripping but not quite torqued up enough - I turned the hex driver a tiny bit further & stripped that one too
The following user(s) Liked this: AndyAus
|
Please Log in to join the conversation. |
|
...
I carefully drilled out the remainder of the thread with a 3mm drill bit, then enlarged the holes with 3.2 and 3.5mm bits, tapped the hole with #2 & bottoming M4 taps: Had to use overly long grub screws temporarily as I'd run out of the shorter ones That's torn it .. I have to say I feel ambivalent about opening this - in less than two minutes I took off 80% (I guess) of it's value, going from NIP to unused to used ... on the other hand, it's a spare part - keeping it in a box & looking at it occassionally, then putting it back because it's "too valuable to use" was daft.. Front end competed: ... and the rest of the chassis. It didn't seem worth putting radio gear in until I know what I'm going to do about the missing speed control. And "done" for now. Yellow tinted oil bottle was a deliberate choice, My memory may well be faulty but I remember ALL old Tamiya kits having "yellow" oil, so the "correct" blue bottle just didn't look right to me |
Please Log in to join the conversation. |
I hate it when that happens 
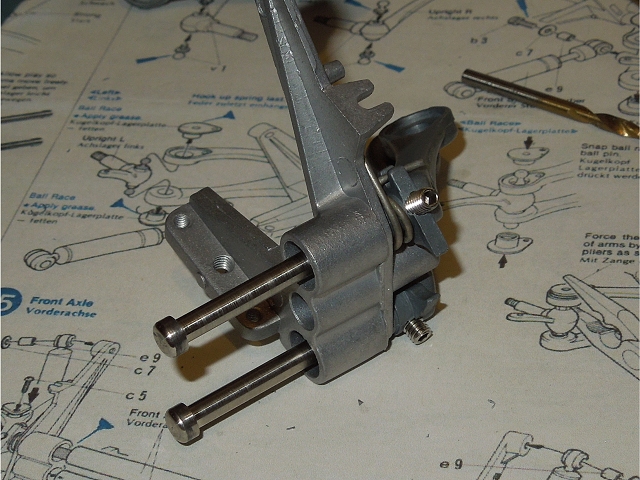
I have a stash of SRB front (and rear) arms with stripped threads, optimistically waiting for someone to come up with a miracle fix with some sort of filling that is strong enough to make new threads
The following user(s) Liked this: AndyAus
|
|
Please Log in to join the conversation. |
|
You're really dead set against using the next size up? I know the two I used are sticking out, but hose are M4x6mm, the shorter (shortest) M4x4mm aren't quite so offensive |
Please Log in to join the conversation. |