Keyword

TOPIC:

CC-01s: RV, Unimog, Bedford TM, Valp, Ford CMP, Series 3 Land Rover, SD Revopak 9 years 2 months ago #33414

Managed to get some primer on the body parts ... interior is in the process of getting 2-3 coats of basic colours on before detail painting, I can't remember the reason why I completely glued it together but I hope it was a very compelling one because getting a paintbrush in all the nooks and crannies is a right pain

:whistle:


I've also been thinking my next build, it was going to be the Morris Quad Riot wagon - and although the ability to perform driveby squirtings has some appeal, I decided I'd rather do something with my 1:10 scale skip (having planned to sell it, then changed my mind).

It'd have to be a late 70s/very early 80s flat fronted & angular UK (or at least Euro) truck, & TBH I feel I still both 2D plans and a 3D version to work from.

I found what looked to be a nice example of a 1977 Matchbox "Superkings" Bedford TM skip truck on eBay, but it turned out the "good" label was a optimistic & it must have taken a heck of a good photo, because it was dirty & had inexplicable glue additions & damage. It cleaned up OK, but still :(

I couldn't find any plans for the truck cab (only a poor quality one of I guess an earlier, curvier version) so tried something new (for me): drawing my own up. A cutting mat with its graduated lines on it came in handy to get camera & truck positions for identically scaled front & side elevations.

No doubt newer & better drawing programs are available, but I'm still using Paint Shop Pro 5.01 because it came free with something ... I think it was a printer, but it was some time ago, the copyright date in it is 1998 :blink: 
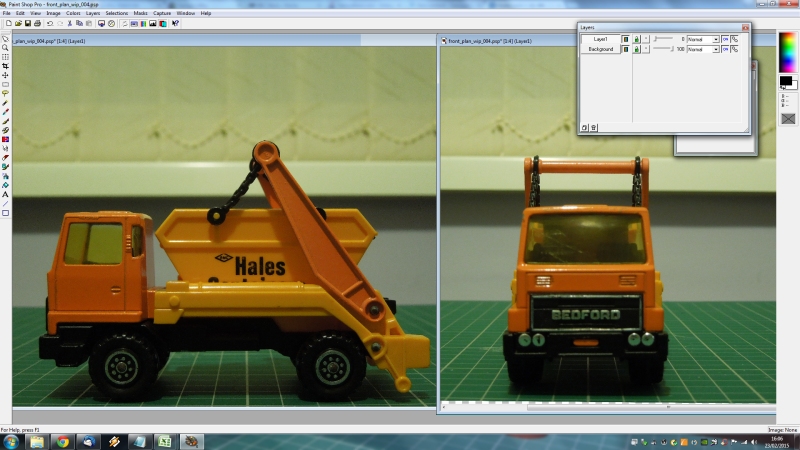
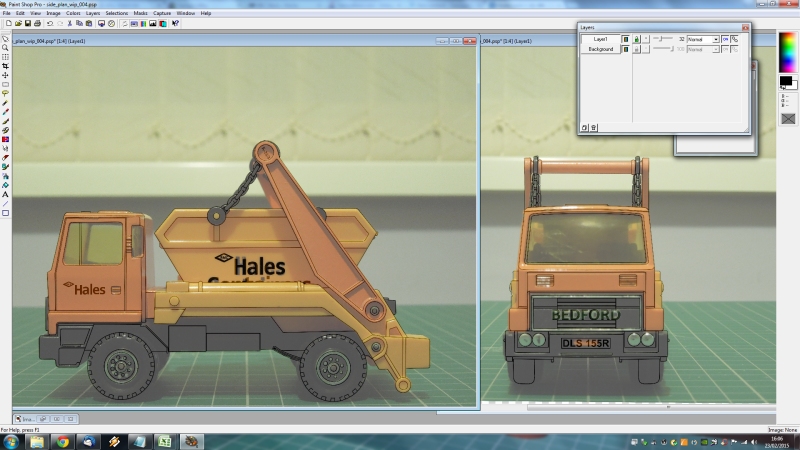
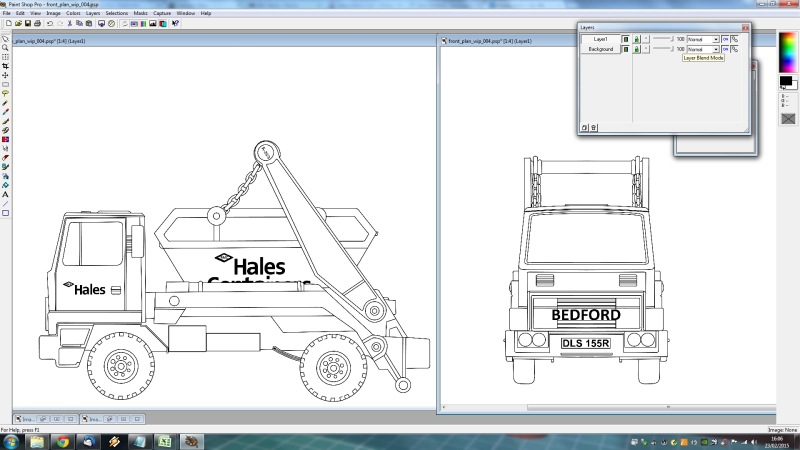
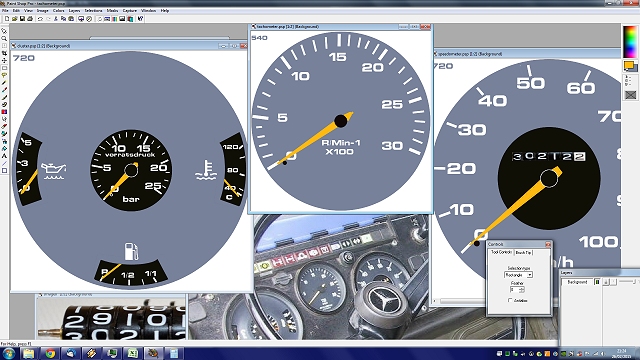
Anyway - add in a new layer with white background/black foreground, fade to about 35%, then draw in all the edges with straight & bezier line tools + circles & rectangles, & a bit of text so when you fade the photo layer right out you have a blueprint :)


Attachments:
The following user(s) Liked this: stingray-63

Please Log in to join the conversation.

CC-01s: RV, Unimog, Bedford TM, Valp, Ford CMP, Series 3 Land Rover, SD Revopak 9 years 2 months ago #33421

Managed to get some primer on the body parts ... interior is in the process of getting 2-3 coats of basic colours on before detail painting, I can't remember the reason why I completely glued it together but I hope it was a very compelling one because getting a paintbrush in all the nooks and crannies is a right pain


Oh the fun :pinch:
If you can't fix it with a hammer, you've got an electrical problem mate :)

Please Log in to join the conversation.

CC-01s: RV, Unimog, Bedford TM, Valp, Ford CMP, Series 3 Land Rover, SD Revopak 9 years 2 months ago #33423

Clever work using Photoshop!

I can't wait to see how you solve what has to be a very complex painting job on the Unimog Tanker.
Signature now gets correct formatting if you edit it in your Profile. Use normal BBcode if you want.
www.tamiyabase.com was formatted automatically.

Please Log in to join the conversation.

CC-01s: RV, Unimog, Bedford TM, Valp, Ford CMP, Series 3 Land Rover, SD Revopak 9 years 2 months ago #33425

...

Oh the fun :pinch:


Well if this was a prototype & there was going to be a production run I could just use it for dimensions & design out all the jobs that need a double jointed spider monkey to perform :D

Thinking about it there was a certain logic to gluing it all before painting - I had to glue the driver to the seat because taping/clamping/bluetac'ing just wasn't working & he had to be fixed to get the seat position right because it also dictated the gap to the other seat & the size & position of that; and the dashboard again had to be glued because temporary fixing wasn't working on that & it really needed to be so I could work out the size/position for the speaker soundboard ... I'm rambling but lets just say I can see why so many cars have lexan bodies with dark windows & no interior ;)

Please Log in to join the conversation.

CC-01s: RV, Unimog, Bedford TM, Valp, Ford CMP, Series 3 Land Rover, SD Revopak 9 years 2 months ago #33426

same the tamiya trucks have basic interior compared to yours

Please Log in to join the conversation.

CC-01s: RV, Unimog, Bedford TM, Valp, Ford CMP, Series 3 Land Rover, SD Revopak 9 years 2 months ago #33439

Clever work using Photoshop!

I can't wait to see how you solve what has to be a very complex painting job on the Unimog Tanker.


I did have a license for Photoshop a long while back when someone else was paying for it, but TBH I found it intimidating & never did any more than resizing & watermarking images in it.
PSP 5 (as used here) is a lot more accessible :)


Can't say I'm too worried about the painting, It'll be me first time with an airbrush but I'll really only be using it as a spraygun, no complicated stuff :)

Please Log in to join the conversation.

CC-01s: RV, Unimog, Bedford TM, Valp, Ford CMP, Series 3 Land Rover, SD Revopak 9 years 1 month ago #33505

Interior bit painted; I also painted the upright part of the centre console body colour (as it should be) but it looked stupid (false floor too close?) so I overpainted it black.


:)

edit: I think I'm going to go back & add clock faces (speedo, tacho etc) in transfer form.
Attachments:
The following user(s) Liked this: Dam

Please Log in to join the conversation.

Last edit: by Jonny Retro.

CC-01s: RV, Unimog, Bedford TM, Valp, Ford CMP, Series 3 Land Rover, SD Revopak 9 years 1 month ago #33509

Looks Excellent JR :y:
If you can't fix it with a hammer, you've got an electrical problem mate :)

Please Log in to join the conversation.

CC-01s: RV, Unimog, Bedford TM, Valp, Ford CMP, Series 3 Land Rover, SD Revopak 9 years 1 month ago #33510

Instrument faces hand drawn in PaintShopPro...


... printed on white transfer paper & clearcoated ...


... & fitted. Extreme closeup is not a friend to the level of accuracy I can achieve :(

Attachments:

Please Log in to join the conversation.

CC-01s: RV, Unimog, Bedford TM, Valp, Ford CMP, Series 3 Land Rover, SD Revopak 9 years 1 month ago #33591

I've given the wheels some attention, sprayed matt black all over, fake nuts painted "Aluminium" & thinned down Humbrol #113 "Rust" & a wash with flat black, wheels also got a thin wash with "rust", flat black & heavily thinned mixed clear & semi gloss clear ... also fitted black lock nuts & painted the exposed end of the shafts.

All that & it looks like I barely did anything at all :whistle:


Body & tank got a light rub down & a bit of filling - some of the gaps on the tank (esp. where the oval meets the upright "feet" were so big I resorted to Milliput, the cabwas less dramatic (other side similar but without any rectification being needed on the A-pillar or roof).

Both have been reprimed & rubbed down, ready for paint :)

Attachments:

Please Log in to join the conversation.

Moderators: caprinutstingray-63AndyAus
Time to create page: 0.202 seconds
Cookies are required to make this site work. If you continue to use this site you permit us to use cookies.