Keyword

TOPIC:

CC-01s: RV, Unimog, Bedford TM, Valp, Ford CMP, Series 3 Land Rover, SD Revopak 8 years 9 months ago #34749

Rebuilt amber beacons with flashing 5mm orange LEDs & styrene...


Interior needed a bit of modification for the wiring ...


Bracing on the load arms is probably a bit over the top - M8 studding & acorn/dome nuts...


Mudflaps are 1mm nitrile rubber sheet ...

Attachments:

Please Log in to join the conversation.

CC-01s: RV, Unimog, Bedford TM, Valp, Ford CMP, Series 3 Land Rover, SD Revopak 8 years 9 months ago #34788

It's quite warm here, the Dichloromethane (plastic weld) isn't quite boiling in the pot, but is visibly simmering :blink:

I made some 1/12 scale euro size pallets to cover the speaker for running without the skip, held on with M3 studding through the load bed & held on with thin bore pipe. I'll add a tarp or something later.


Attachments:

Please Log in to join the conversation.

CC-01s: RV, Unimog, Bedford TM, Valp, Ford CMP, Series 3 Land Rover, SD Revopak 8 years 9 months ago #34789

Very tidy mate :)
If you can't fix it with a hammer, you've got an electrical problem mate :)

Please Log in to join the conversation.

CC-01s: RV, Unimog, Bedford TM, Valp, Ford CMP, Series 3 Land Rover, SD Revopak 8 years 9 months ago #34797

Added some net, scale canvas tarp (bakers drill, will need dying) & scale bungees (method @ tamiyabase.com/...=260#34794 for future reference).

Attachments:

Please Log in to join the conversation.

CC-01s: RV, Unimog, Bedford TM, Valp, Ford CMP, Series 3 Land Rover, SD Revopak 8 years 9 months ago #34809

All this hot weather is great for baking out the fumes on the Scorcher repaint, but it does need to cool down a bit & the paint harden up before I want to start covering that with masking tape ...

It has given me a chance to do a bit on the Bedford though, this is is stripped & ready for primer; as built with a couple of exceptions - I've lost count of the number of times the joints on the side window dividers have failed with the slightest touch (my own fault in retrospect, I should have cut the side windows out with two openings, not just the one & add the dividers in after) so I've given up on them & will fake them with paint or vinyl strip directly on the windows. 2nd is extra reinforcement on the "fixed" end of the fake hydraulic rams.


White primer (not left bare) is on all the bits that'll get brush painted later, and satin black paint on the wheels.

Red primer on the main body, rams & loading arms was a deliberate choice - the load bed & rams need to match the skip & using the same primer & paint seems like a good choice ;)

The orange on my previous Unimog project came out very bright over white primer, this seemed like an obvious way to tone in down this time. And it saved a big of masking, there'll be enough of that to do later :whistle:


Paint (or a darker primer in this case) also brings out the shape/form - I think this is looking pretty good :)

Attachments:

Please Log in to join the conversation.

CC-01s: RV, Unimog, Bedford TM, Valp, Ford CMP, Series 3 Land Rover, SD Revopak 8 years 9 months ago #34810

Paint (or a darker primer in this case) also brings out the shape/form - I think this is looking pretty good :)


Yes I think that is very accurate :y:
If you can't fix it with a hammer, you've got an electrical problem mate :)

Please Log in to join the conversation.

Last edit: by AndyAus.

CC-01s: RV, Unimog, Bedford TM, Valp, Ford CMP, Series 3 Land Rover, SD Revopak 8 years 9 months ago #34817

Paint (or a darker primer in this case) also brings out the shape/form - I think this is looking pretty good :)


Yes I think that is very accurate :y:


Agree, the details sort of pop with that primer on.
Looking good!
Signature now gets correct formatting if you edit it in your Profile. Use normal BBcode if you want.
www.tamiyabase.com was formatted automatically.

Please Log in to join the conversation.

CC-01s: RV, Unimog, Bedford TM, Valp, Ford CMP, Series 3 Land Rover, SD Revopak 8 years 9 months ago #34830

Masking the cab, my cunning plan was to spray the rear bed yellow, mask that too & spray the lower parts black - but the weather turned nasty & wasn't expected to break for a few days so I had to strip it all off: it's not good to have tape on for too long...


White cotton cloth now looks much more like a dirty old canvas tarp, technique was to fold it up, dilute olive drab with a lot of thinner & dribble on (to get one colour), then squeeze (with gloves on, to get another colour), then wetted the whole thing with water & more squeezing (to get the 3rd) ... kind of cheap tie die ;)


It's ugly but it all works ... I need to do a bit more soldering & add a few connectors, and install it a lot tidier :whistle:


Container transfers seemed like the right proportions when I drew them up, but look a bit too heavy/large now. I'll see what they look like when the whole thing is back together, but I can see a smaller version being necessary:


Masking for black bits:

The following user(s) Liked this: larbut

Please Log in to join the conversation.

CC-01s: RV, Unimog, Bedford TM, Valp, Ford CMP, Series 3 Land Rover, SD Revopak 8 years 9 months ago #34871

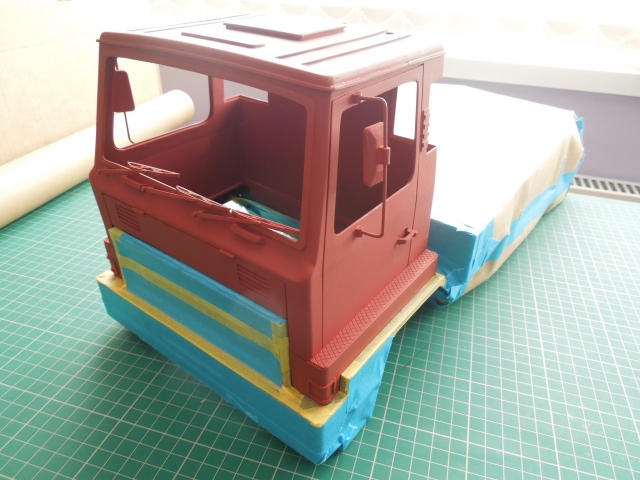
Satin black rattle can, + unmasking ...


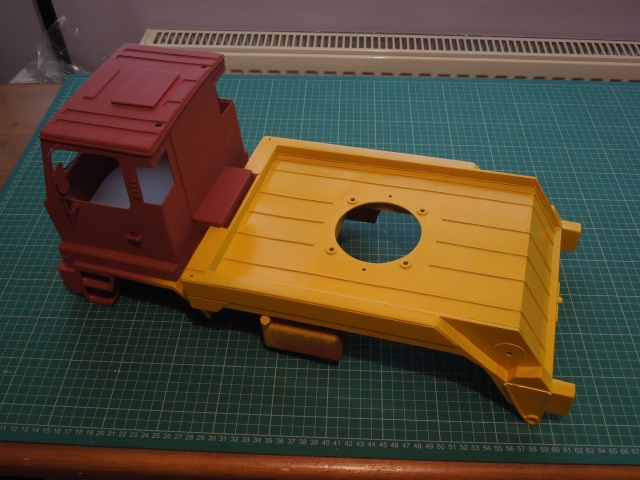
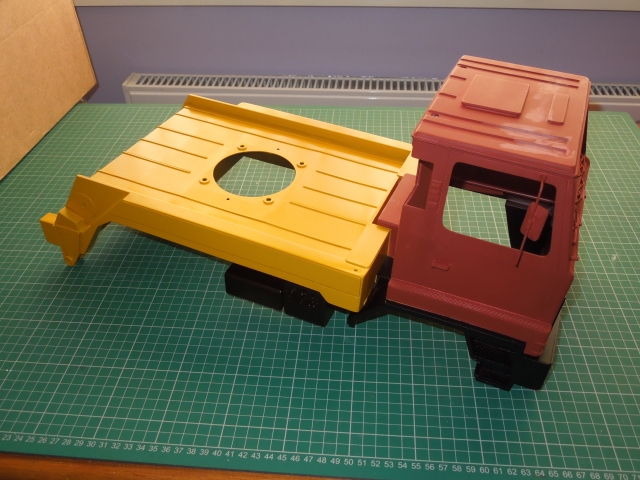
... and masking again for the 3rd colour... if this was a "production" body - i.e. I hadn't been build a "prototype", "one off" or "making it up as I went" I would have engineered it in three distinct sections for post paint assembly, but it isn't ...


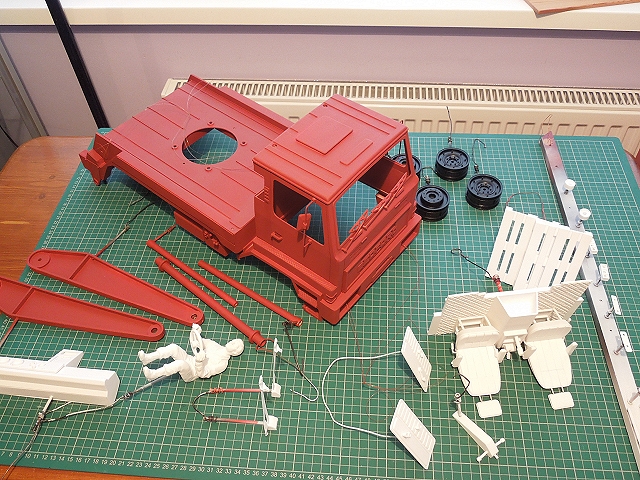
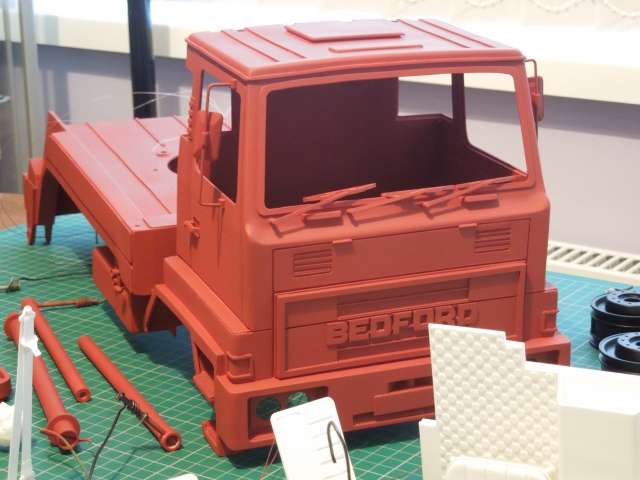
Way back when I'd started planning this, I planned on airbrushing X-6 Orange over red primer, having been a bit disappointed with the aerosol orange over red primer finish of my Fiat 880 tractor project, and been a bit alarmed at how bright the orange came out over white primer on my Unimog. I have to remind myself of that, because painting the cab (& load arms - not pictured) was a little problematic.

First problem, coverage ... usually I draw off the clear portion of the settled out paint, then add just enough back in to make it a brushable consistency, then dilute with thinners from there. As it was a bit warm yesterday I figured that would give a spray that would dry too quick, so left it in & then diluted.

It went on beautifully, but dried real ugly - there just wasn't enough pigment going on to get even coats. Things went better when I added just enough thinners to let the paint get sucked up - about 75% paint, 25% thinners rather than the usual 50:50 (so 3:1 rather than 1:1), and a bit more thinners as the day got hotter.


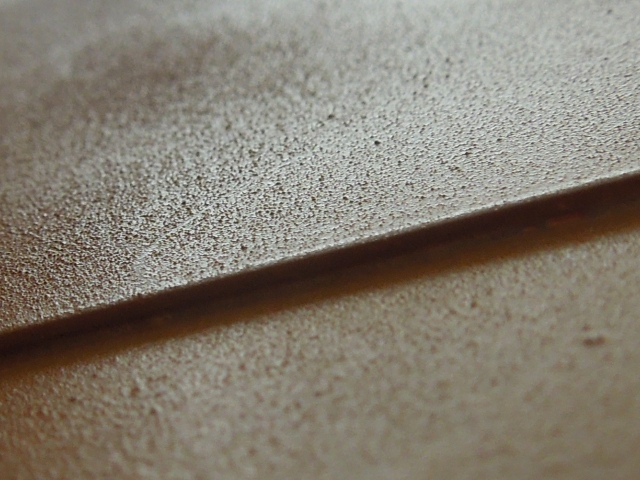
Next, overspray. A term that unhelpfully also gets used to describe masking failures, and when paint if sprayed at too high a pressure, resulting in it partially drying before it hits the target ... in this context however I mean partially dried paint from the area you're spraying, drifting on to a different area, then when you spray that area - yuk :sick:

This was my own fault - trying to spray the dregs from the suction jar on the inside of the cab, intermittently sucking up just air - and not noticing the resulting paint dust settling on the back panel of the outside of the cab - because it was the same colour as the paint. I sprayed over that on the next coat - and the result looks like sandpaper.

This photo is a crop of an extreme closeup taken at an angle/with lighting to make it look as bad as possible, so it's not quite as nasty in normal viewing, but still something that needed correction - in this case a light rub down with 1200 grit paper, wet - you can tell when enough has come off by the change in sound - then carrying on painting.

I mention this is detail because I'd wanted to include an example of "overspray" in my article on paint faults, but had never managed to achieve it until now :blush:


This is after 5 coats (I think, it may have been 7)/ 4 jars later, it's not 100% but it is I think better than the finish on my tractor.

Please Log in to join the conversation.

CC-01s: RV, Unimog, Bedford TM, Valp, Ford CMP, Series 3 Land Rover, SD Revopak 8 years 9 months ago #34872


Wow, looks great JR :y:
If you can't fix it with a hammer, you've got an electrical problem mate :)

Please Log in to join the conversation.

Moderators: caprinutstingray-63AndyAus
Time to create page: 0.197 seconds
Cookies are required to make this site work. If you continue to use this site you permit us to use cookies.