


")


Introduction
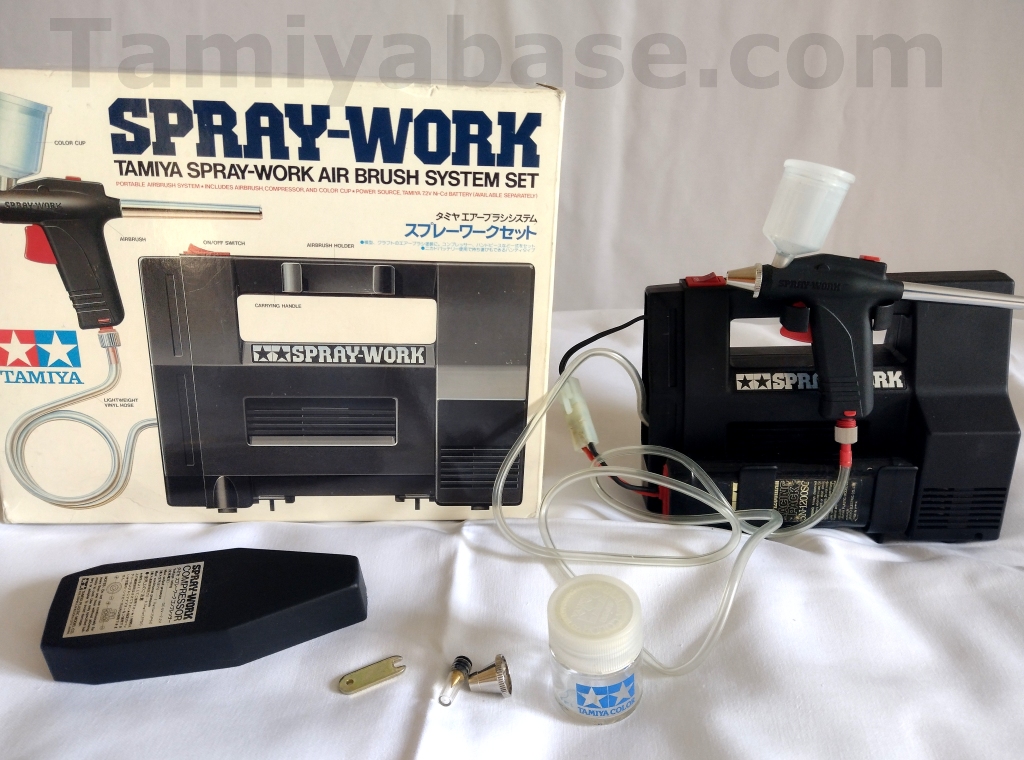
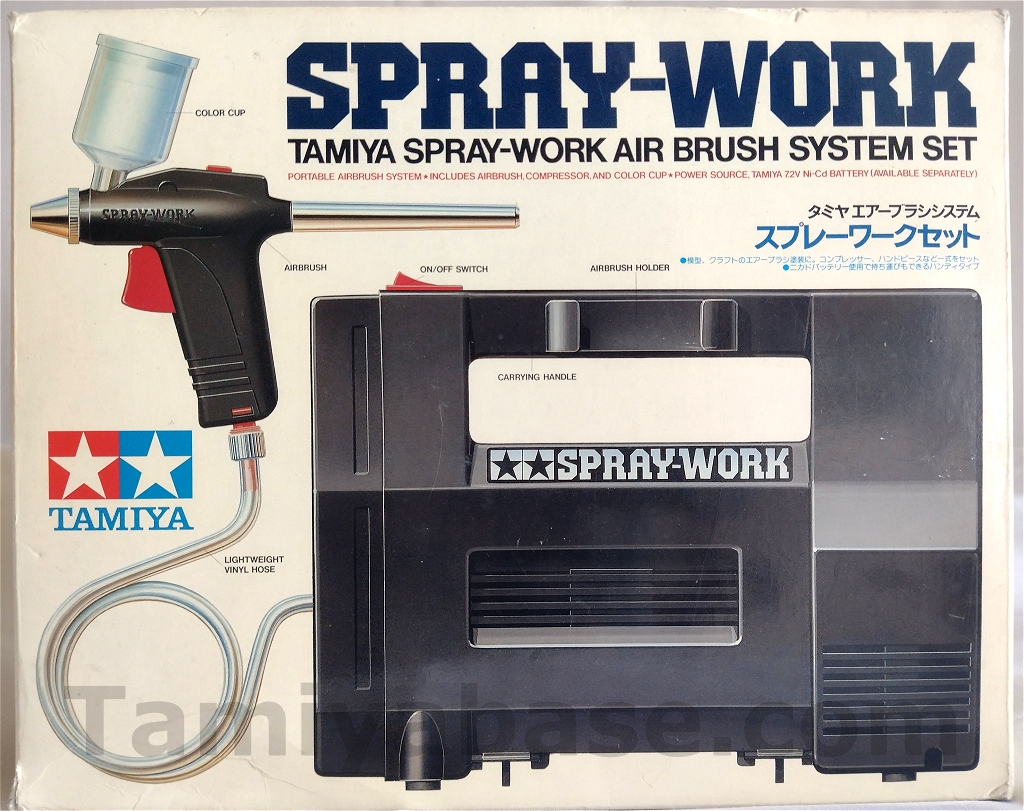
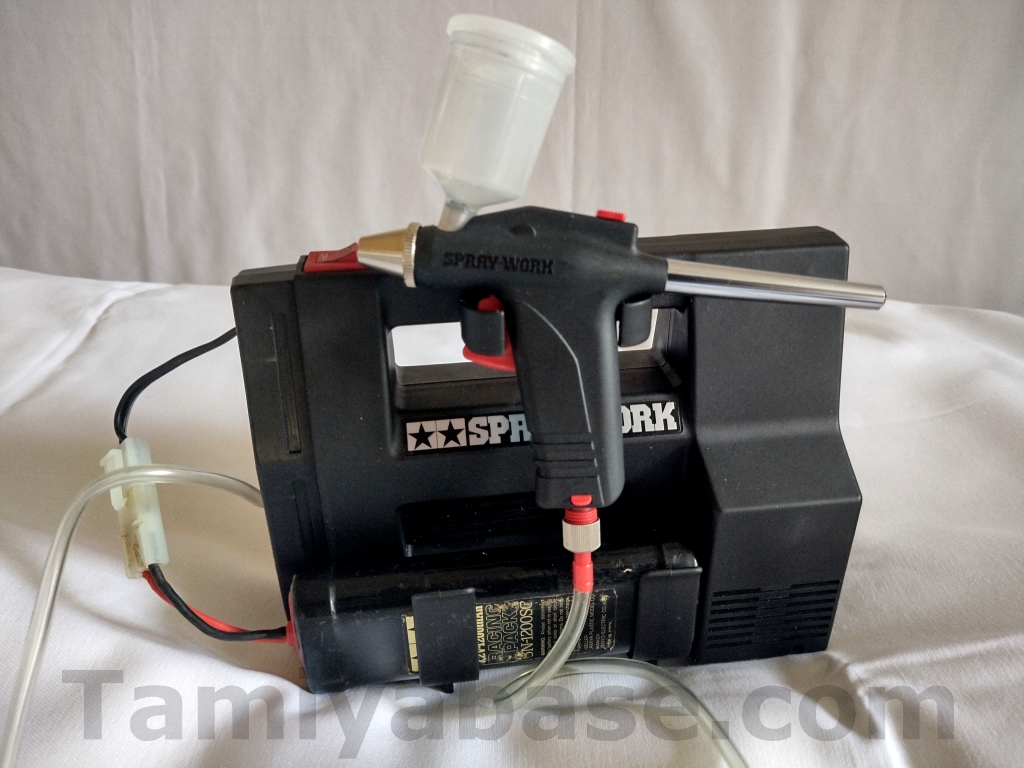
First offered for sale in 1988, the Tamiya 74502 Spray-Work Air Brush System Set – which consisted of the gravity fed, single 74531 Spray-Work Basic Airbrush and a fixed output battery powered compressor was intended to be a low cost and easy introduction to airbrushing.
Despite some nifty features – a lot of which weren’t immediately apparent – it never really took off, perhaps due to its very plastic appearance. The airbrush, and a set including a revised compressor are still available.
25 years on, are these models (especially the early angular one) worth considering as a first foray into airbrushing?
Unboxing And Connecting Up
The box looks similar to any vintage Tamiya RC kit, being plain white with full colour illustrations on every face, even the inner flaps are used, showing some of the Tamiya paints of the time.
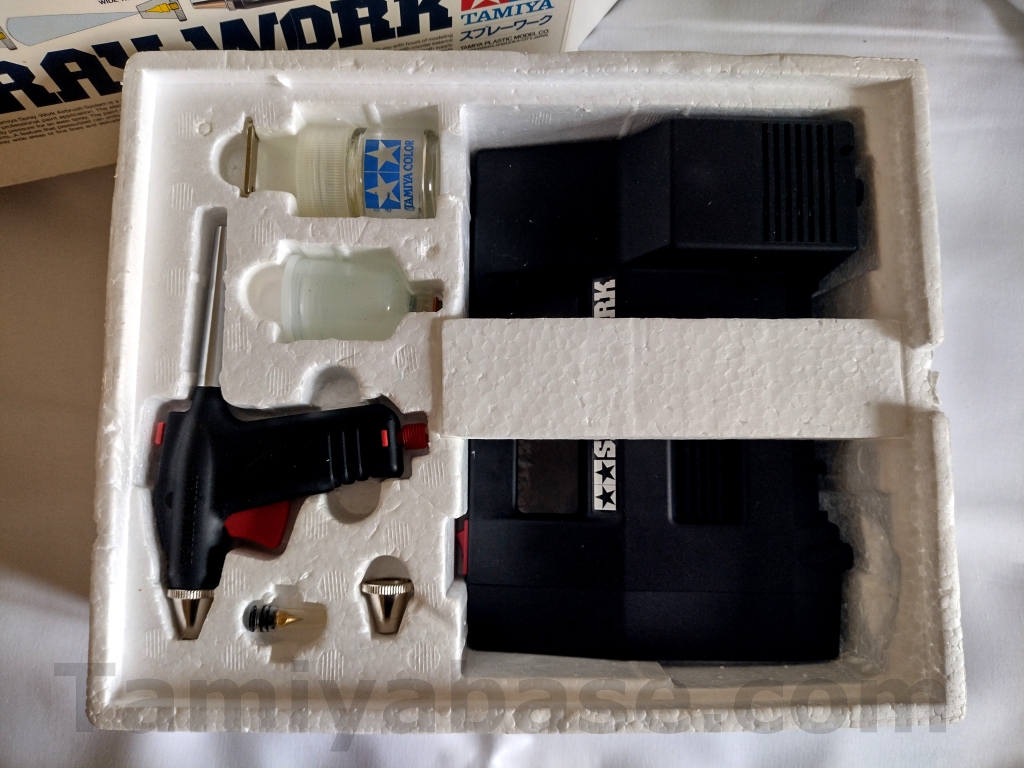
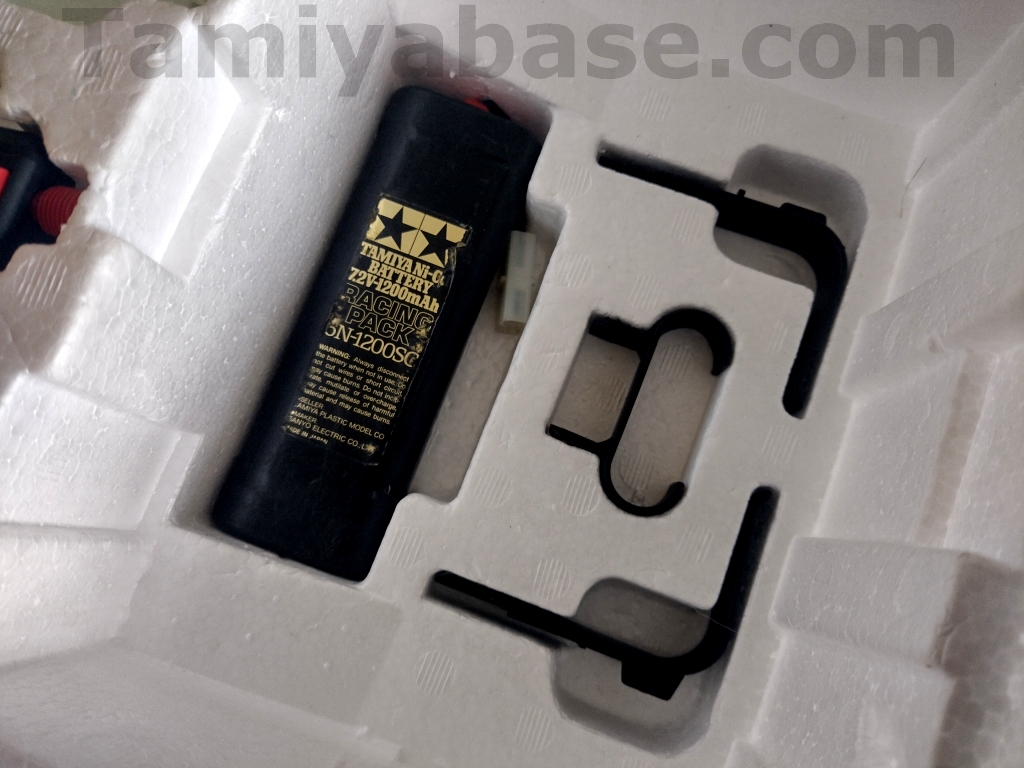
After removing the inner polystyrene lid, most of the components are immediately visible in their own niches. Clips for the airbrush and battery are under the compressor. A battery wasn’t present in my kit (nor was I expecting one), but there was a space for one in the lower insert, so it seemed a shame not to put one in there.
It’s obvious where the clips fit, and they do so with very positive location, though they do take a bit more force than I’d like to remove again for storage.
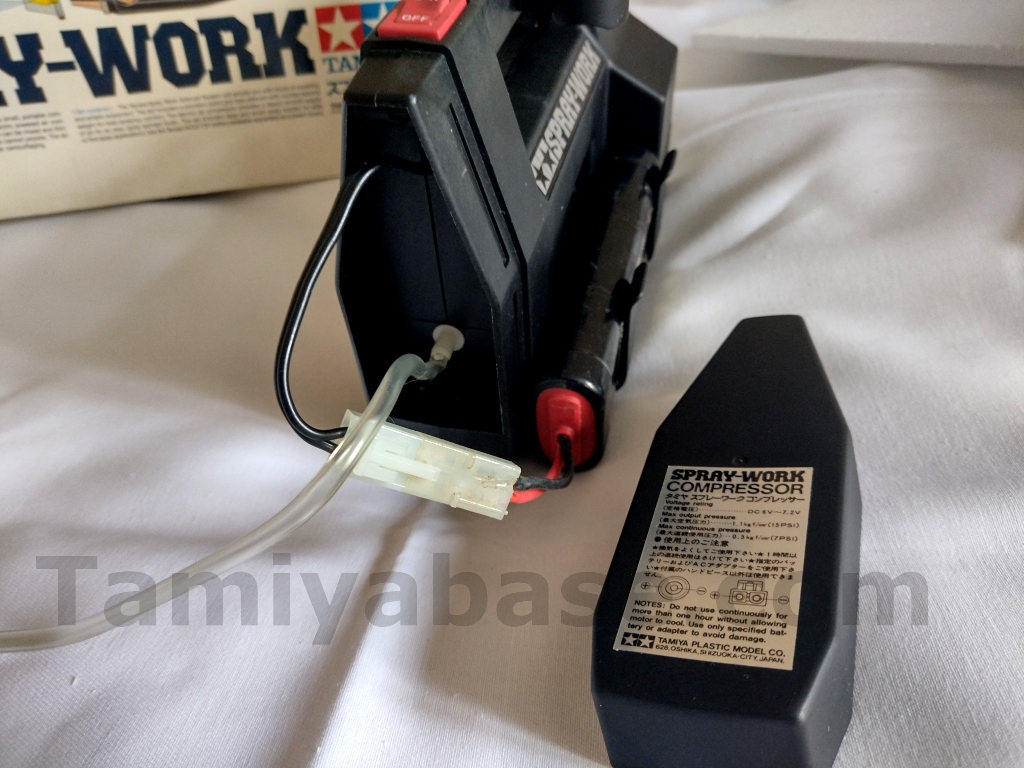
The battery connector is hidden under an endcap, along with the air hose, which screws on to the airbrush.
Specifications & Power Supply
The airbrush is a gravity fed, single action, trigger type with a 17ml cup, “fine” (0.3mm) and “wide” (0.5mm) nozzles, and a 12 position Trigger/needle stop. The thread used on the bottom of the airbrush is 1/8” BSP, so theoretically you could user a different airbrush on this compressor or use the airbrush on a different compressor.
The compressor is tankless and supplies air (max pressure 15psi, max continuous 7psi) to the brush continuously whilst switched on and runs from a 7.2v Ni-Cd race pack of 1200 to 1700mAH capacity (which apparently should give 20 minutes of operation), or the 74502 AC Adaptor for Tamiya Spray-Work, which needs a 100v, 50-60Hz AC input & gives a 6v DC, 2.6A output. Tamiya suggest a maximum of 1 hours use before allowing (an unspecified) time for the 380 motor to cool.
The manual says that unit wasn’t sold outside Japan, and that you should use a 6v, 3A adaptor (with negative centre). However, nowhere is the plug size specified & it doesn’t appear to be a standard size, having an oversize central pin.
Even having split the compressor case, I’m no closer to accurate measurements, but it’s in the ballpark of 5.5x3x9mm*. However, the battery connector is wired directly to the DC socket, and power from either source goes to the power switch via a fuse on the +ve side, then onwards to the motor.
This means you could – and more easily - attach a DC adaptor (of the correct output, I found it drew 1.6 to 1.8A) via a 2-pin, 7.2v female “Tamiya” socket.
* The only firm information I could get on size was from an eBay listing for a generic Chinese wall wart adaptor being sold as a “replacement” for Tamiya Spray-Work compressors, which is supplied with a 6x3mm tip.
Not Milk
With the pressure being fixed (but see the next section), the only variable you have any control over to get the paint to flow is how much you dilute the paint. Apparently, describing the correct viscosity as “like milk” is a problem now (seems an odd thing to get offended by) – but it’s only ever a starting point, shorthand for “thinner than the paint came out of the jar, but not at thin as water”, or “thin enough that you can spray it, but not so thin it immediately runs off or gets blown around”.
The manual for this unit shows 2 drops falling off a stirrer in quick succession, so “like milk” doesn’t seem a bad reference. Elsewhere I’ve seen 2:1 paint to thinner or even 50:50 specified, and as paint tends to thicken as it ages, a qualitative (“like”) measure would seem to be better than a quantitative (specified amount) approach.
As it turns out, the “basic” airbrush is not that fussy about viscosity, at least with the “wide” nozzle and the needle stopper all the way back. If I had to characterise it, I would describe the thickness of the paint I used as somewhere between full fat milk and single cream.
More On Voltage
As mentioned before, there’s nothing different about the way the input from either battery or mains adaptor is handled internally, and nothing to electronically regulate the voltage sent to the motor. In addition, there’s nothing that mechanically governs the speed the pump is driven at, and no sort of pressure relief.
You can therefore see that the output pressure must vary to some extent, based on the power source: a regulated 6v supply provides less voltage that a (nominally) 7.2v, 6 cell Ni-Cd battery, and as a 1.2v Ni-Cd cell can be 1.45v when fully/freshly charged, a 6N, “7.2v” race pack can easily be 8.7v.
NiMH cells were not in use at the time this set was made, but for the later model (1990 to present, with the same wiring and motor but less drain due to a simplified pump), 6N, nominally 7.2v packs of up to 1700mAH are implicitly suggested. Fresh off a charger, they can easily have an even higher voltage than Ni-Cd (up to 1.5v per cell, so 9v for a 6N battery, or sometimes more).
Tamiya backed (quite briefly) “Life” (based on a confusion between “Lithium-Iron” (Li-Fe) and Lithium Ion) batteries of nominally 6.4v, but I’ve not seen them mentioned in connection with the later 74520 model. There’s no sort of cut off in what passes for a circuit in these compressors, so any Lithium based battery is not to be recommended – the same goes for 2S Lipo batteries, even if nominally they’re 7.4v and 8.4v when fully charged.
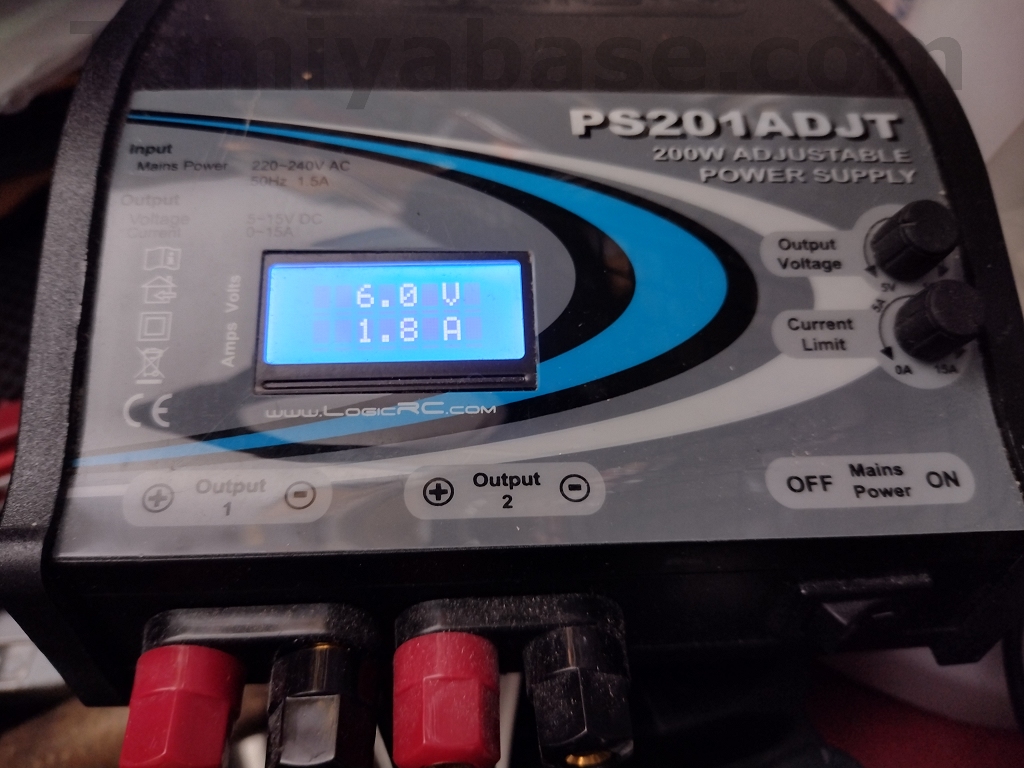
Does any of that mean that if you have an adjustable DC power supply (like the Fusion unit reviewed at https://tamiyabase.com/articles/55-editorial/reviews/174-review-logicrc-fusion-ps200adj-power-supply, or the later PS201ADJT I used here) mean you can push the voltage up from the recommended 6v?
I found performance to be adequate at 6v, all 7.2v seemed to do was cause the compressor to run faster and make a lot more noise. Theoretically it should also be causing more pressure, allowing more viscous paint to be used, or coverage over a slightly wider area, but I think I’d go for the longer (probable) lifespan at 6v than any possible performance advantage of higher volts.
Other Variables
The other obvious variable for spraying coverage (and/or success) is how far away you hold the sprayer from the target and which of the nozzles you use.
The manual suggest that the fine nozzle is for lines and delicate (1:35?) camouflage patterns, and the wide nozzle for wide areas. For both, the sort of spray pattern you can expect from 1-2 cm and from 10cm away are shown.
There’s also the “needle stopper”, which should be set forward for a small trigger movement for lines and camouflage, and rearward for large objects (whole 1:32 road car bodies?) – which should be sprayed from 10 to 15cm away. This last point was evidently something a previous owner really wanted to remember, as it's been penned in on both the manual and part of the polystyrene inner box.
Signs Of Age
One big problem with this set is that you’re totally reliant on the 35-year-old plastic bellows still being viable, and the only source of spares is going to be another unit. Presumably some one-way valves are employed, but it’s not clear if a failure in one set of the four bellows would cause the output to pulse or fail completely.
My air hose was shedding something oily, but as it uses simple press fittings it should be easy enough to replace.
From the manual it’s clear that Tamiya didn’t want users trying to make their own repairs, and they have a point – unless the glass fuse has gone (in which case, why?) or a wire has dropped off there’s not really anything that can be done to fix it.
I can’t describe the box, polystyrene inners – and especially the manual – as mint, but they’re passable, the unit is clean, and all the bits are there. This is important, as apart from the glass mixing jar, which is available (but with white print) the only source of parts is going to be buying a second set.
Performance ...
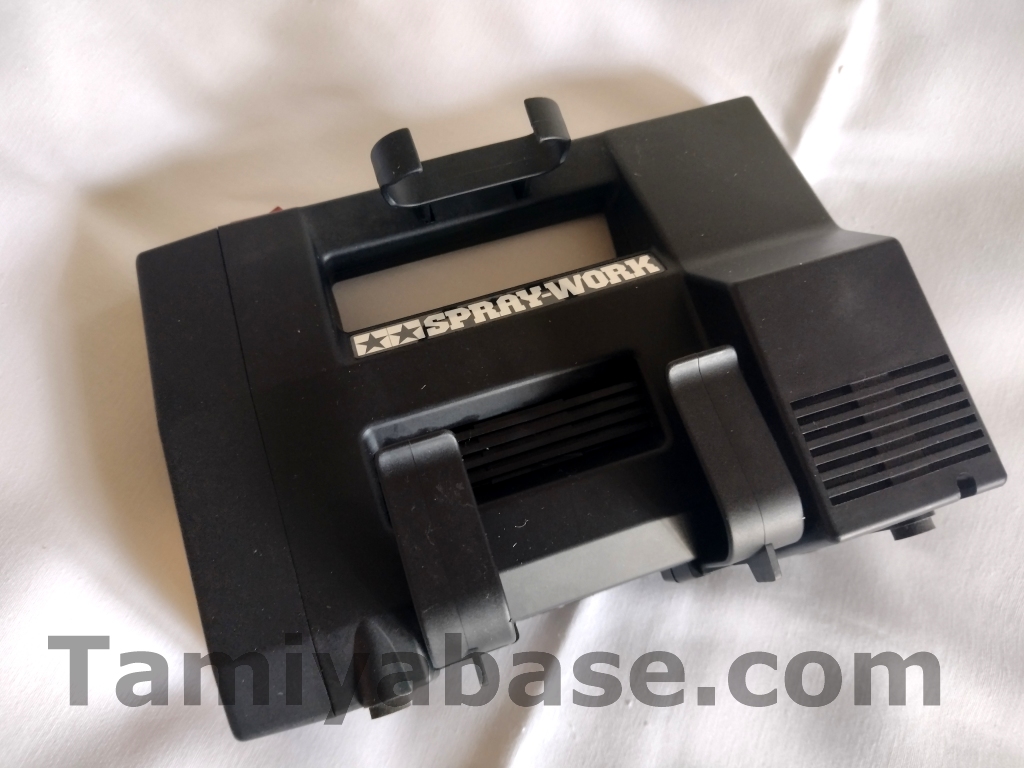
I found the compressor to be noisy in use (though nothing like my 24L tank “outdoor” compressor), especially as the air hose isn’t long enough to put it any distance away.
However, unlike the average 3L tank compressor that tends to want to move about (especially on smoother surfaces) under load, it’s very stable.
The 4-bellows pump means that there’s a surprising lack of pulsing too.
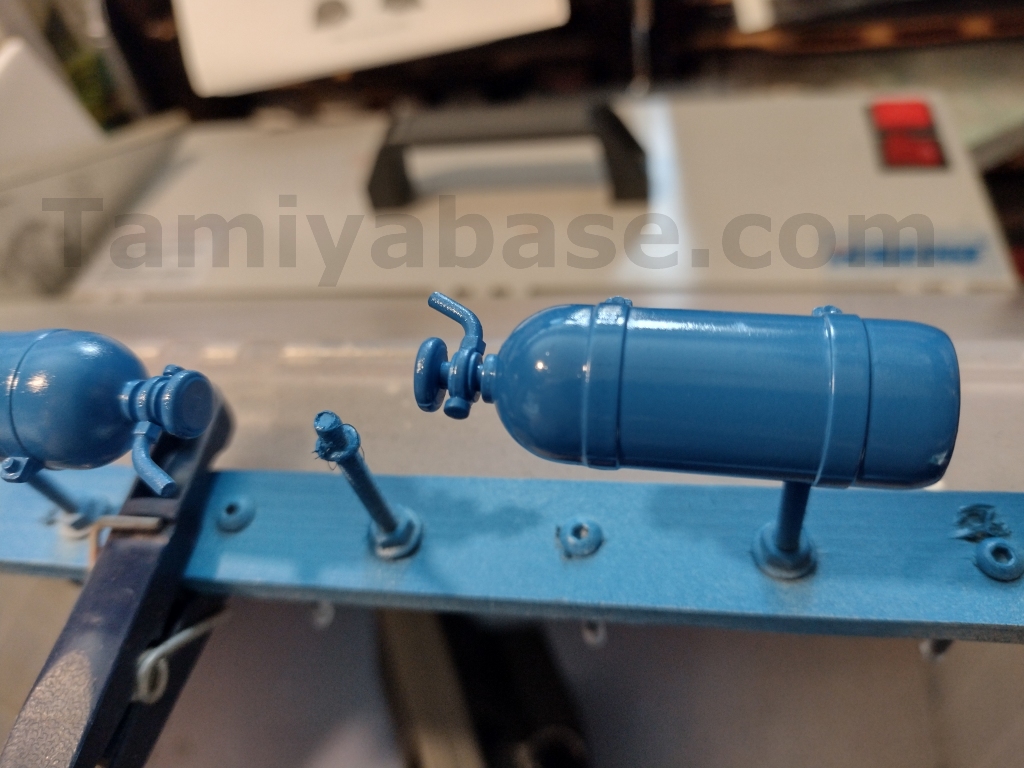
The only thing I tried the setup on in anger was several coats of NOS bottle blue (which is not quite X-14 Sky Blue) in quick succession and was very pleased with the results. It’s a little more orange peely than a more expensive airbrush with thinner paint, but I got no runs, excellent coverage with three light coats, and a fairly shiny finish.
... And Failure
I’d planned to clean the airbrush out, swap nozzles and try the airbrush out on lines and dabs with the Needle Stopper control in various positions, but I didn’t get as far as finishing the back flushing before the compressor failed.
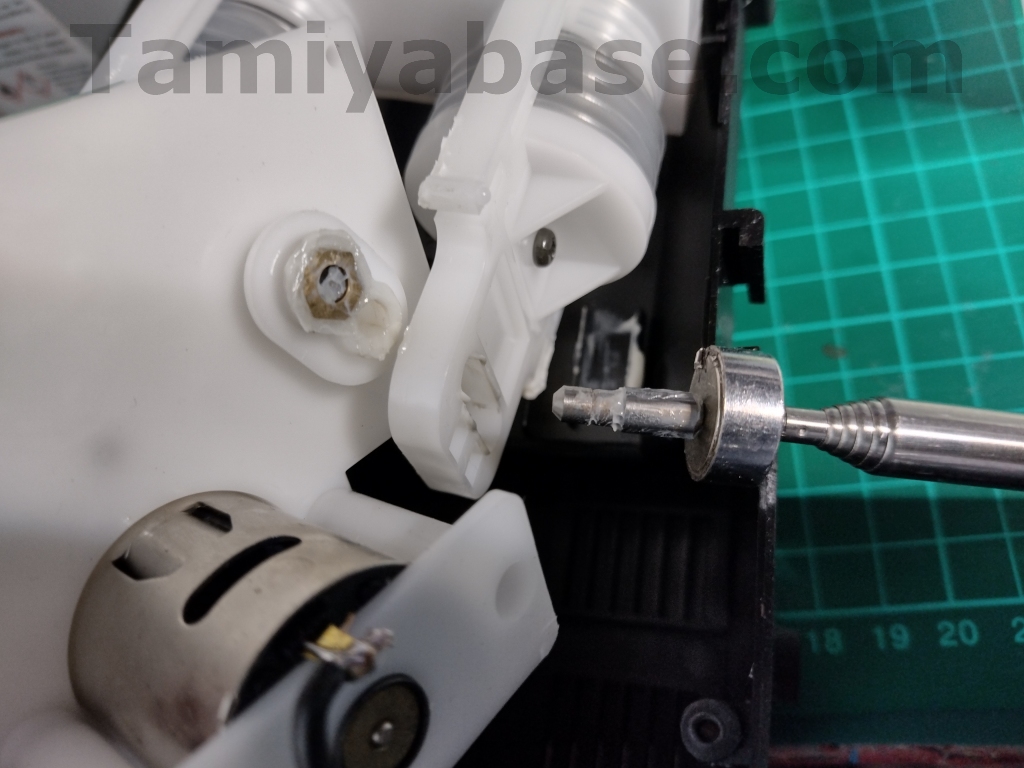
After less than 5 minutes use, there was a bang, and the compressor started knocking really badly, and pistoning back and forth, so I immediately shut it down. After opening the case, the pin on the lower motor output (which engages with the lower bellows frame to provide the back & forth motion necessary for pumping) had got spat out (shown on the magnetic holder in the picture).
There was no obvious damage or breakage, and the pin was a good tight fit when I reinserted it, but after just a few seconds use it failed again. From looking at the photo I took there seems to be a crack in the plastic, and as it’s a thin, hard and oily plastic, I’m not sure that it can be fixed. I may try a through degrease of the parts & a smear of epoxy glue at some point in the future – though without much hope of success.
Right at the start I asked if one these was a viable way to start airbrushing – I have to say no, it isn’t.

Cleaning
The apparent difficulty of cleaning airbrushes was one of the things that put me off for a long time, and despite this set being made simple for the newcomer, it doesn’t extend to cleaning.
The required process is something like:
Leaving the cup attached, wash/wipe it out until little to no paint comes out.
Backflush, i.e. put some water or thinner in the cup, put finger over nozzle cover & squeeze trigger. Wash out the (now bubbly and somewhat paint filled) cup & repeat.
Remove Hose
Unscrew chrome Nozzle cover for cleaning
Unscrew counterbalance & put aside;
Loosen Needle Holder Knob & pull out needle for cleaning – the needle holder knob, screw and collar (especially the Collar) will try to escape at this point;
Undo nozzle for cleaning, with the provided “wrench” ;
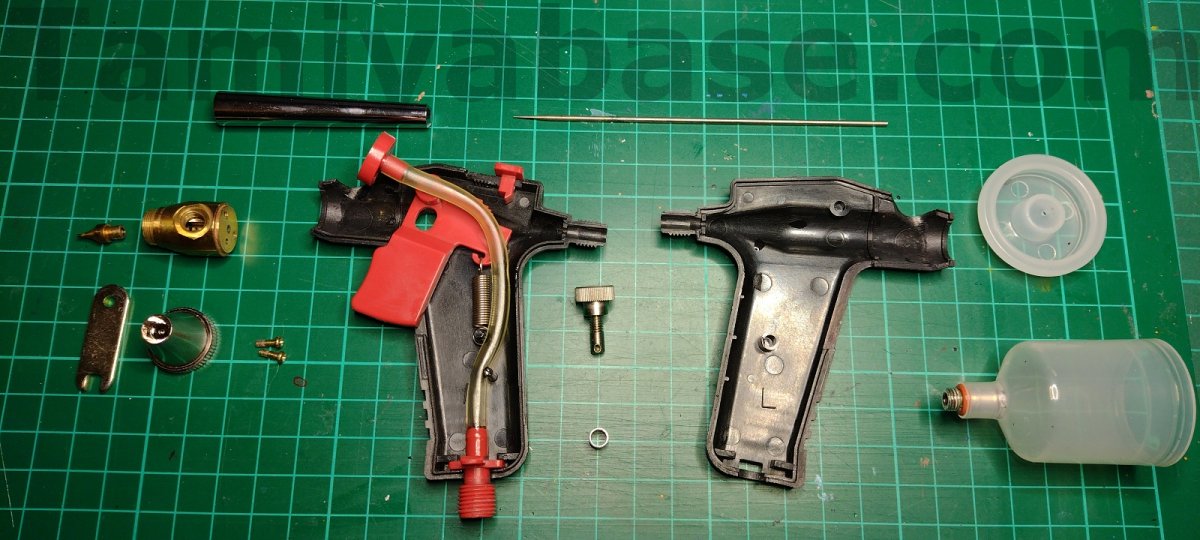
Now that you don’t need the paint cup to stock the brass Center Block rotating, you can remove it for cleaning;
Separate the pistol grip shell halves, unclipping the Hose Connector if needed. The left half should be removed, with the right half retaining the internal parts;
Undo the two small cross point screws to separate the brass Center Block (from the red plastic Needle Guide) for cleaning;
Clean all the bits that need it;
Reassemble, and test (with water or thinner) for cleanliness and function.
That seems like some extra steps and a much higher tool requirement than any single action airbrush has a right too – it’s also more complex and feels higher risk than doing a full clean on a cheap Chinese double action airbrush.
I only tried Tamiya acrylic paint – so could clean up with water and a little X-20A thinners – if I’d been using a different paint with much “hotter” thinners I’d also have to be concerned about the possibility of melting plastic components and the case as despite being very careful, the thinners had migrated inside.
Modern Equivalents
The nearest equivalent to the vintage set here would be the Tamiya 74520 Spray-Work Basic Air Compressor w/ Airbrush, which appears to be current model, even if it’s not widely available.
That airbrush is fundamentally the same, and while it gains a choice of paint cup sizes, it only includes the 0.3mm “fine” nozzle, with the “wide” one being an extra cost option.
The compressor has a restyled case, and internally, has a pump with only two sets of bellows, and uses the extra internal space to hold a 6N rechargeable battery. Output would appear to be the same, but it’s claimed to be quieter, and more efficient, getting 20 minutes from a 1400mAH pack, or 30 minutes from 1700mAH.
Prices vary from 110 GBP to 160 GBP, presumably plus 20% VAT on landing, and a fee for processing it. That means the price will probably end up being more like 140 to 200 GBP. Prices for the more “traditional” kit have risen massively in the UK recently, and for that sort of money, I’d rather go somewhere like everythingairbrush.com & get a piston compressor with a 3-litre tank, regulator output & an entry level airbrush like the Harder & Steenbeck “Ultra” 2 in 1 gravity fed double action model.
There’s also the question of how old any set you buy might be – I don’t know if there’s any real way to differentiate an early one (presumably from 1990) from a genuinely freshly made one, and that will have a real impact on how long it’s going to last.
If I simply wanted to test the water as cheaply as possible, eBay or Amazon have any number of basic compressor and DA airbrush kits for 20 GBP or less, or all in one handheld compressor / battery / airbrushes for as little as 15 GBP.
It’s possible to buy the airbrush on its own, but at 40 to 50 GBP you can buy a couple of basic Chinese models of different design or be a lot of the way towards an entry level German unit.
Overall
Positive Points
Somewhat rare & interesting;
Meant to be entry level;
Looks good on the shelf;
For the Tamiya fan who has everything else;
“old” model can perform quite well (until it breaks);
Level of portability not otherwise seen until very recently;
Needle Stopper function potentially useful.
Neutral Points
Power supply somewhat problematic;
More limited range of adjustments than a more conventional setup.
Negative Points
Airbrush cleaning more of a faff than ever;
Age means it could well not function or be on borrowed time. Mine broke almost immediately, though not in the manner I expected;
Plastic threads & fittings don’t bode well for longevity;
Ditto for the plastic-on-plastic sliding parts of the pump;
“Current” model has all the same problems and is outclassed on value and most features by newer designs/options.
Despite being quite rare, you should be able to find a nice looking, complete (and possibly functional) example for 65 GBP or so – and a lot less for nonfunctional, incomplete or soiled sets.
However, given my experience and the other potential problems, I think you have to regard it simply as something to look at.
Mine did work (briefly), and quite well, but with probably no means of fixing it other than buying another one and hoping that’s not broken in the same way, it’s purely ornamental.
That’s’ a bit of a shame, as there could have been times when I might have used it in preference to some of the more conventional (and adjustable kit) that I also have. Despite the level of dismantling required for proper cleanup, I may well use the airbrush on its own (with another compressor) just to see what I can do with it.
This is a review of sorts, so that means giving a final rating. As a combo, and if it had continued to work, it may have deserved as high as a 4 out of 6, but given how quickly mine failed despite seeming to have had little to no use and been stored well, I have to assume most are going to be similarly fragile and, with some regret, give a final rating of 2 out of 6.

n.b. the manual should now be available in the TB downloads section.
__________________________
Written by TB member Jonny Retro