

Introduction
 The Dyna Storm, though seldom seen due to rarity, is legendary in the history of Tamiya. While the Avante may be considered the ancestor of 4WD TRF buggies, the 58116 Dyna Storm released in 1992 is the ancestor of the TRF 201. Itself an evolution of the Astute chassis, the Dyna Storm used an FRP deck, sleeved aluminum shocks, and a Multi-Disc Clutch (MDC) to tame the power of the recommended (but not included) Acto Power 2WD motor. A limited re-release of the same model was available in 2001 as 49190, the version I was able to track down. Unlike most re-releases, this is identical to the original in nearly every way. The only difference is the inclusion of a pink motor that looks like, but isn't, an Acto Power.
It took quite a hunt for me to track down one of these new in the box, and I'm glad I looked when I did because they are pretty much impossible now. I managed to find an original Acto Power motor as well to make this as much like it always should have been as possible. Sadly, replacing parts (especially tires) is going to be very difficult so this will probably get run less than many of my buggies. That's a shame because it is a joy to drive. Sometimes I forget how good a proper old racing brushed motor can be. I would say that I recommend getting one of these except that there is no point in such a recommendation because you probably can't find one. You'll have to settle for looking at mine.
Update: This model was destroyed in a 2022 fire. I hadn't really driven the model at all when it was destroyed so I can't say anything about the handling characteristics. It has not been replaced.
Building the Chassis
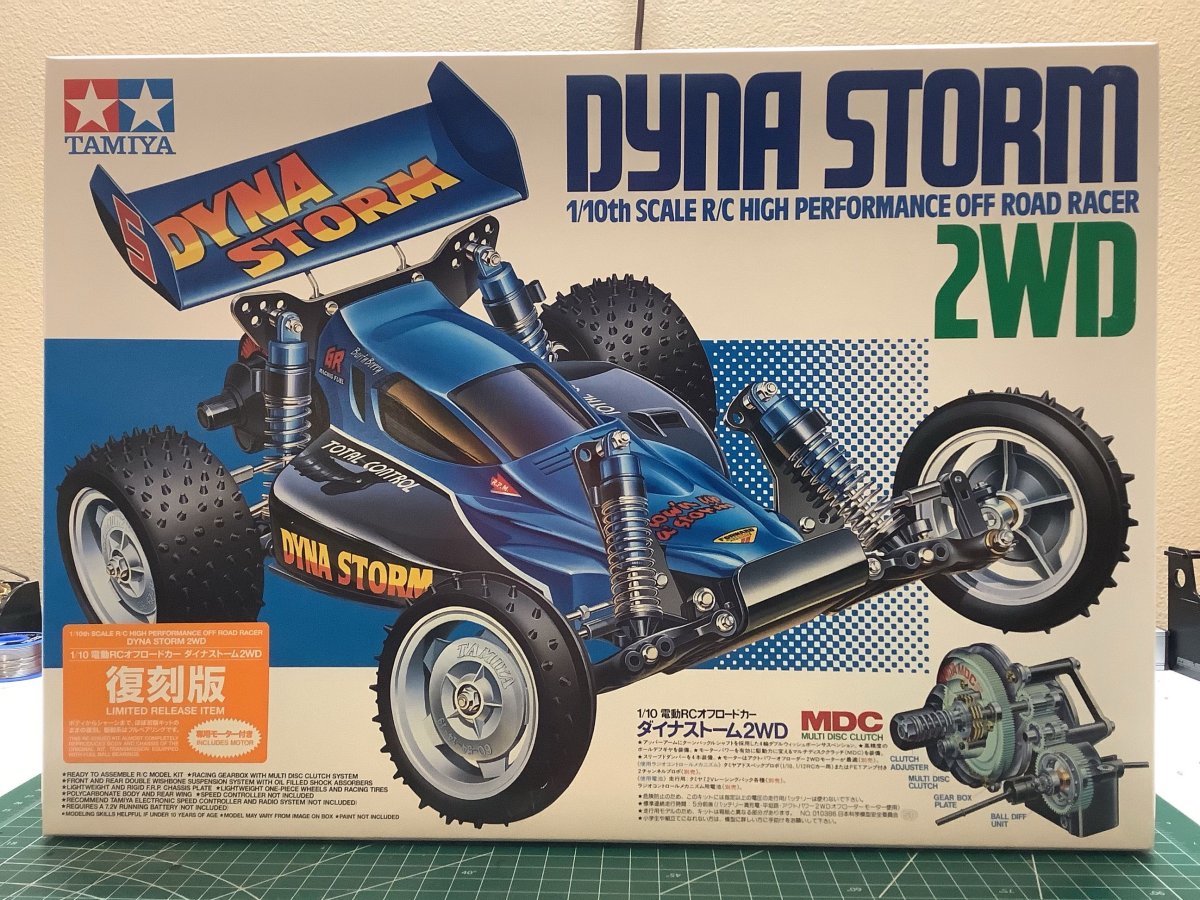
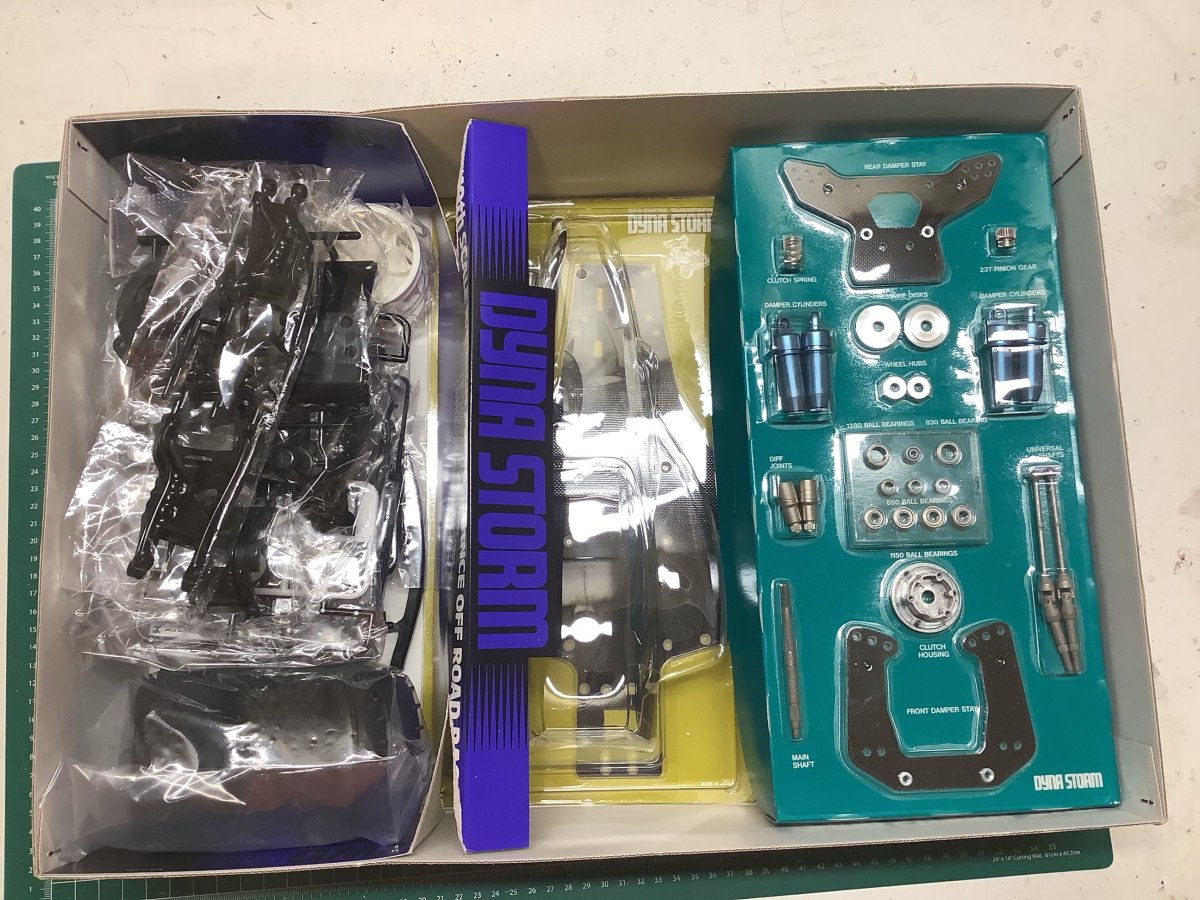
That orange sticker on the box identifies this as the re-release version of the Dyna Storm. Other than that, it looks exactly like the original. Because the original didn't come with a motor, there is no space in the blister packs for the pink motor that came with the re-re. This is a proper old-school box with a full visual presentation of all the key parts of this chassis. Because the body doesn't have an overspray film, you can see through it to the center blister pack.
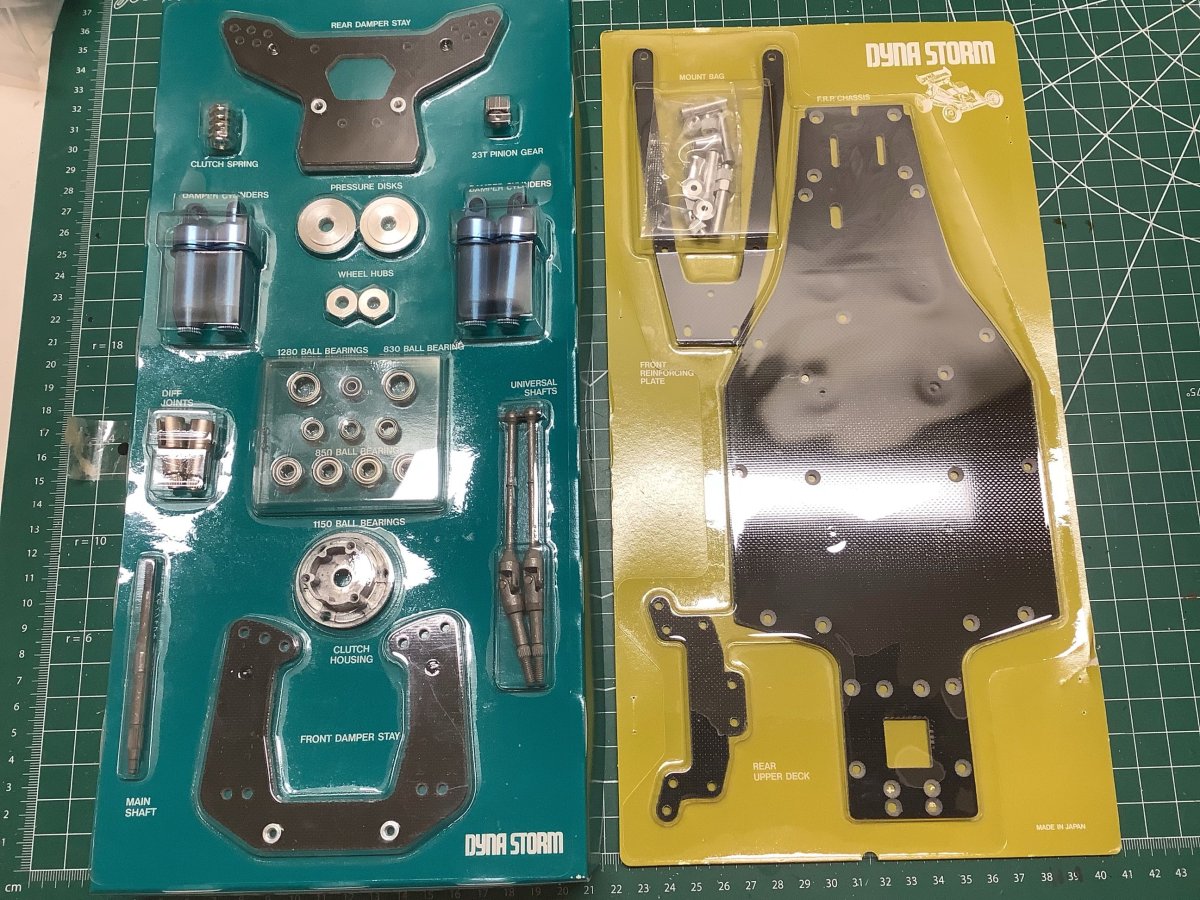
Here I'm showing the contents of the blister packs and some other special parts. The cyan blister contains the FRP shock towers, aluminum shock bodies, universal axles, and the clutch housing. The mustard blister contains the FRP chassis plate and brace. The right-hand photo also shows the metal motor mount and battery holder.
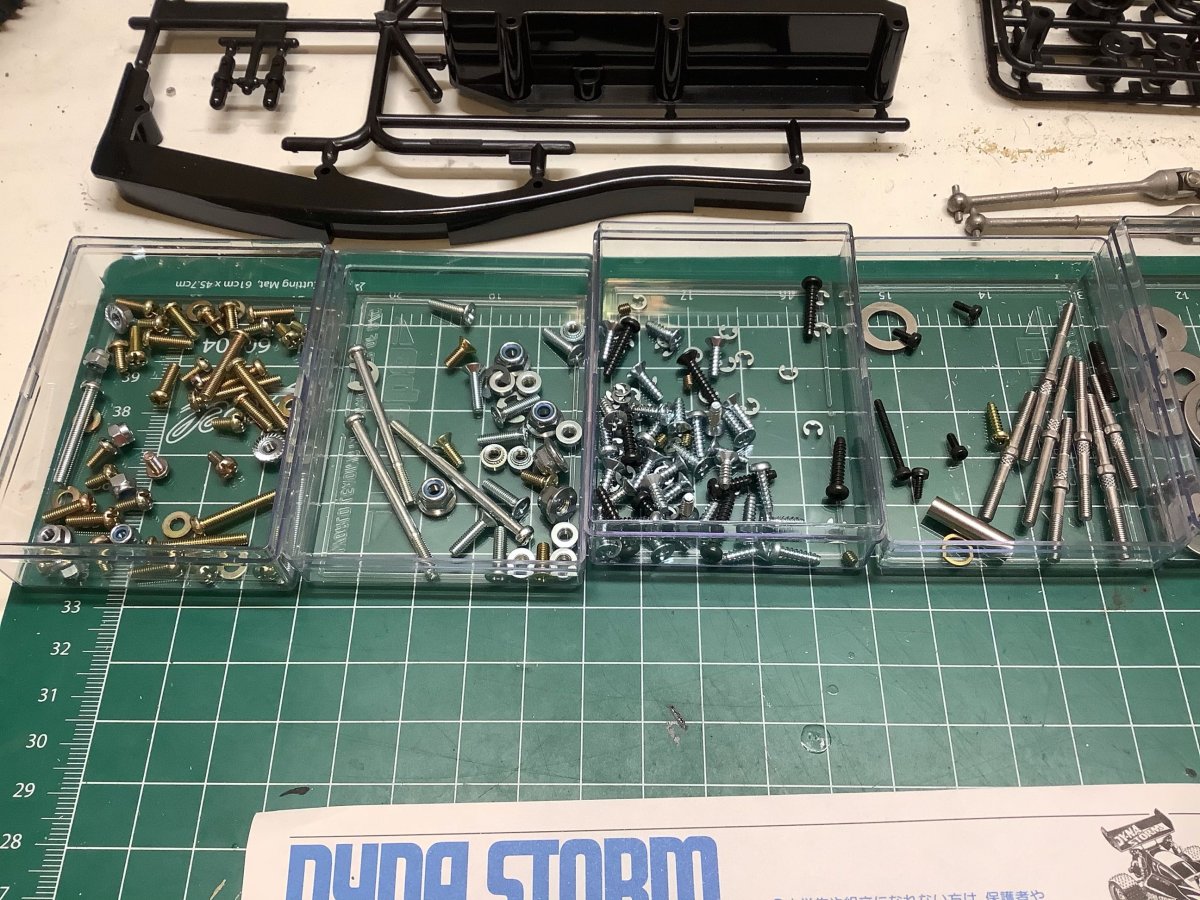
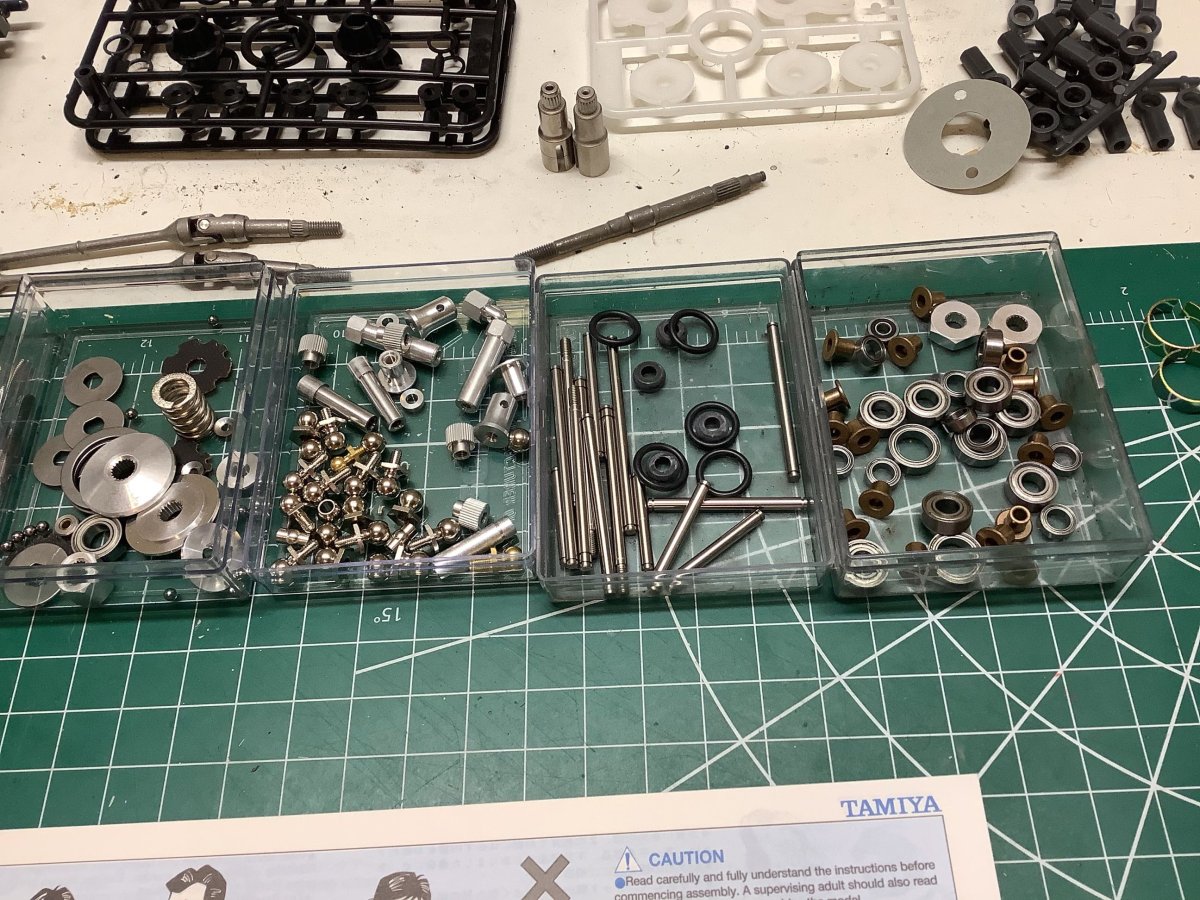
There is a lot of hardware in this model as you can see. I needed 8 servo bins to contain it all. I love this kind of build: very complex with lots of parts. Note that full ball bearings are included on the far right.
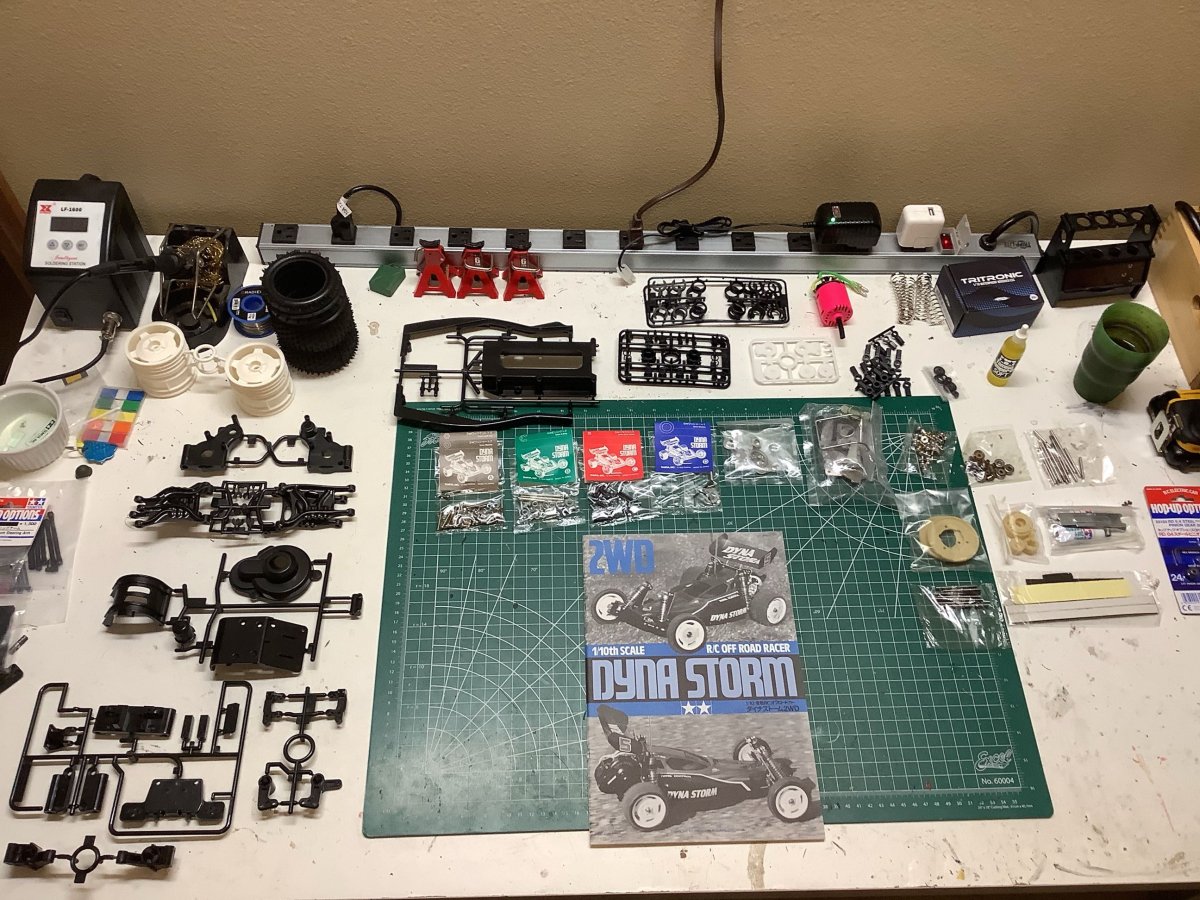
This picture shows the full contents of the box attributable to the chassis on my build table, ready to get started. There's something special about the old manuals with the blue printing.
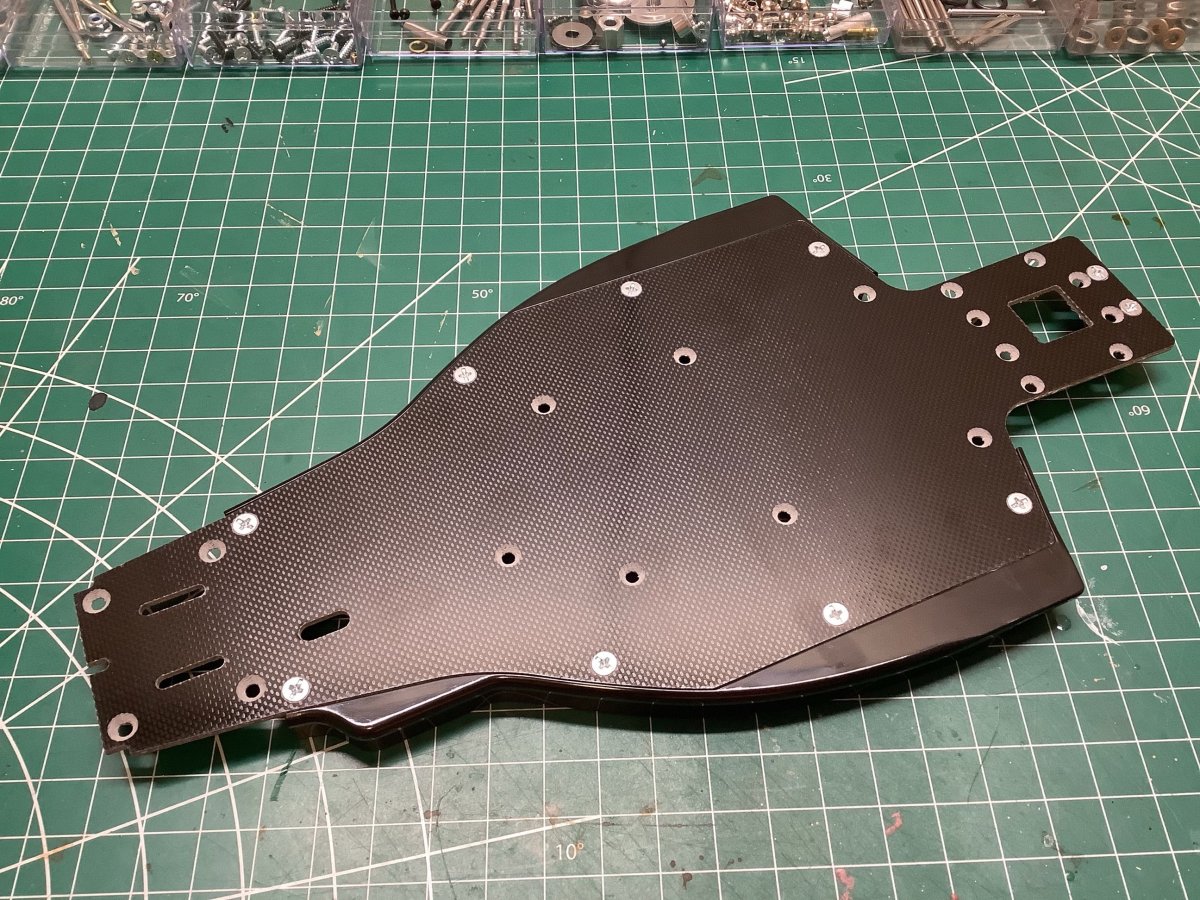
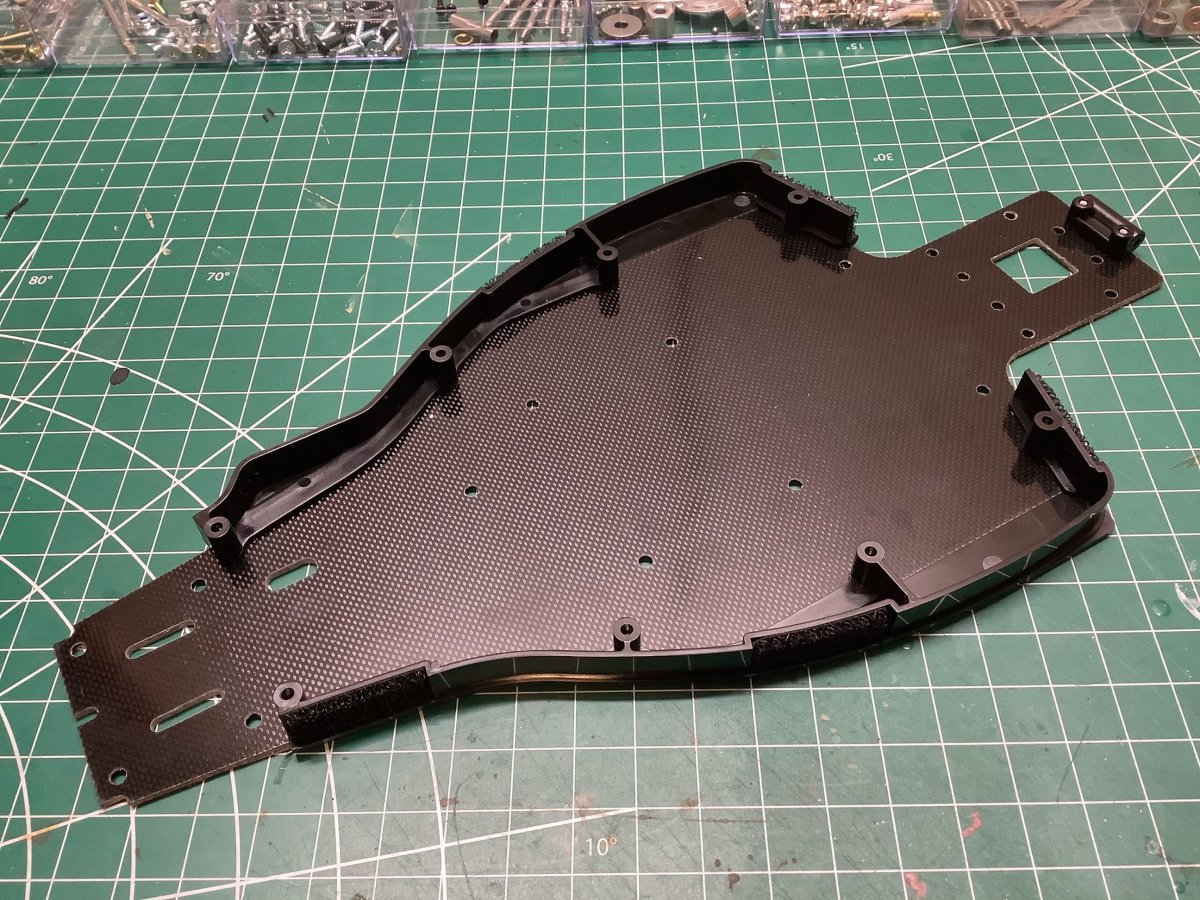
The build starts with the main chassis plate which is FRP (fiber reinforced plastic). While the plate is already very stiff, the addition of the plastic side plates shown really makes the whole thing incredibly rigid. The view from below shows that 4 screws were used per side to affix the stiffeners. They are not symmetric. One has a bump to make room for the servo corner.
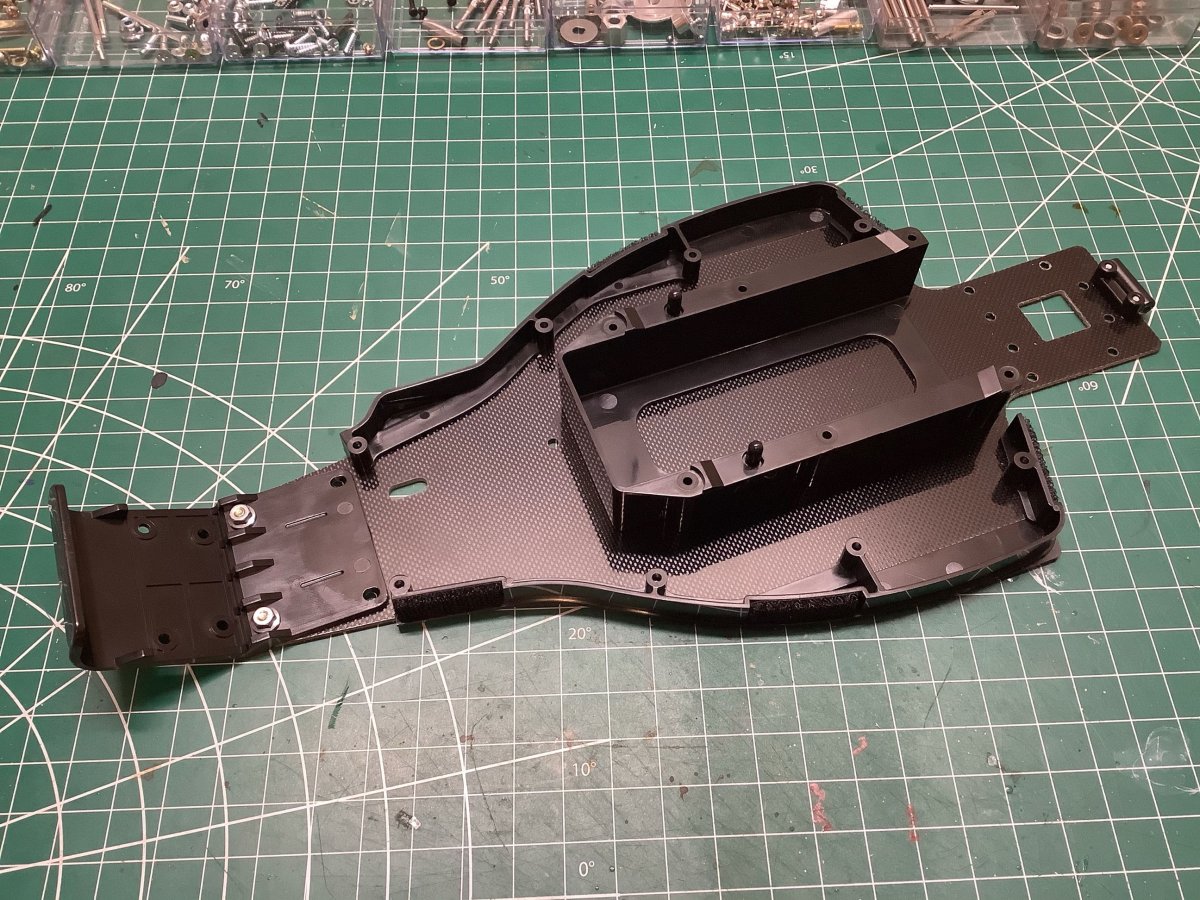

A C-shaped bracket is installed next to support the battery, but this also serves to add even more rigidity to the chassis. The front bumper and skid plate also install at this point.
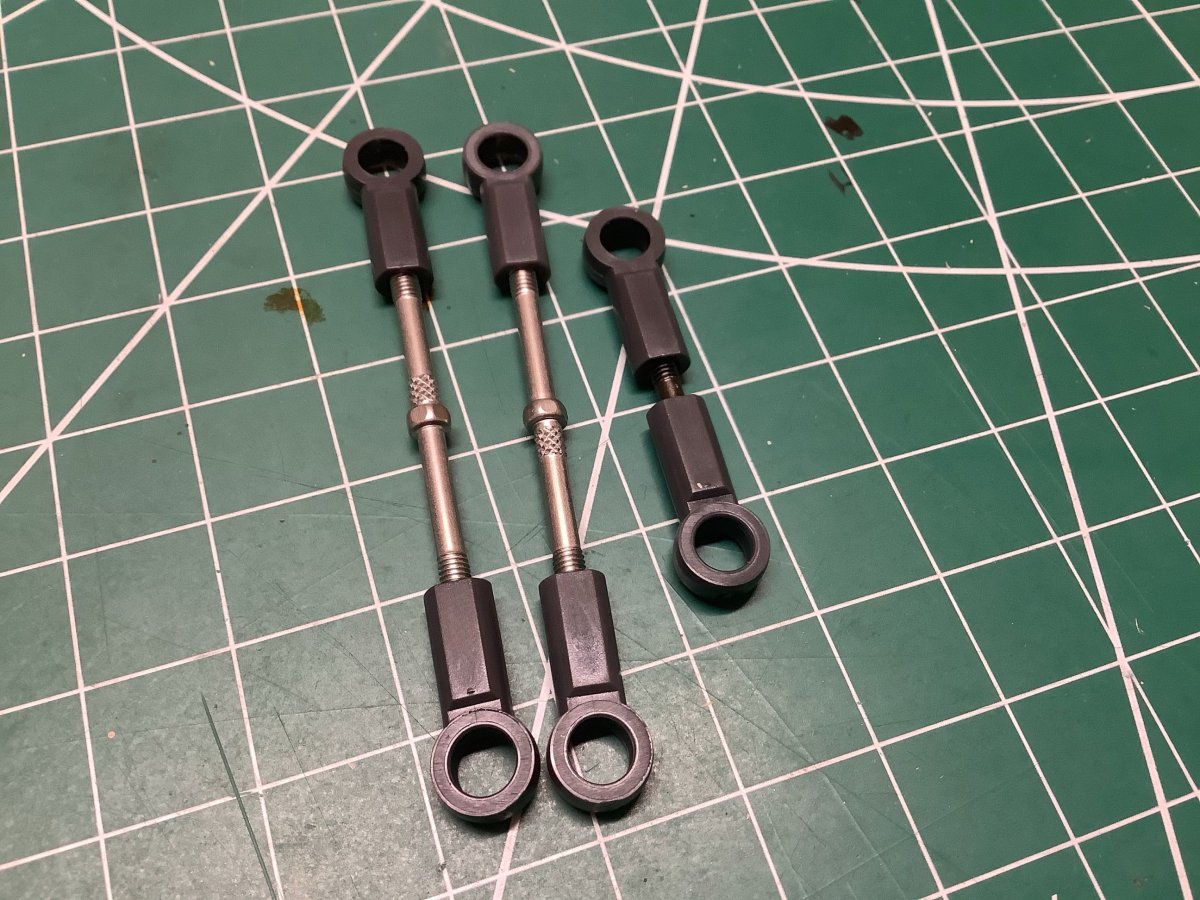
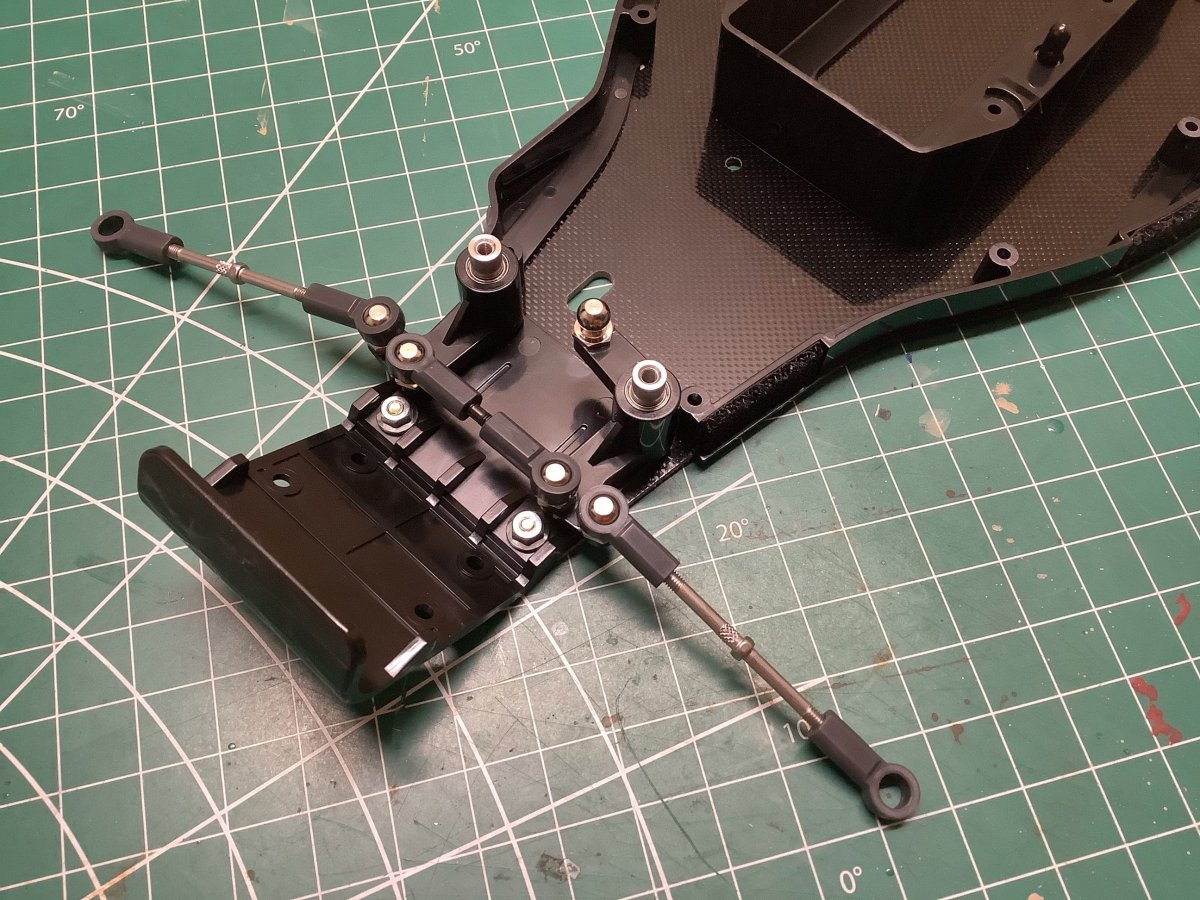
Next comes the dual bellcrank steering. The steering links are turnbuckles which allows for easy toe adjustment. These look like they might be titanium, but I'm not 100% sure. If only I had a mass spectrometer. The only bushings (as opposed to bearings) used in the model support the steering cranks, but I'm OK with this. They only need to support small rotations.
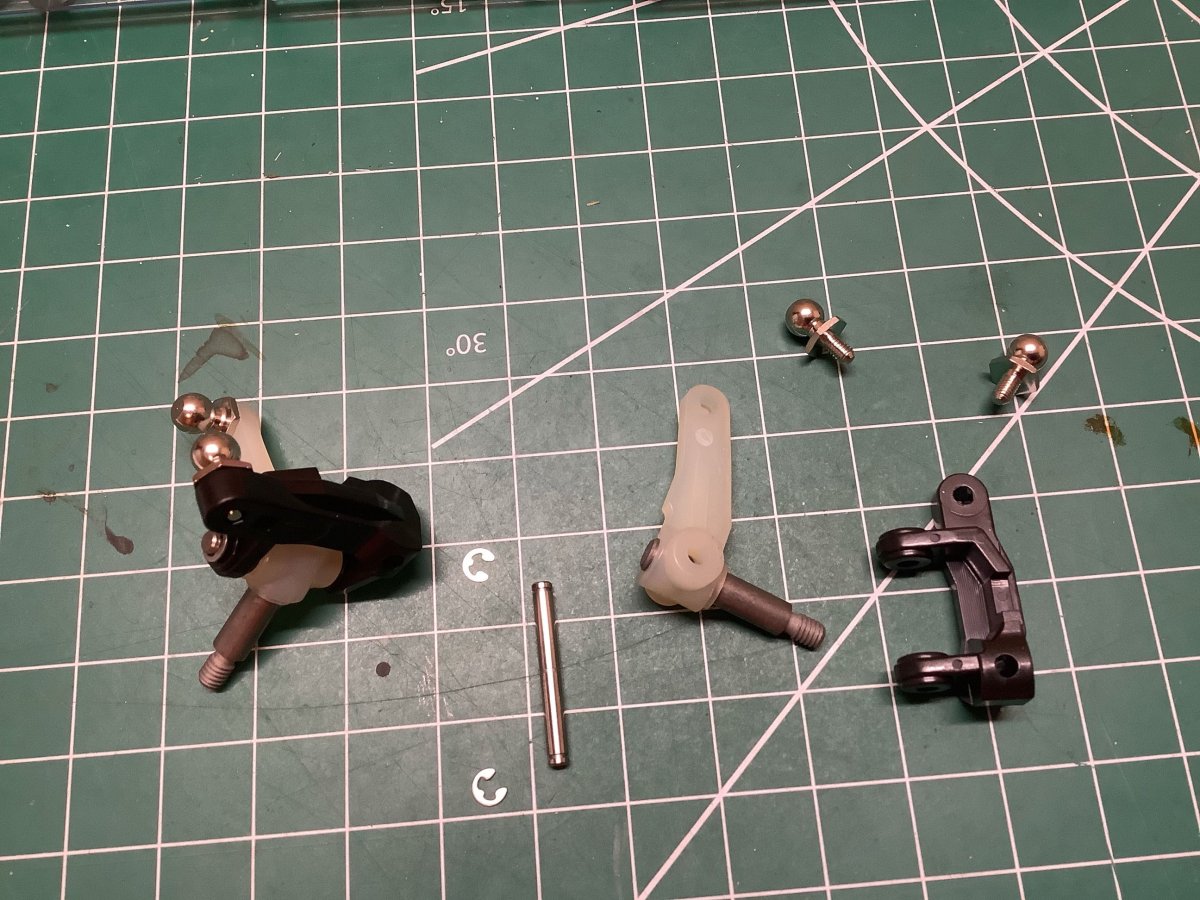
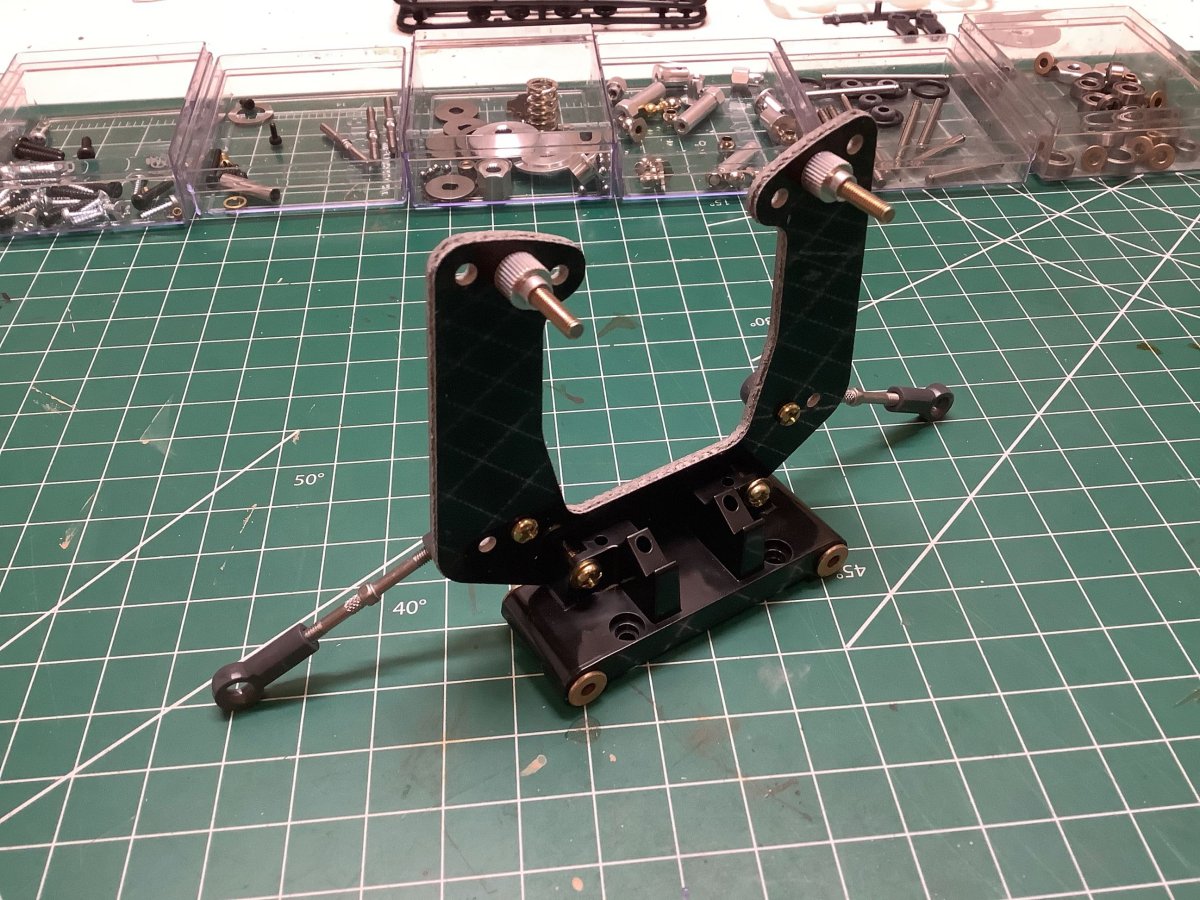
Next comes the assembly of the steering uprights and knuckles. A completed assembly is compared to an exploded view on the left. The upright is a C-hub, and the knuckle is a plastic crank with a steel axle pressed into it. The kingpin is a smooth shaft with E-clips at either end. On the right I've assembled the front shock tower to the upper suspension links which are also turnbuckles. Note the flanged bushings which will support the lower control arm pivots.
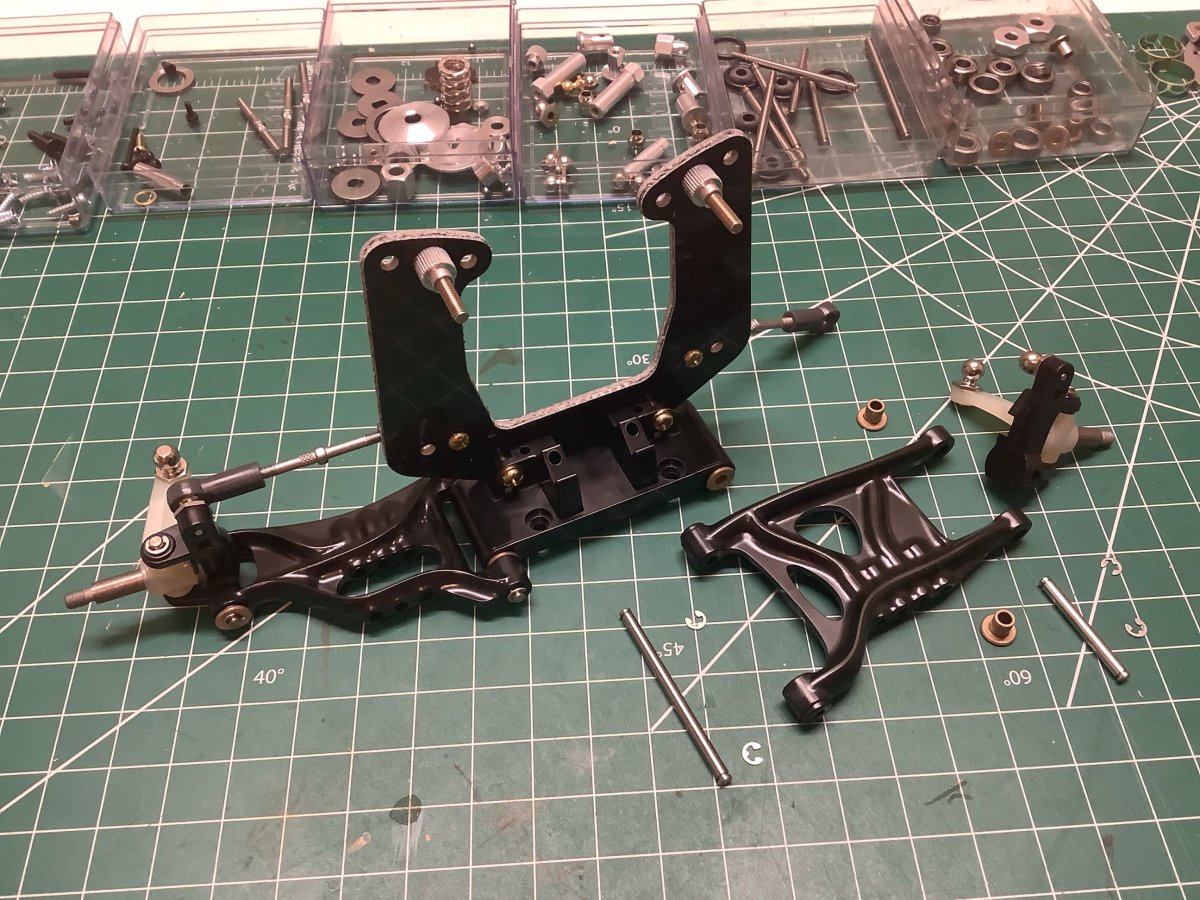
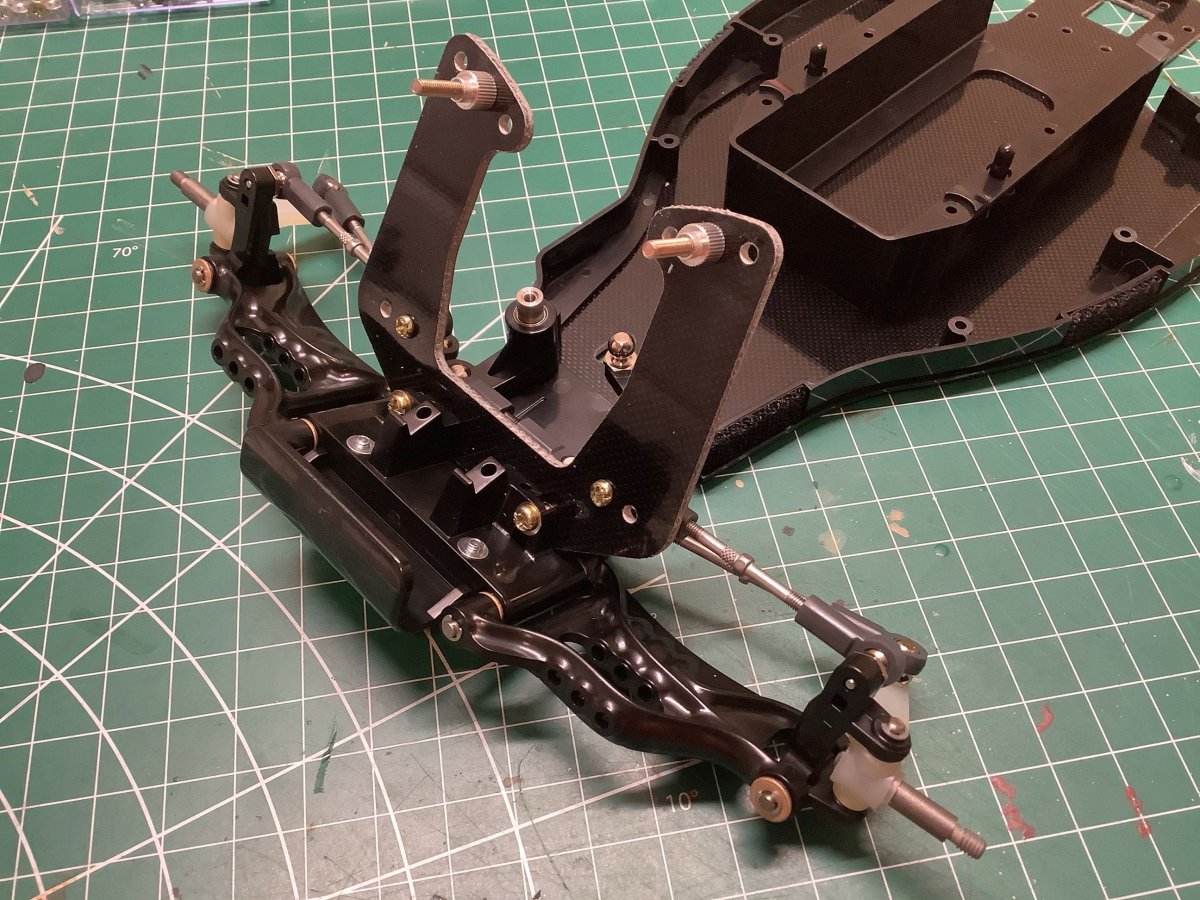
The lower arms are now connected to the front suspension block with smooth pins as shown on the left. The steering knuckles are also attached. Note the unique, complex shape of the lower arms. In the exploded view, the wrong arm is actually shown. I set a rear arm on the table for the picture, but it should of course be a front arm similar to the one already installed. On the right the front suspension module has been attached to the chassis plate.
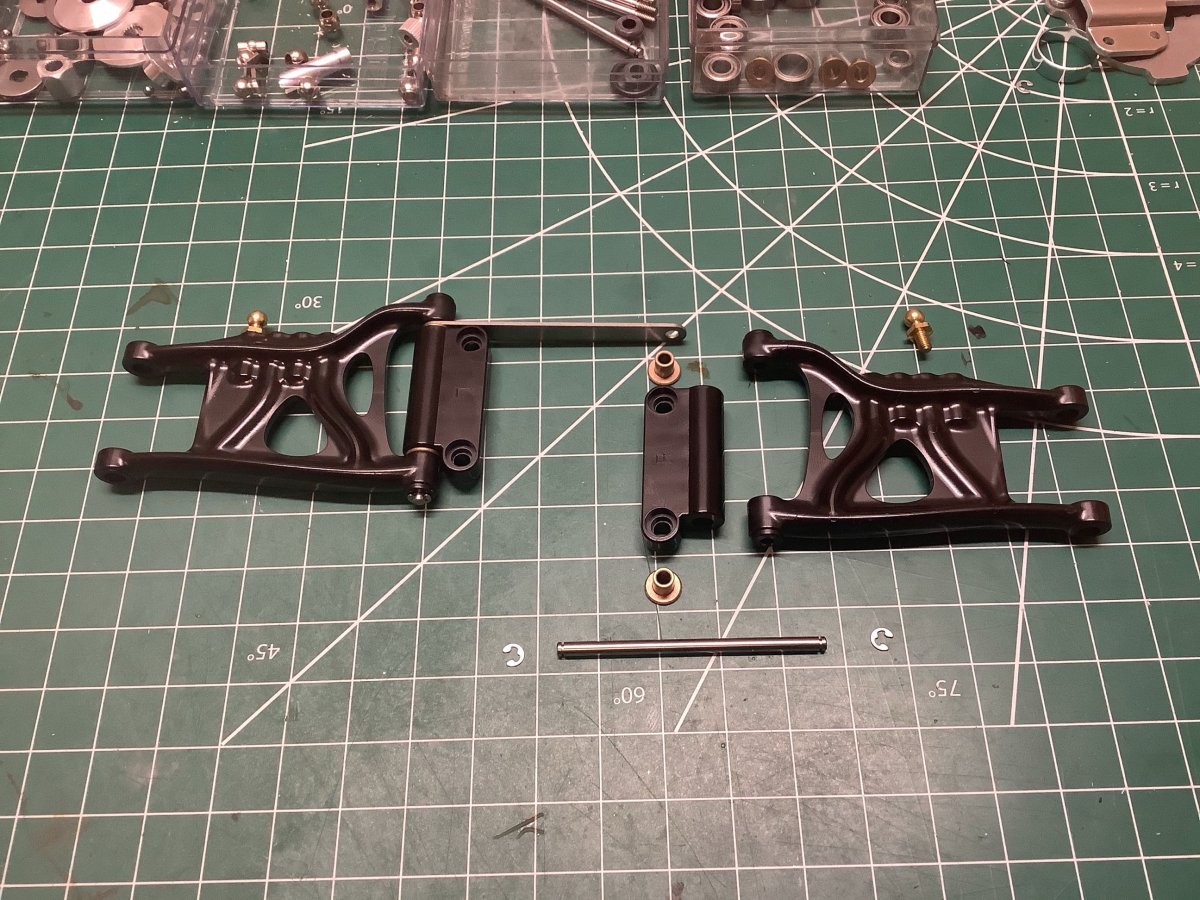
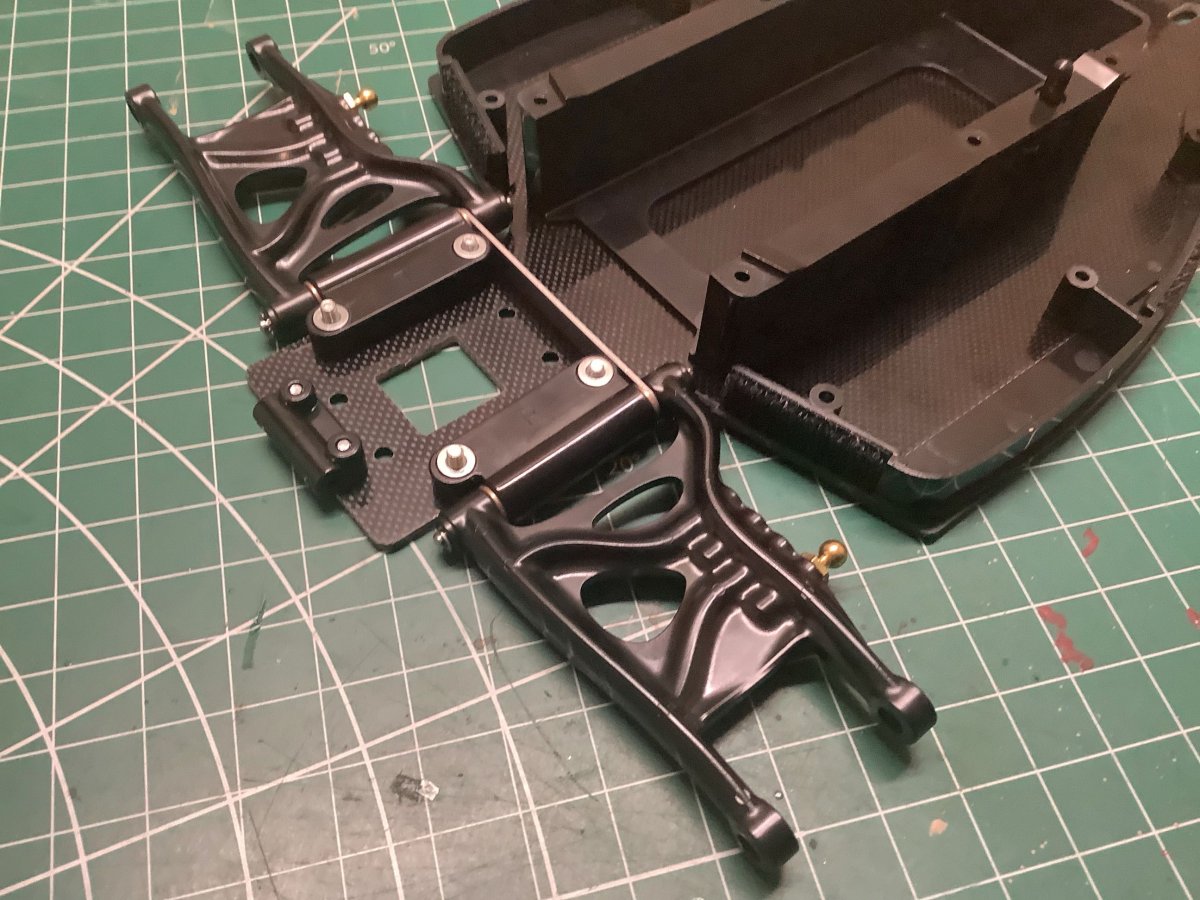
Here is the rear lower suspension assembly. Again we see the complex arm geometry. The arms are separated by a metal plate and pivot on flanged bushings supported by plastic brackets. The assembly is shown attached to the chassis on the right. The installation uses the fairly uncommon Tamiya press nuts (no hex, friction fit).
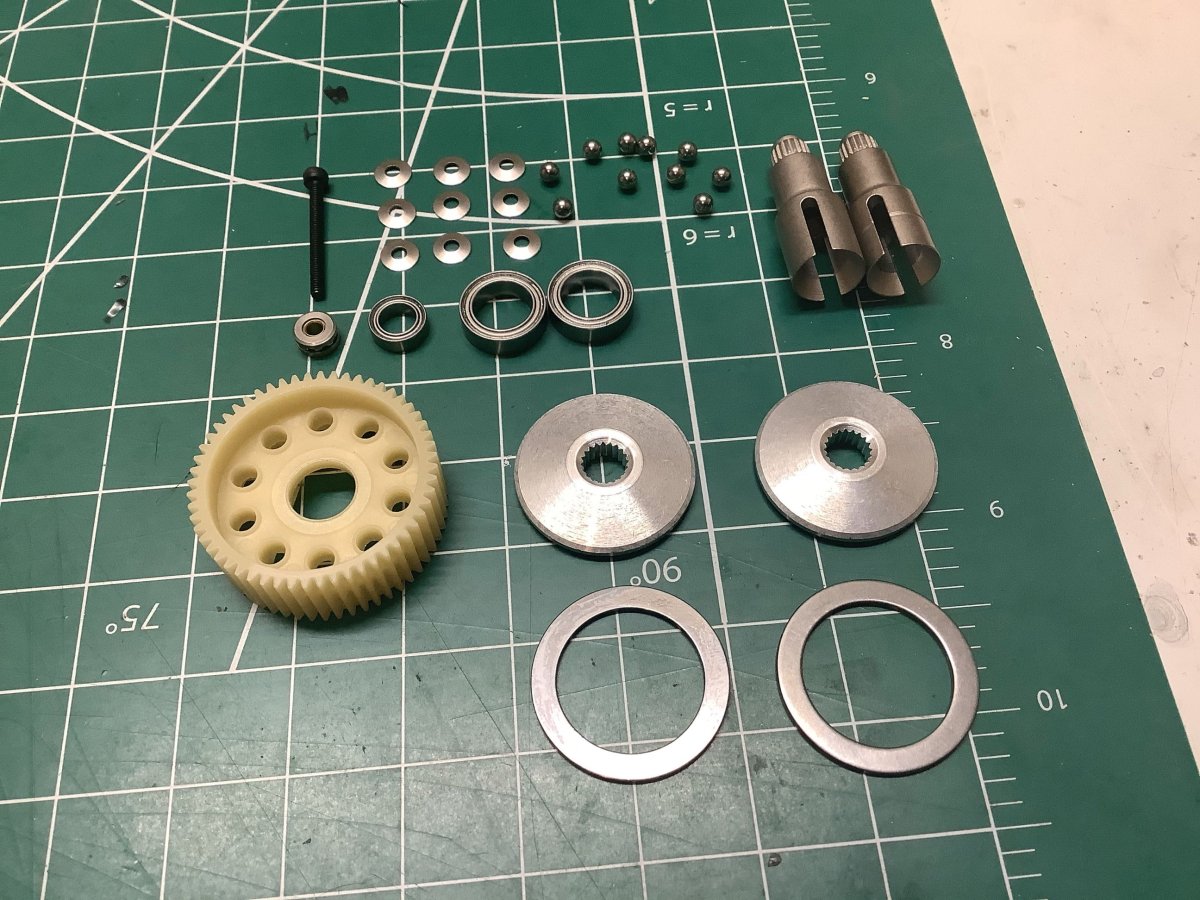
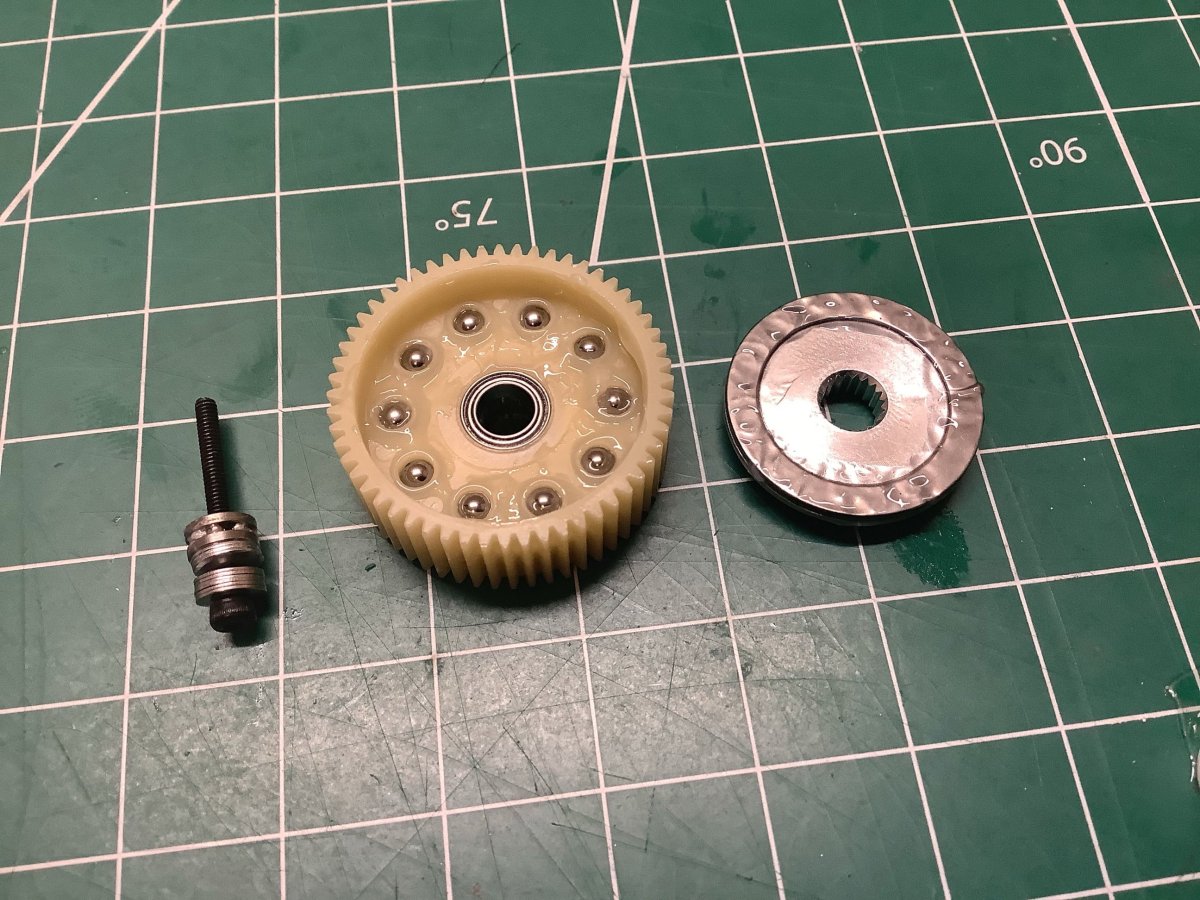
Now to build the rear ball differential. At this point these are pretty standard for me, but I always enjoy the process. There are ten 3mm balls in the ring gear and nine Belleville washers under the thrust bearing which have to be stacked in a specific orientation. The pressure disks are aluminum with a steel contact ring and are splined on the inside to accept the drive cups.
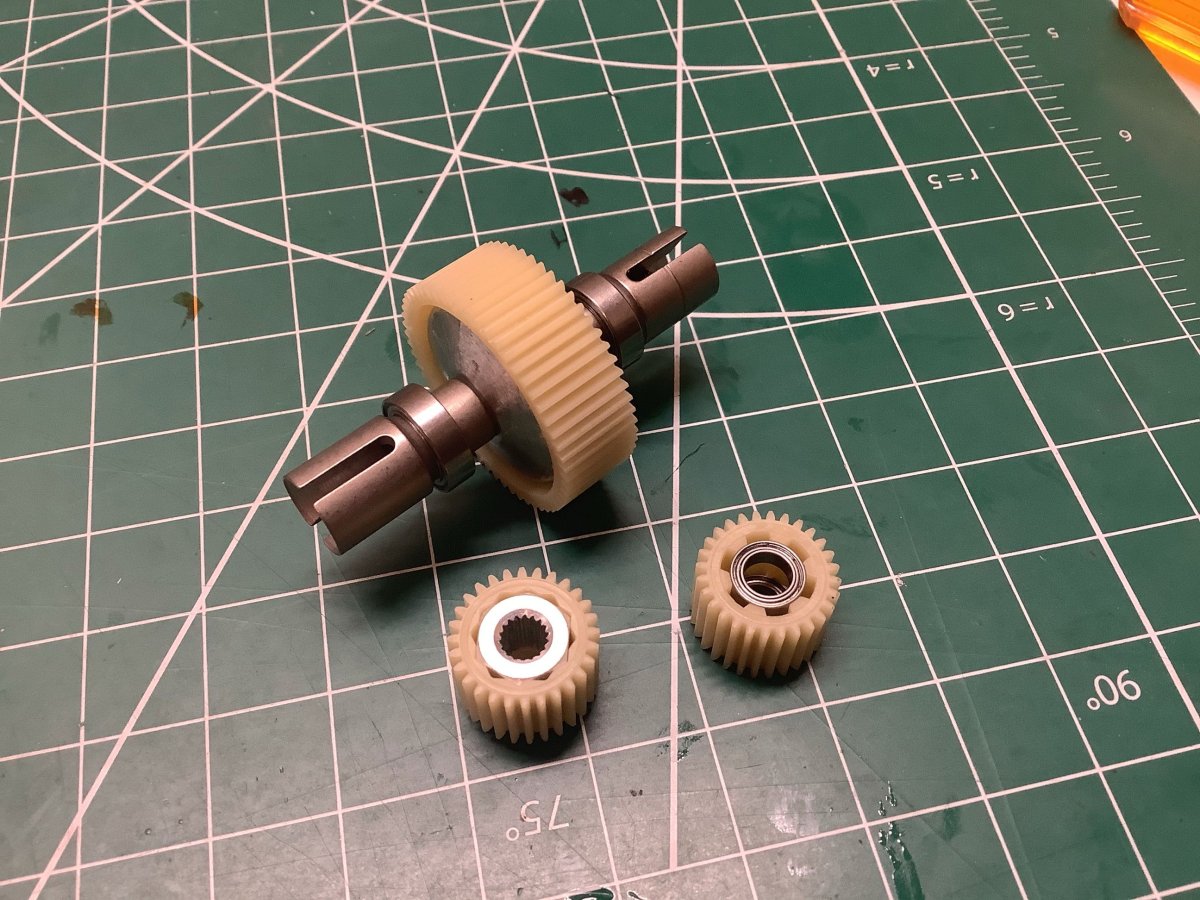
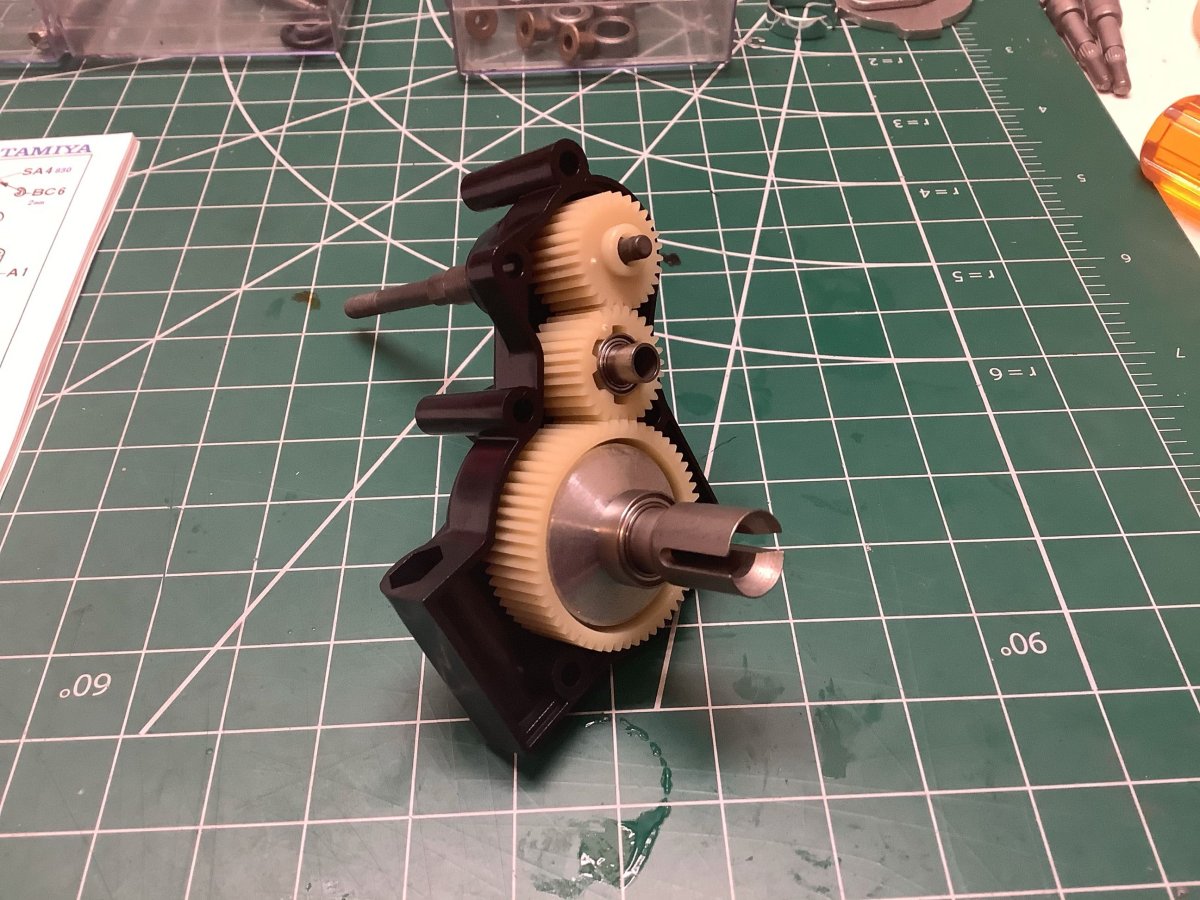
Here is the completed ball differential alongside the other two gears which make up the inside of the transmission. The assembly is shown at right. The counter gear is supported by a hollow axle shaft, and the drive gear splines to the main shaft.
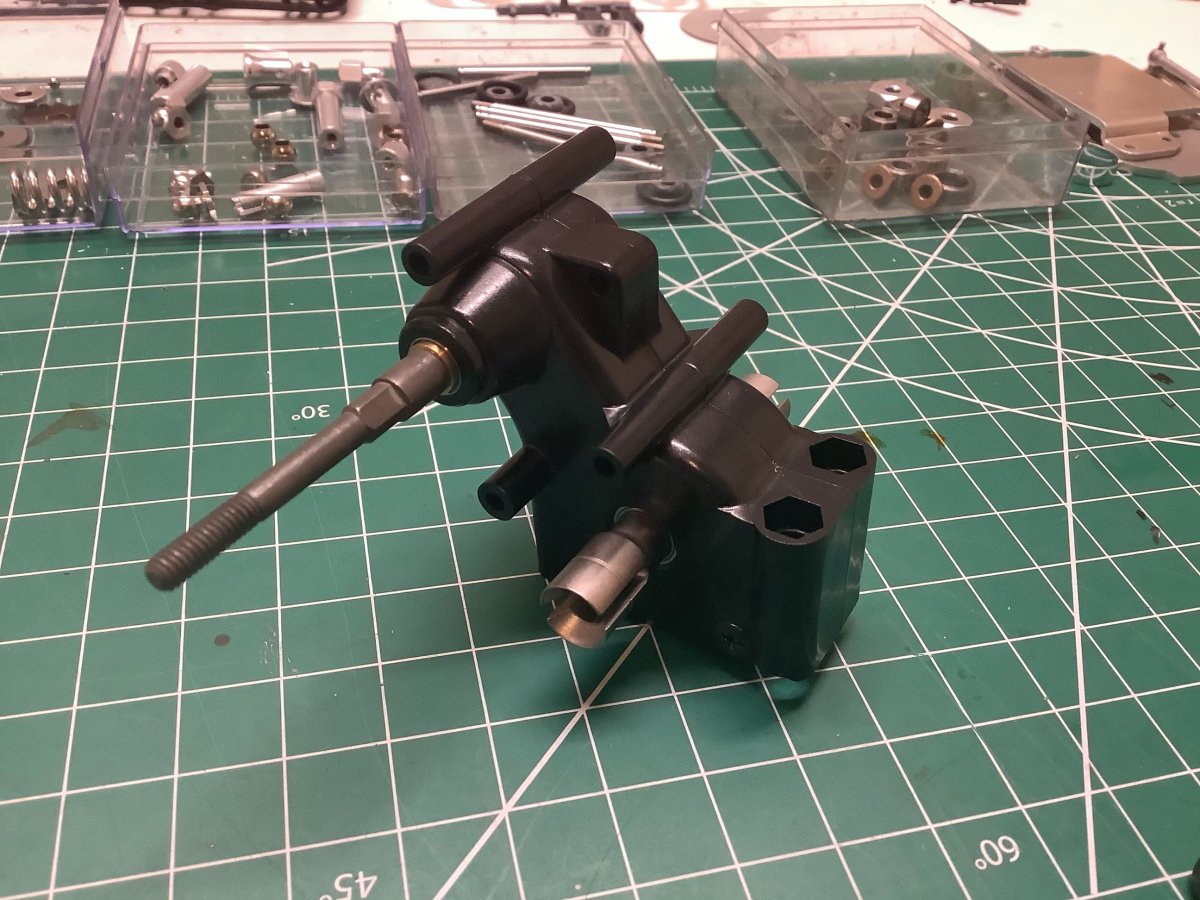
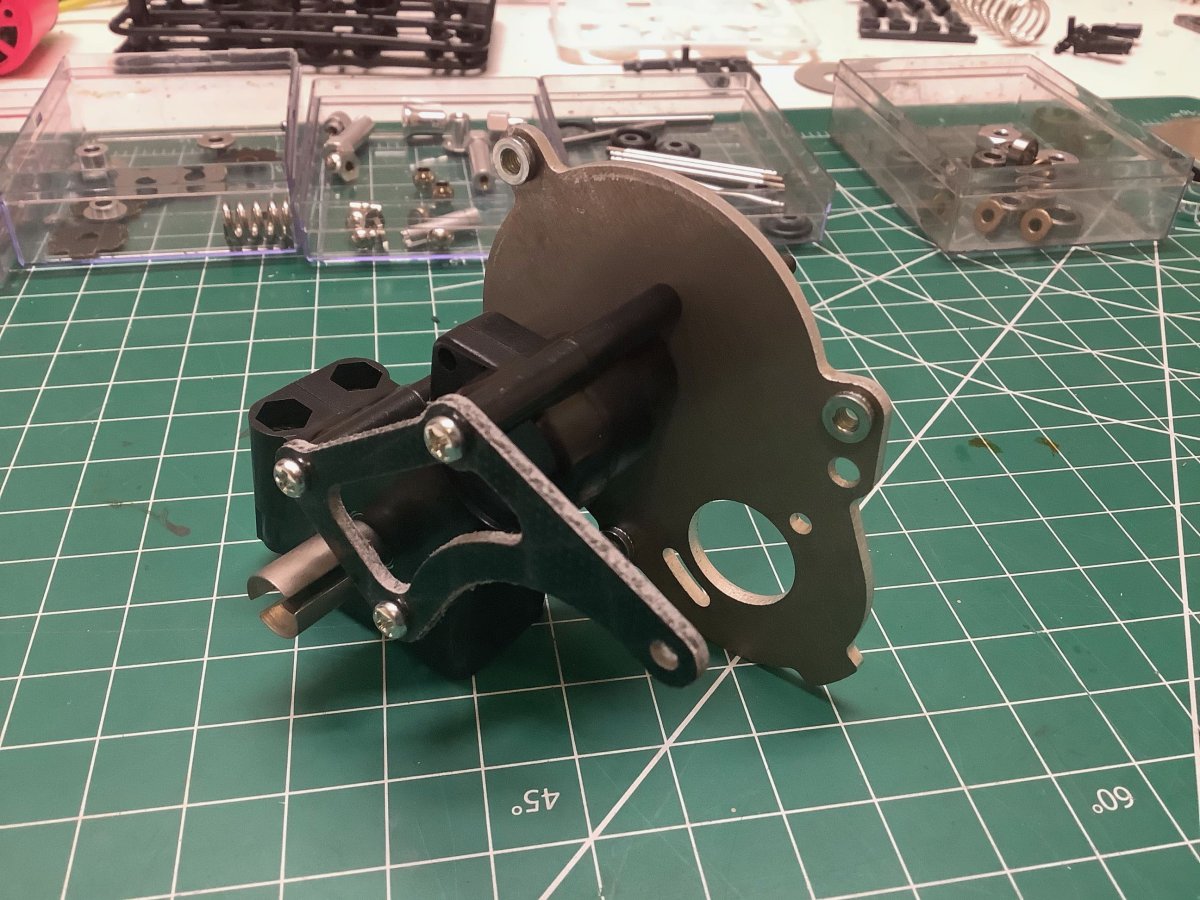
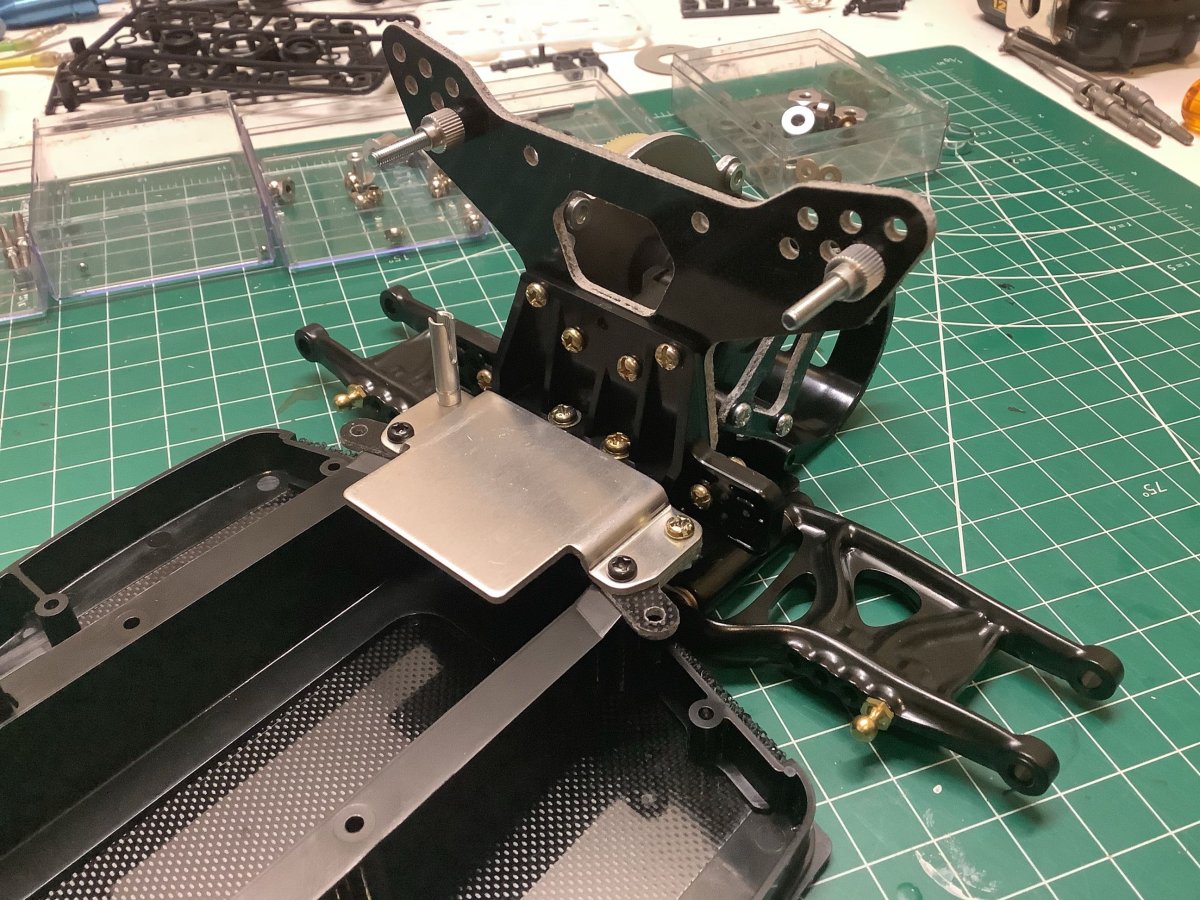
Here is the transmission with both housings fastened. On the right you can see the metal motor mount has been attached as well as the FRP support brace.
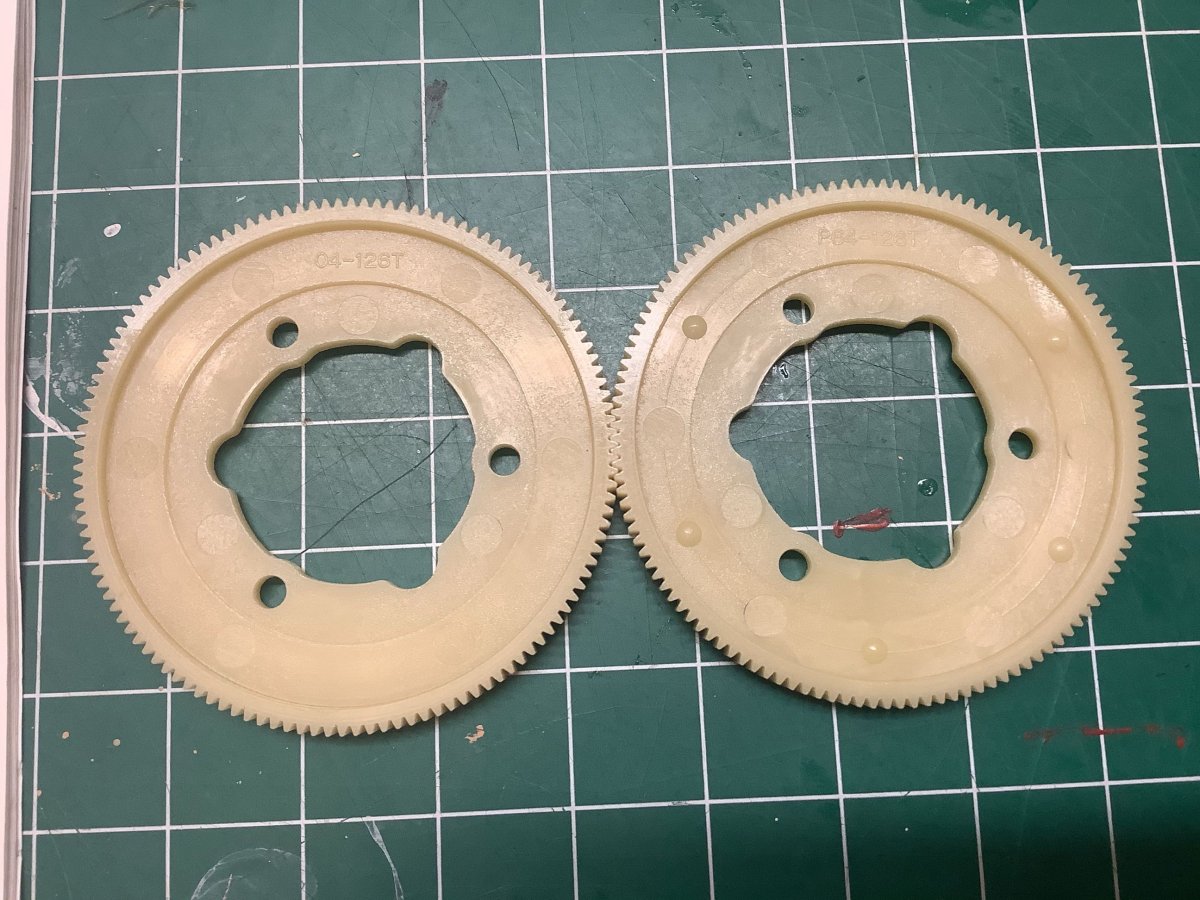
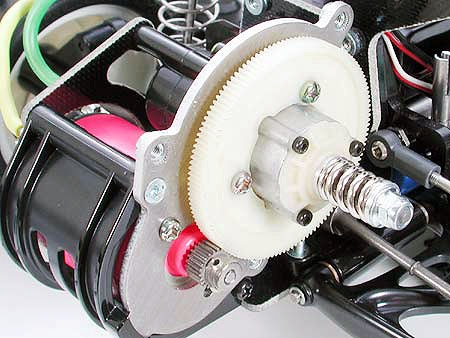
Although 0.4 mod gears (metric) and 64p gears (imperial) are considered to be compatible, they are not exactly the same. 0.4 mod would technically be equivalent to 63.5p. This is the first kit I've ever seen which comes with a spur gear for each option. They both have 126 teeth and are barely distinguishable, but the 64p has a slightly larger diameter. Even though it is much easier to source 64p pinions where I live, I decided to stick with the 0.4 mod spur and use a Tamiya pinion to keep it all in the family. This is a very fine pitch which is unusual for Tamiya buggies. It offers a lot of pinion size options as well as very quiet running.
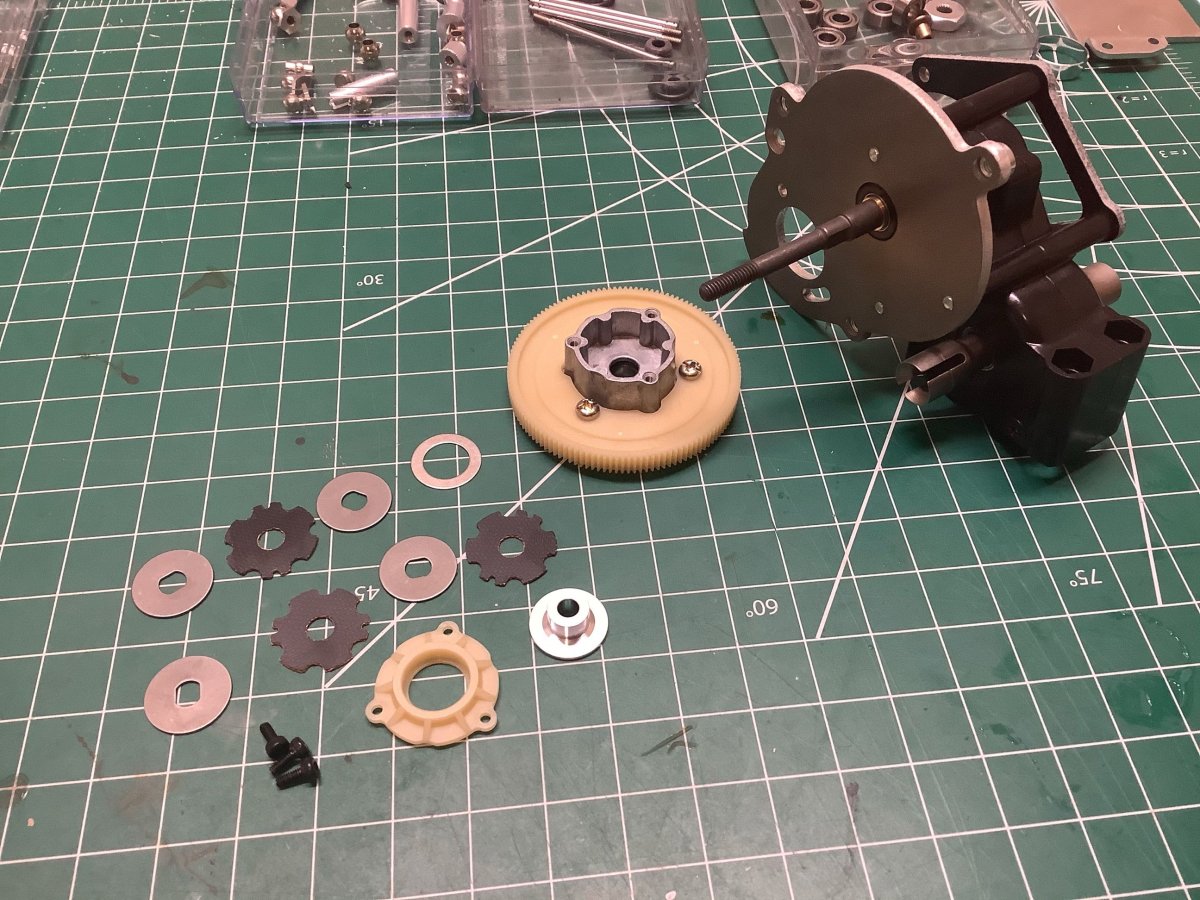
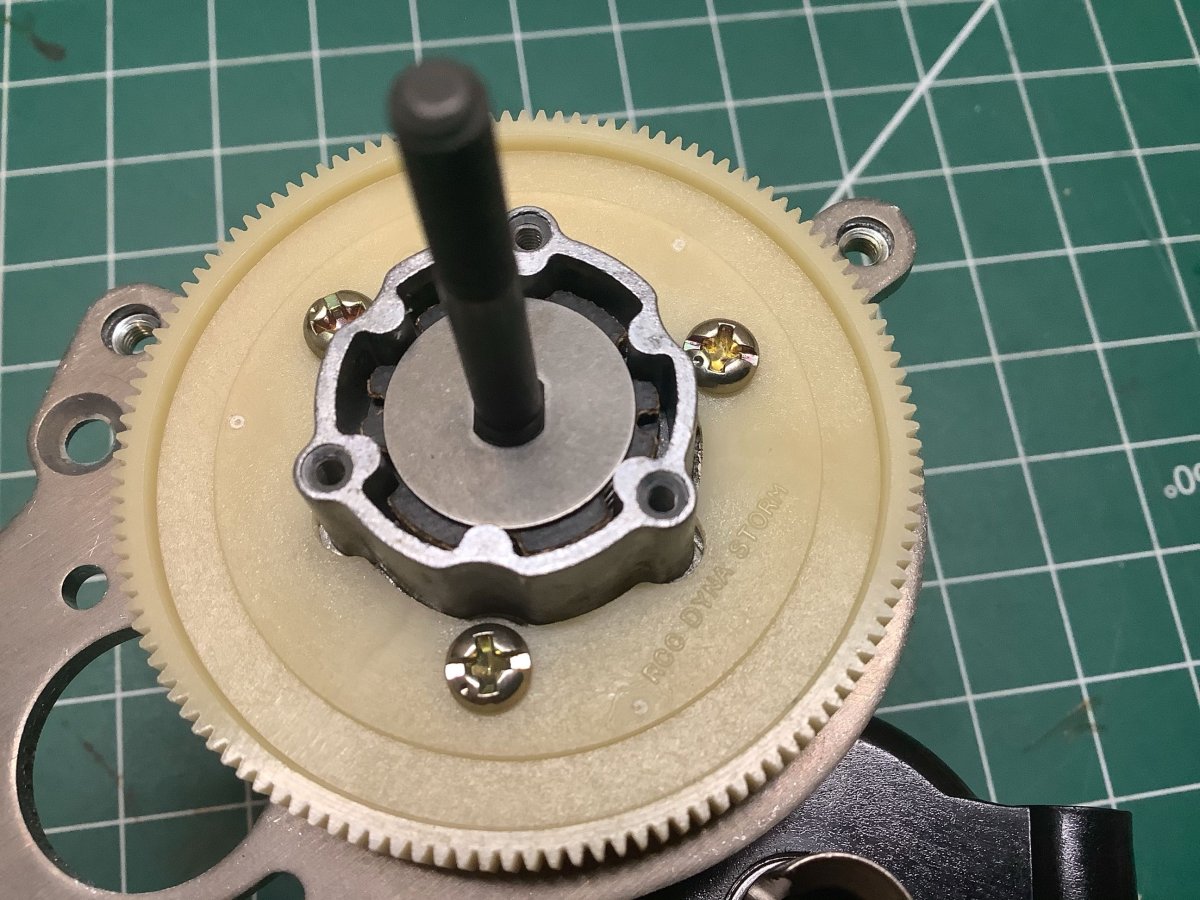
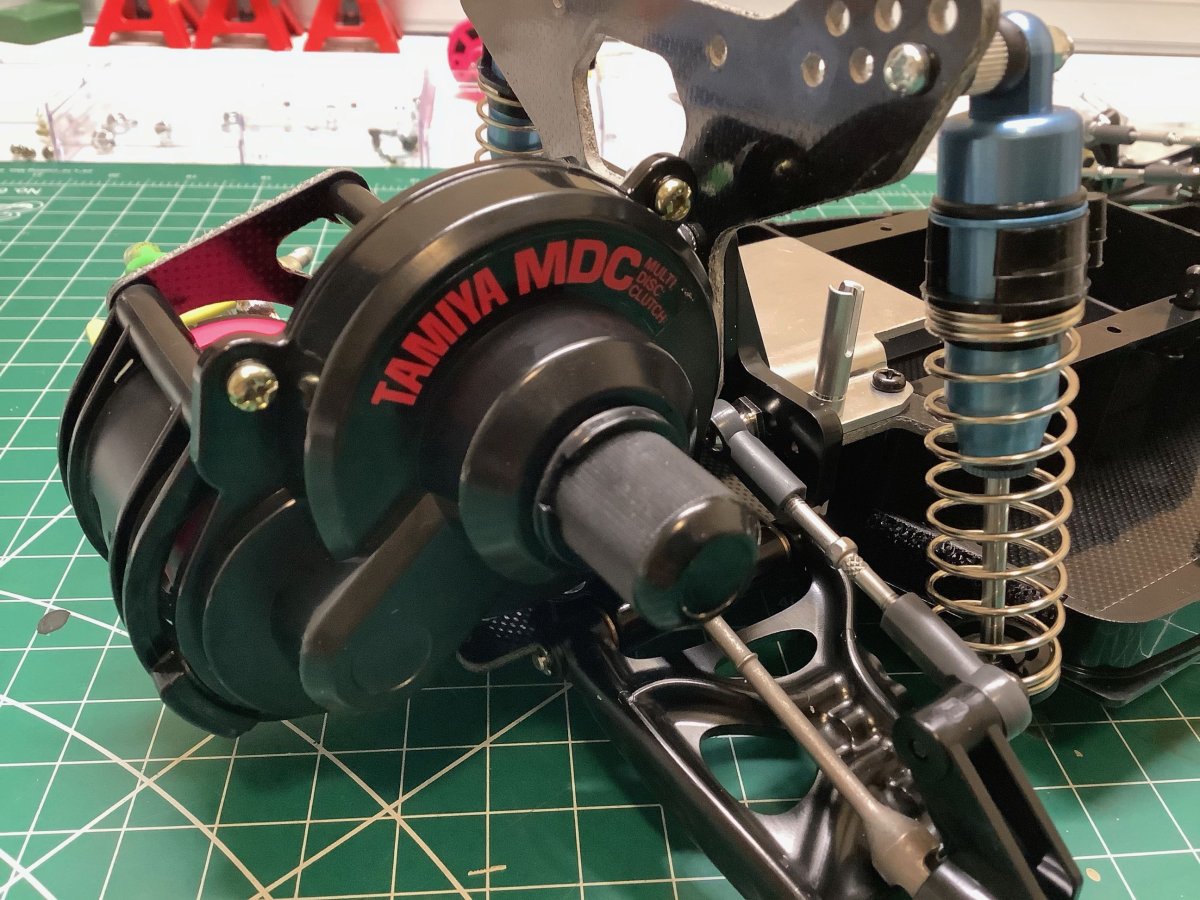
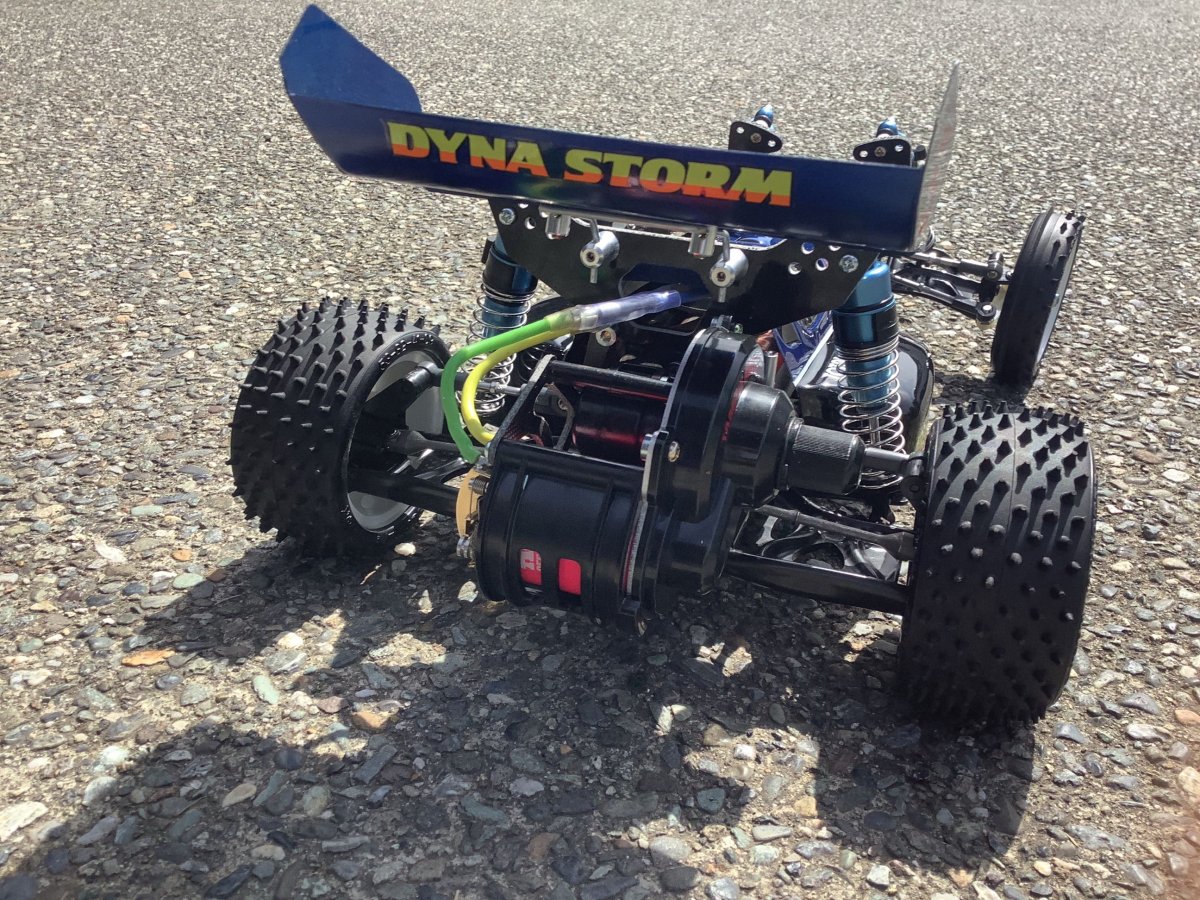
Now to build the MDC (Multi-Disk Clutch), one of the defining features of the Dyna Storm. It builds up very similarly to a motorcycle clutch. The input shaft has flats on it which mate with the four pressure disks on their inner diameter. The three clutch disks are made of a friction material and mate with the housing on their outer diameter. The housing is bolted to the spur gear. In the absence of any clamping force, no torque is transferred from the spur gear to the input shaft. Pressure on the coil spring provides friction to clamp the rotors and stators together while still allowing slippage if a certain torque threshold is exceeded. Using multiple disks allows for a much smaller diameter clutch than a standard single disk clutch. Slipper clutches are unusual on Tamiya vehicles, so this one is a big deal. The parts are shown on the left and the open assembly on the right.
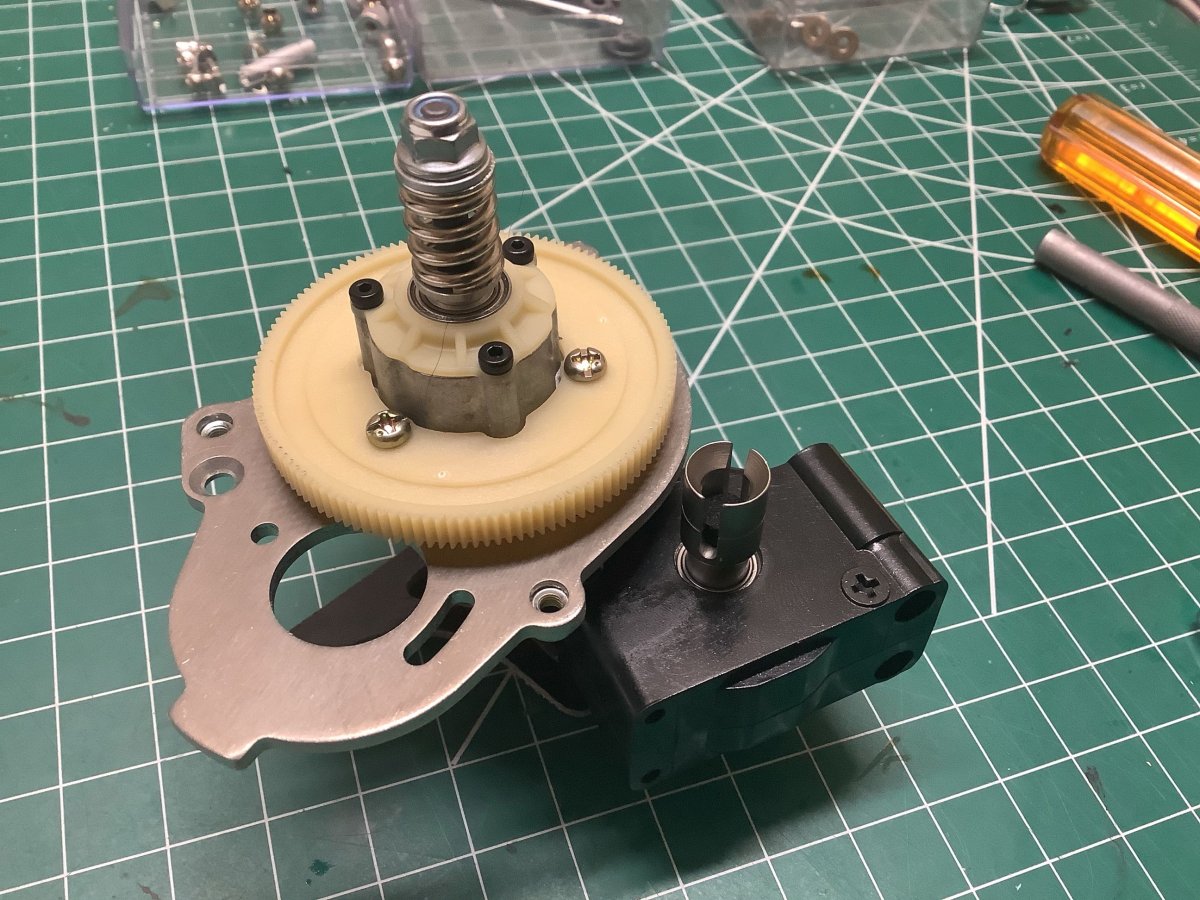
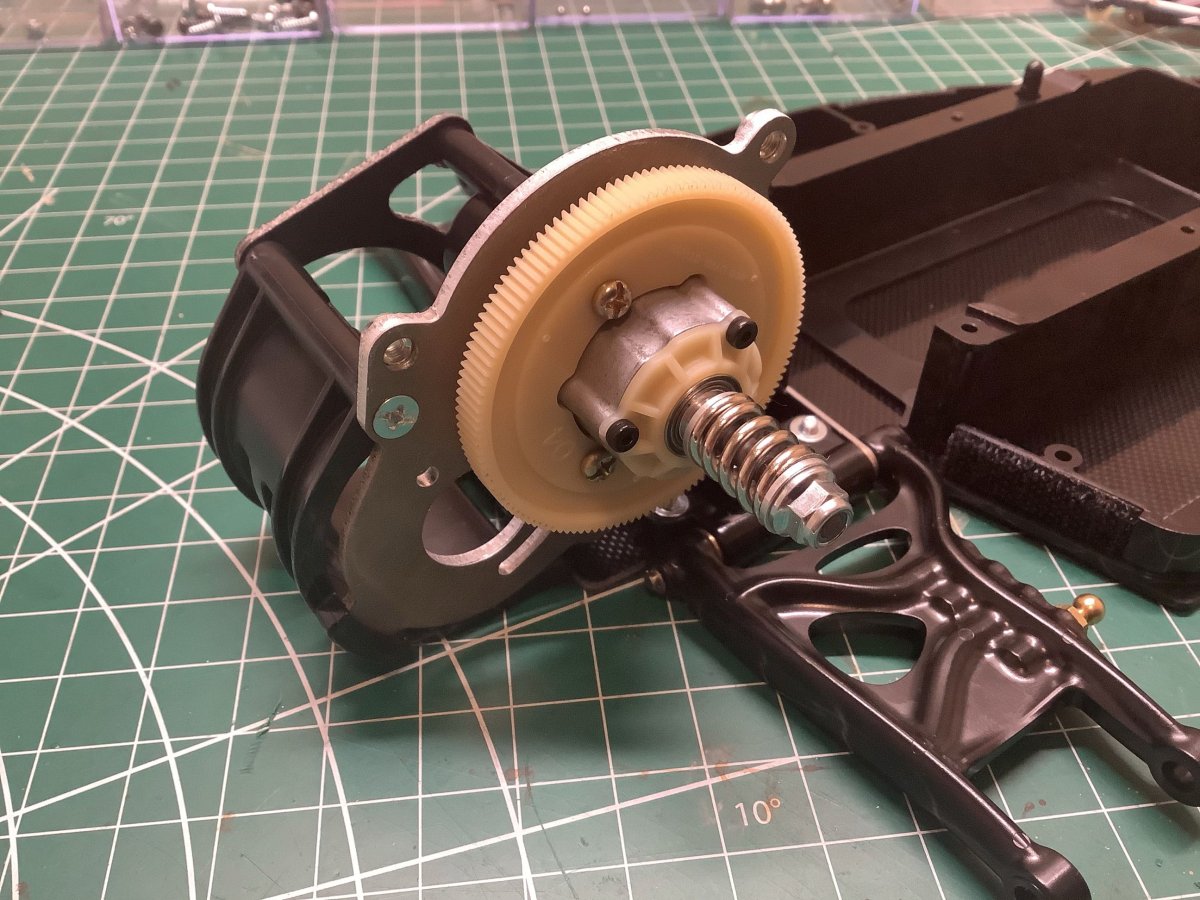
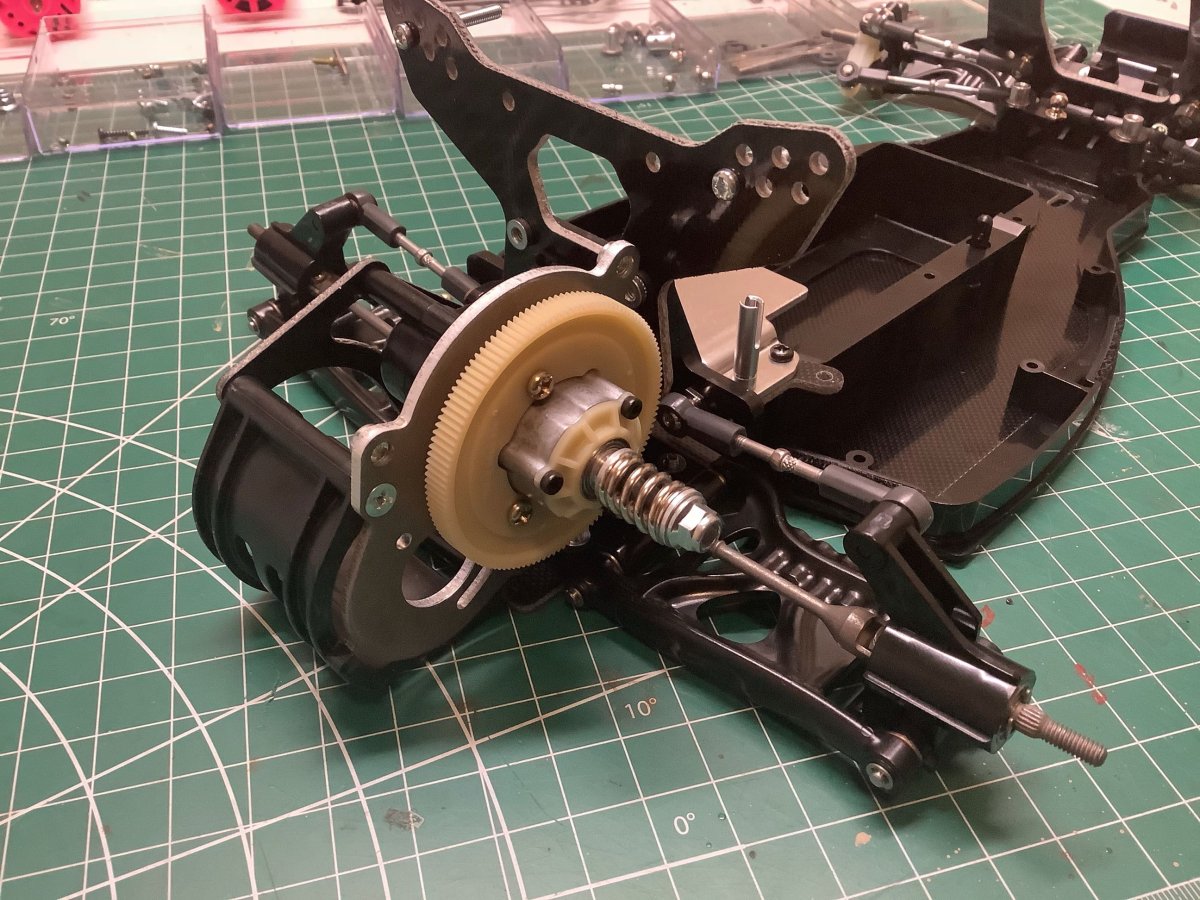
Here I've installed the spring to adjust the preload on the clutch. That completes the gearbox allowing the whole thing to be bolted to the rear of the chassis as shown on the right.
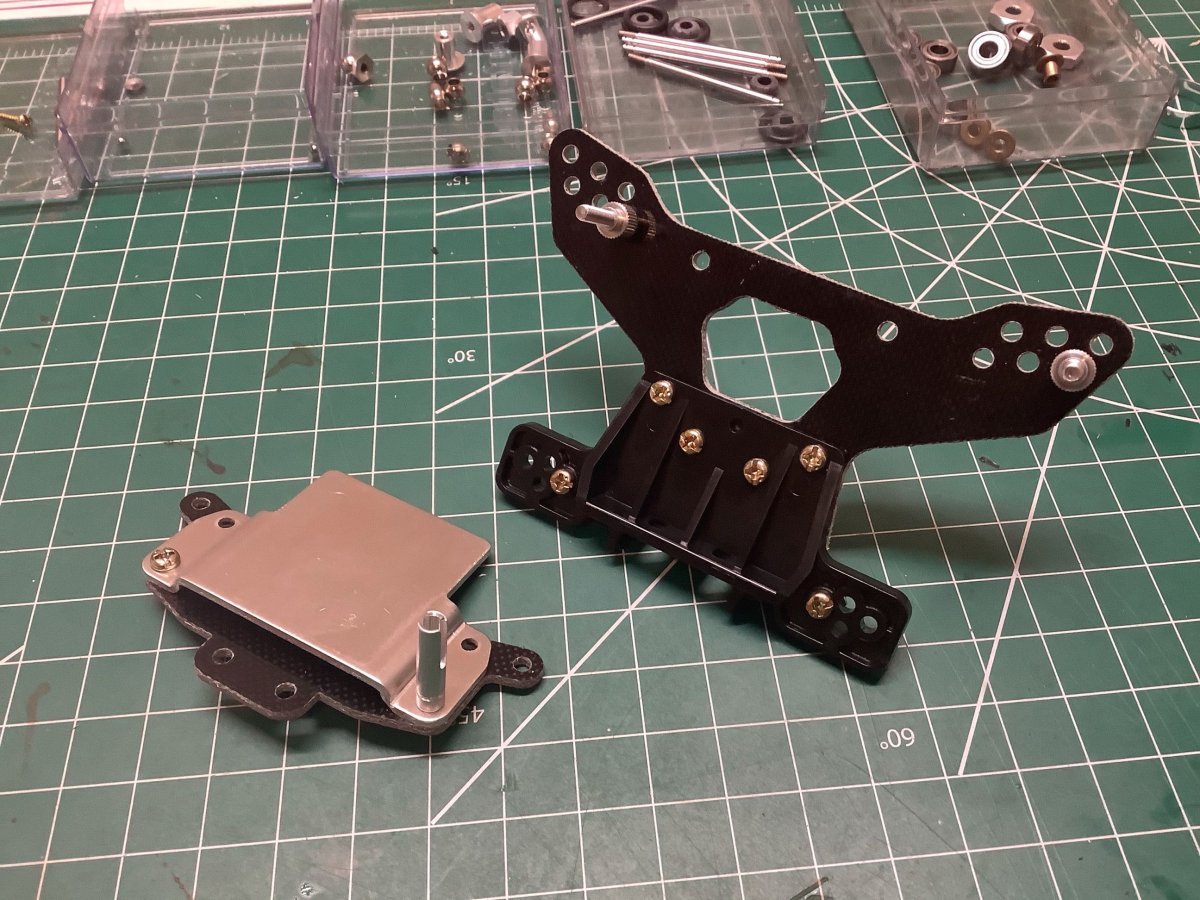
Here are the subassemblies for the battery hold down bracket and the rear shock tower. The bracket is sheet metal with an FRP plate beneath. The shock tower is also FRP and supports the bracket which will hold the rear wing.
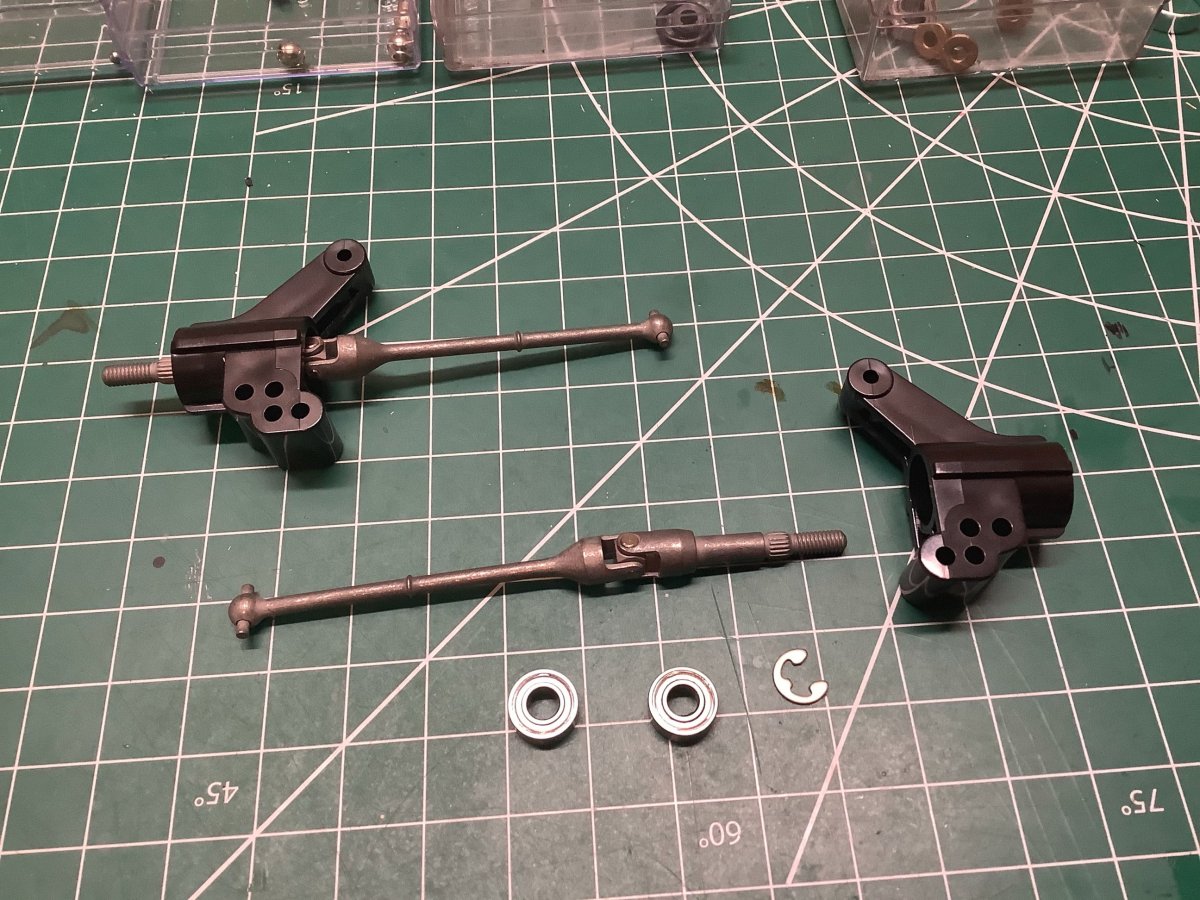
Now I've installed the bearings and universal axles into the rear uprights. The universals are pre-assembled and are intended to be permanent. The right-hand photo shows the completed rear suspension with uprights and upper turnbuckles installed.
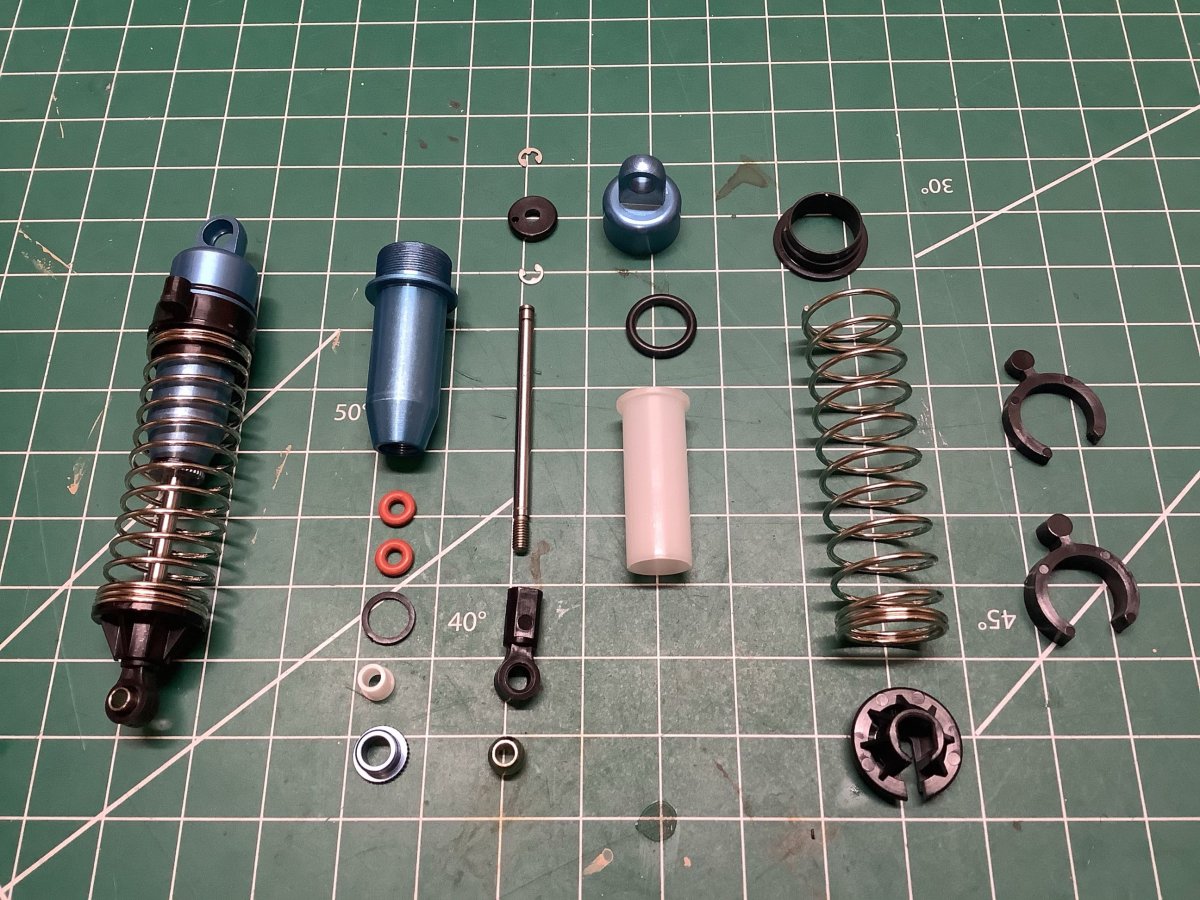
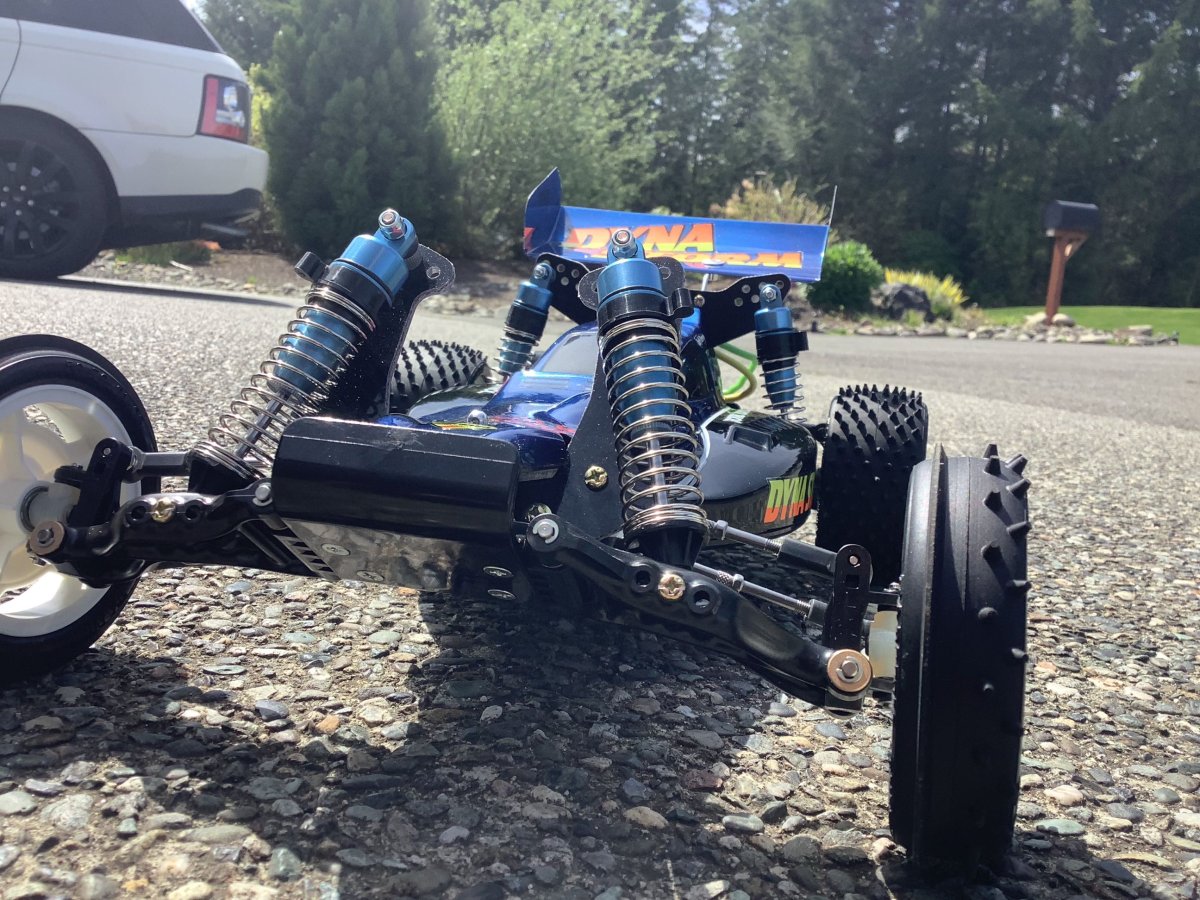
These beautiful shocks are unique to this model. They are the only Tamiya shock set to use a sleeved insert. The intent is to reduce friction and wear, but of course it also reduces fluid volume. The piston head rides against the sleeve. The head and rod end caps are also aluminum and there are plenty of seals. All four dampers use the same cylinders and rods, but the front dampers have an internal spacer to limit the extended length. The rear springs are also stiffer.
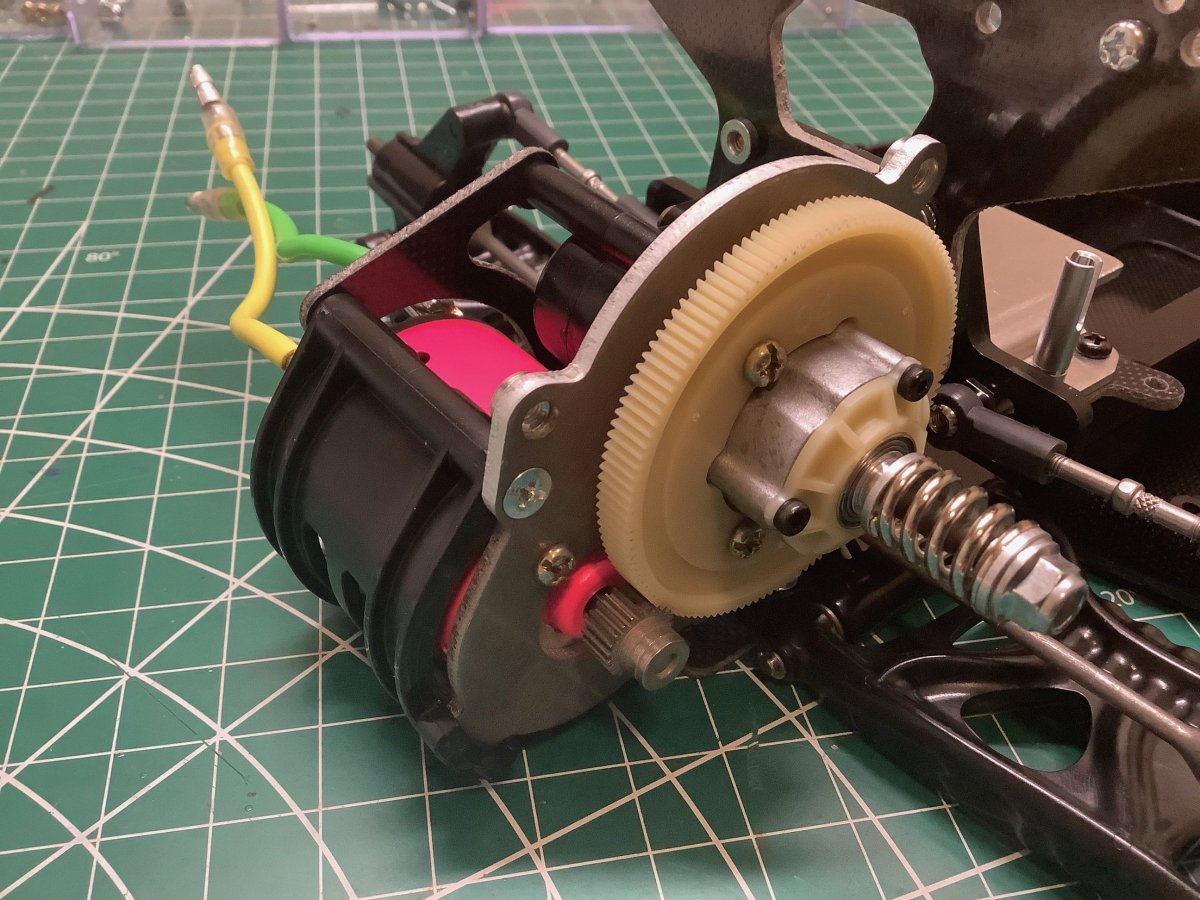
Now I tried installing the stock pink motor and the stock pinion to see how it drove and compare it to the Acto Power motor. On the right I've also added the MDC cover plate which still allows access to make adjustments.
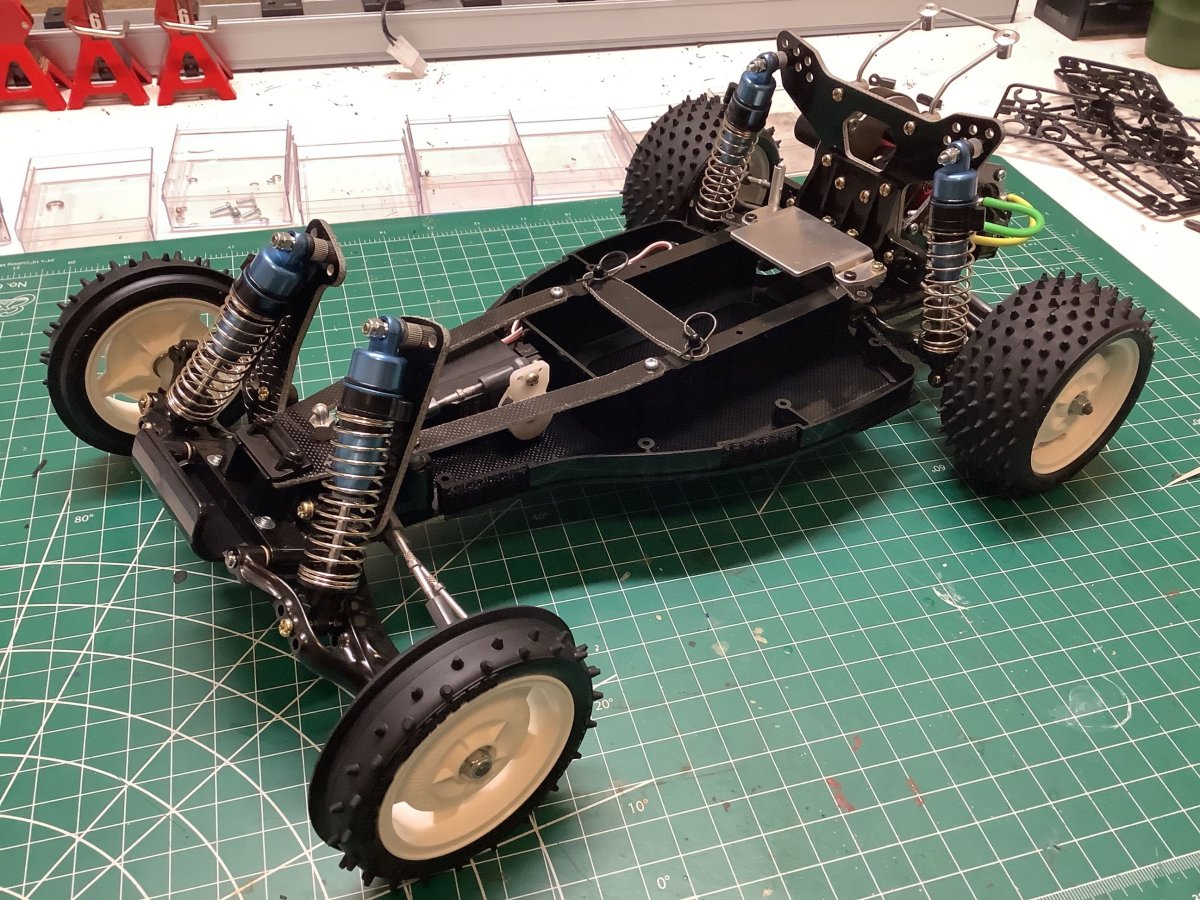
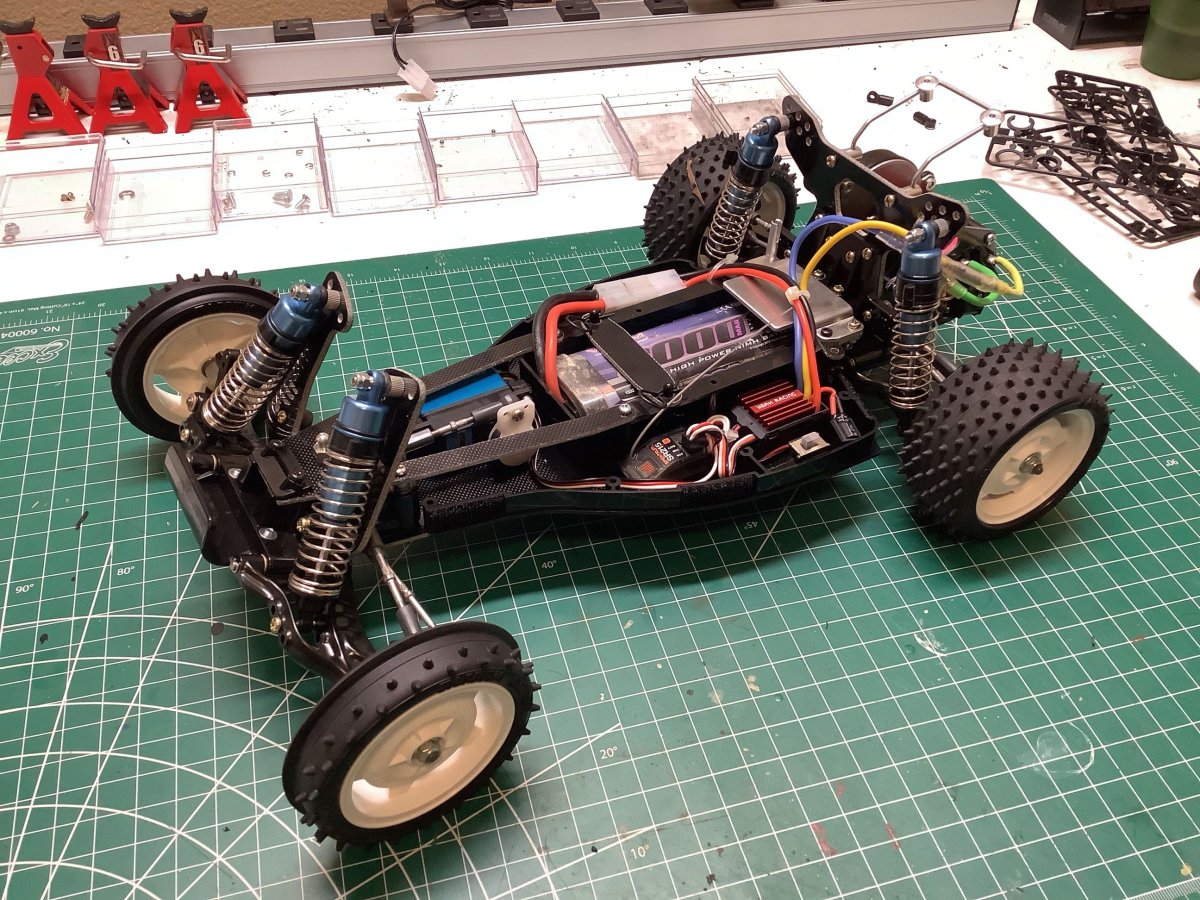
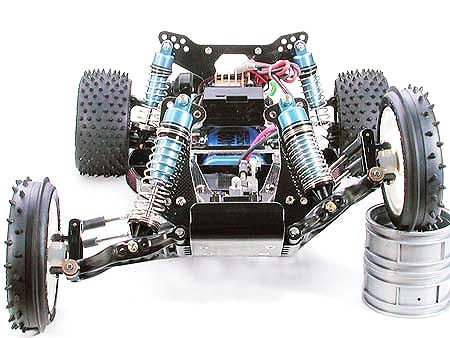
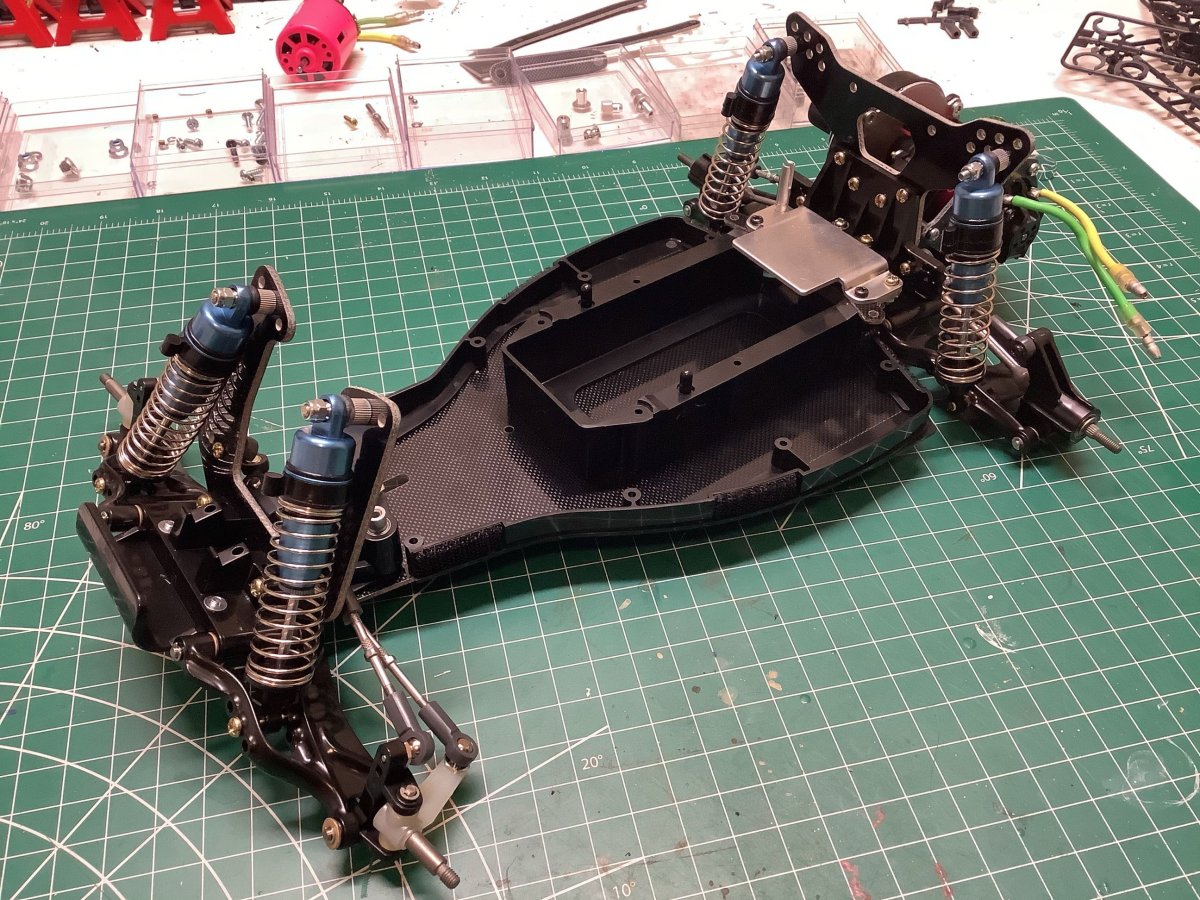
The final rolling chassis is shown on the left. You can see that I've installed the upper FRP chassis stiffener and the steering servo. The wheels are common enough, but the rear tires with round spikes are rare as are the front ribbed tires. I don't intend to run on these tires; I'll use a more common set. There is not much room for electronics as you can see on the right. At this point I had not yet installed the final power system, but I chose an 80A ESC to handle the low turn motor and changed the connector to use a 2s LiPo.
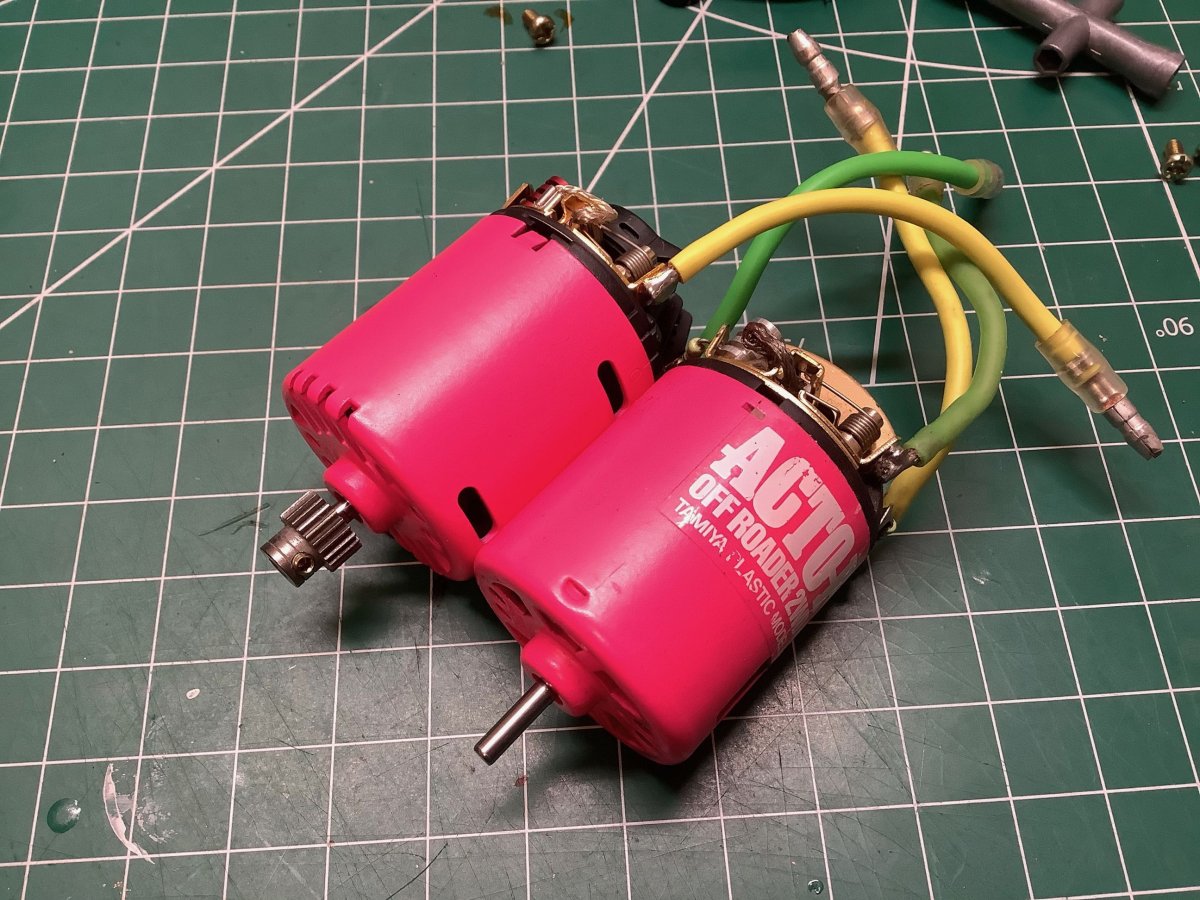
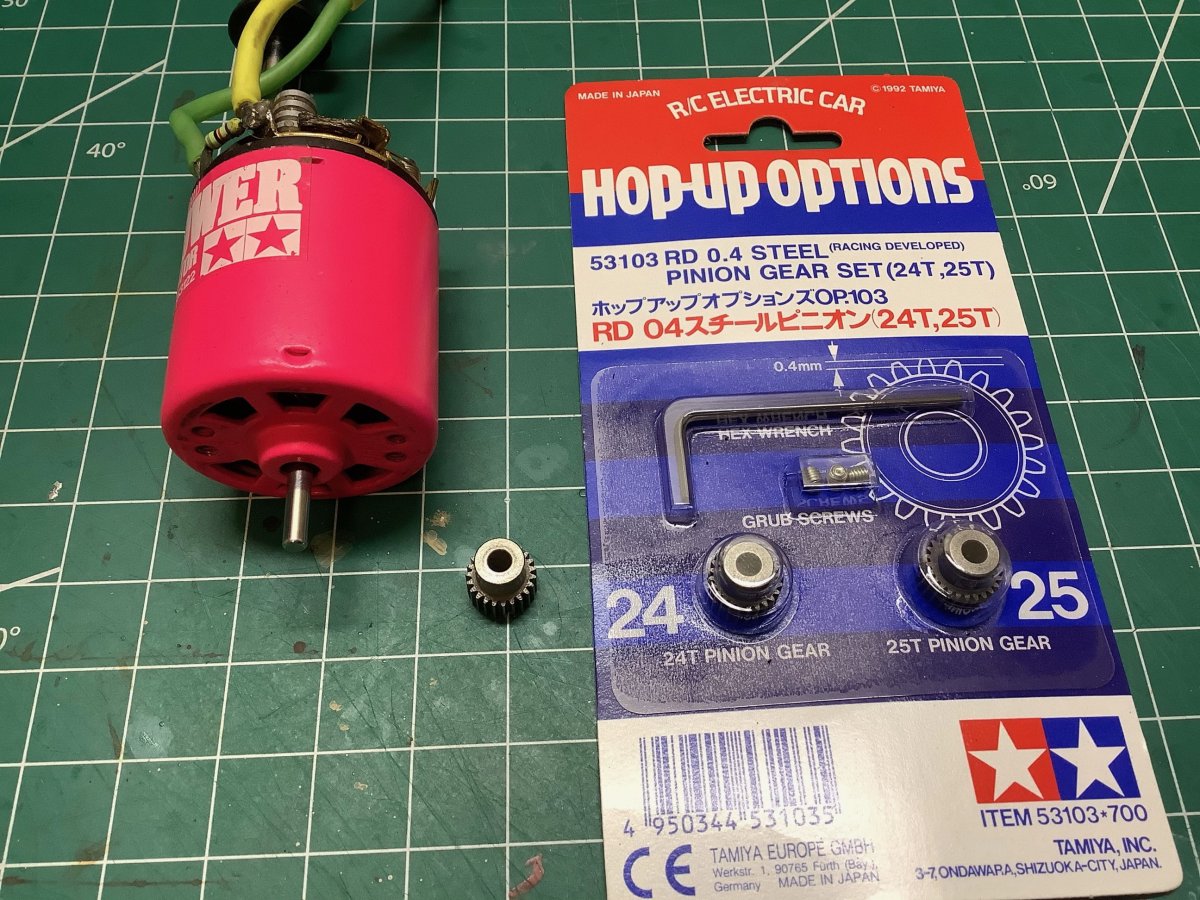
Unlike the original Dyna Storm which came with no motor, the re-release came with a pink motor similar to, but distinct from the pink Acto-Power motor recommended for the original. The kit motor has no specs published for it, but it is generally considered that the original 14T pink motor is better, so I picked one up. You can see the differences on the left. The motor with the label is older and is the one I used. One subtle difference is the green and yellow wires are opposite when comparing the motors, yet they still rotate the same direction when connected to color-coded power. Another difference is that the kit motor does not have adjustable timing, but the Acto Power does. I set it to full advance which actually required me to set the timing the opposite direction from how I received it. The motor was set to retard the timing out of the box. Odd. I used the kit recommended 24T 0.4 Mod steel pinion gear shown.
Painting the Body
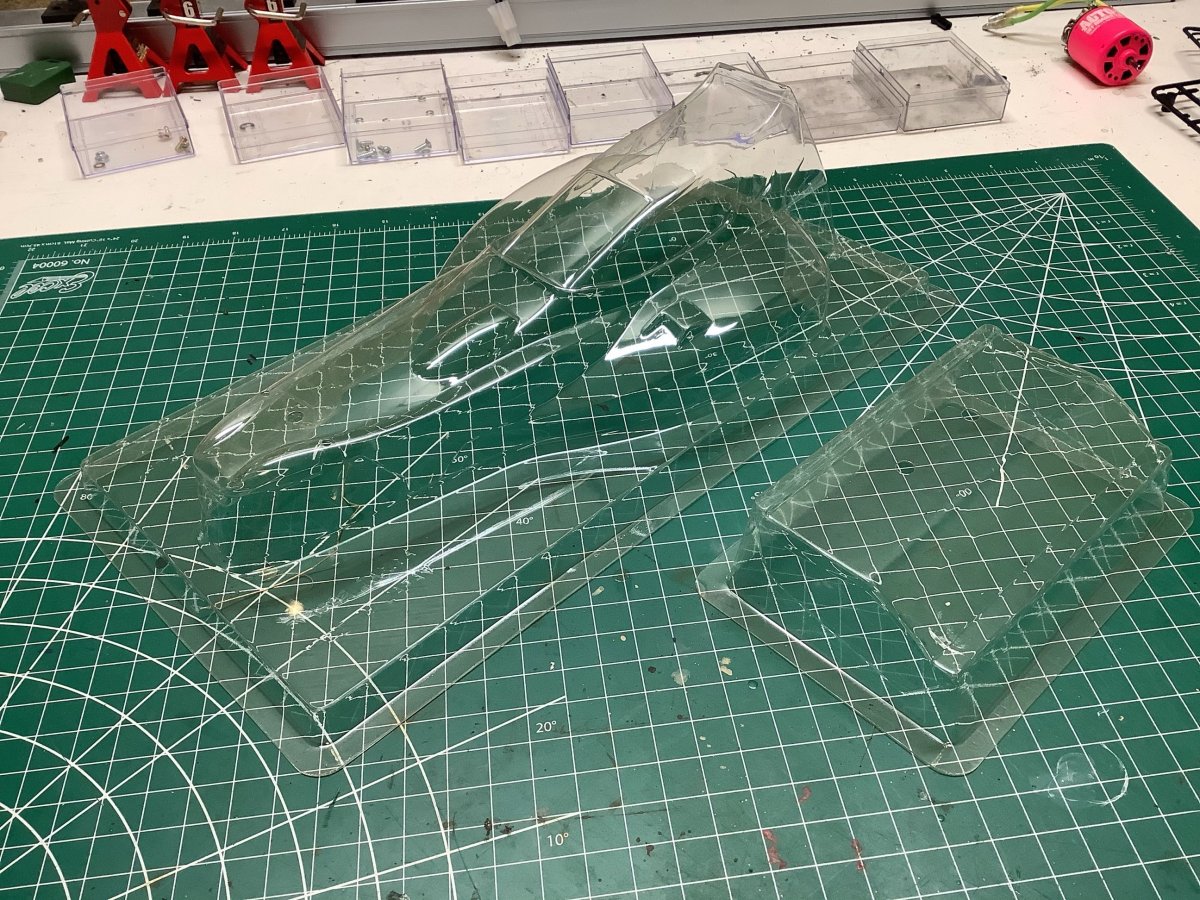
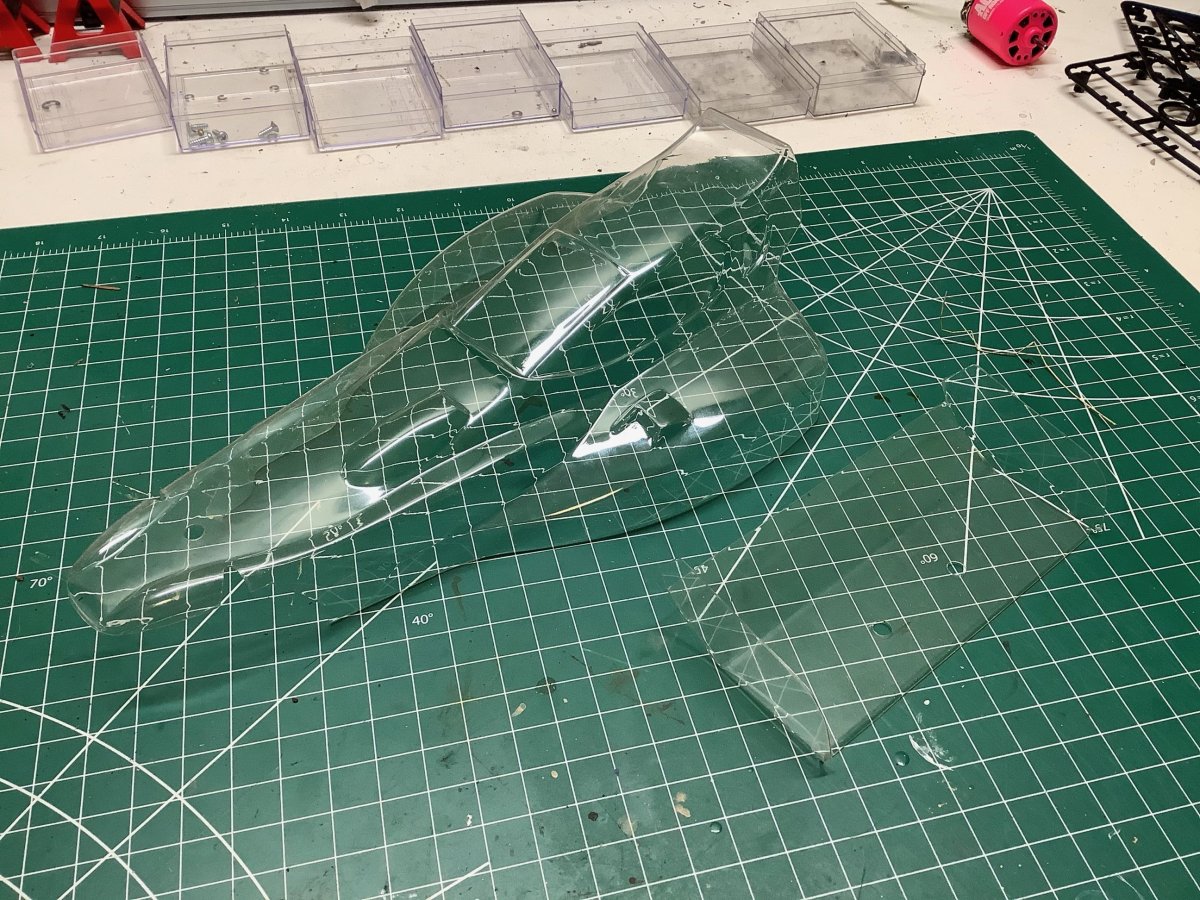
This is one of the only polycarbonate bodies I've seen come in the box without a protective overspray film. That means it looks nice and shiny, but it also means that I'll have to mask the outside. Here you can see the body and wing both before and after I've trimmed away the scrap.
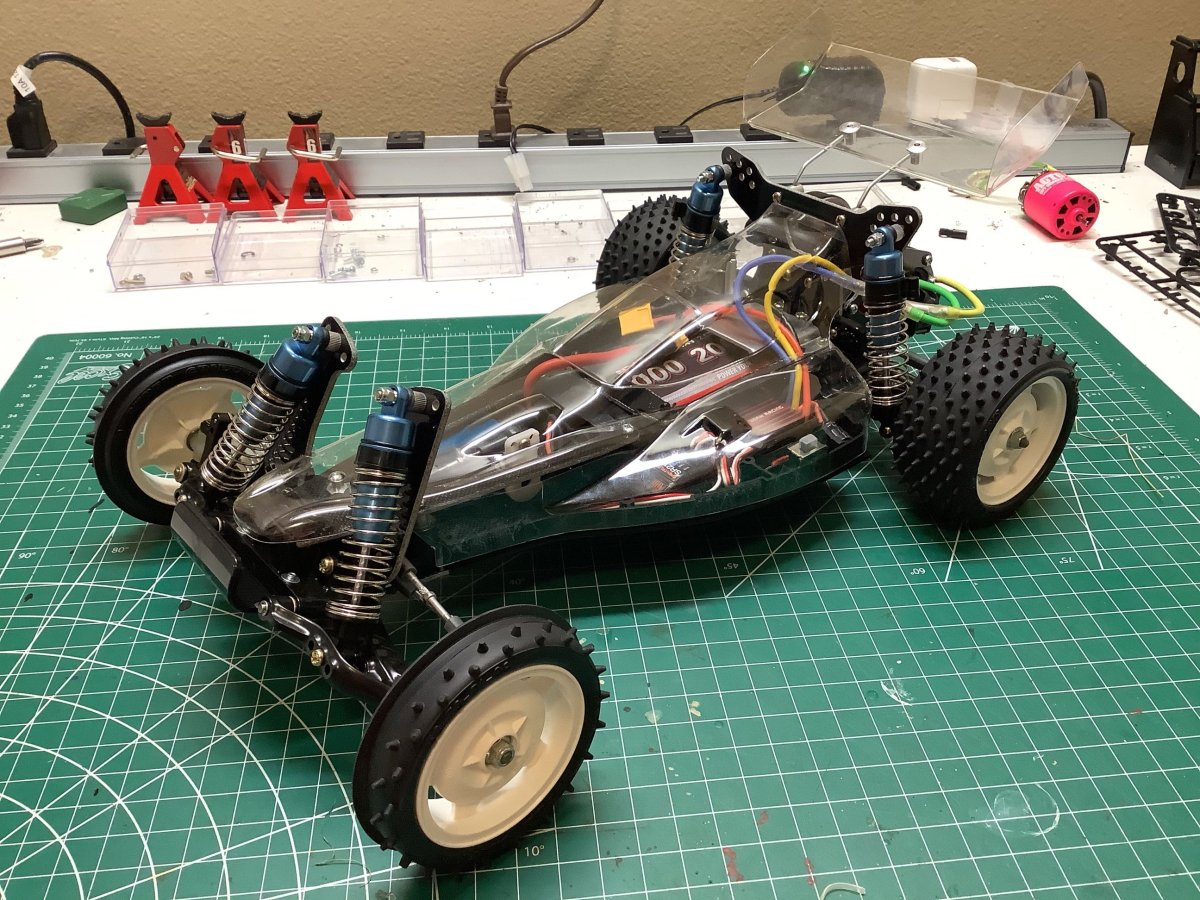
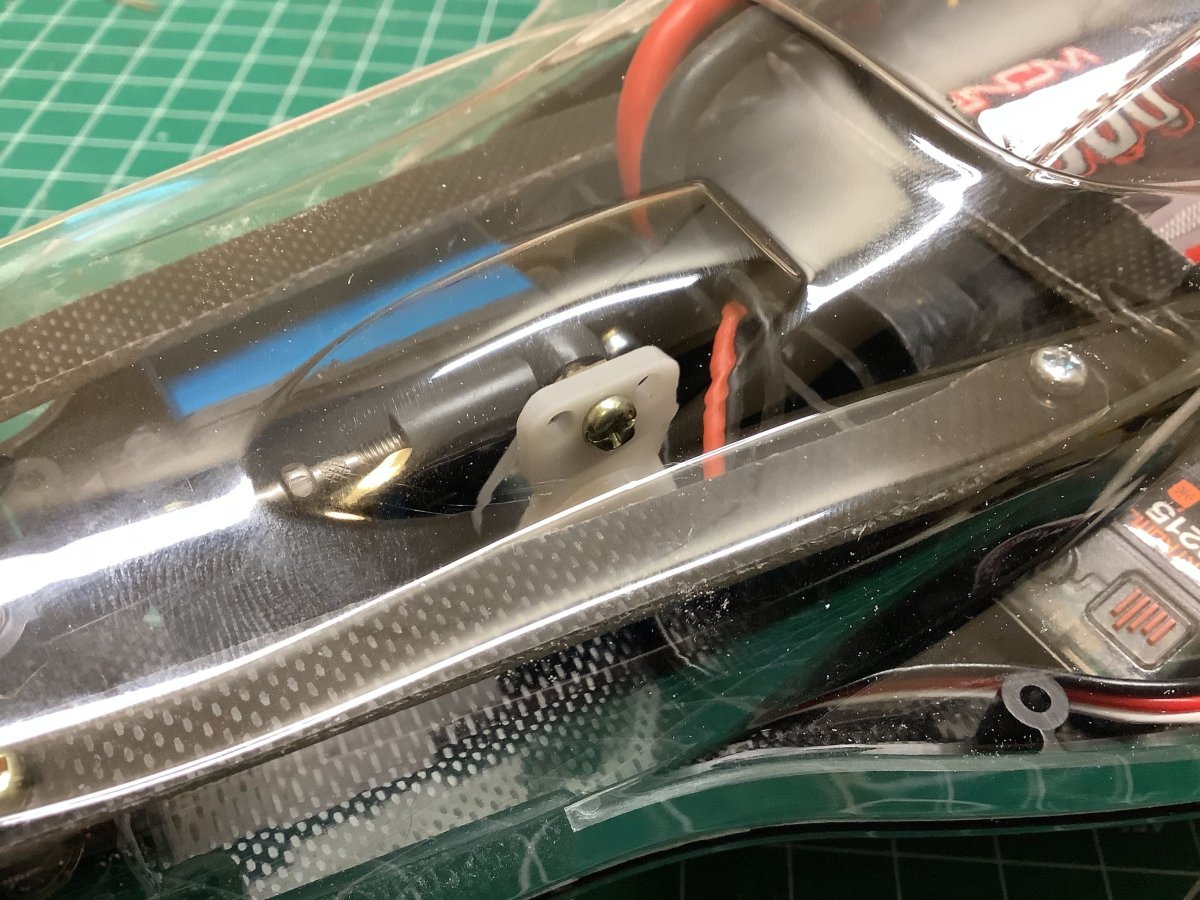
These photos show a test fit of the body to the chassis. This is a very low body with very little space underneath. If you've ever wondered what that blister is for ahead of the windshield, the photo on the right shows that the space is needed to provide clearance for the steering servo horn.
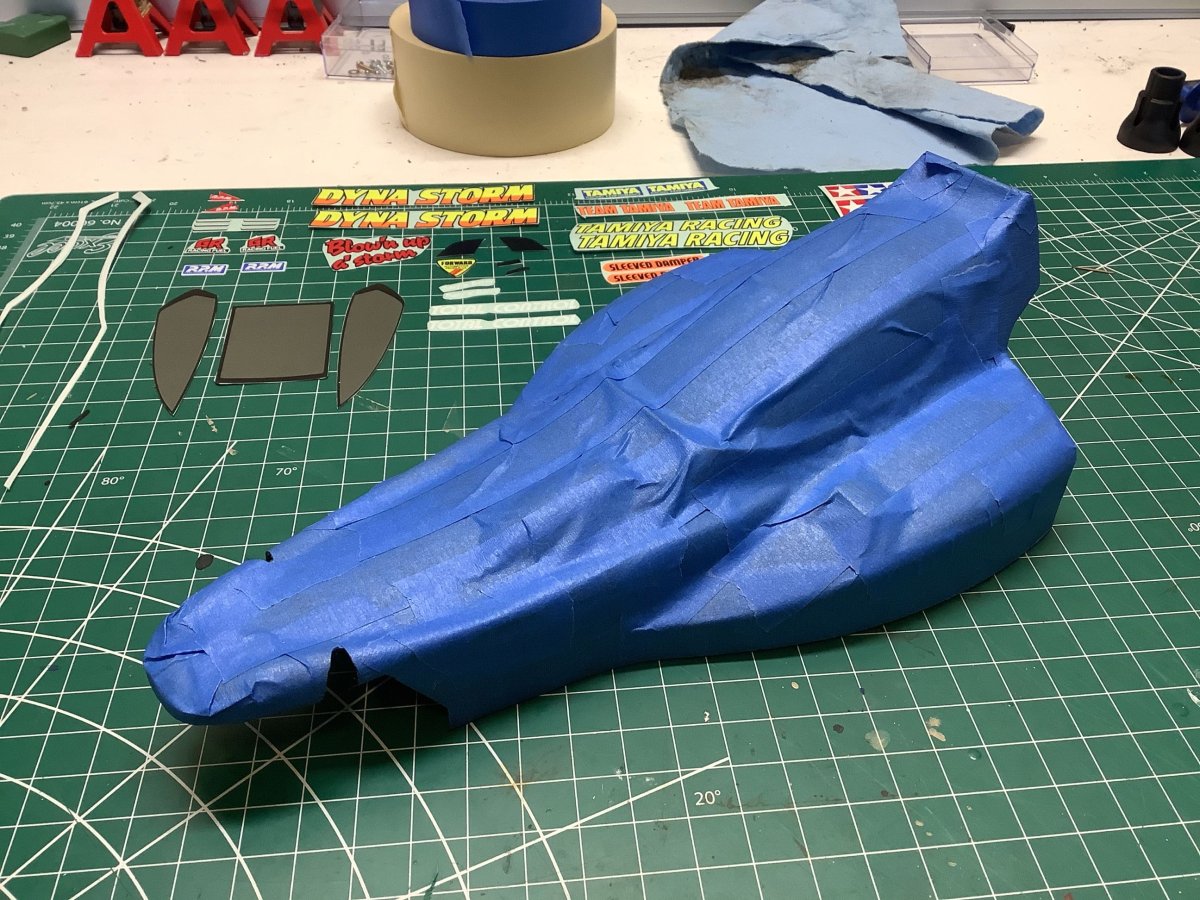
Here I've masked the entire exterior of the body. Less obvious is the fact that I've also masked the windows from the inside. No window masks were included so I had to do it manually. I've also masked off the lower area which will be black. In the background you can see that I've cut out the stickers and have them ready to go.
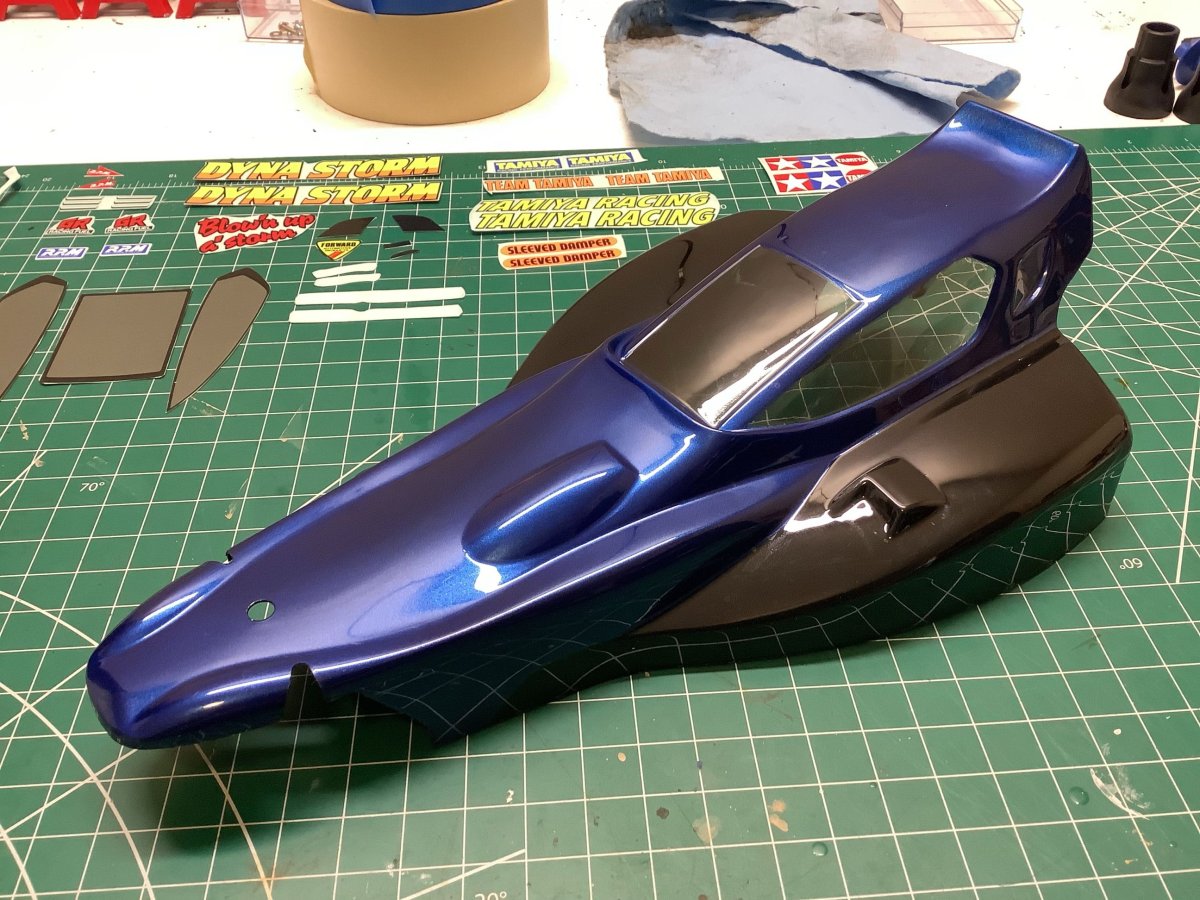
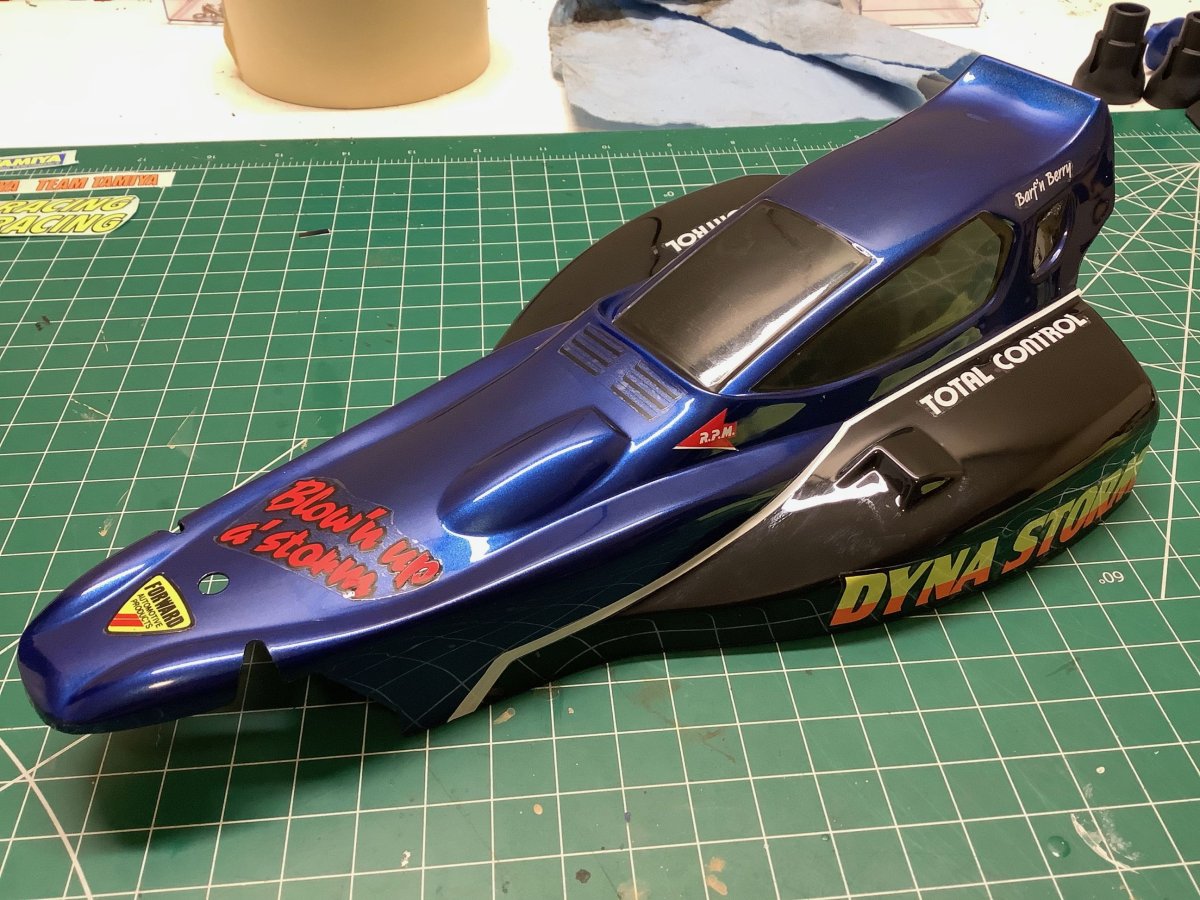
I decided to use dark metallic blue instead of the lighter version. This resulted in less contrast, but also in a model more distinct from the rest of my collection. On the left I've applied the black and blue. I applied a layer of silver behind the blue to make the metallic pop, and then backed the whole thing in black. On the right I've added smoke to the windows and applied the stickers.
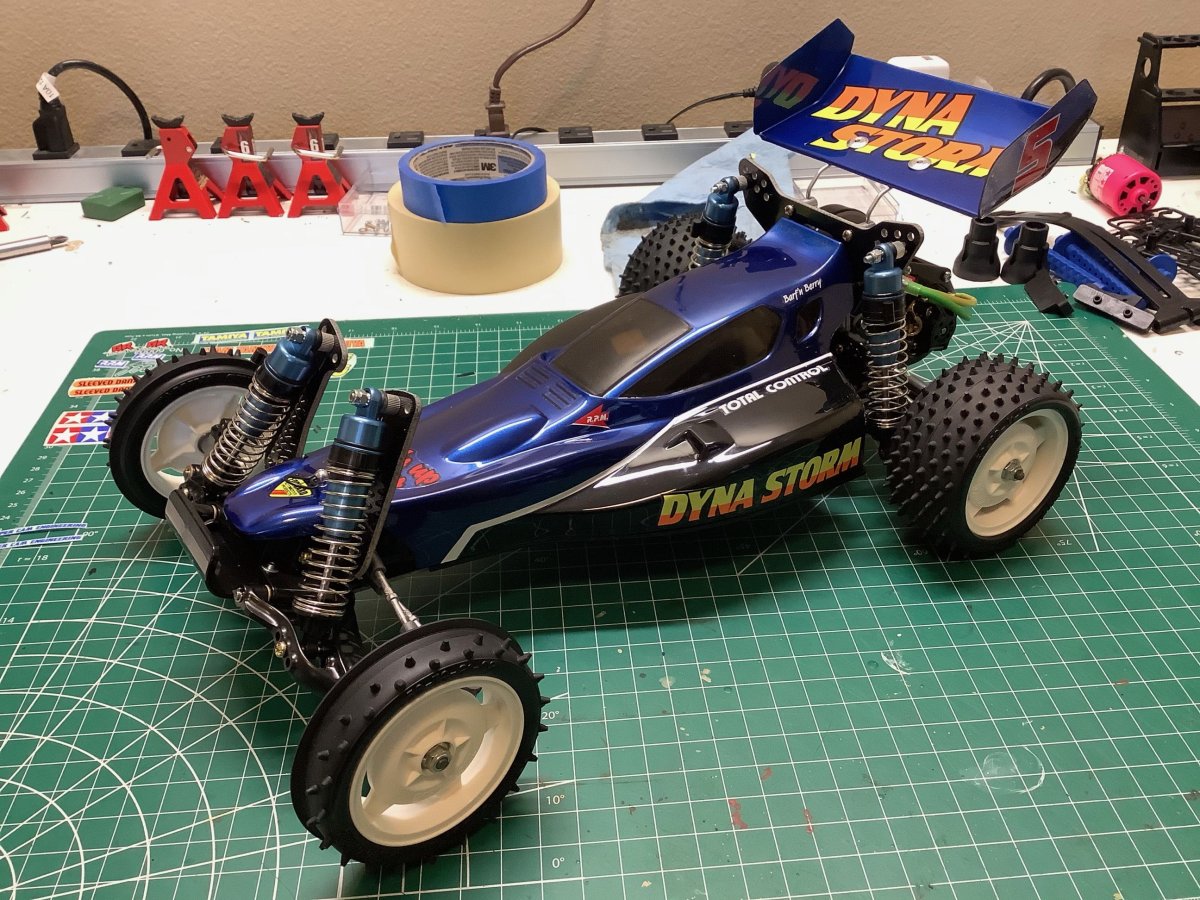
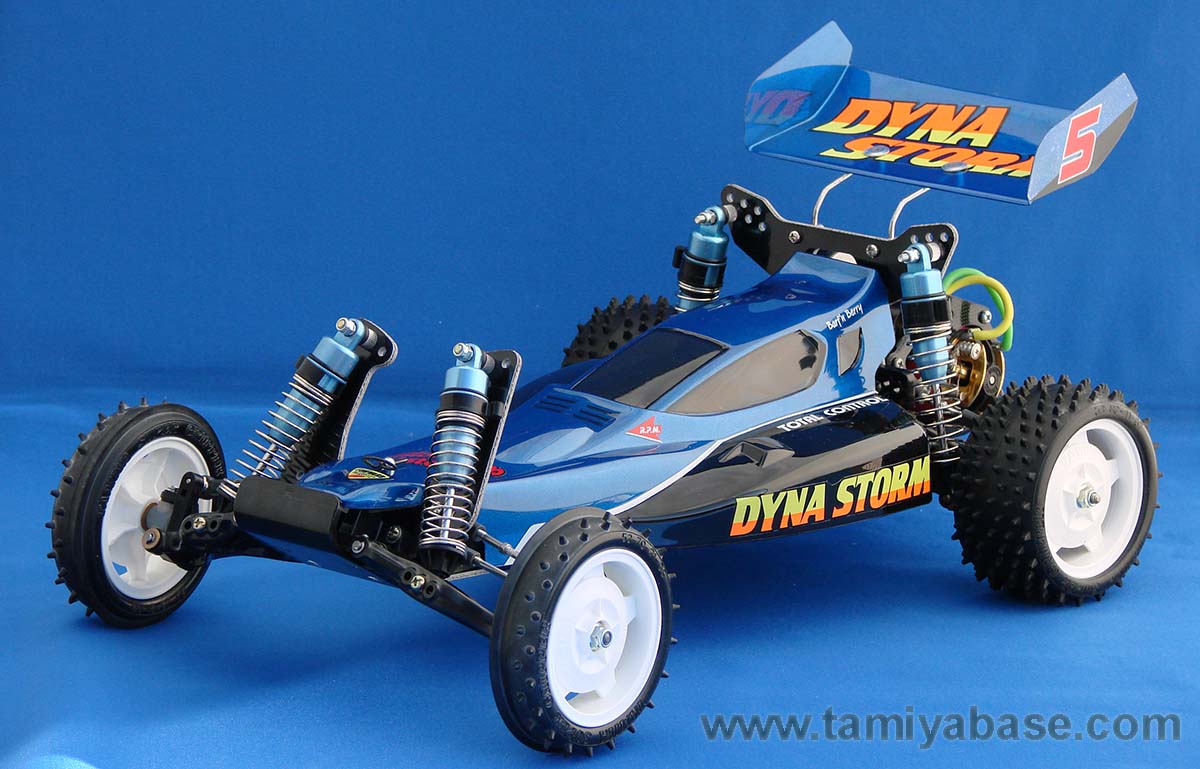
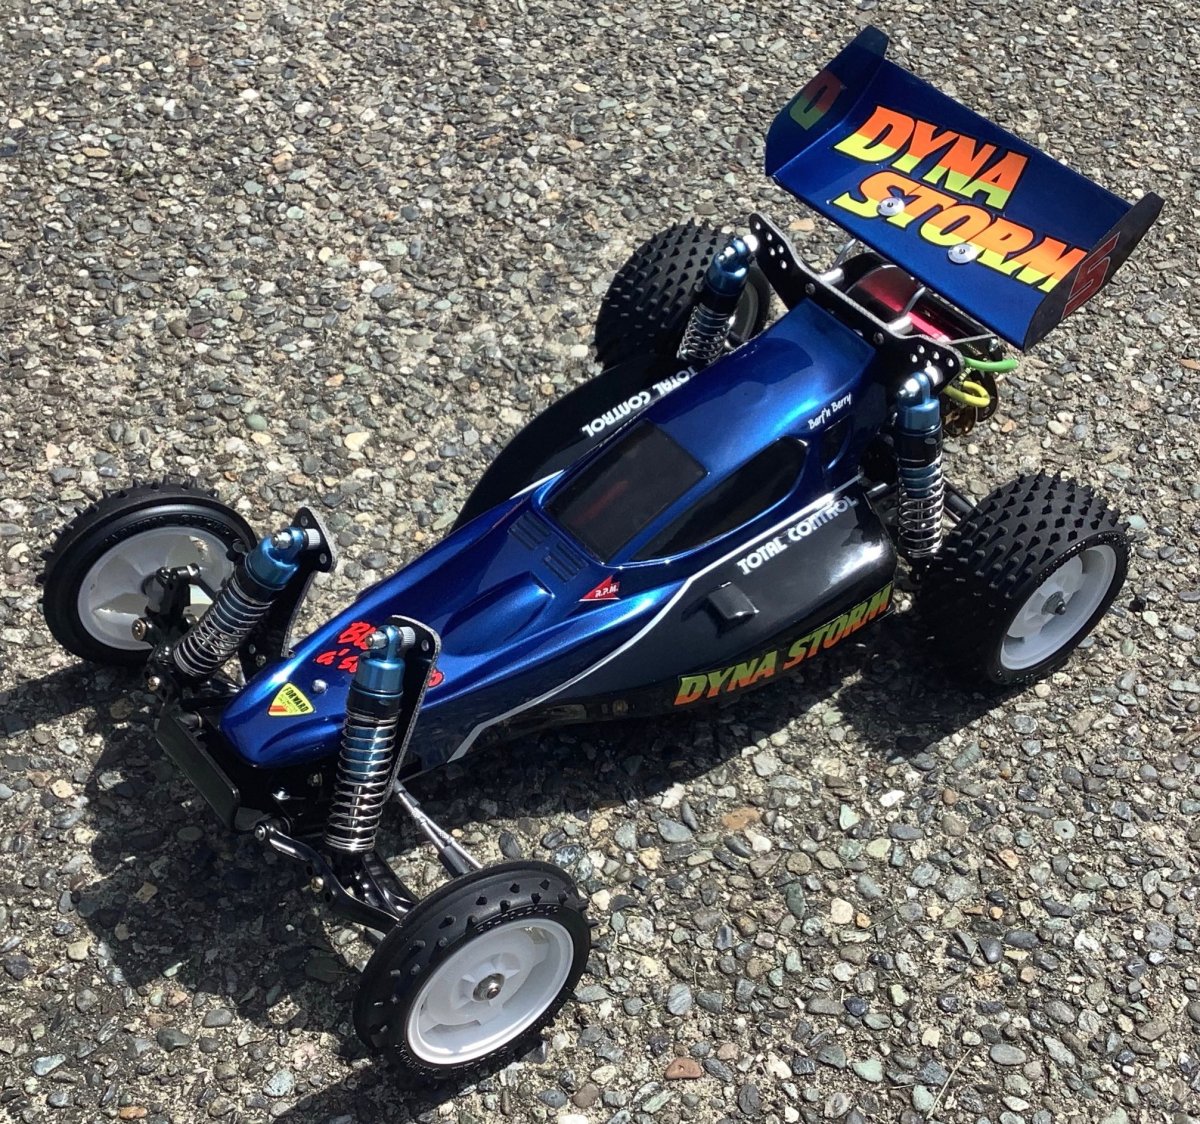
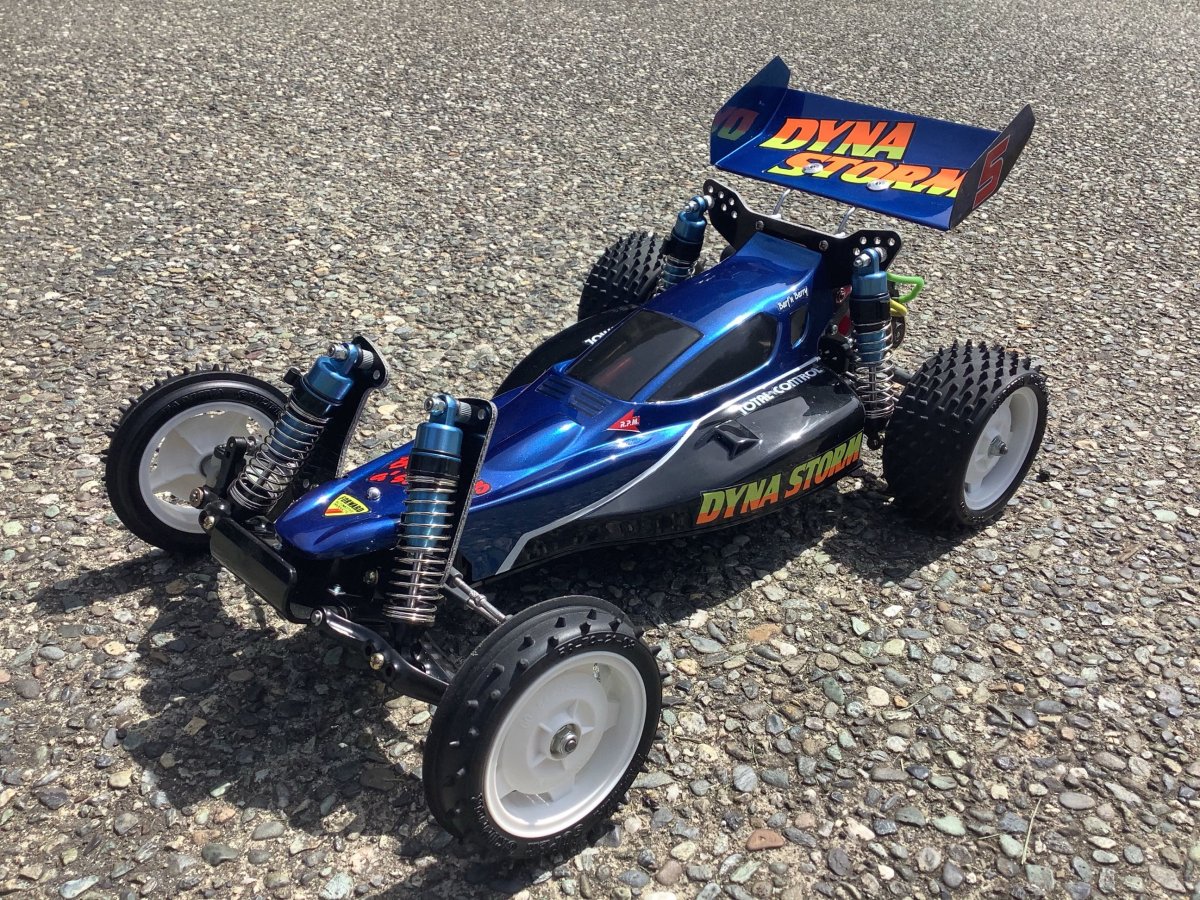
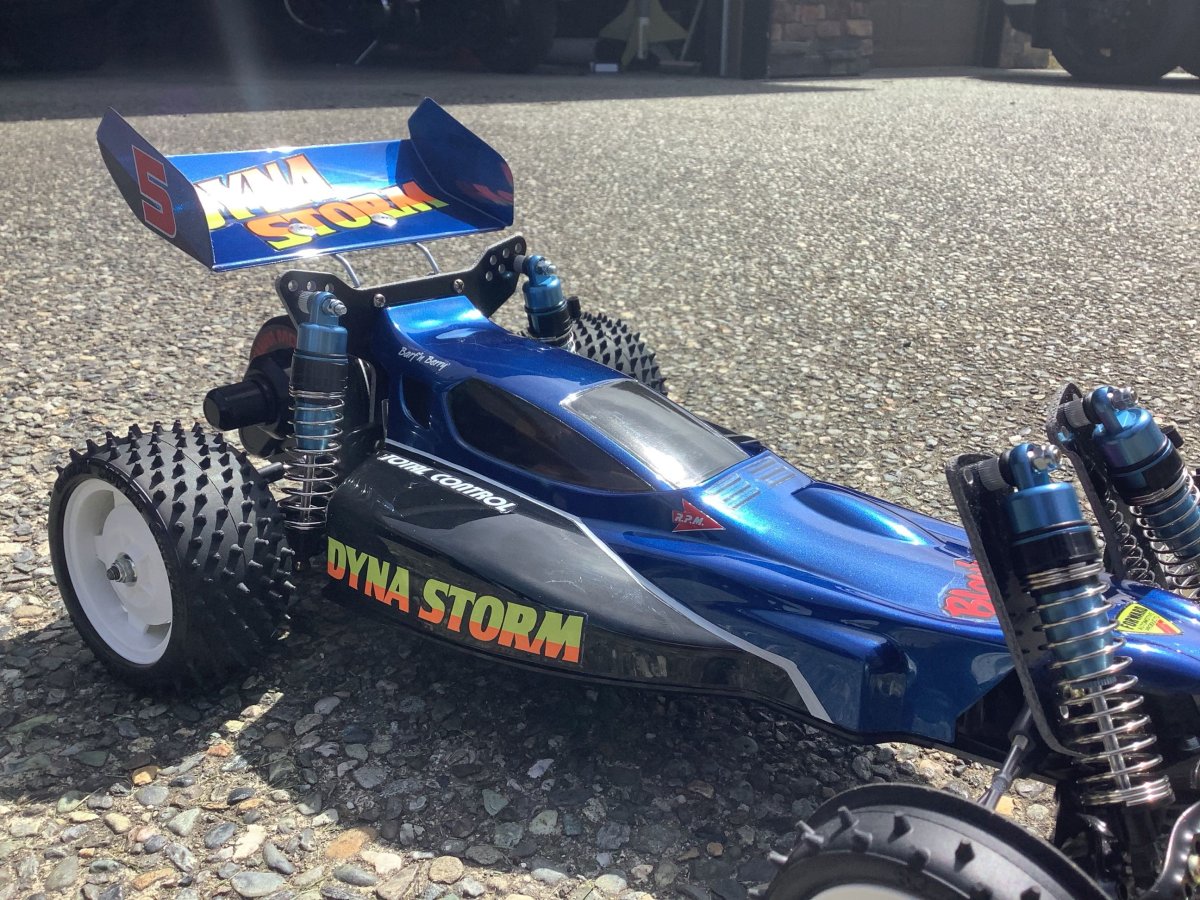
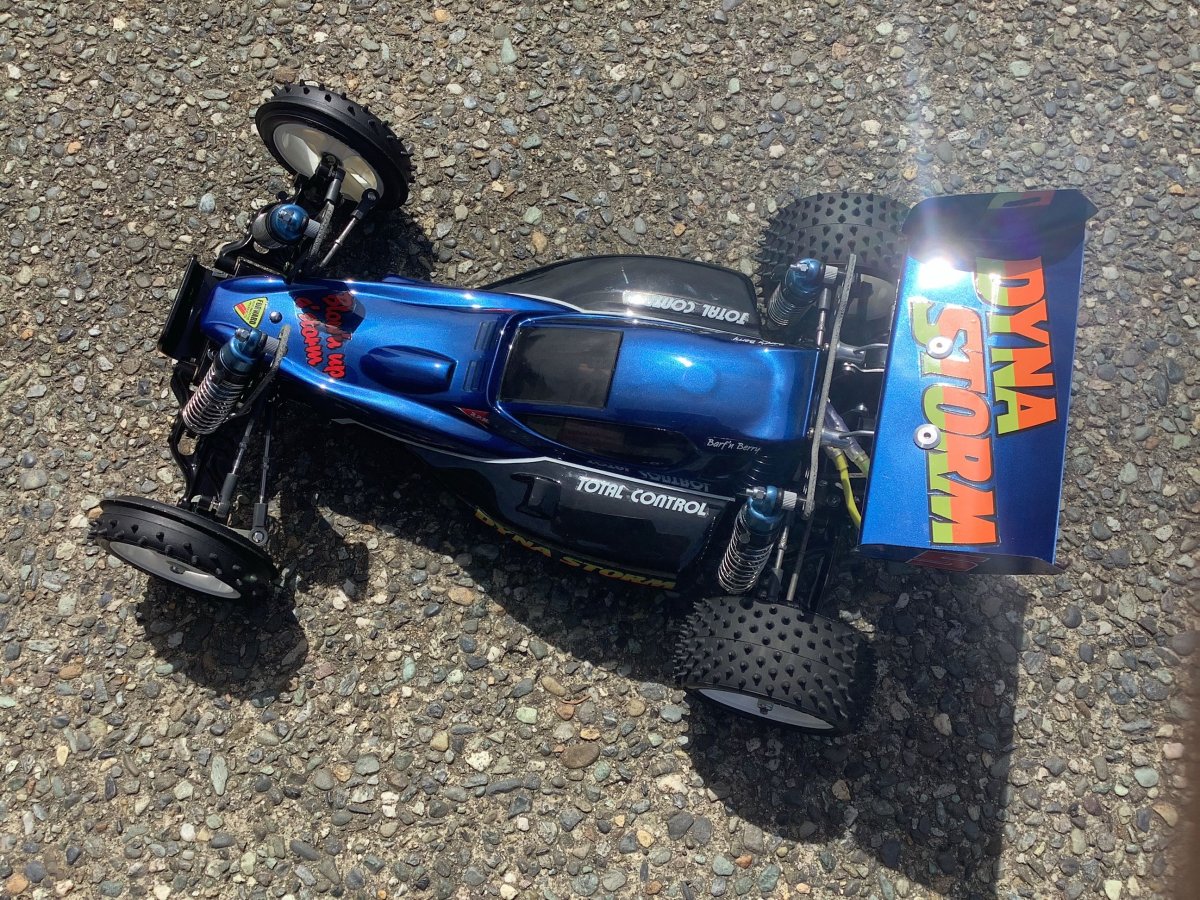
Here is the completed model! This is a very sleek buggy. For the wing, I painted it blue from beneath, added a layer of silver, then another layer of blue so it would appear blue from both exposed sides.
Final Photos
I decided to use dark metallic blue instead of standard metallic to distinguish this buggy a bit more from the Avante. I think it looks pretty good. This is an extremely sleek body that cuts through the air like a knife.
_____________________________
Written by Eric Albrecht
Visit Eric's personal site with lots of build threads.