

Learn different ways to make decals for your rc car boat or plane, especially if you want to recreate vintage decals for a restoration.
Part 1 – Artwork and a bit of colour theory
Part 2 – Different ways to make decals
Part 1
So you want to make your own decals. There are then two parts to this problem, firstly you need artwork and secondly you will need to print or make them somehow. Most people have a home printer and know how to print decals from the internet, so I'm going too assume that you are looking for something better.
Ok, so where can get artwork? You only really have 4 options:
- you can search the web
- you can scan what you've already got as sometimes logos are re-used on different models
- you can search for logos online (you should be able to find hi-res files for almost any largish company) (link so some I have found (Goodyear, Audi etc)
- or you can trace/copy new artwork from scan or images
My preference is to search for a logo first and then scan or find images (eg team names and graphics) and re-trace them. I usually re-trace even high quality logos because of the way I print them, but I will cover the why of that in more detail in part 2 of this article.
So that's all well and good, and many of you would already know that. The next issue is going to be that you can't print the right colour. The bad news is that for most people you won't be able to match exactly some colours from whatever decal maker as used. This is because of two reasons, the file formats you would be using and the printing methods are different to the one that Tamiya etc would use to make the decals.
Artwork Formats
Image Formats
Image formats are very important, as they will determine you printing options and print quality. Artwork can either be a bitmap, vector based or a combination of both. Jpg, png, tif, gif are the more common bitmap image formats. Tif is a very good format for storing images as its a raw image format and there is no loss of quality, but will produce large files.
Next is Jpeg, a very common compressed image format. A good format that balances quality and file size, although be careful if you editing a jpeg image as constant re-saving of a jpeg image can degrade the quality. This is because it's re-compressed each time it's saved. The next is png, not quite as good as jpeg in terms of quality as it has a smaller colour range. A benefit though is does have the ability to set the background as transparent. Lastly is gif, it has only a limited colour range it can produce, and is only really good for compressing simple imagery where colour accuracy doesn't matter. Bitmaps are generally used for photographs.
The other way to setup artwork is as a vector. Vector is a line based artwork format, made up of solids, lines and gradients. Unlike Bitmaps it is highly scalable with a much smaller in file size. For some print methods such as vinyl cutting, vector artwork is essential. Of the various file formats available, SVG is the only pure vector format that I am aware of that can be read by pretty much any program. Other file formats such as PDF, ai, cdr, ps and eps will encapsulate both vector and bitmap artwork.

![]()
DPI - Dots Per Inch
As vector files are scalable, it doesn't matter what size you make it, it can scale and print with the same quality. Bitmaps are different as they are made up of pixels. So as you enlarge a bit map, it loses quality. DPI is dots per inch, so the more dots, the better the image quality can be. Monitors are generally 72 dpi, whereas printed material like books and brochures are a standard 300 DPI. You can get away with printing at 240dpi or even 180 dpi, but you will start to notice the pixels if you look closely.
When scanning in decals for reproduction, I recommend scanning at 600DPI. I then save the image back to 300DPI. Now if you print out a scan of a decal sheet, you will notice it will be close, but not exactly the same colour. The are 3 reasons why:
- The decal sheet is screen printed with specific colours
- The scanning process is in RGB, so an approximation of the colour scan takes place
- When you print, your printer will print in CMYK format, so the RGB is converted to CMYK lastly you will print on a paper stock that the whiteness of the paper varies between brands and stocks, and this will also have an effect on the colour.
So the biggest issue with re-making vintage decals is that the original decals where made with specific inks colours, whereas when you print a scanned or re-made artwork, the colour is made up of a combination of set colours (usually CMYK) with a limited range (gaumet).
A Bit more about Colour
There are generally 3 colour formats that are in general use: rgb, cmyk and The Pantone Matching System.
RGB (red – blue – green) this is a format that is used to make the colours on your monitor. Also used when scanning images. Images like jpg and png are saved in this format too.
CMYK (cyan – magenta – yellow – black) – current offset printers and print machines like home based inkjet machine use a mixture of these 4 colours to print the images.
Pantone Matching System – a proprietary colour system for generating the widest range of colours. If you want the most accurate colour representation, this is the colour system you will have to use. Printing these colours requires specialised inks though, that are only available on some machinery like offset presses and screen printing. This is also pretty much the only format that you can use to make metallic and other specialised colours, although some specialised wide format printers will print gold, silver, white (important of you are not printing onto a white substrate) plus green and red.
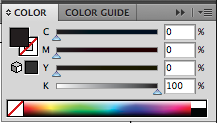
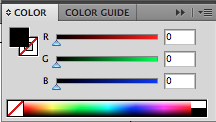
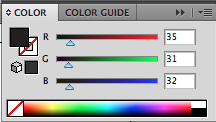
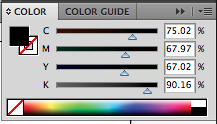
CMYK and RGB versions of black and its converted colour makeup. Also note the difference in how the colours are made. CMYK is additive building eventually to black, while RGB is like a screen, with less colour, the image goes black, adding in colour goes to white.
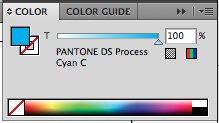
Some print techniques can order specific colours, one such colour system is the Pantone matching system, which can be used to specify an exact colour. Printing that colour in RGB or CYMK will only be an approximation. Specially printed guides are used to pick and confirm colours, and show the colour changes when printed CMYK.
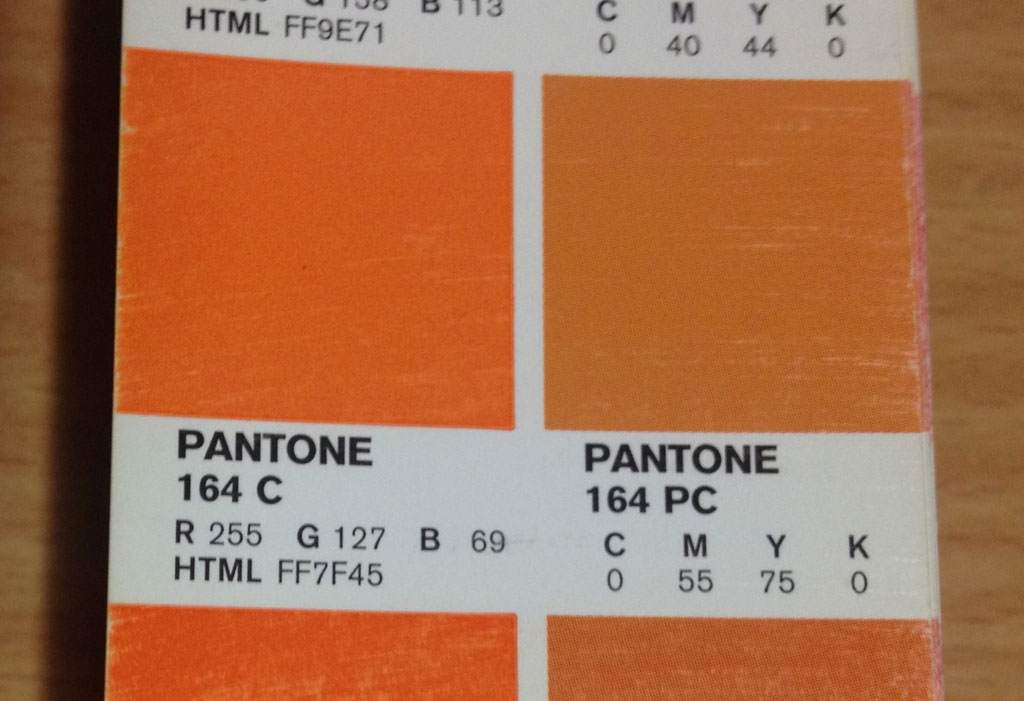
If you've ever printed something out, and seen greys go to green or blue go purple, this is because at some point the file has changed colour formats. So anytime you switch between colour systems, the colour will always change slightly. Because of this, many printers make use of a conversion chart called a swatch book (or a pantone bridge). It shows you a pantone colour, the equivalent rgb value and what it will look like if printed in cmyk.
Some Notes on Scanning
Scanners generally operate in RGB mode. That means the sensor will read in the colour of your image as it is scanned and assign the closest RGB value for each pixel, so you will always get a slight colour shift when scanning.
Moire Effect
Depending on what you are scanning, you may notice a pattern appear in your scan that didn't seem present in the original. This is because the image made by screen printing or offset printing can sometimes be made up of little dots (sometimes called a halftone print, but not seen with a digital print). When you scan the image back in, you don't quite get a 100% replication of the print, and hence the moire affect appears. This can be reduced by blurring the scan a little followed by a little sharpening (both common tools in many photo editing programs).
Artwork Programs
Most scanners will come with either a lite version of photoshop or some other bitmap editor. There are also some open source programs, and a few paid for programs that you can use to scan and make artwork. If you know of any others, please add them in the comments section below.
Free Programs
- Inkscape - http://inkscape.org (limited cmyk support, plus at standard it assumes 90 dpi when importing)
- The Gimp - http://www.gimp.org (no cmyk support)
Paid For Programs
- Pixelator - basic image editor)
- Coreldraw – full blown image editing and drawing program that is expensive, but not as dear as Adobe's products. Widely used in the signage industry
- Illustrator – full blown editing and drawing program, very widely used in the graphics industry
- Photoshop – industry benchmark for photo editing software
As you would expect, the paid for programs allow you to specify exactly the colour settings you use.
While I cannot go through the usage of all the programs, I can give you my preferences. The majority of any decal artwork I make,
I do so as a vector based artwork file, using cmyk format - gives me the smallest file size, with the most flexibility and closest colour reproduction that I can get on the print machines I have available (with cmyk, there is no colour conversion between artwork and printer). I also try to vinyl cut as many stickers as I can, and this best done with vector based software.
I prefer vinyl cut decals because they:
- will last longer and be more durable,
- tend to be in brighter colours than a printer can produce,
- are available in colours that are impossible to print (such as chrome, metallics, carbon fibre look and lots of others),
- artwork files are smaller and can be easily manipulated,
but vinyl does have some limitations:
- text under about 4 mm high cannot be cut
- vinyl is best suited to simple block colours, so no gradients, multi-coloured decals are time consuming and often difficult to do
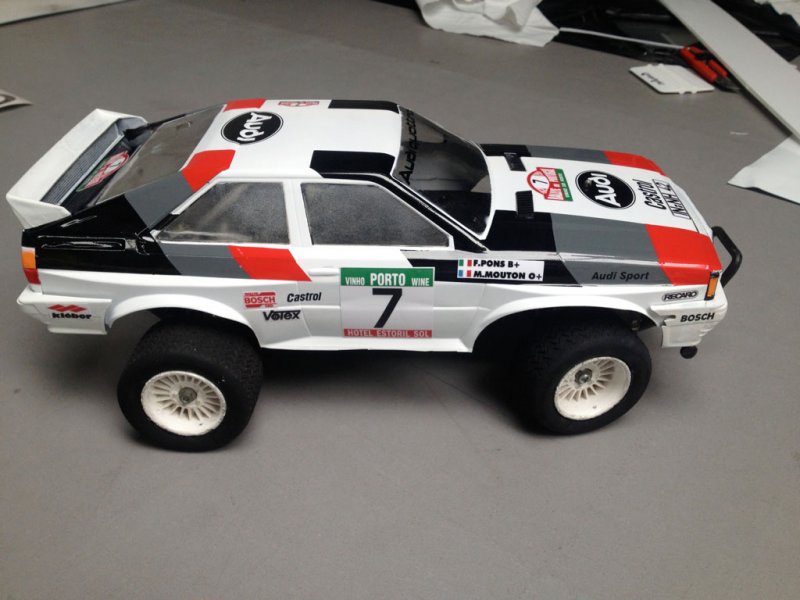
Example of my work process with some vector and printed images.


The picture on the left is the car as I received it. It had repo decals and they weren't very good and the colours weren't right either. I used vinyl for the large areas as its more durable and closer in colour to the reference colours I found.
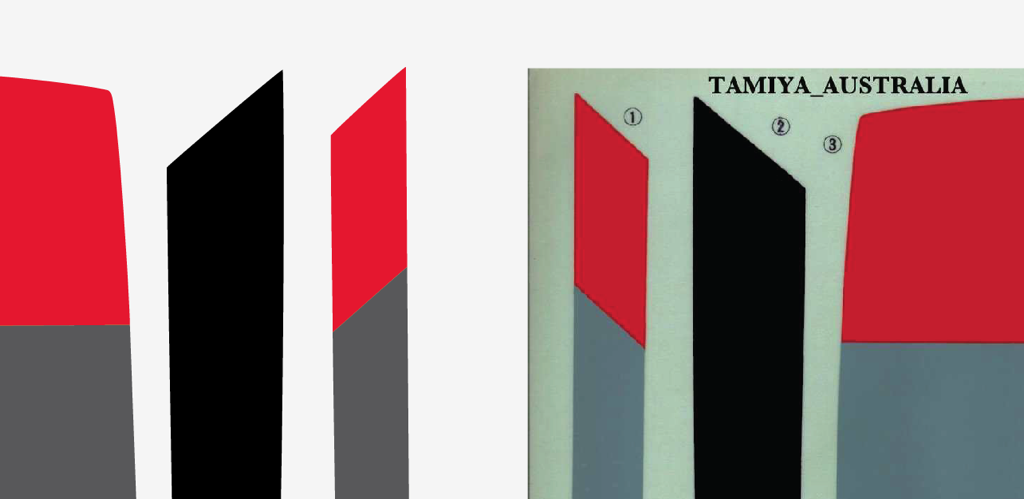
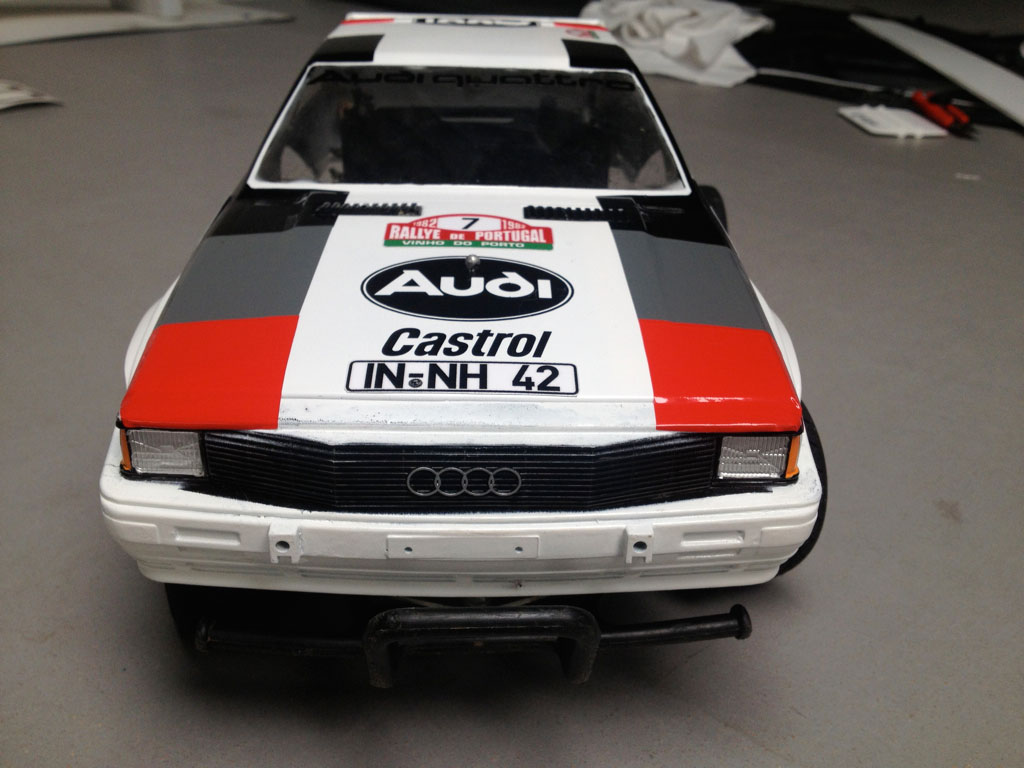
Picture below – shows a close up the front bonnet
Part 2 will detail several ways you can make (or have made for you) the decals from your artwork.
________________________
Written by TB member yogi-bear