


We've covered putting on decals wet before, but sometimes a decal won't conform to the shape of your RC car.
The answer here is to use a hairdryer to gently warm the decal so it'll sit flat without wrinkling. That simple tip doesn't make for much of an article though, so the following is a lot of extra pictures and text expanding on that very simple premise.
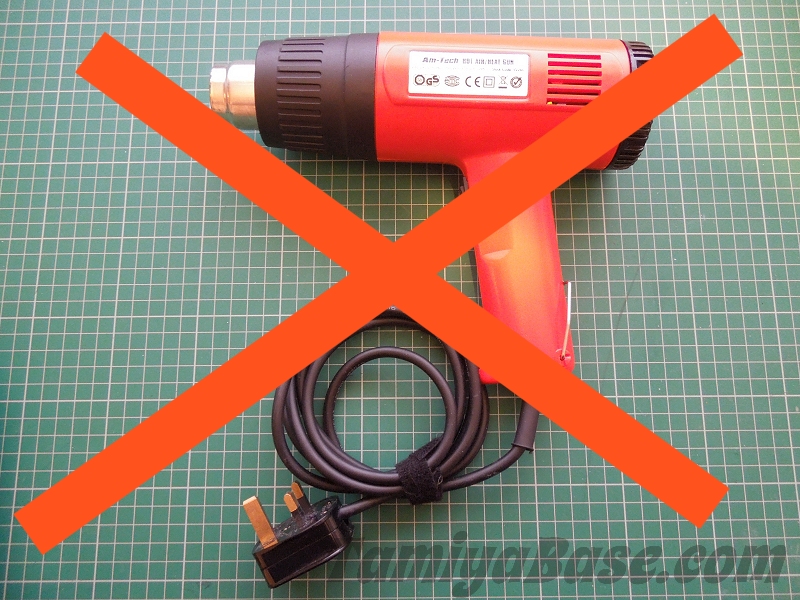
First, what not to use.
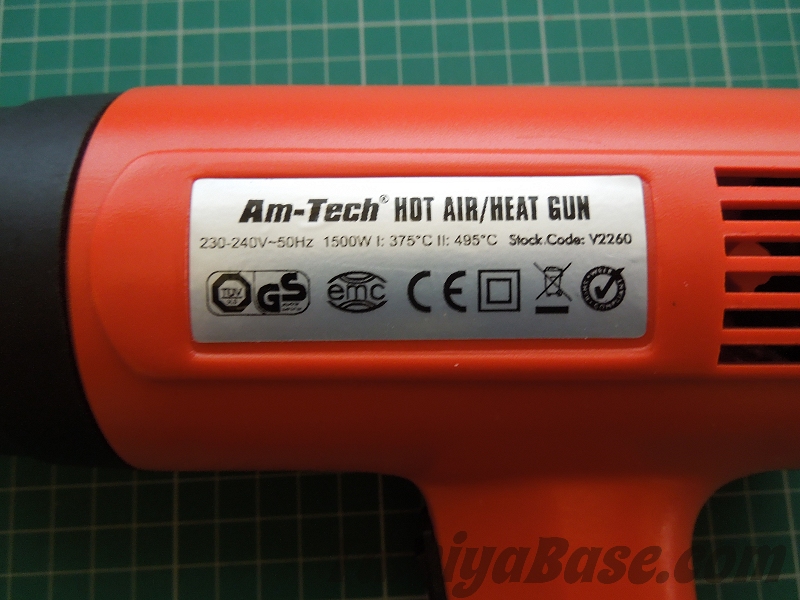
This is a Hot Air (or Heat) Gun. You can tell that by the industrial design, that heat levels are often mentioned (375 and 495 Celcius here), that there'll often be a warning such as "Do not use as a hairdryer" on it ... and in this case, the "Hot Air/Heat Gun" label.
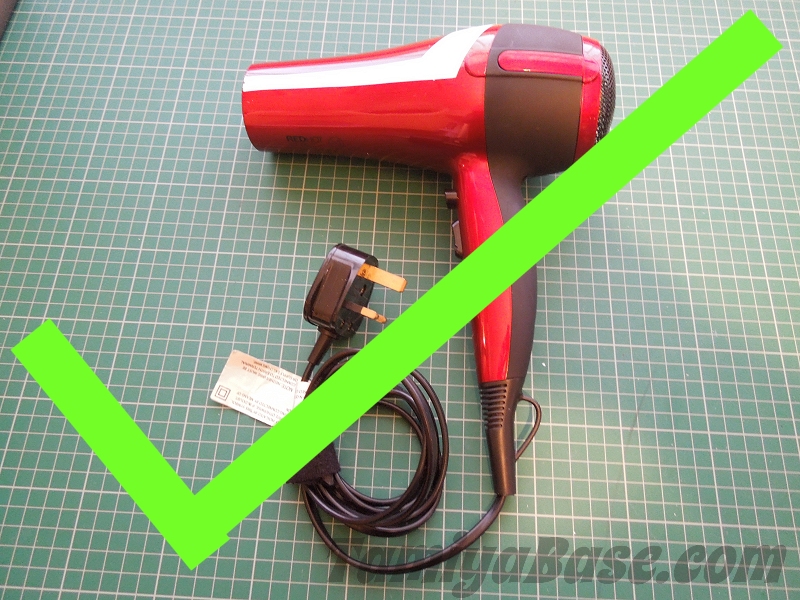
This (below), on the other hand is a hairdryer. This was a cheap one bought online & a Starsky & Hutch stripe added to make it a bit more manly. Ahem. Note the extra "design" in the shape, the seemingly inflated power ratings (2,200W here), and the multiplicity of settings. This one has 3 heat levels, two fan speeds & a "cool shot" button, the purpose of which eludes me: a towel is my preferred level of hair drying technology.

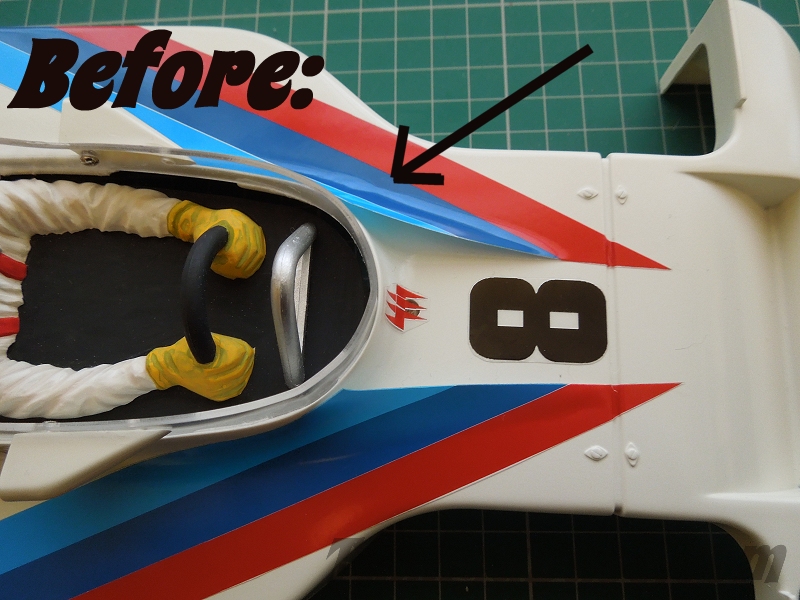
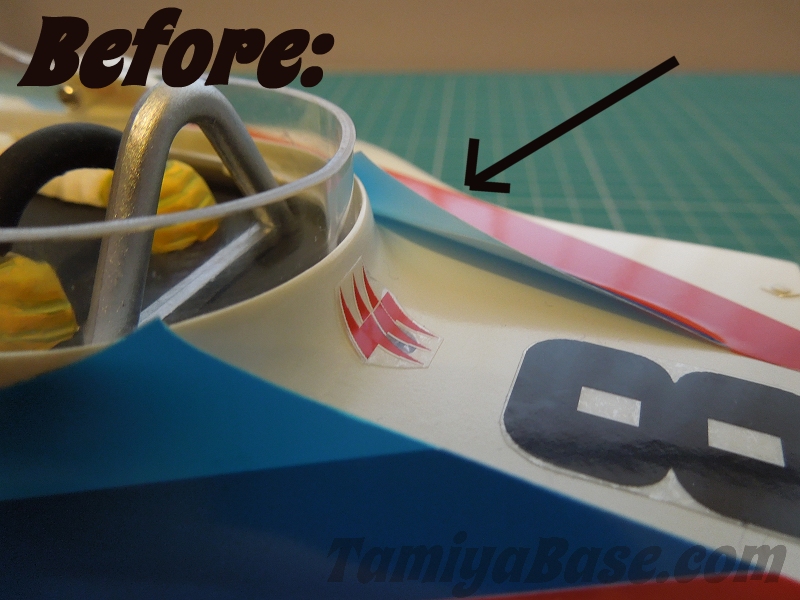
Moving on, some "before" pictures. These might seem like filler, but they do illustrate a serious point: recognising where there's going to be a problem and stopping (and not pushing on & making a wrinkled mess of your decal) is a useful "skill".
This is the front end of a 58013 March 782 BMW F2 car (and Canadian repro decals): note that the flat, stripe decals are not conforming to the cars shape where they transition from flat to 3-dimensional concave curves, and back to flat again.
Method:
The images here show a "hard" (injection moulded styrene, aka ABS) body, but the theory is just as valid for vacformed bodies - just be even more careful with the heat.
The watchword here is patience - I set my hairdryer to the low speed and medium heat, kept it moving at a distance (not closely focused on one point) to let the heat build up slowly - we want the decal to soften so it can stretch a little, not melt...
As a rule of thumb, if you can keep a finger in the area being heated, it's reasonably safe.
I didn't take any "during" photos, but if I had they'd show the hairdryer 20-30 cm away, and a finger pressing down on the decal: move from where the decal is stuck down to where it isn't (stuck down) in small increments, and if it looks like the decal is going to fold or wrinkle, back off, put in a bit more heat & try from a different angle.
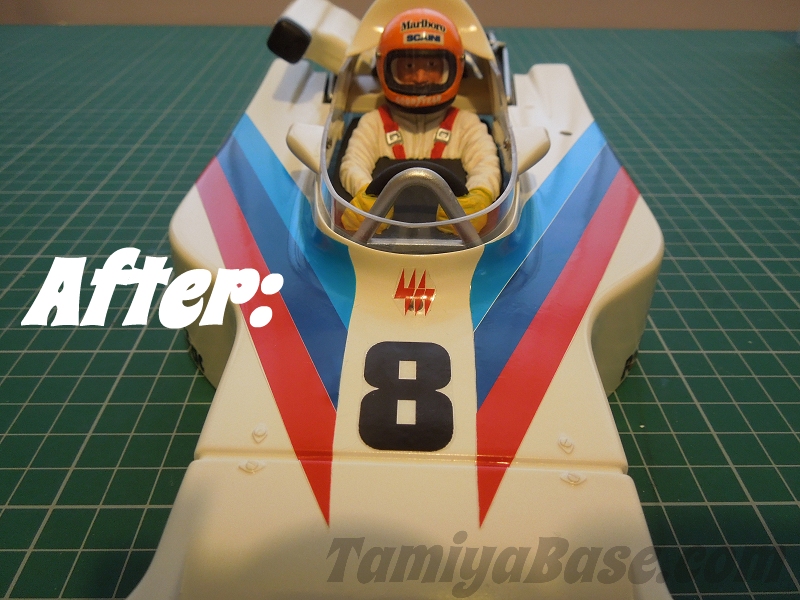
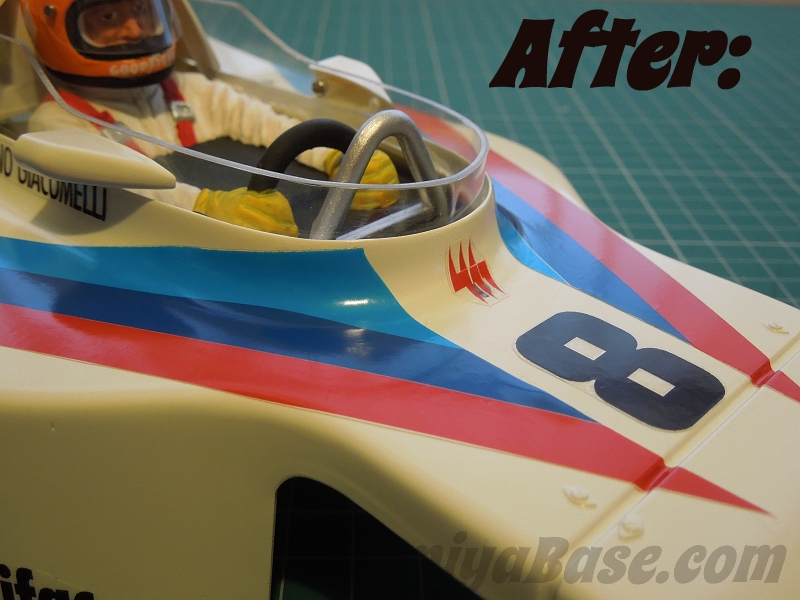
"After" photos: note the lack of bubbles and wrinkles. From the head-on shot you can see the negative space white band is pinched towards the top where the light blue part of the decal has stretched a little, nevertheless I'm quite happy with the result.
________________________
Written by TB member Jonny Retro