Although I've covered it before in the "Masking & Lining" piece, a recap can't hurt.
The example here is a vintage body, but the techniques for painting the re-release one are fundamentally the same even if some of the details are different (e.g. loose door handles vs. fixed, rear lights, wheelarch (fender) curviness, etc).
Preparation
For the purposes of this article I'm going to assume that whatever you've had to do to your Scorcher shell (e.g. paint stripping, sanding, filling, priming, spraying - see earlier pieces on Paint Stripping, Paint Prep. pt.1 & pt.2, and Spraying Paint (& Clearcoat) as appropriate)t you already have a shell with the nose, sunroof, rear licence plate cover & rear light clusters fixed on, and that it's covered in well bonded, properly cured, compatible and decent looking white paint of your choice.
I'm skipping over all that, because although it can be time consuming and tedious, and requires a certain amount of skill, it's relatively easy. One thing I will stress though is the importance of a wet rub down with very fine (1500 or 2000 grit) wet & dry paper after final priming - it has a really big effect on the final finish of the paint.
Masking
This can take 2 to 3 hours to do properly, so having picked a good day to do your spraying, start early.
You'll need a supply of masking tapes - I don't mean the stuff from your local Pound shop or B&Q, I mean tapes with a proven history. I use Tamiya 6mm and 10mm tapes for the edges, plus blue 3M tapes in greater widths for covering larger infill areas. Good quality brown Kraft paper can be used where really large areas need protecting, but that doesn't apply on the Scorcher.
Check each area as you go, and a final time before spraying, as any lifting will probably result in spray drift. If a particular bit of tape keeps lifting, chances are that you stretched it beyond its capabilities & it might be better to peel it off & try again with a fresh length.
Window Areas
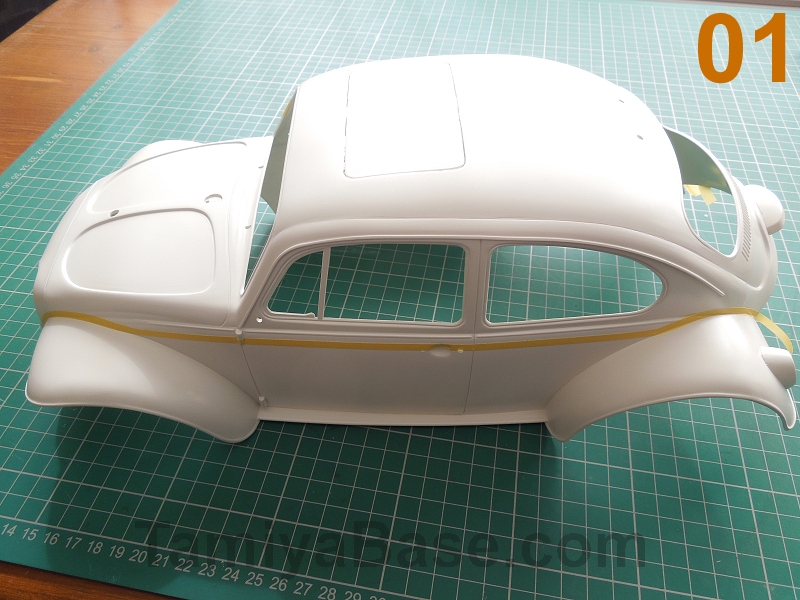
I started by laying down a length of 6mm tape on a clean cutting mat and cutting it in half down the middle, then used the uncut edges to mark the lower limit of the white area on the side windows. (image 01)
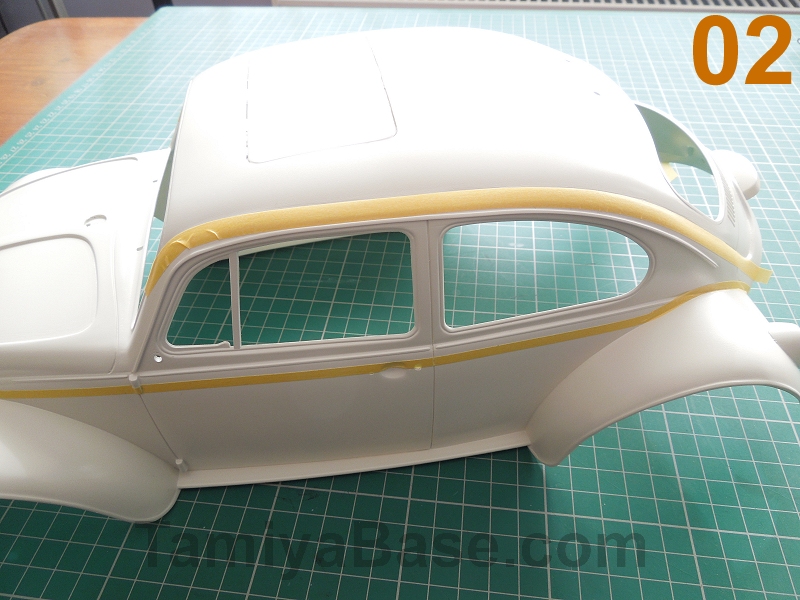
The top edge doesn't curve quite so much, so can be done with full width 6mm tape. Note the wrinkles - although not ideal, they're on the inside of the curve, not the paint edge so as long as they get covered up later it'll be fine. (image 02)
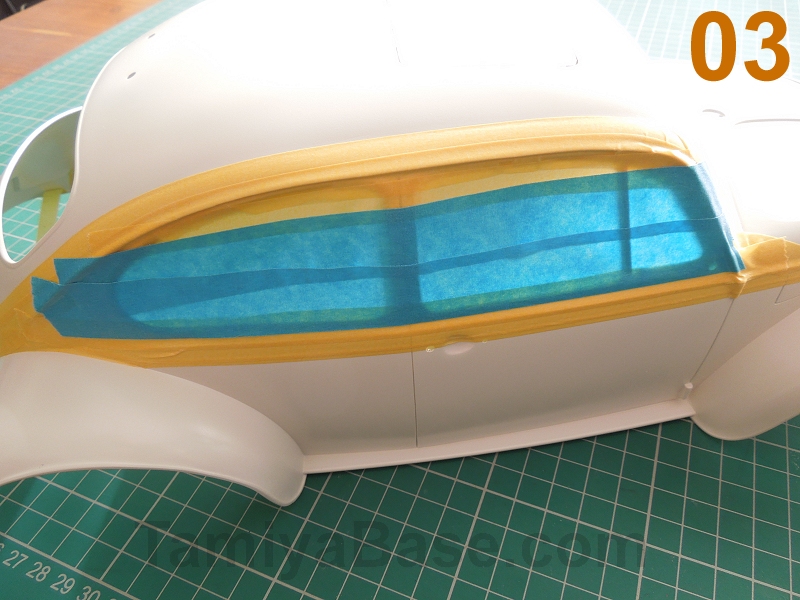
A few strips of 6mm and 10mm start the infill area, then the rest is covered with wider blue tape (image 03)
 .
.
Bonnet Petals & Tail End
The scalloped areas on the front end can be quite tricky, I've tackled it here by using overlapping strips of 10mm tape (image 04)
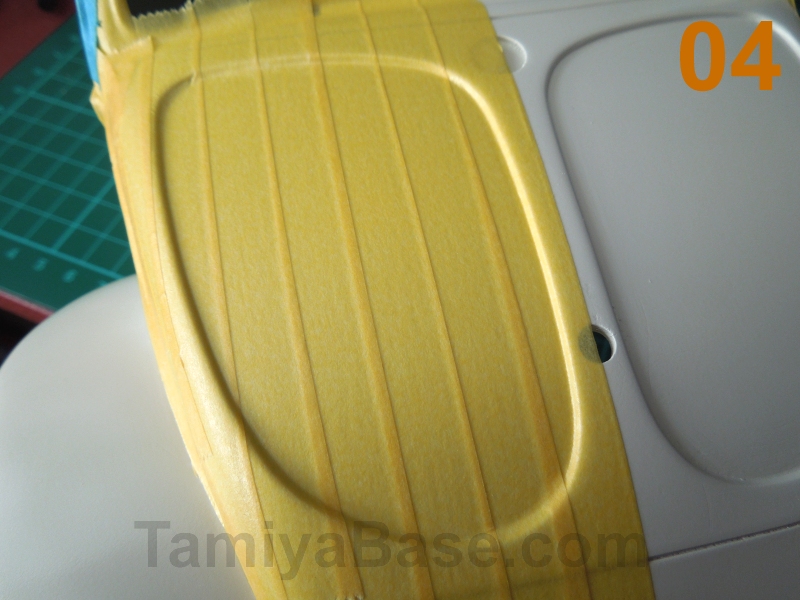
Tamiya also make 18mm and 40mm tapes, these would probably be better as the lower number of overlaps reduce the opportunities for tape bleed (wet paint creeping under the tape).
Either way, carefully bend the tape around the contours (rather than attempt to stretch it afterwards) and use a thumbnail to push the tape into the small voids caused by the ridges of the preceding strip of tape.
Snap-off type craft knives can work very well in model making, but for this I'd suggest you need a proper scalpel with a really sharp pointed blade (something like a cast alloy Swann-Morton holder & 10A blade) to cut the tape to the correct shape with a very light touch & minimal damage to the body/paint underneath (image 05)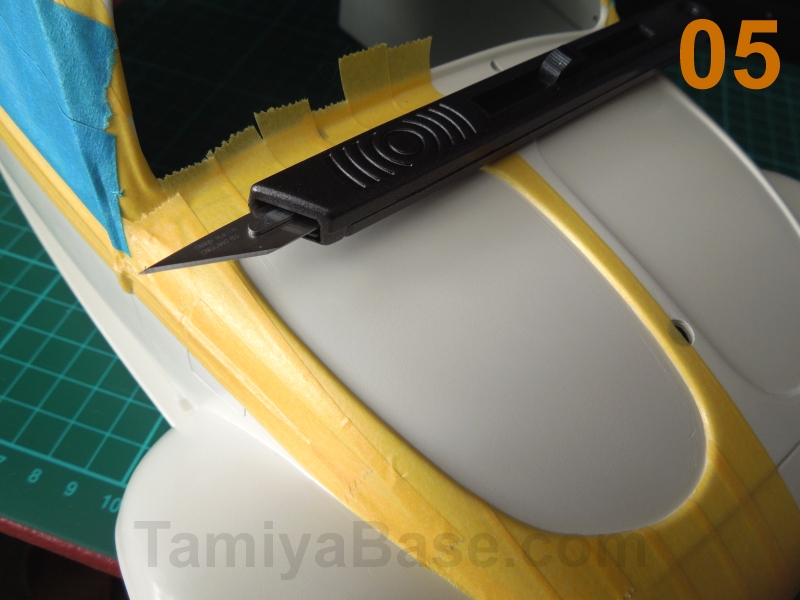 .
.
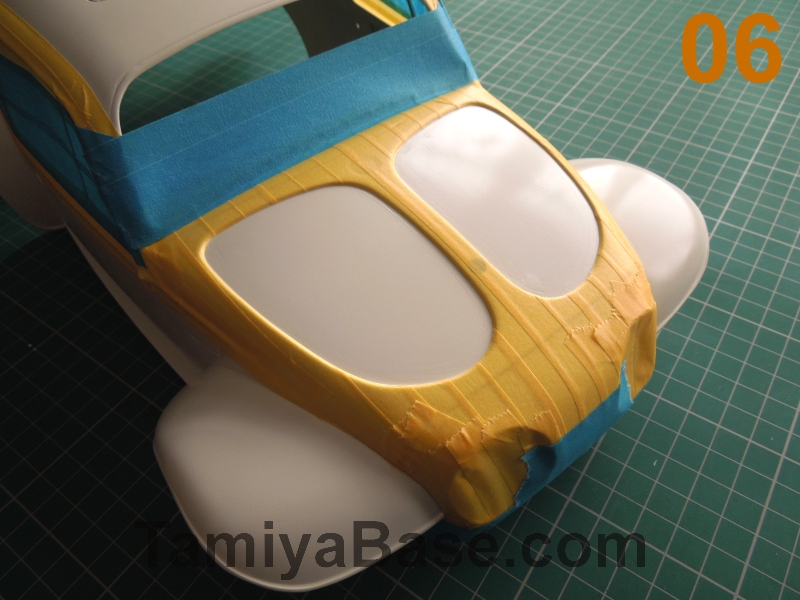
Also cover up the remainder of the nose (which should also remain white) & tidy up the windscreen area, remembering not to go further up than about 2/3rds of the way up, as dictated by the side window area upper limits(image 06)
 .
.
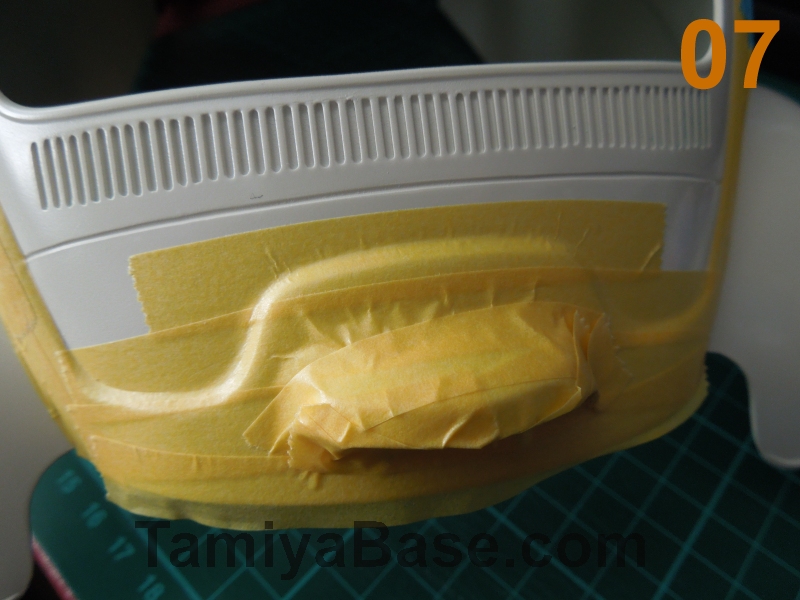
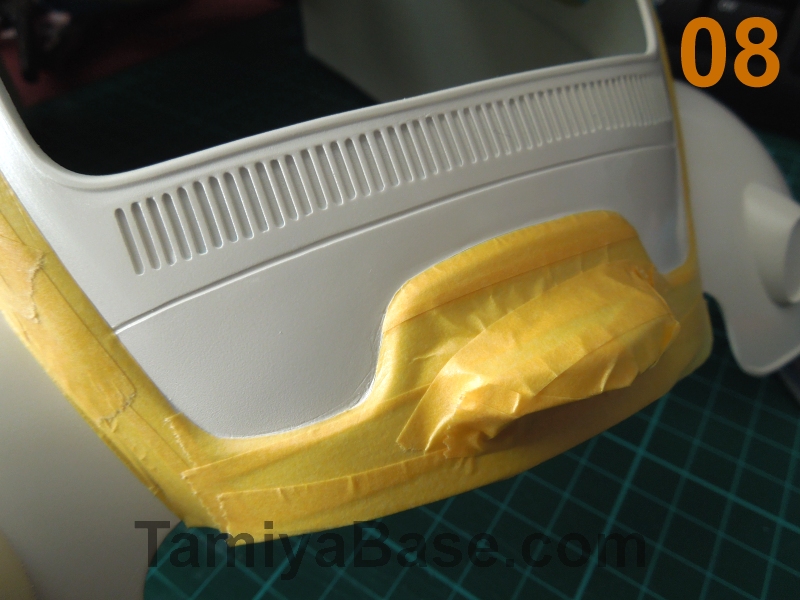
The tail end should be masked as above, just with the tape at 90 degrees across the bodywork rather than running front to back (image 07)
Note the ghosts of knife marks from 2 or 3 previous paint jobs that sanding, filling, primer & paint have failed to hide completely (image 08)
 .
.
Roof
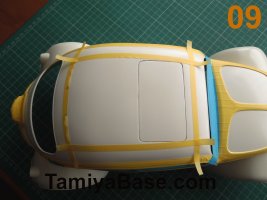
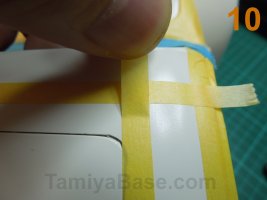
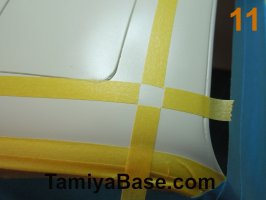
Mark the edges of the white roof panel with narrow tape, overlapping the ends (and not pressing the tape down at this point) (image 09). Lift the ends (image 10) & cut back to where the corners should be rounded (image 11) - don't cut directly on the model as you will mark it.
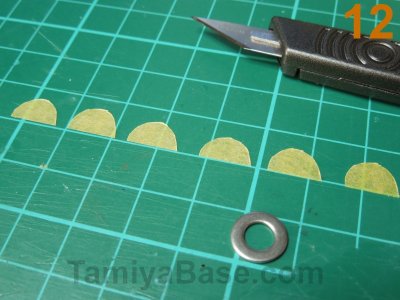
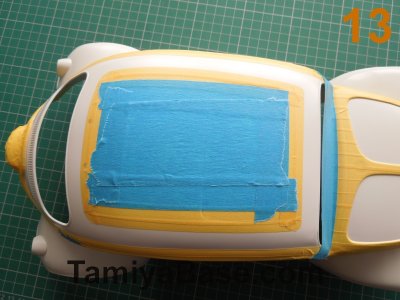
Stick tape to a cutting mat & cut out with suitably sized templates (washers, small coins etc) (image 12) - make more than you need & pick out the best. Apply & press down, along with the lines & take extra care at the overlaps, then fill in the inner area (image 13)
Sills
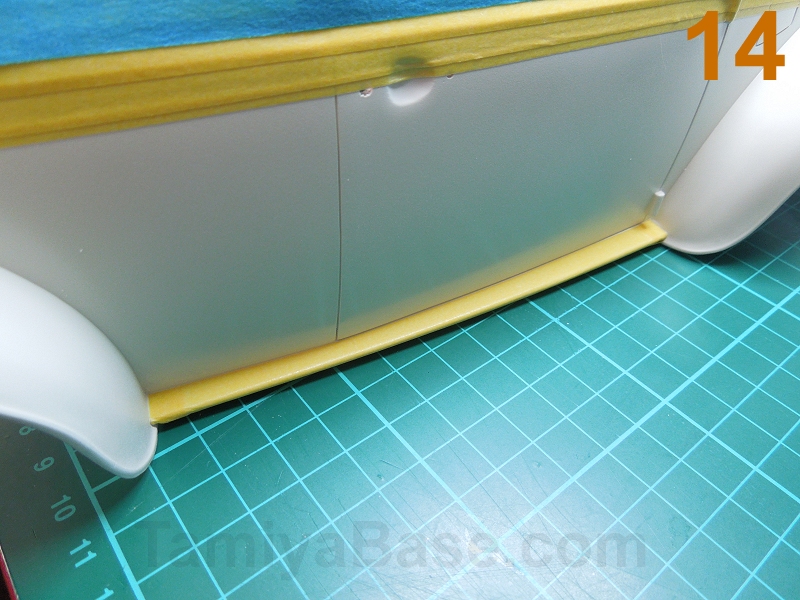
Yes, it's tedious and fiddly but these need doing too. Start with short strips of tape, with the end cut at a slight oblique angle to suit where the wheel arch (fender) meets the sill, then fill in the remaining areas with long strips running front to back (image 14)
 .
.
Insides
I like the undersides of the wheelarches (fenders) to be the 2nd colour (blue here) with the rest of the interior the primary colour (white), this means a lot of tape on the inside too - at least it doesn't have to be done quite so painstakingly as the outside.
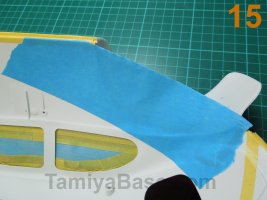
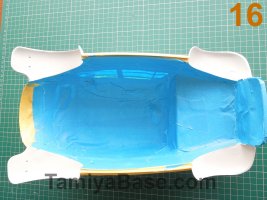
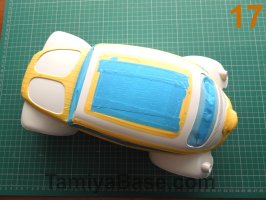
Start with broad strips of tape on the inside of each arch (image 15) & carefully trim back. The rest is just filling in the gaps, which can be done fairly quickly as long as each edge is pressed down well (image 16). A little reinforcement may be needed on the outside of the rear windscreen area (image 17).
Spraying the 2nd Colour
I've covered spraying in some detail before, but it's probably worth re-stating a few key tips:
• Check the weather, even if you're spraying indoors. Don't try & get it done before the rain arrives.
• Shake/mix the paint well & test (e.g. on a bit of card) before spraying.
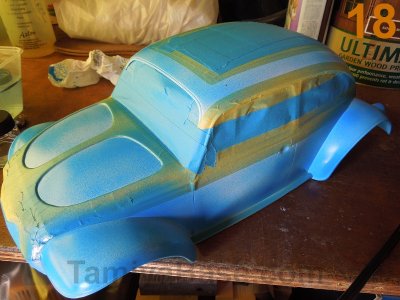
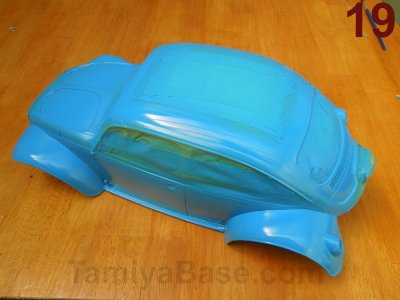
• Don't try to do it all in one go, aim for several light coats (images 18 and 19). I'd be surprised if you could do it all without missing any bits or causing faults in less than 3 coats TBH. Type of spraying (and brands) will have a impact on the number of coats - heavily thinned paint through an airbrush will take more than the average aerosol, and Tamiya TS paints less (due to the higher pigment content).
• Remember, if you're planning to go over with clear later, you don't need to try to get a super shiny finish at this point.
• If you make a mistake or something lands in your fresh paint, don't try to "fix" it by wiping or adding more paint. Leaving it alone to fully cure very often means the problem can be gently sanded away (see previous articles on paint faults).
Unmasking
There are several schools of thought as to when you should do this, varying from as soon as you put the can of paint down, to allowing 24 hours of drying time. I try to leave it at least 2 - 4 hours (depending on temperature) to be sure there's no wet paint hiding in crevices anywhere that could get tracked across the underlying colour.
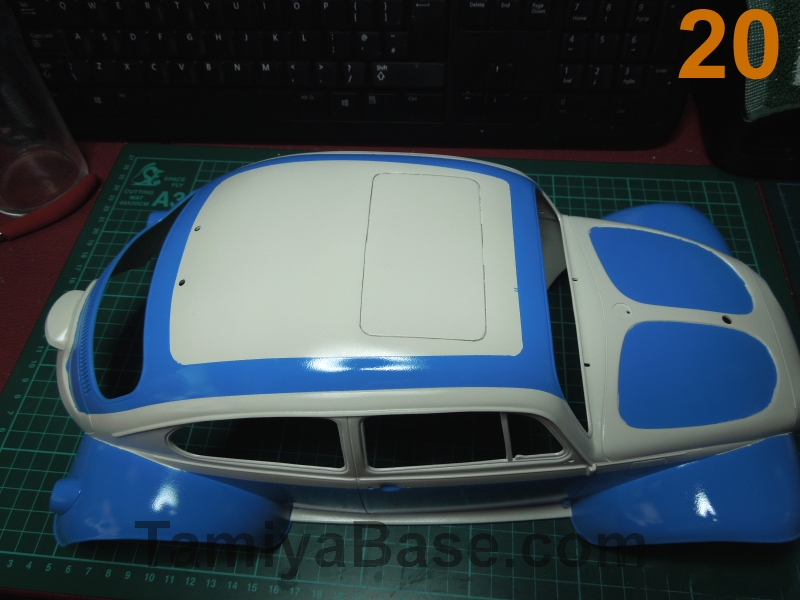
I think the main things are to handle the body carefully so you don't leave fingerprints in the still soft paint, and to be cautious in taking the tape off - don't try to remove big areas in one fast rip, but instead remove the bits of tape one at a time in reverse of the order they were laid down (image 20)
 .
.
Edge Cleanup & Lining
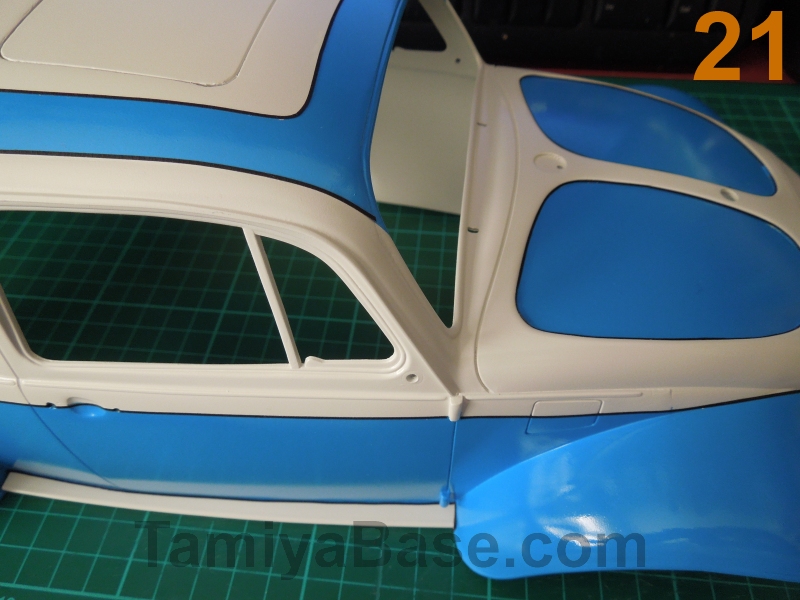
I haven't managed a masking job that didn't need at least some clean up ... in the main, a slightly wobbly edge can be covered up with line tape - you don't really see the line at first, just a nice crisp edge. I've used Ansmann line tape & wasn't at all impressed. Kyosho "Micron" tape is much better, but even then you have to be careful about not stretching the tape during application so it doesn't shrink back and lift later on. You can cover a surprising amount with even 0.7mm wide tape (image 21)
 .
.
I don't feel at all bad about this, as even on 1:1 cars edges between colours are positioned to be hidden under trim, or covered with pinstriping - and line tape is just the scale equivalent of that.
If a bleed is bigger than tape can cover, provided the 2nd colour is properly cured and the underlying paint is sound, you can persuade it off with very careful sanding with fine wet & dry paper, the matt appearance that leaves will be covered by clearcoating & rubbing out later.
Clearcoating
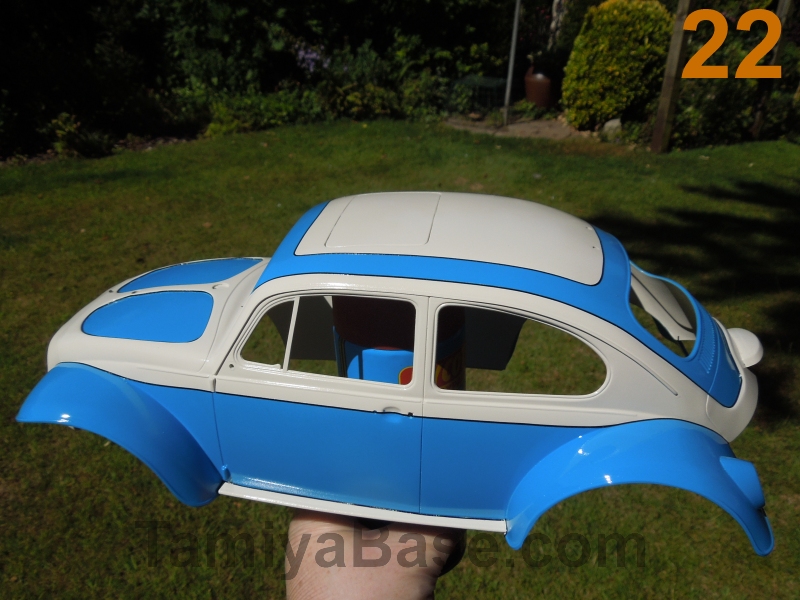
The aim here should be one or more light coat(s) to build up the depth (without worrying about orange peel at this point), then a final "wet" looking coat (image 22)
 .
.
Hycote (acrylic) Clear Lacquer works fine on single colour paintjobs & seems to be 100% compatible with properly cured Tamiya X/XF and TS paints. Halfords (again, acrylic) Clear Lacquer is possibly superior, and does seem to be safer on multiple colours - but you do need to be aware that clearcoat can/will remelt whatever is underneath and can cause an ugly mess if you put too much on in one go.
Rubbing Out
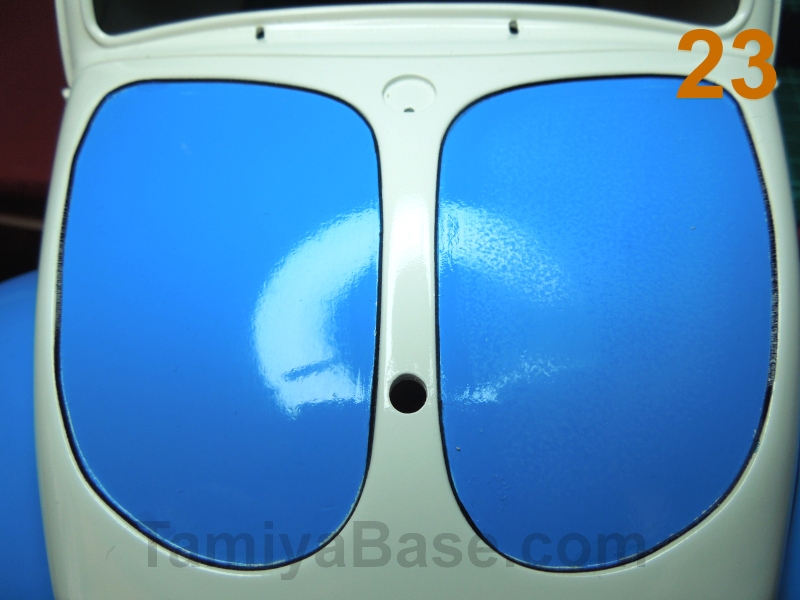
I've covered this in depth before, but basically the process is to take off any roughness apparent in the final clear coat by sanding with very fine wet 'n' dry paper then restoring & improving the shine by polishing (see image 23 - right side has been sanded, left sanded then polished).
The Scorcher body has a lot of edges & details where damage can occur very easily during this process, so I didn't attempt to treat the whole thing, just selected areas:
• bonnet petals
• main white area of roof
• accessible parts of the wheelaches (fenders), away from the edges.
The paint does need to be properly cured & hard before you can consider doing this, even under ideal conditions you shouldn't really be looking at doing this under much less than a week. If you have the patience to leave it for a couple of months it would be even better.
Detail Painting
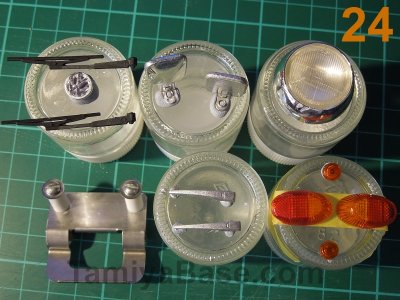
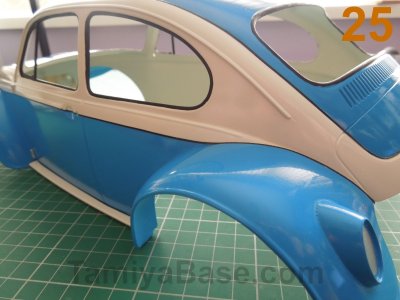
Parts that are separate from the body can be worked on before or concurrently with all the above, but some details need to be done only after clearcoating & rubbing out (images 24 & 25)
.
| Item | Vintage | Re-release |
| Licence Plates | Spray yellow, clear then blue - then carefully sand off the blue on the raised digits/letters (see previous article on the subject). | Spray holders (& apply decals) |
| Driver | Sand/fill mould/join lines on arms/hands & helmet, prime & brush paint. See previous articles on painting driver clothing & faces. | As vintage. |
| Rear lights/lenses | Brush paint oval inside holders in a silver colour, lenses with clear orange & clear red. | If you've used the kit lights unmodified, paint the lens portions in a silver colour then overpaint with several coats of clear orange & clear red. If you've Dremelled out the lens portions to use the clear lenses also in the kit, paint the inside of the holders silver (& the appropriate part of the rear fenders) and paint the clear lenses clear orange & clear red. |
| Window rubbers | Brush paint with a matt of satin black, e.g. Tamiya XF-85 Rubber Black. | As vintage. |
| Front indicators | Clear orange. | As vintage |
| Door hinges | Brush paint in silver colour. | As vintage. |
| Door handles | Brush paint. It's more accurate if they're separate from body, but if already glued on you have to think carefully (right at the start of the project) whether you want to try to remove them. | (Part of body). Brush paint. |
| Shutlines, rear vent details | Years back I advocated ultra fine point permanent pens, then graduated to painting with a heavily watered down darker shade. Now I'm not so sure. Remember that you don't see painted in shutlines on Tamiya RC cars in their catalogues & Guide Books - there must be a good reason for that. | As vintage. |
| Rain gutters, trim line. | Given my standard of painting, I think they look better body colour than done untidily... | Ditto. |
Assembly
Not a whole lot to say here, I prefer fitting the driver and licence plates with servo tape (buy it in big rolls as "car trim tape" as you get much more choice of widths and it's cheaper), and Canopy Glue for the lights, VW badge & door handles (if appropriate).
Other than that, be careful with the fasteners & get JIS (Japanese Industry Standard) screwdrivers - they're not the same as Philips and the wrong tools will slightly damage the heads - which you won't fit out until you try to remove them.
Decals
This has been covered before so I'll just give you a few bullet points:
- Price/availability of genuine vintage decals (or good quality reproduction sets) is a problem, and most eBay decals are garbage. The Canadian MCI Racing ones are the best of those freely available, though colour registration and spelling/wrong word errors abound. Re-release decals sheets have made up sponsor names;
- Cut out carefully. Consider buying a pair of reasonable price straight and curved scissors & only using them for this purpose. If they get gummy, clean the edges with solvent.
- Separate decals from the backing with the point of a craft knife, and dip in clean slightly soapy water before applying. Really - this gives you the option to immediate remove & replace without damaging the paint or decal if you got the position a bit wrong. Once they're correctly placed, squeeze the water out from the centre outwards with a bit of cloth or kitchen roll.
Conclusion
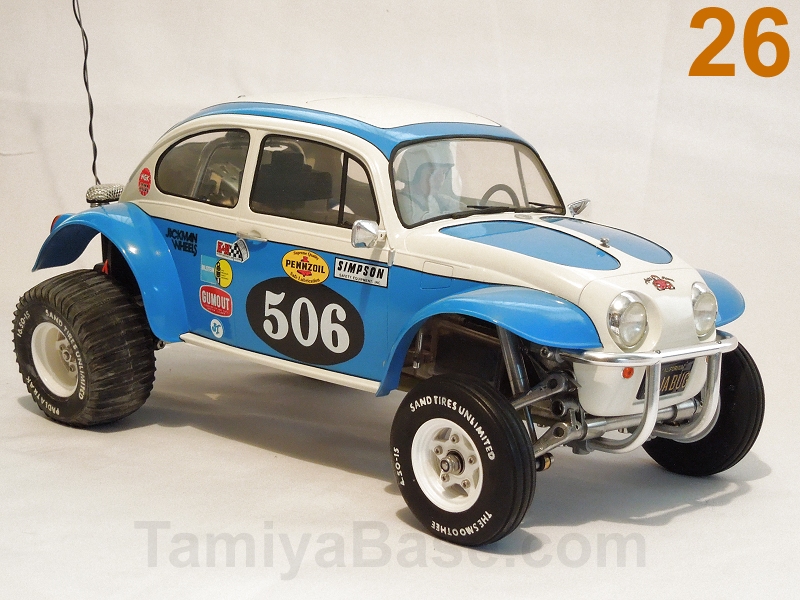
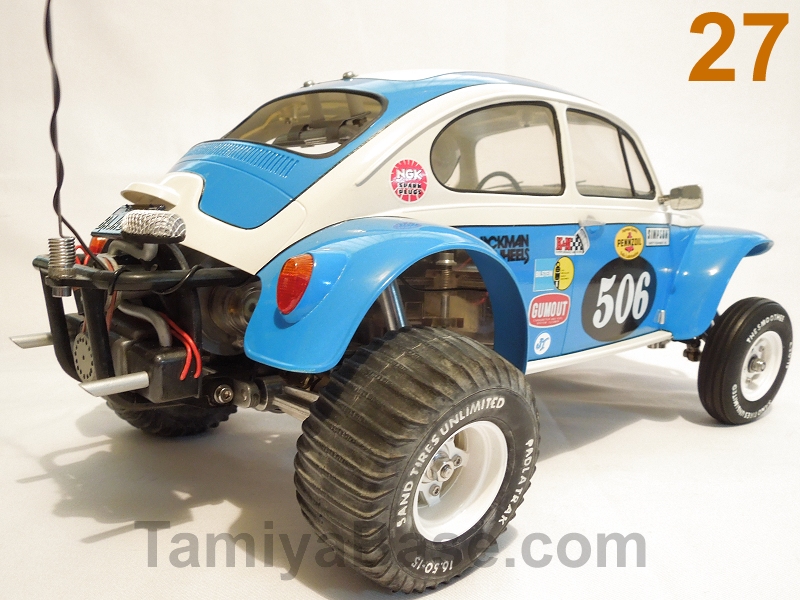
... and there it is, all done, and posed on my Scorcher chassis (images 26 & 27)
Despite a few issues along the way, the hardest part will be giving it back to its owner - it looks better than mine :)
________________________
Written by TB member Jonny Retro


