Keyword

TOPIC:

Richard's 6x6 build from left over parts. 2 years 3 months ago #70153

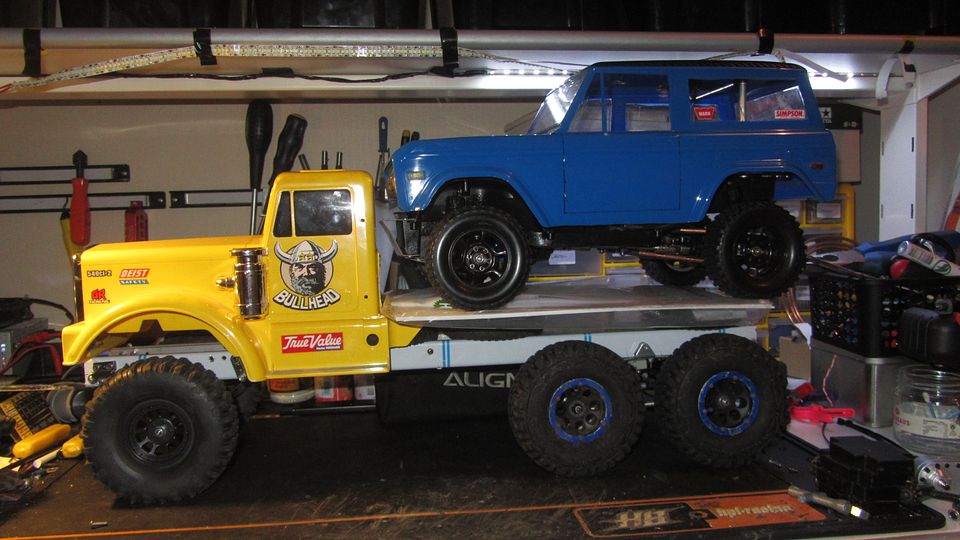
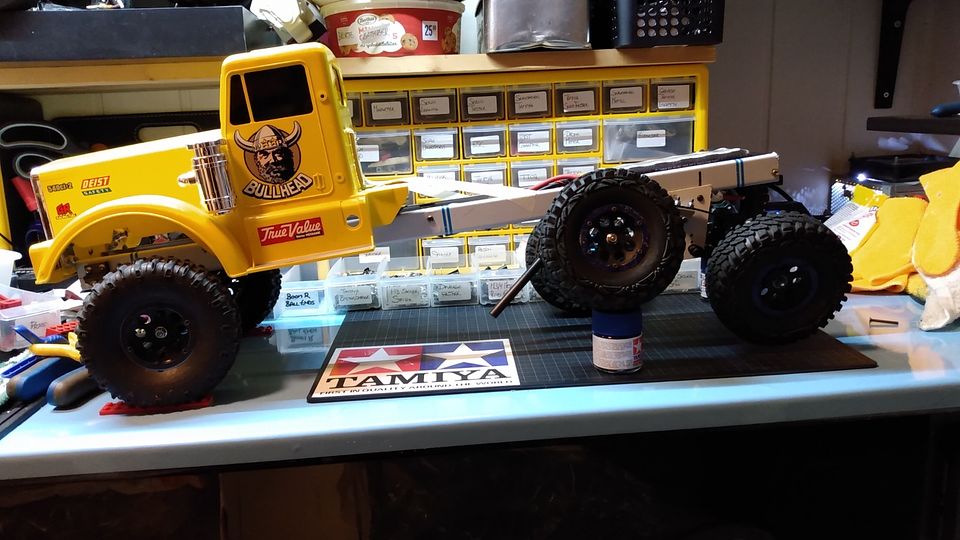
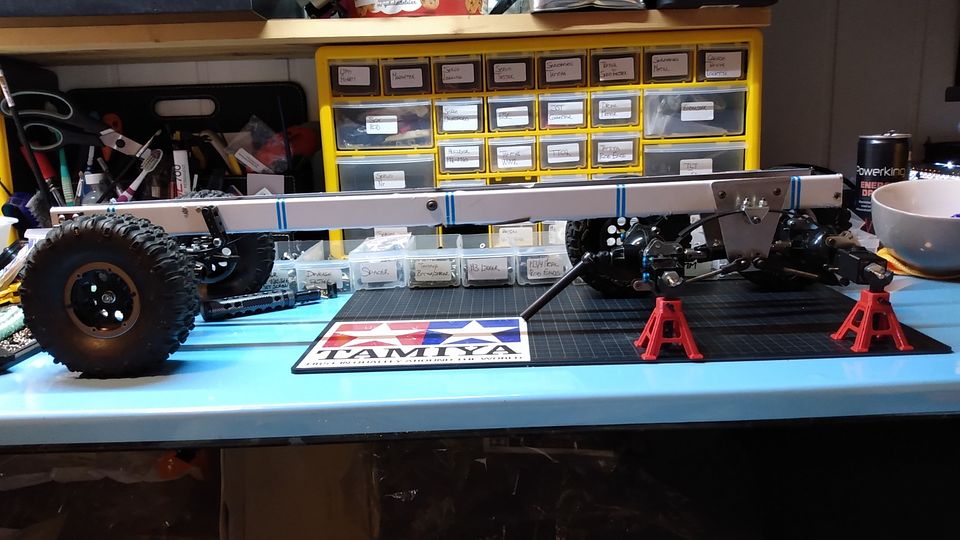
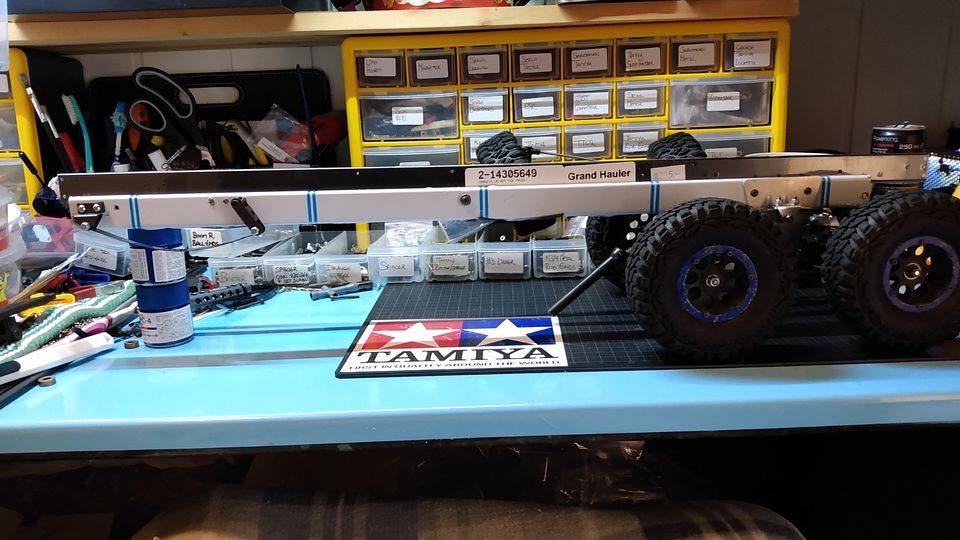
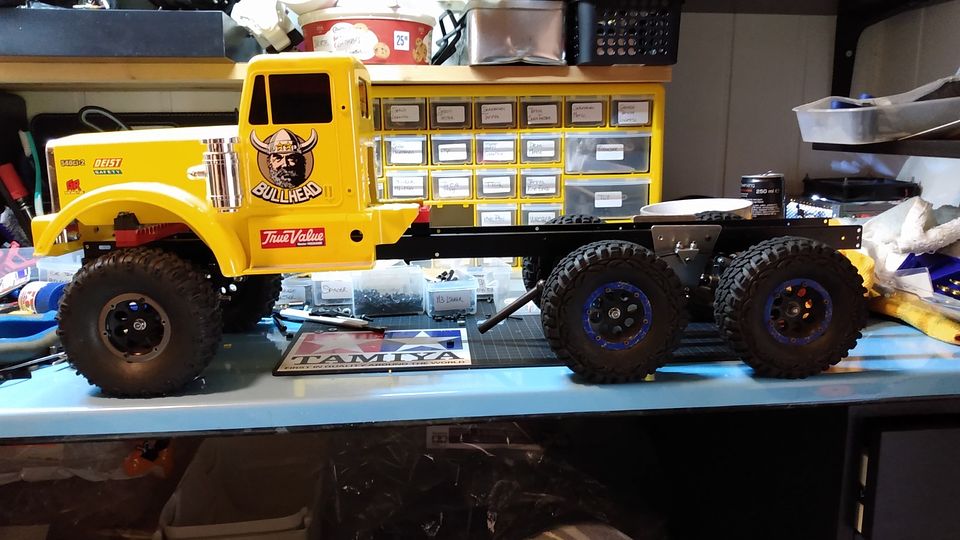
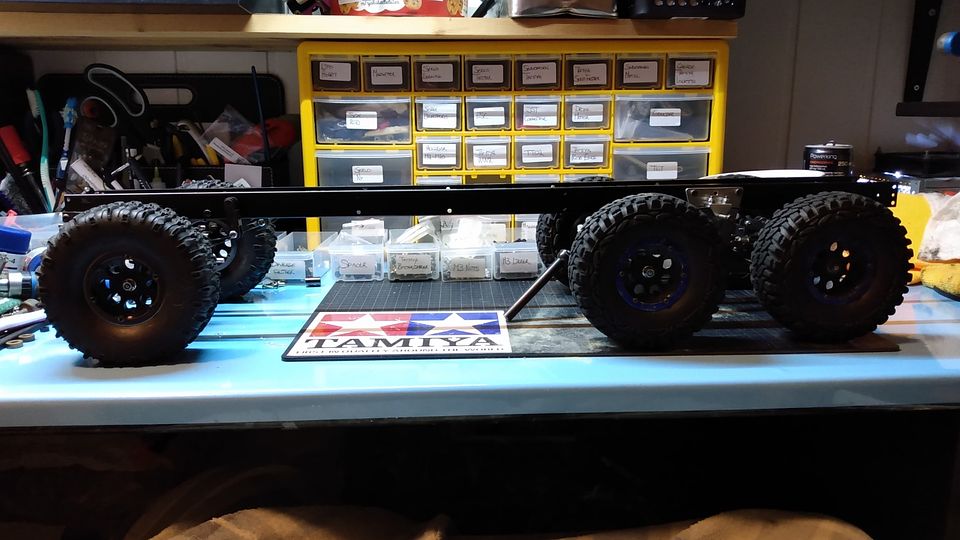
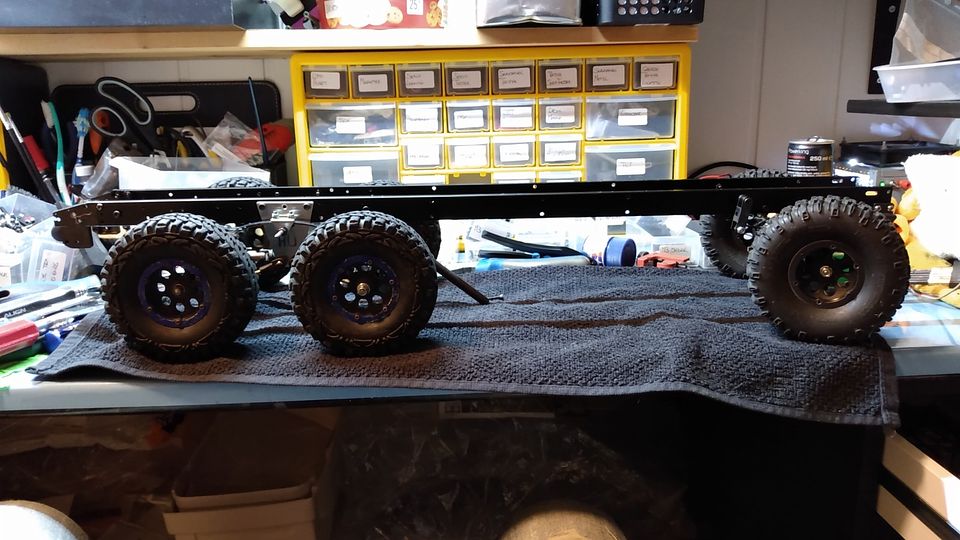
I'm not sure I've posted pictures of this before as up to now only has been a chassis with High Lift axles, Bullhead body and just rear suspension mocked up.
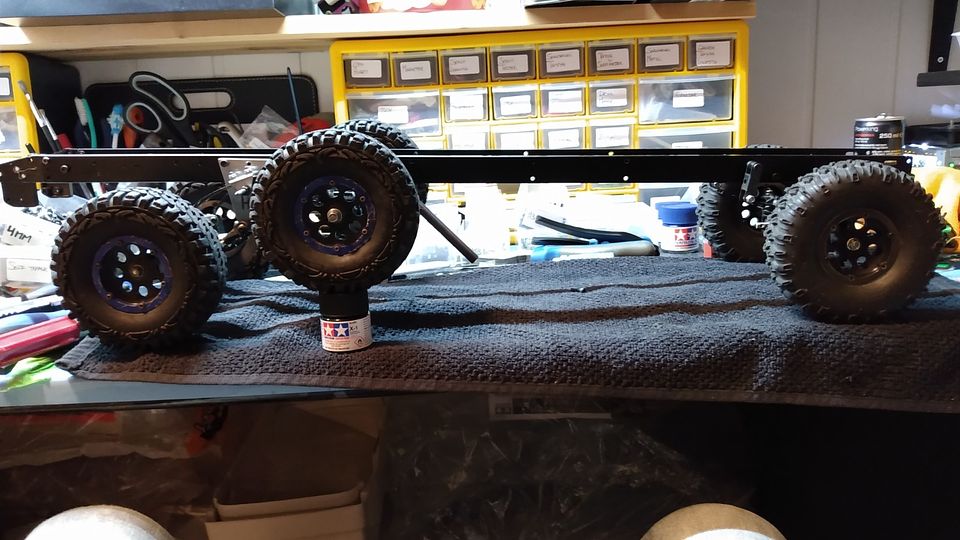
Frame is 1mm stainless steel that a mate made for me, it might be replaced by a longer one as it is about 10cm too short than I want it to be.
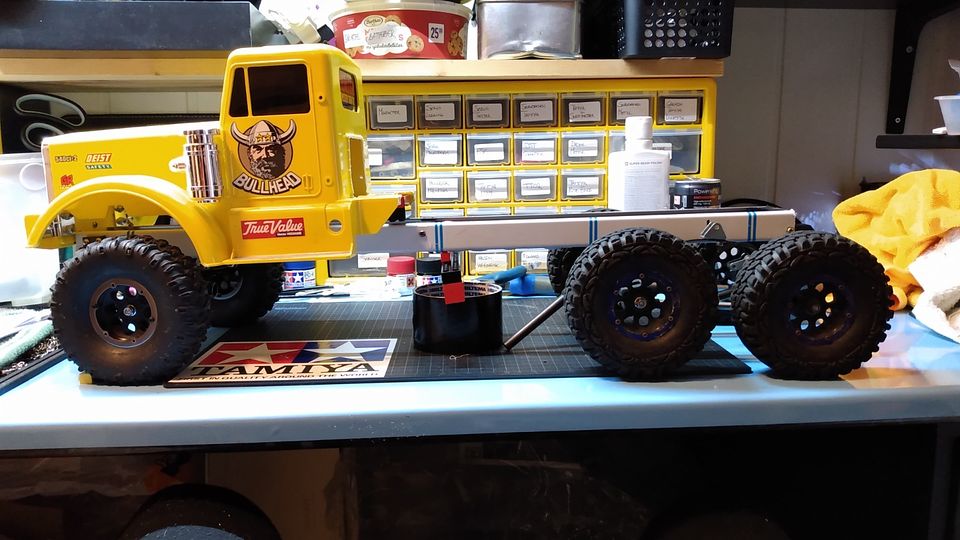
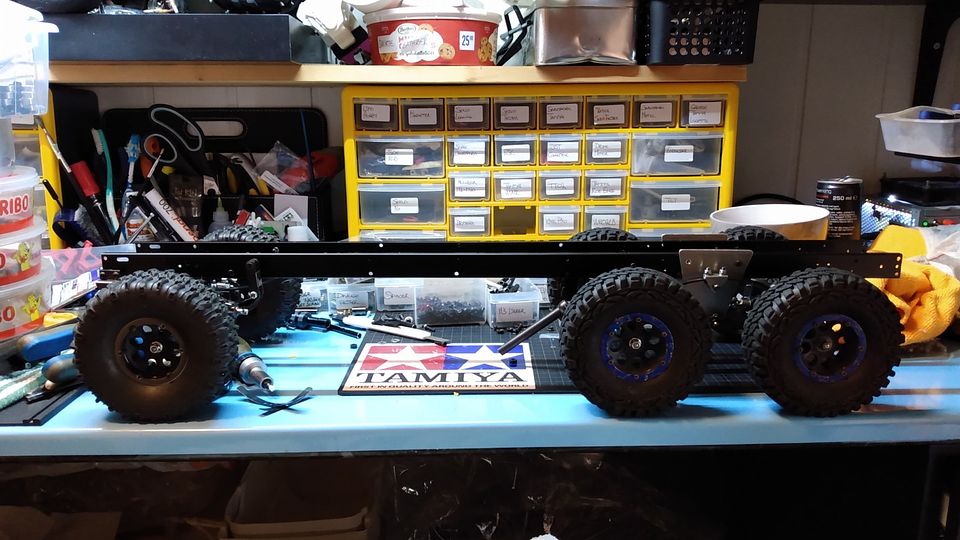
Here from a while ago.


And from today


As it has been winter here for a while and it don't seem to be gone anytime soon, I want to build a snow plow truck for the winter and rescue truck for the rest of the season.
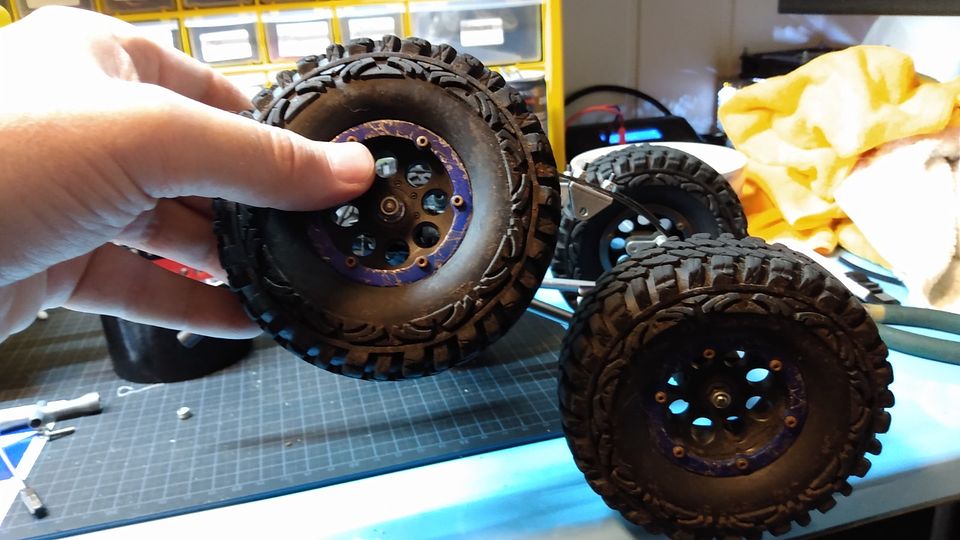
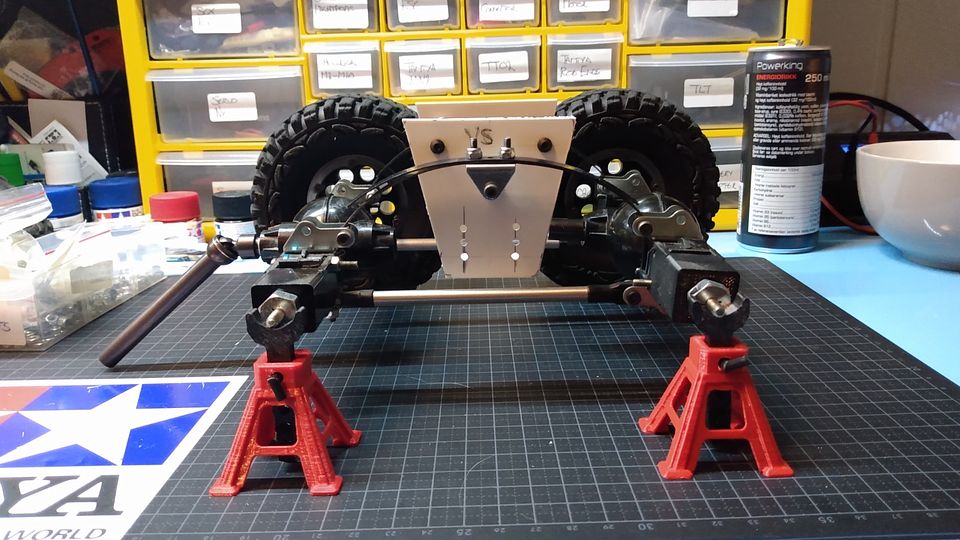
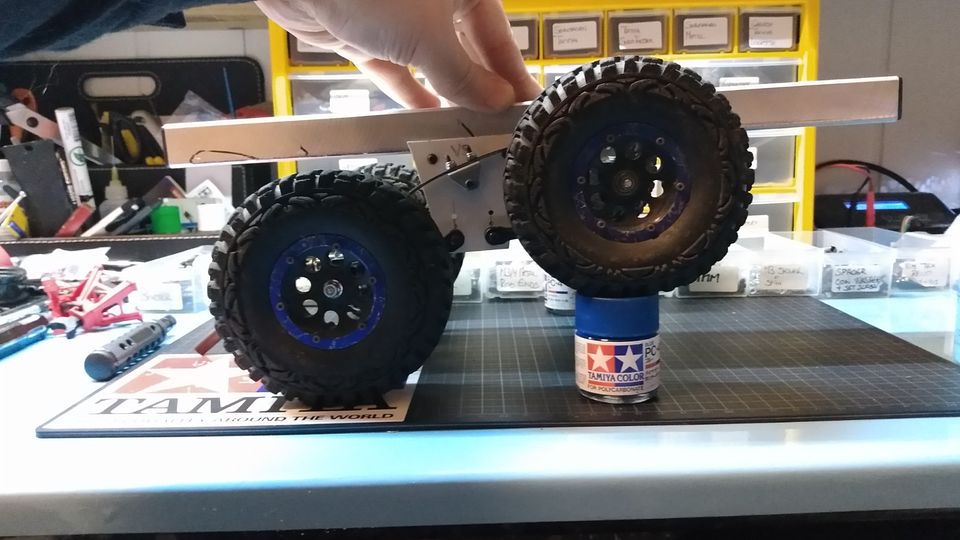
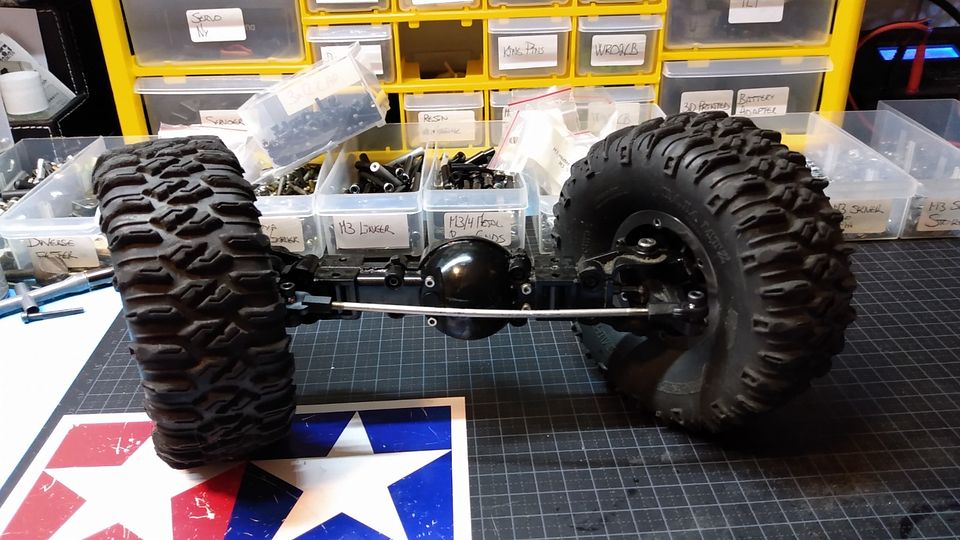
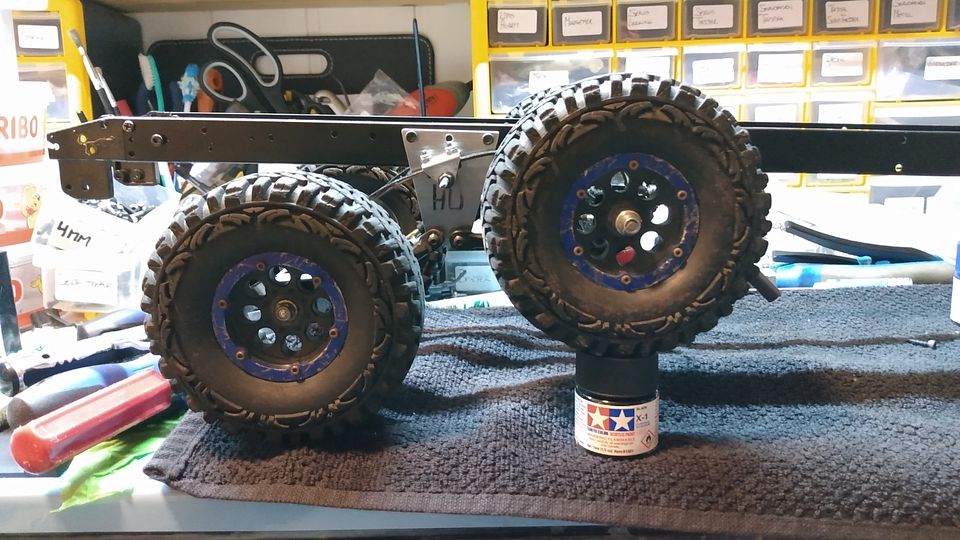
First thing I did today was to swap out the front wheels with some new Axial 1.9 beadlocks I have had for a while (same as the rear ones)
The rear wheels and tires is from my former trail rig that later became the twin turbo 4x4 Hot Rod.

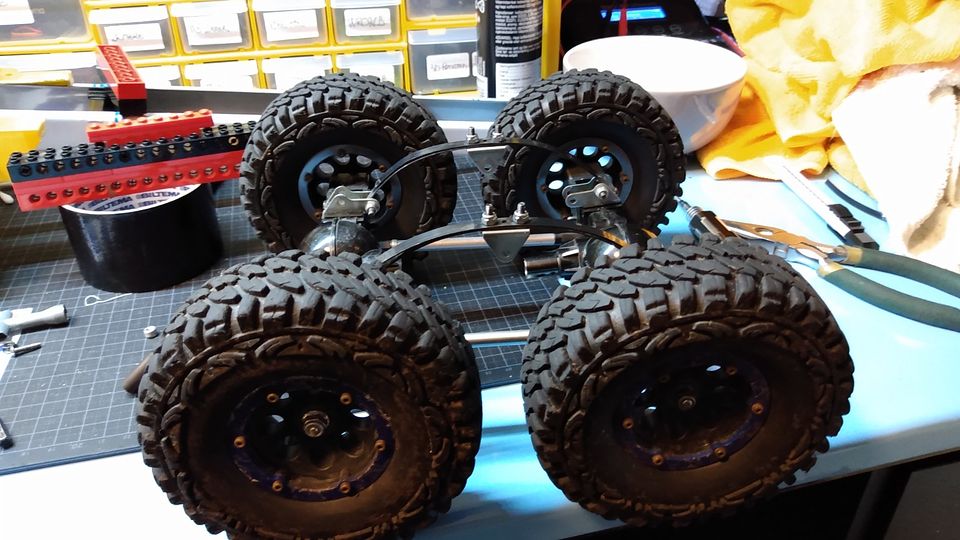
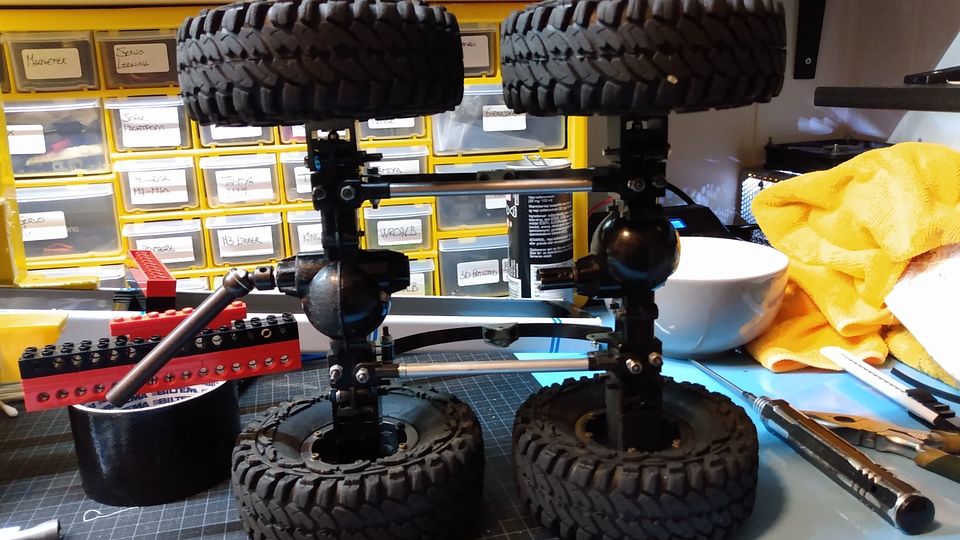
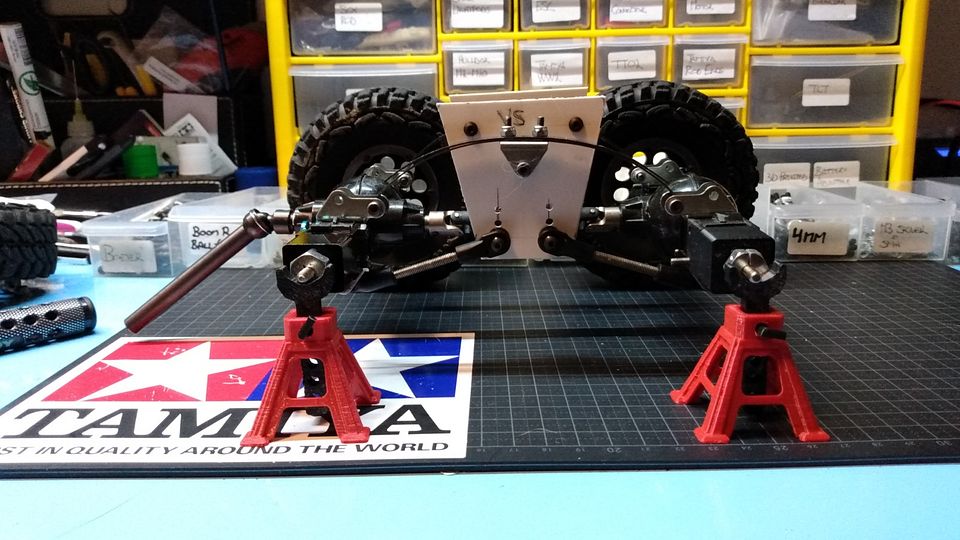
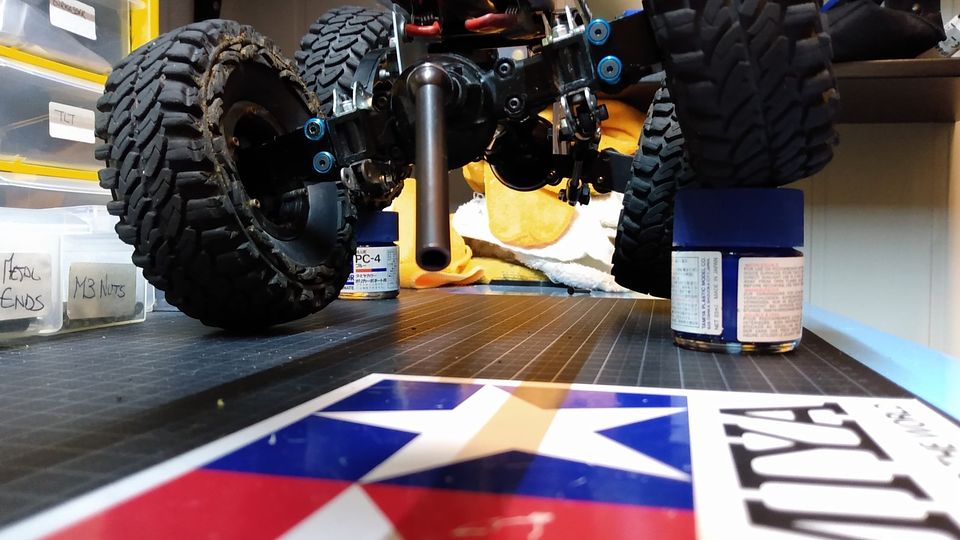
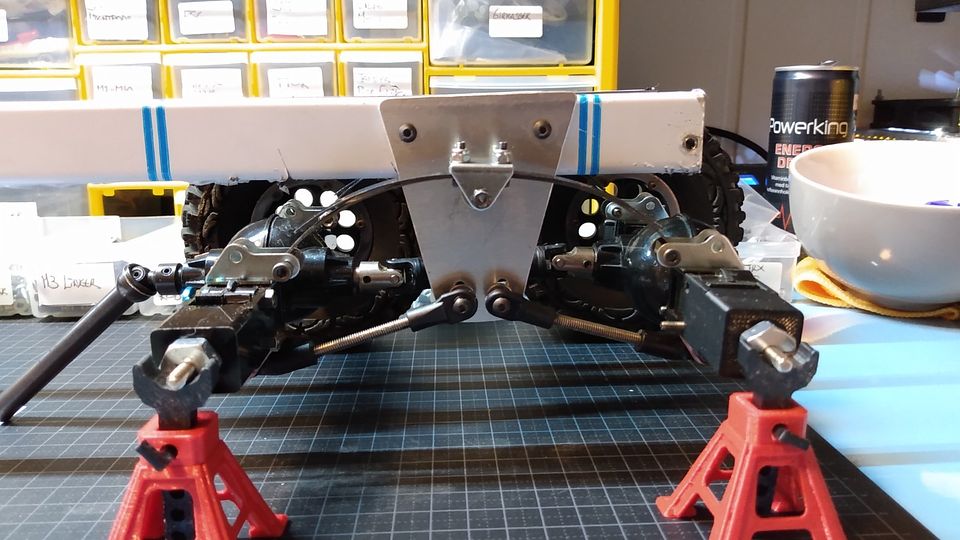
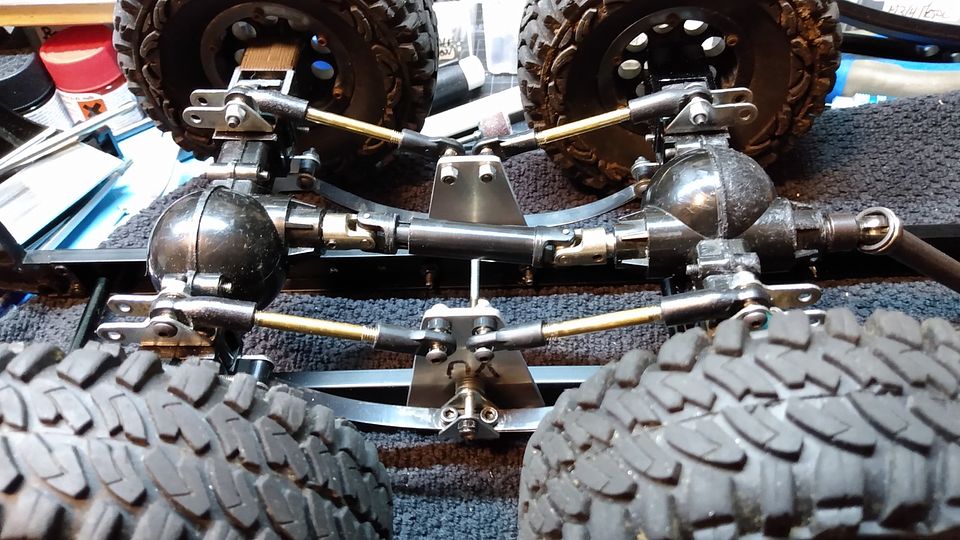
The rear suspension as I started earlier today


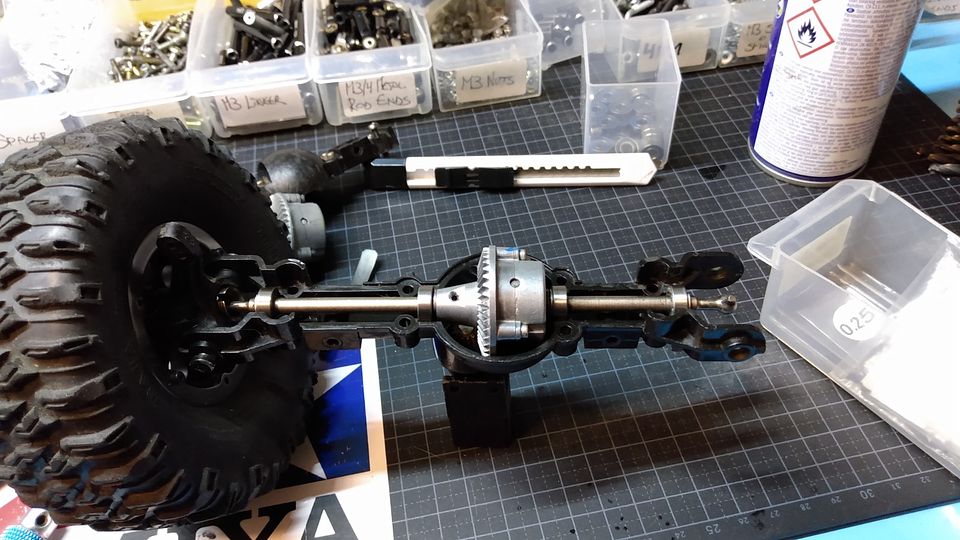
Tamiya High Lift - HL from now on, axles are dead easy to convert to power trough for 6x6 and 8x8 applications etc, just trim off the seam that holds the rear part in place on a stock axle of one of the pieces,  and then bolt them together.
Same goes for TLT axles if you can find those.
HL axles have 6mm wider track than the TLT and feature a round pumpkin vs TLT that has a more square look to it like the semi trucks.
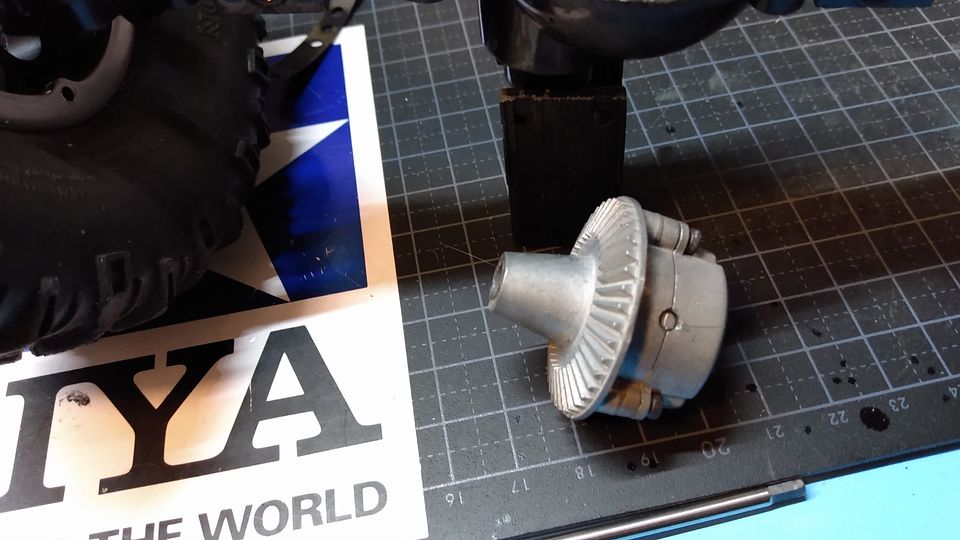
TLT and HL uses same diff, but on the HL the diff is lockable via a set screw. Both uses TA04 steering knuckles.
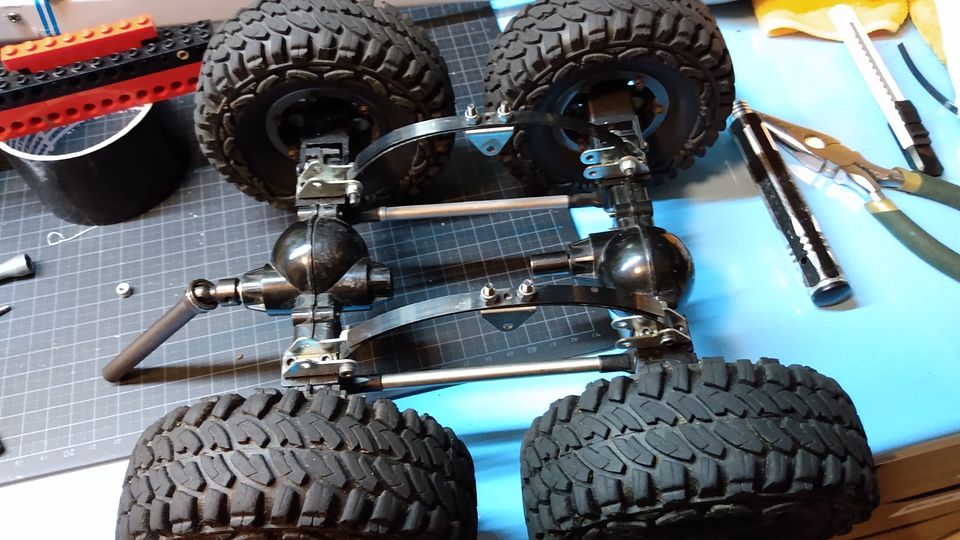
Those brackets are link mounts for the TLT, but can be used as leaf mounts etc. I have loads of those.


Should be able to flex like this when finished


The lower link is just to hold the axles together as I make the suspension work.
It will have lower links like Tamiya semi trucks.
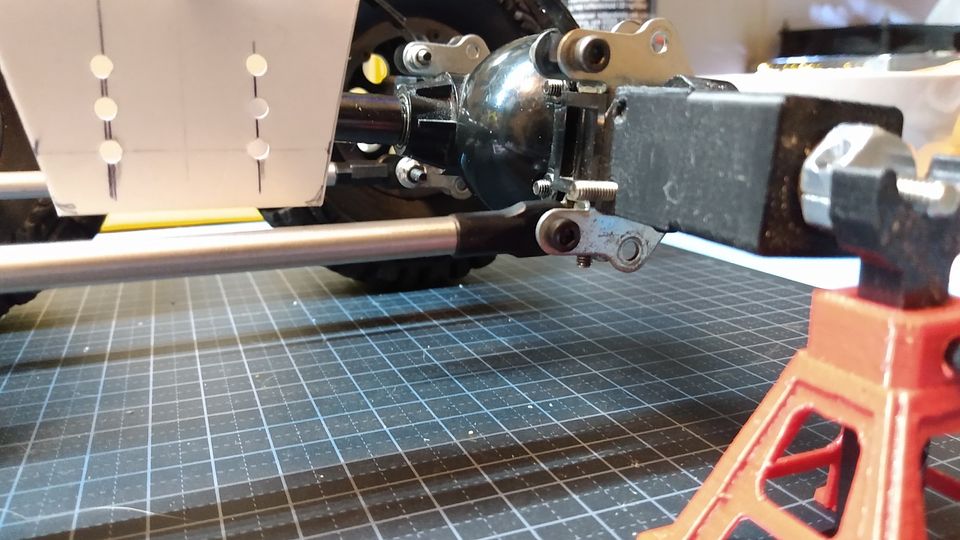
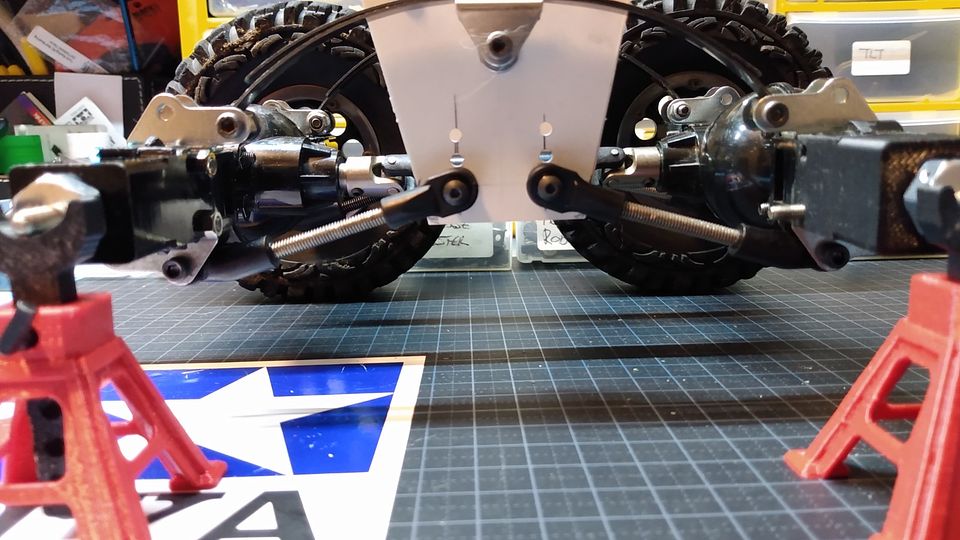
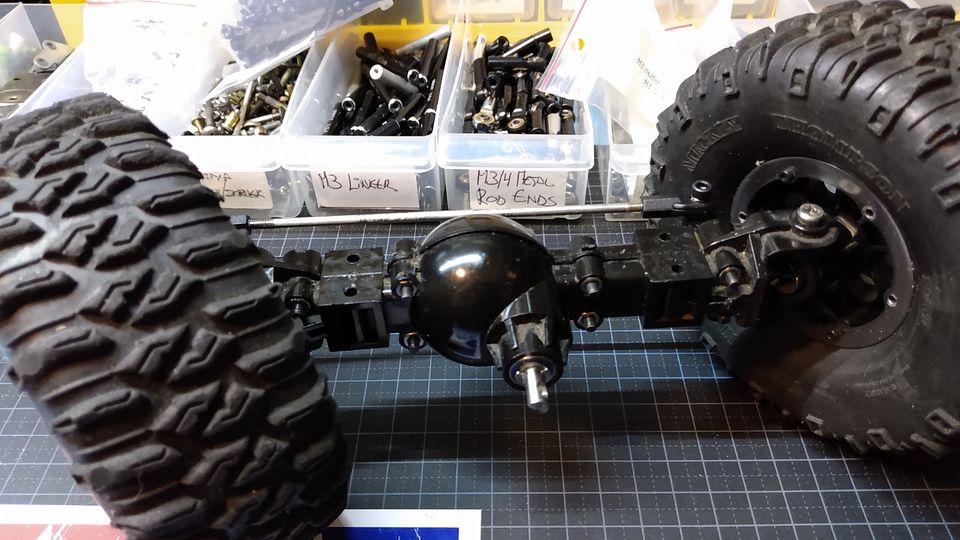
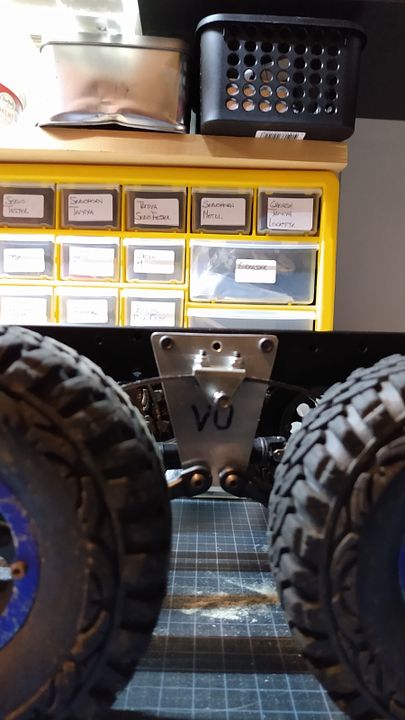
You may spot the square bits on each end of the axle. Those are straight axle adapters and they replace the steering bits to make them a bit tidyer.
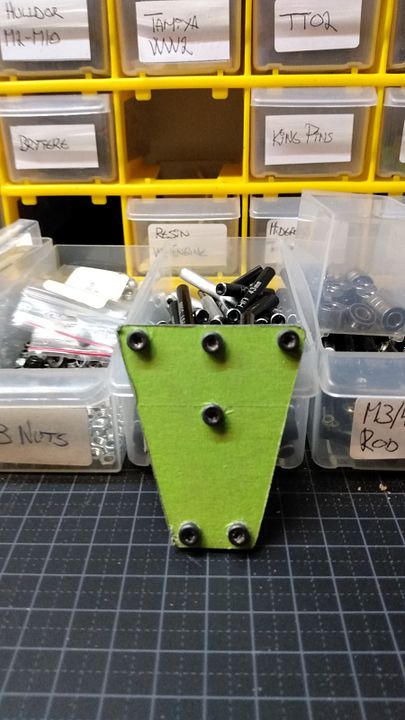
Mine is 3 printed by a friend.


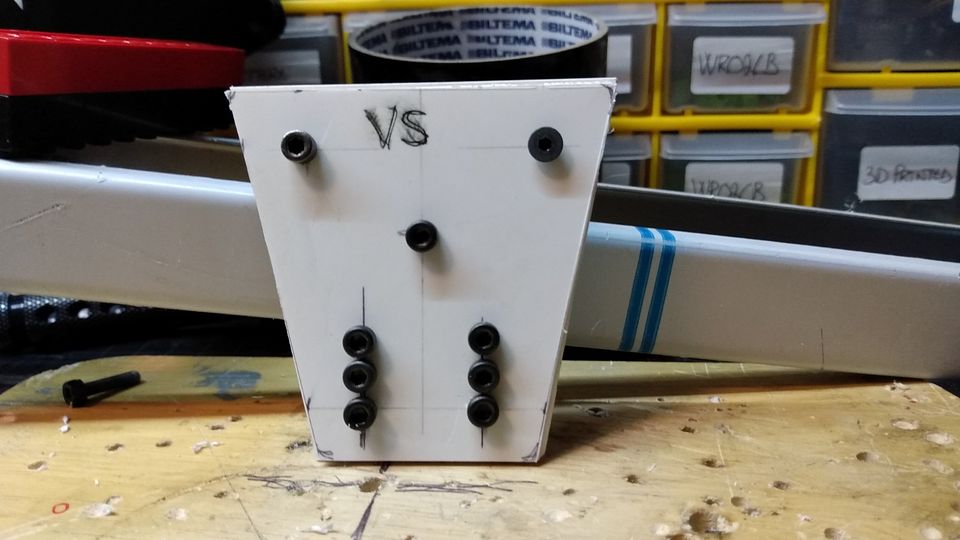
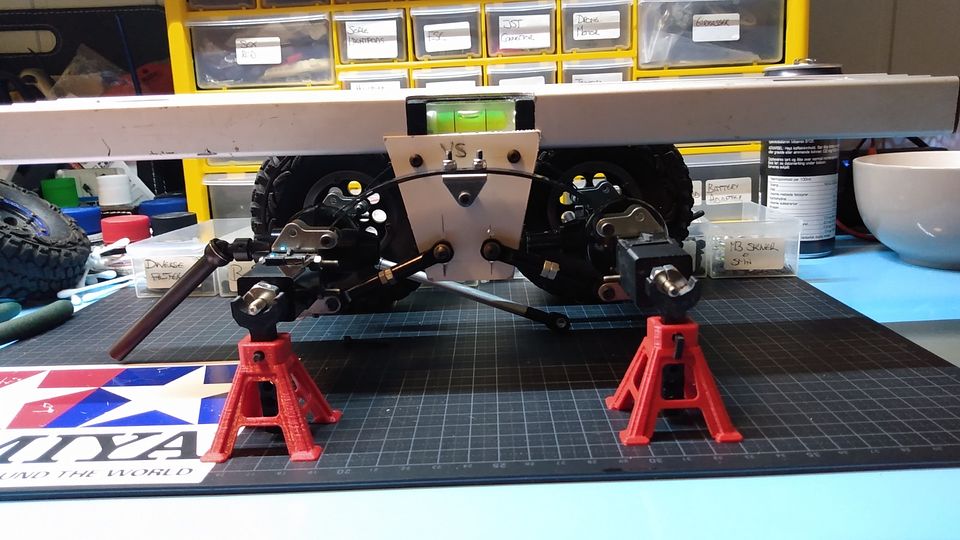
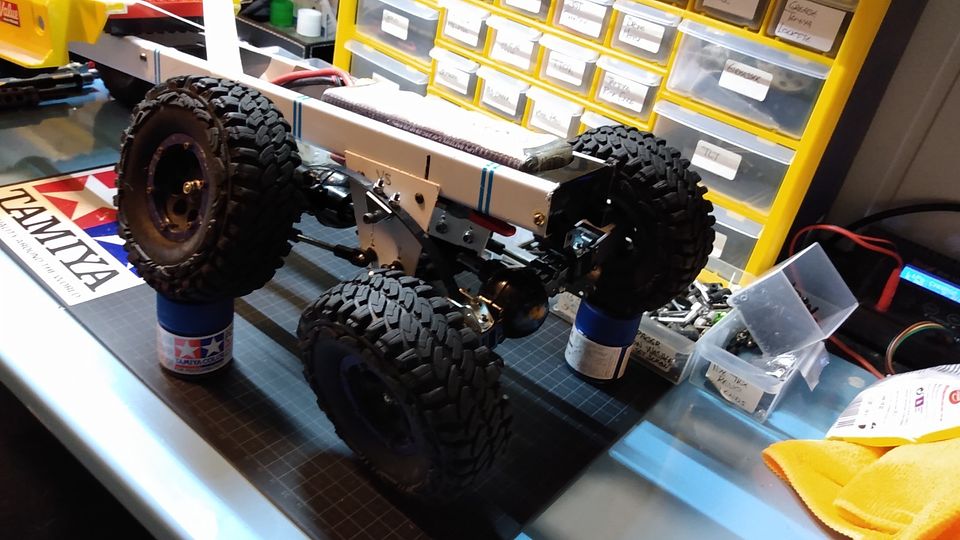
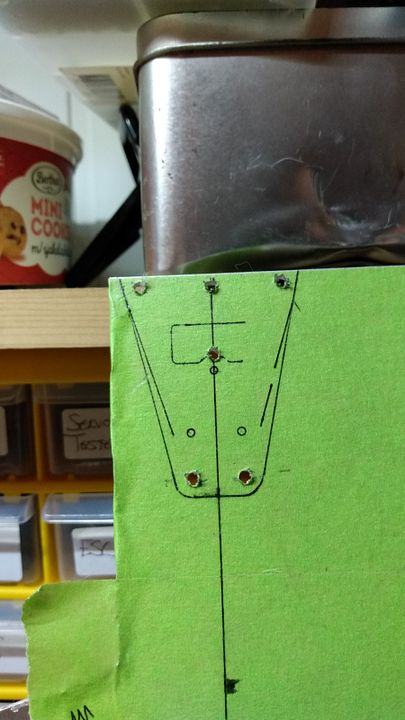
Next I made styrene templates of the suspension mounting plate based on the look of the Tamiya ones.


Then fitted them to the suspension to see if it could work.
Flpped the leaf pivot point so the axles would not swing so much when one axle compresses.
I would have used a semi truck leaf spring axle mount as those are low profile ones, but I do not have any of those.


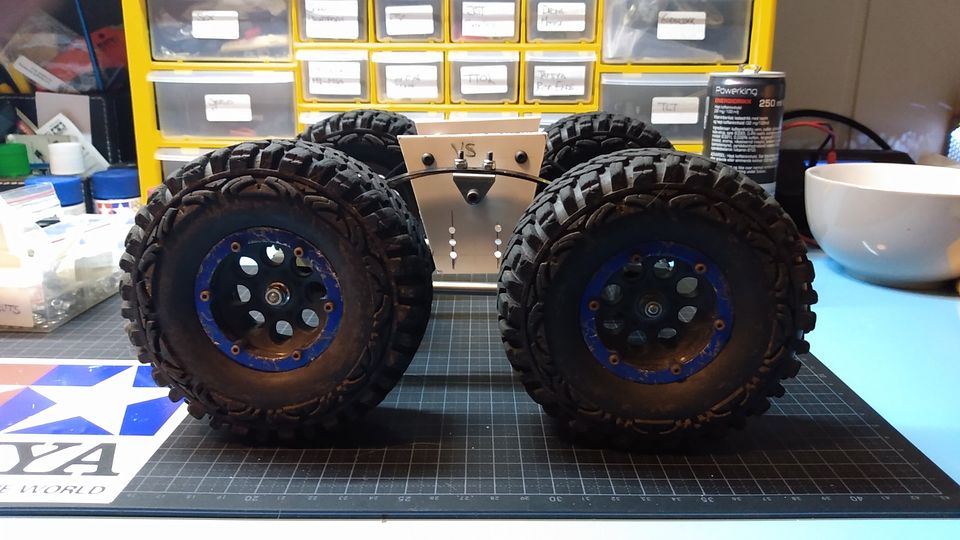
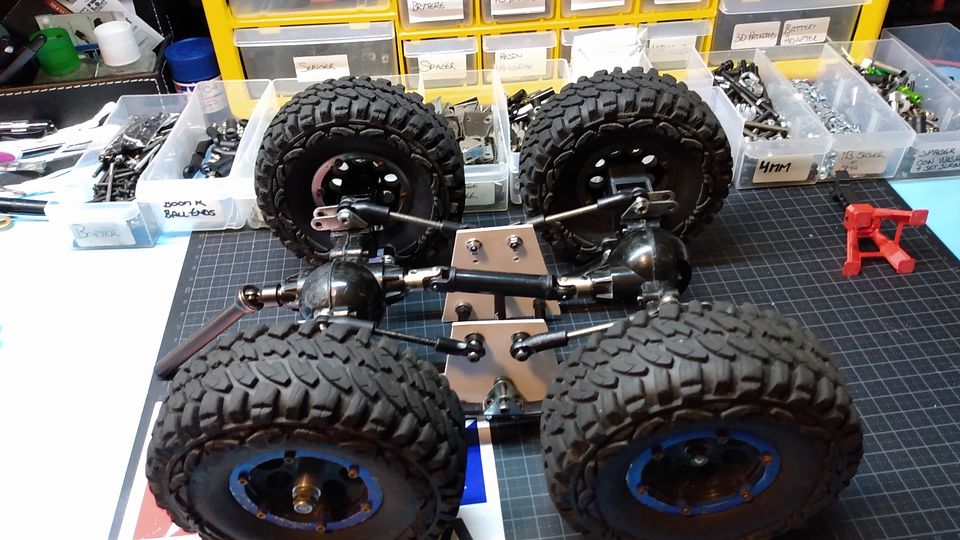
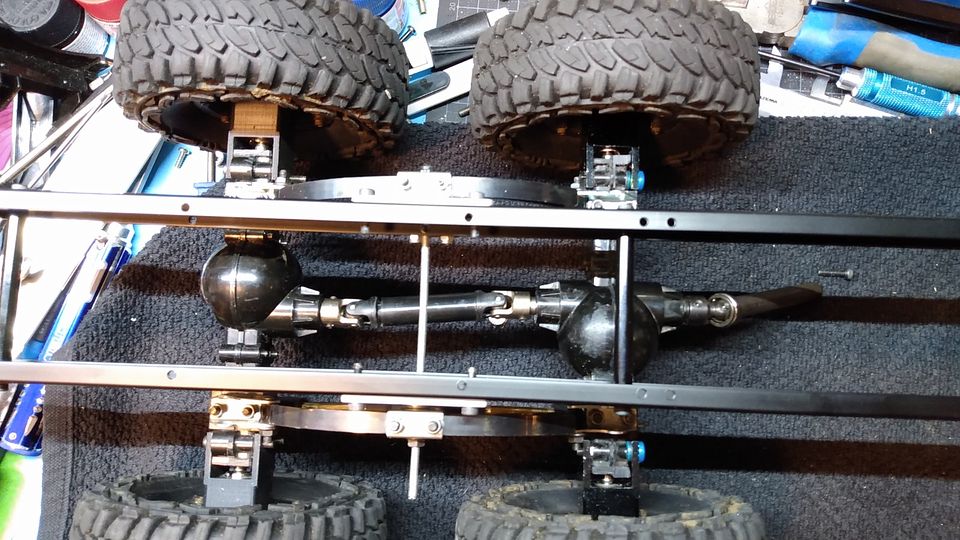
A better look with the wheels off.
I decided to fit a link mount like the other side and fitted the same type to the underside of the axle for the links to be mounted to.


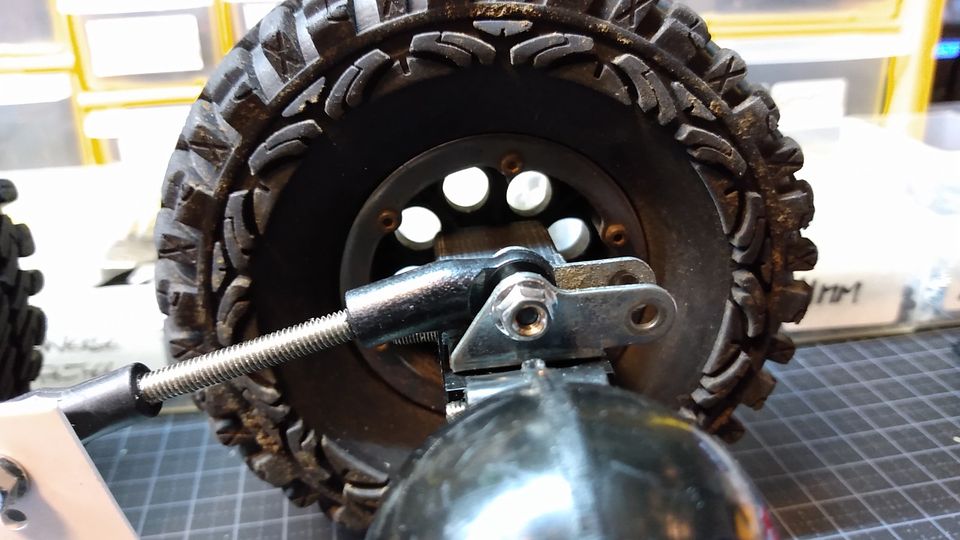
Here a better view of the link mounts and the axle straight adapter.
It still uses the orginal drivecup and wheel axle as stock axle, but within the adapter.
They are easy to fit after the steering knuckle ears are removed along with the steering stop flange at the end of the axle housing.


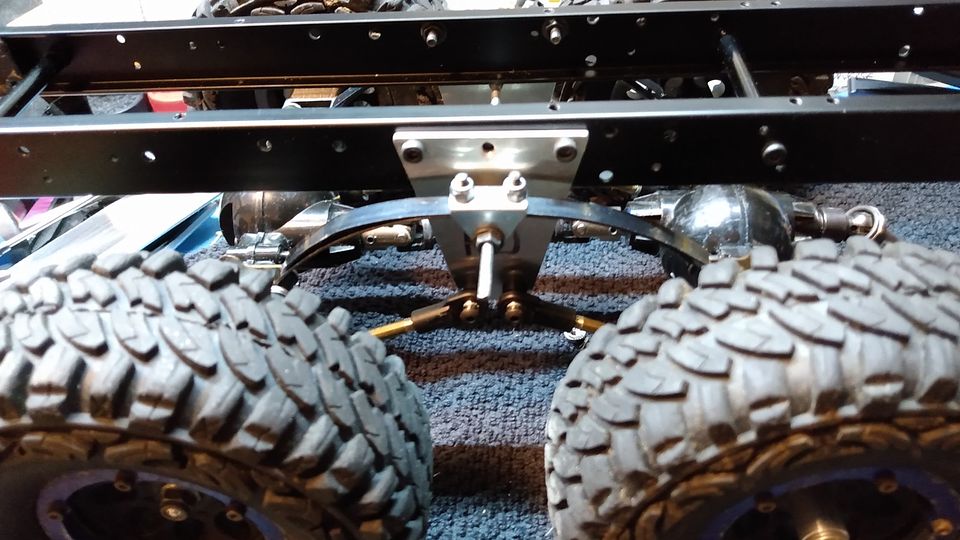
Made a start of the lower links. They will change till I find the perfect setup for my needs.
Rod ends are metal ones from RC4WD and are not precise enough for me on normal crawler stuff, but on this it works fine.


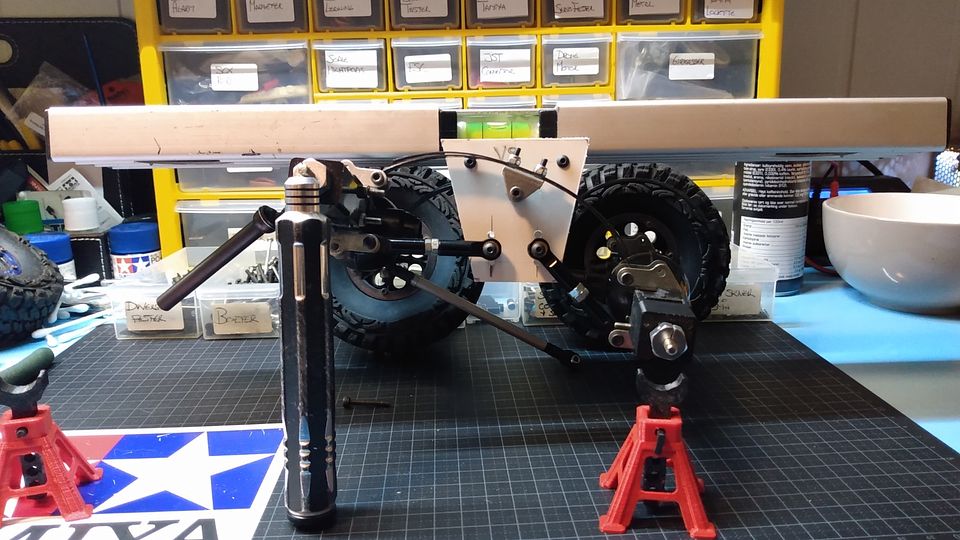
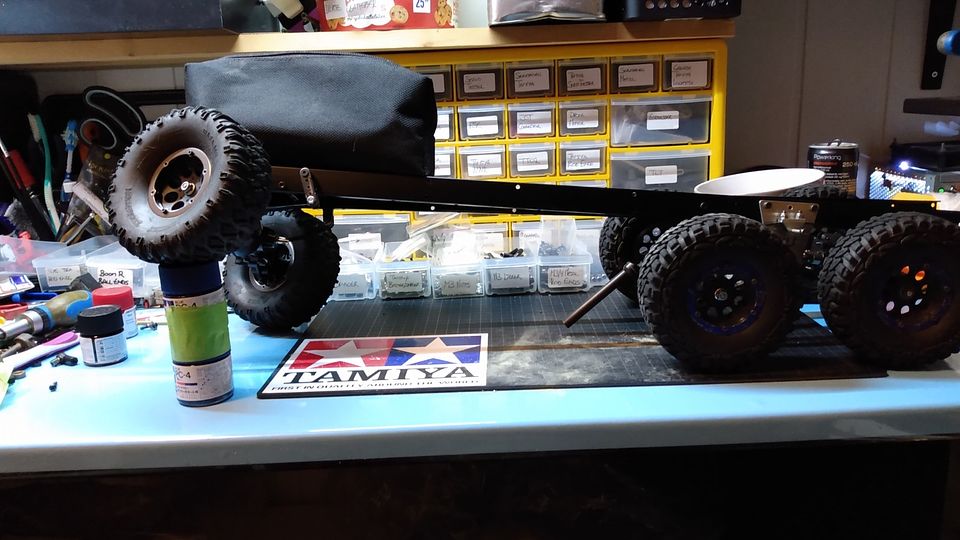
Imagne my leveler is my chassis and this is the max flex between those two axles.
They are over 6cm in difference from the ground to the wheel axle.
With links fitted to the other side, this might be even more,
I can fit some sort of restrictor on the chassis for the axles if I want too.


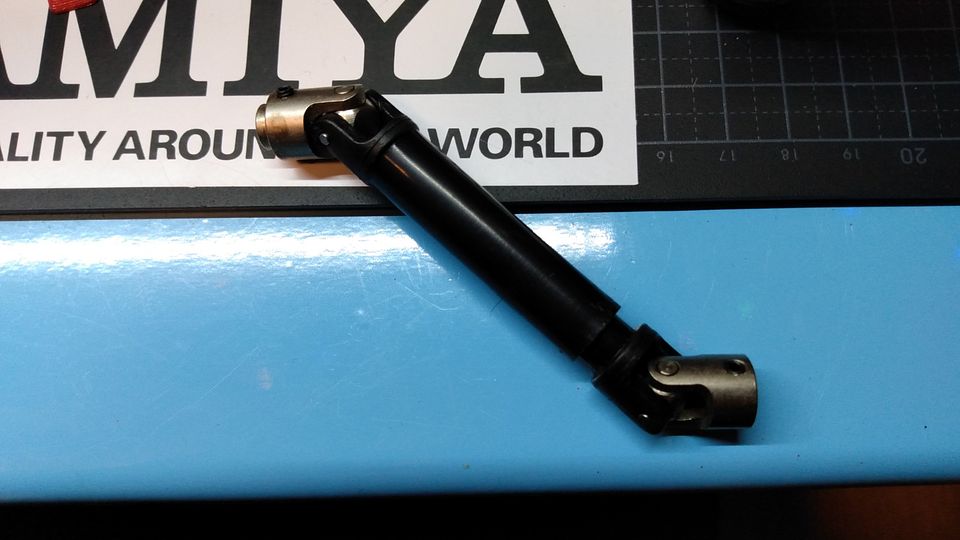
Between axles I will use these Traxxas driveshafts. I have plenty of these in stock. Used to use these all the time on my custom builds.
This is max angle of the joints, can do a bit better when modified.


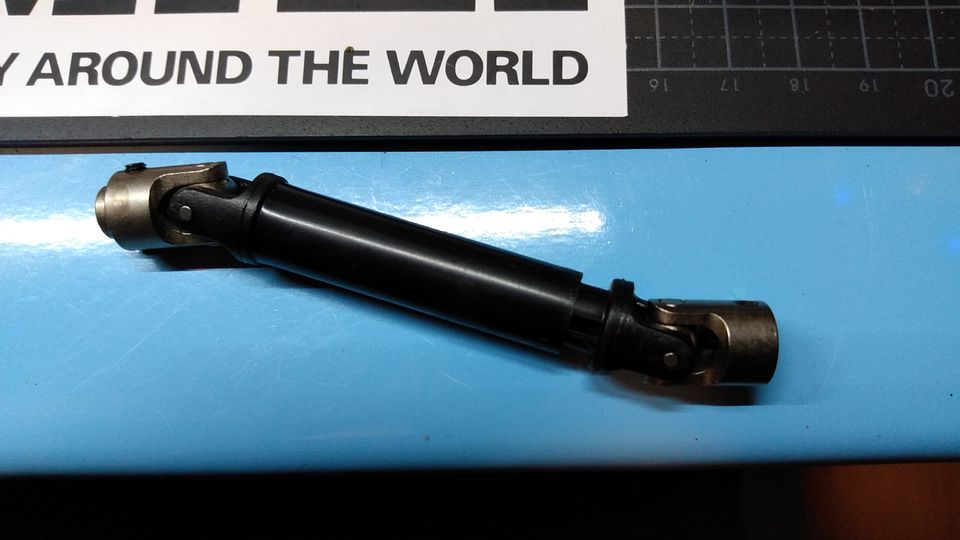
And this is about the same angle as the axles at max flex.
So these will do fine.
As they are plastic they are easy to shorten. Need 1cm shorter? Cut 5mm off each end 


6 hours was enough today.
Takes a while when I need to go through all my boxes as my bolt length selection is coming down rapidly.
Out of 3x8, 3x10 and 3x25 among other sizes.

Please Log in to join the conversation.

Last edit: by caprinut.

Richard's 6x6 build from left over parts. 2 years 3 months ago #70160

Another awesome built arrives. Very nice Richard.
The following user(s) Liked this: jord001

Please Log in to join the conversation.

Richard's 6x6 build from left over parts. 2 years 3 months ago #70161

Great job!! 
The following user(s) Liked this: jord001

Please Log in to join the conversation.

Richard's 6x6 build from left over parts. 2 years 3 months ago #70162

Wow…really nice build! Looks very intresting. Keep the pics coming 
Proud owner of the Bruiser Family
The following user(s) Liked this: stingray-63, 1972 LeMansGT Jim, jord001

Please Log in to join the conversation.

Richard's 6x6 build from left over parts. 2 years 3 months ago #70208

Thanks guys 


Today I made new lower links and flipped the link mounts.
Reason is I wanted to have as long links as possible which makes the axle move less in a arch motion when flexing.
To be able to use the holes in the plate mount I had to use some spare bent rod ends (Boom Racing) at the axle mount end.
The real plate mount will be made out of 2mm aluminium and the link holes will be closer together to make the links longer than this which is a good thing.


Close up of how I fitted the link mounts on the axle.
The bolt closest to the link is button head so the rod end can move as much as possible.


How it looks the correct way


A closer look.
I would like to have bent rod ends at the plate mount side as well, but I have non left.


Max flex with some weight added.


Mocked up on the chassis


It does flex one jar of PC paint at each corner of the axles


That's all I had energy for today..
The following user(s) Liked this: stingray-63, 1972 LeMansGT Jim, silvertriple, jord001, Ducksnuts

Please Log in to join the conversation.

Richard's 6x6 build from left over parts. 2 years 2 months ago #70310

The current frame is a bit to work with as it is 1mm stainless steel and to make it worse the two sides are not equal as they was bent up seperatly.

Because of thiis I have now ordered the frame for the Grand Hauler which happens to be 6.5cm longer than the current one and it's about the length I wanted in the first place.
The second one is all the holes are either drilled or tapped which makes work so much easy for me.
The new frame is 66.5cm long, current one is 60cm.

I could also have bought 1m long frame rails that is not tapped or drilled.
One issue I have is that I have no drillpress to make holes straight and my eyes are not what they used to be.
This reason alone makes it more appealing to order a tapped and drilled frame.

I have made new suspension plates in 2mm aluminium, but the holes is miles out.
Have to make new ones to make the suspension work as it should be.
Someone on FB gave me the measurement for the Tamiya plate so I will copy those while I'm waiting for the frame rails.
Have to coporate some lift in the plate like the styrene one I made earlier.
The following user(s) Liked this: stingray-63, Al, jord001, Ducksnuts

Please Log in to join the conversation.

Richard's 6x6 build from left over parts. 2 years 2 months ago #70333

Still plenty of snow outside, albeith hard as rock and ice in the driveways
Hopefully winter is not gone while I continue on this build.


And this was the plate I made which I'm not happy about.
Drill bits seemed to wander and the blunt tip of the atumatic puncher seems to make it worse.
I'm going to see if I can sharpen that tip.
Also bought new drill bits which also should help the matter.


Basickly I made my own version of this lift kit which is for standard Tamiya semi trucks, but with 10mm lift built into them.


Lift kit fitted earlier this week.
Stainless is pita to drill into, just sayin'


Looks like Steve Wonder has been here, so this has to be readone for sure.
Just waiting on my orginal Tamiya Grand Hauler frame rails now, which should arrive Tuesday next week.


Today was spent on opening the front axle.
It was missing the pinion and 2 wheel bearings also got replaced.
If you look closely, you will spot the setscrew on the left of the ring gear. This locks the diff on HL vehicles.


Compared to a standard diff from a TLT / Tractor Truck aka semi which lacks the ability to be locked without opening it.
This one is locked with hot glue and can be pulled apart if I want to in the future. This has seen many many trail miles.


Pinion was a heavy duty one from RC4WD. These has been discontinued for many years now. You might luck to find them online now and then.


Front axle complete again. The JIS bolts was replaced by button head allen ones as I have not enough Tamiya bolts in that length
Also made a steering rod so the front wheels dont flop around while mocking up.


As the diff assembly is a used one it was a bit notchy with the new hardned pinion gear.
I shimmed the pinion outwards by fitting 5mm shims behind the e-clip to take out the slack and make it less notchy.
Also greased up the gears with Castrol Marine grease as I always do on off-road vehicles that might see wet elements.


That was all I managed today before dinner.
 
The following user(s) Liked this: stingray-63, Al, 1972 LeMansGT Jim, silvertriple, jord001, Ducksnuts

Please Log in to join the conversation.

Richard's 6x6 build from left over parts. 2 years 2 months ago #70355

My new Grand Hauler framerails came in the post today


Compared to the old frame rails. The extra 6.5cm will be perfect.


First mock up. Right where I wanted it to be


In words of Jeremy Clarkson, YEEESSSSS!


Made new rear suspension plates.
Much more happy with these.


All bolts fit without problems


Now I could fit the rear suspension with the new plates.


Had to drill new front holes for the plate in the chassis as the big tires takes more space than the orginal semi tires.
I used the forward most hole in the chassis and drilled new holes forward from that.


It does flex two bottles of PC paint with some help.
Hope most of the flex will still be there when the frame is finished.
I have some orginal semi crossmembers, but most is hacked so I will need to make some I think..
Now the frame is held together with 59mm links.


Glad the new frame was exactly what I wanted 
The following user(s) Liked this: Jonny Retro, stingray-63, 1972 LeMansGT Jim, jord001, Ducksnuts

Please Log in to join the conversation.

Richard's 6x6 build from left over parts. 2 years 2 months ago #70357

Yeahhh Richard. Congrats.
The following user(s) Liked this: caprinut, 1972 LeMansGT Jim, jord001

Please Log in to join the conversation.

Richard's 6x6 build from left over parts. 2 years 2 months ago #70395

Today I made brass lower links (4mm) because I want to add a little weight down low.


Think I'm finished fine tuning the rear suspension for now so I will move on to the drivetrain next.


One bottle of X paint of articulation is just perfect without any load.
Axles bottoms on the frame so stop motion is solid as can be.
Driveshaft spins freely at max articulation as well, happy days 


Been planing the drivetrain in my head.
Think it will consist of GCM 1:1 transfercase and Axial transmission up front.
Not sure on gearing or motor yet.
For motor I do have a spare 55t and 80 turn motor.
15 years ago I used to use 84/14 spur/pinion and 55t motor on Nimh. That worked good, but was slow with good run time (3hours on 3000mAh is my record regarding battery consumtion)
This time I think I will have a bit more power.
I also have a spare 3300kv Castle motor, but think that will be too much for this setup.

Axles has 2.66:1 gear ratio vs a stock Axial axle had 2.92:1.
Transmision has 2.6:1 internal ratio while spur and pinion can vary between 17/56 (3.29:1) 32 pitch to 13/87 (6.69) 48DP so the gear ration can vary greatly if I need to..
First I need to see what I have laying around. Think I have seen a 84 or 87t spur somewhere....
 
The following user(s) Liked this: Manotas, stingray-63, jord001, Ducksnuts

Please Log in to join the conversation.

Moderators: caprinutstingray-63AndyAus
Time to create page: 0.254 seconds
Cookies are required to make this site work. If you continue to use this site you permit us to use cookies.