TOPIC:
Blakbird's 47331 Pajero Build 5 years 8 months ago #51438
|
Note: This build log is excerpted from my
web site
. You can check there for larger versions of every photo or further reading.
The Tamiya CC-1 (Cross Country) chassis was originally released in December of 1993. Most chassis configurations evolve over the years and are incremented with new numbers, but the CC-01 has stayed the same for 25 years and is still for sale. I count at least 12 different bodies which have been used on this chassis in that time, and that does not count another 10 color or trim variations. The hard shell Pajero body was the first and was sold as 58132. The same model was released again in 2008 as 49490 and then again with the same number in 2013. The 4th and most recent release in 2017 was 47331. I only have the most recent version, but I can't spot any obvious changes in all that time. Between all those releases and lack of changes, it is safe to say that several generations of fans have enjoyed this great little model. 
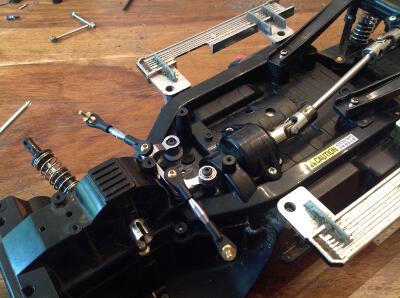
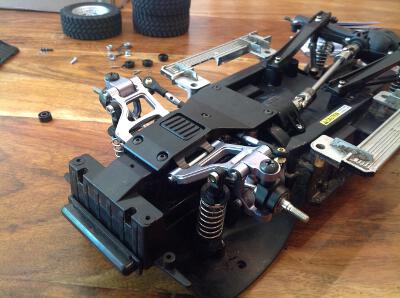
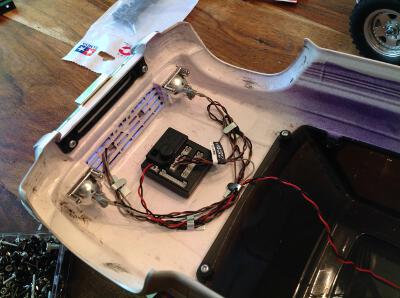
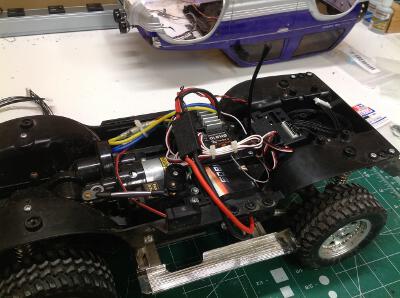
This is a 4WD shaft driven chassis with independent front suspension and a solid axle on trailing arms in the rear. It is a pretty small model so the 540 silver can motor is plenty to move it along as fast as you would reasonably want a vehicle like this to go. It is one of my favorite to drive in that I can pretty much stay at full throttle all the time without worrying about anything. With relatively little ground clearance and open differentials, it isn't excellent off road. On gravel or low cut grass it is really at home. Trying to crawl over anything it will get stuck pretty quickly. The rear differential can be locked, but only by opening it up and replacing the spider gears with a plug. The model has proven exceptionally durable without any needed repairs so far. Like all hard bodies, it looks best with some lights! I am still using the stock motor and ESC along with a cheap analog Futaba servo which seems to be just fine. Battery space is limited so a 7.2V NiMH works best. After a few months of driving I went in and added a bunch of aluminum suspension parts and some upgraded shocks. Later I added a full lighting system, roof rack and bumper, and other scale accessories. This has ended up being a pretty deluxe CC-01. I hardly took any pictures of this while I was building. I built this as a learning project with my 12 year old daughter and we were concentrating on the parts rather than on taking pictures. Therefore, the first picture is the completed chassis! You can see that the main chassis is a single piece bathtub style design which makes it very stiff and durable. The gearbox is integral to the chassis and is located just ahead of the motor. The gears are very wide for a car of this size and are made of nylon. They should last almost forever. I really like the scale wheels and tires as well. The wheels and running boards are not chrome but a dull metallic silver color. The integrated wheel wells help keep debris away from the electronics. Here is a closer view of the electronics installation. The 540 motor is mounted centrally aligned with the chassis. A tray behind the motor holds the speed controller and receiver with the steering servo beside the motor. The battery sits in a lateral slot under the electronics. Because the battery slot is specifically shaped to fit a 6-cell NiMH pack, you really can't fit in anything else unless it is the same size. NiMH is fine for this model anyway. The weakest point of the design is the steering crank. The steering crank has only a single long axis which runs from the top where the steering servo is to the bottom of the chassis where is connects to another link going out to the wheels. This single long axis is pretty loose and does not ride on a bearing. It connects to the lower cranks with a couple of flats which do not fit tightly. This makes it hard to drive the vehicle in a straight line. 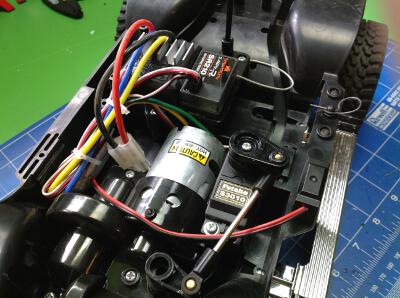
From the bottom you can see the suspension and drive line. The front suspension is independent double wishbone type. The rear uses a solid axle with 4-bar links. The shocks are oil filled plastic CVA all around. The rear shocks attach in an odd way, connecting to the lower suspension links behind the axle instead of to the axle housing itself. The rear drive shaft is a very nice sliding steel unit with universal joints. There is no front drive shaft because the gearbox is integral to the front chassis. Front and rear differentials are unsealed gear type. 
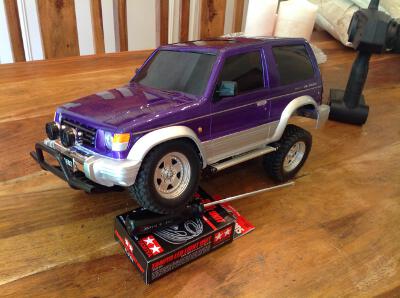
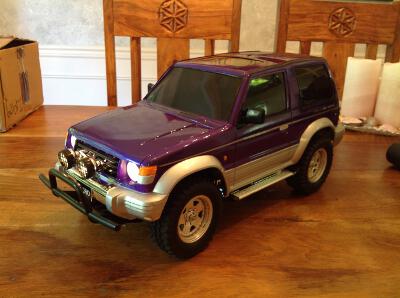
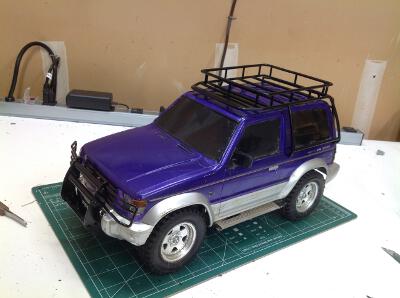
Here is the completed model. The hard shell body has been painted with a Model Master metallic purple (my daughter's choice) and silver along the bottom. I was pretty happy with how the masking came out this time. Nice sharp line. The front light buckets came with the kit and so did the spare tire cover on the rear. The body does not use traditional body posts to mount. There are two body posts in the back but they point aft. You slip the rear of the body over these rear posts, then deform the front bumper forward until it pops over a feature on the chassis, locking the body in place. Makes for a nice smooth outer shell. 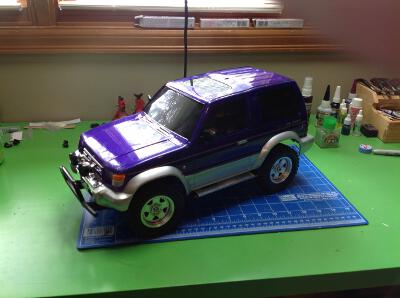
The following user(s) Liked this: stingray-63
|
|
|
Please Log in to join the conversation.
Last edit: by blakbird.
|

Blakbird's 47331 Pajero Build 5 years 8 months ago #51440
|
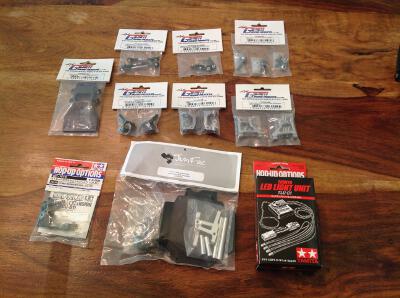
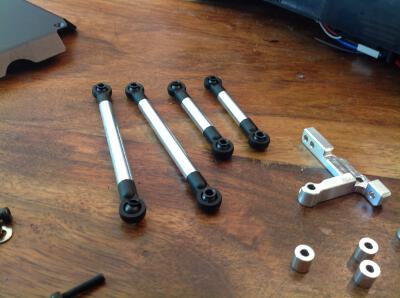
The Pajero is a pretty good model and doesn't really require much in the way of upgrades. Most of what you'll see on this page is just because I thought it was cool. I'll point out the places that the upgrades really made the model better. Below you can see the pile of parts from Tamiya, Jun-Fac, and GPM. During the initial build I changed all the plastic bushings for sealed ball bearings.
One real problem with the CC-01 chassis is the steering system. The long vertical crank axle is very sloppy and this makes directional stability really bad. GPM makes this aluminum upgrade which also puts bearings on the vertical axle. The first picture shows the stock versus the aluminum system. Sadly, the new parts are just as sloppy as the old when first installed. I discovered that this is due to a hardware problem. The flat head screw that attaches the lower crank to the vertical shaft is too long. It bottoms out in the threads which prevents the crank from gripping the bearing tightly and causes wobble. Once you replace this with a shorter screw it works great. No more steering problems. I did lose a couple of screws during the first couple of battery packs due to not using enough thread lock. You need plenty on these bouncing, moving parts. 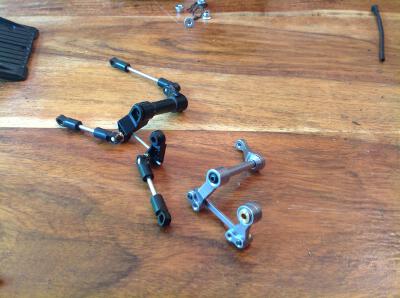
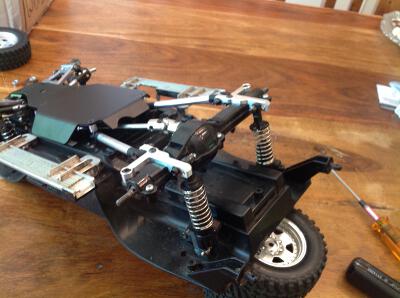
I replaced the entire front suspension with GPM aluminum parts including the skid plate. I didn't want to go with any fancy anodized colors here, so I just used black and silver. There is certainly nothing wrong with the stock suspension. The factory plastic parts will never break under normal use because this truck just isn't that fast. The aluminum sure does look cool though. I suppose it also lowers the CG a bit. The above pictures compare old and new. Pretty much everything you see except the king pins and bearings is new. 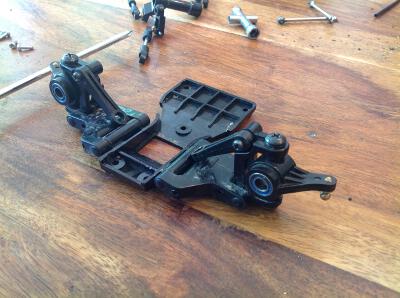
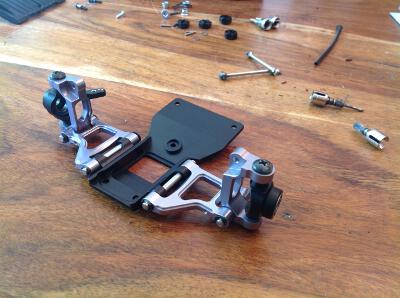
These photos compare the stock and new front suspension as installed. Geometry is the same but the new one looks really nice. I did not replace the shocks. The plastic CVA shocks are really quite good and aluminum upgrades cost too much to be logical here. (Not that logic applies....) Maybe some day. 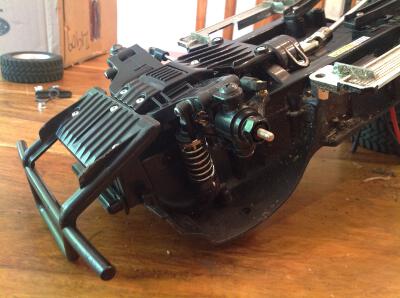
|
|
|
Please Log in to join the conversation. |
Blakbird's 47331 Pajero Build 5 years 8 months ago #51441
|
Another.
 Very nice to learn your daughter. And it is a complexe built for youngs. |
|
Please Log in to join the conversation. |

Blakbird's 47331 Pajero Build 5 years 8 months ago #51442
|
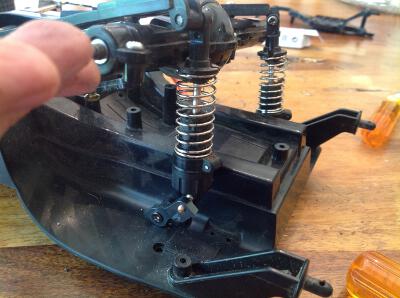
Now this upgrade really does make a big difference. It is called the Tamiya "stroke extension kit". What it does is attach the upper end of the rear shocks to a swing arm instead of directly to the chassis tub. This results in much more articulation than stock as you can see in the right hand image. This also makes the off road performance much better because the wheels don't come off the ground so easily. I suppose it also makes the model look less stock, but only at extreme articulation angles. Under normal driving it looks the same as always and the ride height is unchanged. One of the best things about this model is the scale appearance, so I'm glad it is not affected.
This might look like just a pile of loose hardware, but it is actually a Jun-Fac 4-link conversion kit for the rear suspension. Note the black aluminum skid plate sitting there as well. The right hand photo shows the suspension rods assembled and ready to install. 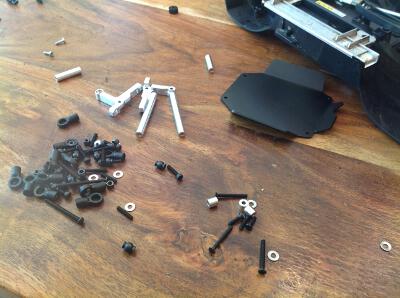
These pictures compare the stock and modified rear suspension. Converting to aluminum links doesn't really change much since the original was already a 4-link type. The overall movement is about the same. The addition of the center skid plate is really nice for protecting the drive shaft though. 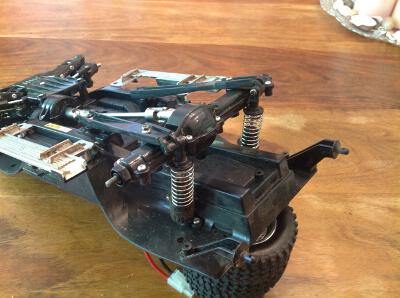
Here's the full chassis before and after. From above, you can hardly tell anything was changed. You can see the steering crank arm on top and a few hints of aluminum on the rear suspension. It might just be my imagination, but the extra weight seems to make it feel more planted when driving. 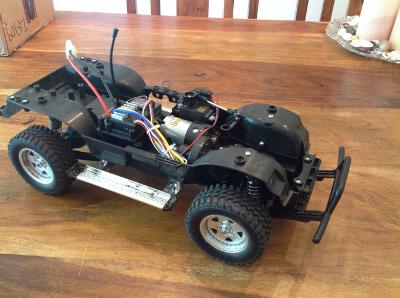

|
|
|
Please Log in to join the conversation. |
Blakbird's 47331 Pajero Build 5 years 8 months ago #51443
|
Last but not least are some LEDs. Scale vehicles, especially hard bodies, really benefit from lighting. I added a Tamiya TLU-01 lighting system along with a few LED headlights and tail lights.
In the front I chose to use halogen colored lights for ultimate realism. This includes the fog lights. The rear does not have any light buckets so I just drilled some holes and popped in some 5mm red LEDs. It doesn't look that great, but in twilight looks fine. I have a set of lenses for the rear lights that I need to install some day. After these pictures were taken I also drilled out the marker lights behind the front wheel wells and installed 3mm amber LEDs. 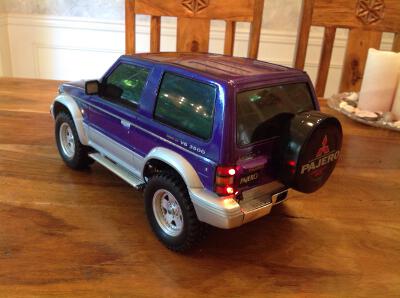
Phase 2: I revisited this model later to add some aluminum shocks. This upgrade is wildly unnecessary because the plastic CVA shocks are adequate for the level of performance this vehicle has, but I really like the shocks and the way they integrate with the already upgraded aluminum suspension. They also leak a lot less. These shocks do not come with springs and need to re-use the springs from the stock shocks. 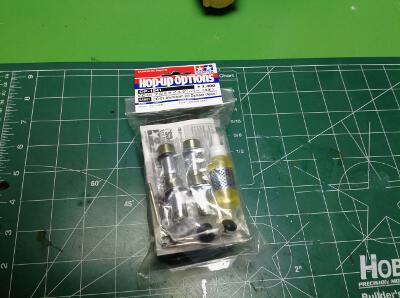
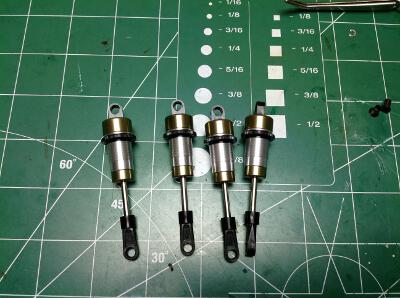
Here the new shocks are installed. I cannot claim with certainty that the handling is actually improved, but it certainly seemed so to me on the first drive. This is turning into a pretty good looking CC-01. Now I guess I better work on the body so it is as good as the chassis ....... 
|
|
|
Please Log in to join the conversation. |
Blakbird's 47331 Pajero Build 5 years 8 months ago #51447
|
Yeahhhh. Aly shocks are smoother. And I love your rear suspension. Is it a, tamiya hopup?
|
|
Please Log in to join the conversation. |
Blakbird's 47331 Pajero Build 5 years 8 months ago #51450
|
I've used a CC-01 chassis on several builds, upgrades have been a secondary consideration TBH, always full bearings, occasionally an alloy steering setup, often tyre swappery, quite often the barrel springs to cope with extra weight, even once a DIY alloy rear link upgrade... Mostly though, I look at them as a good vaue way of holding the wheels in the right positions in a reasonably scale way
") |
|
Please Log in to join the conversation. |

Blakbird's 47331 Pajero Build 5 years 8 months ago #51460
The rear suspension is a Jun-Fac 4-link conversion kit. Since this was my first CC-01 I didn't really know whether the "upgrades" would be functional or just cosmetic improvements. The aluminum steering crank kit was a big improvement that I will do again on other models. |
|
|
Please Log in to join the conversation. |
Blakbird's 47331 Pajero Build 5 years 8 months ago #51461
|
Phase 3:
For the next phase of upgrades I knew the main thing I wanted to do was fix the lighting. I had put in lighting right from the beginning, but the tail lights in particular were unacceptable because I had just shoved some LEDs through holes I drilled in the body. There were no lenses and the shape was not right. I found some 3D printed lenses but avoided installing them for months because I knew how much work it was going to be. Finally, I got to it. The image above shows the new lenses. In order to install them I had to carefully clean away the thick ABS body with a Dremel and then file it smooth to make the lenses fit. I was hard and I didn't do a great job, but it looks OK from this distance. 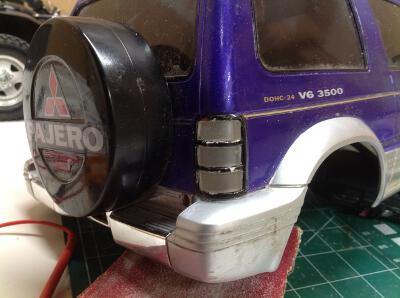
Here is the before and after. On the left you can see the original round lights unceremoniously protruding from the body. In the new version on the right it not only looks better but adds function. There are 4 LEDs on each side: 2 red for tail lights and brake lights, one orange for turn signal, and one white for reverse. These are all now functional. Brake lights get brighter when stopping, reverse lights come on when backing, and signals blink when turning. 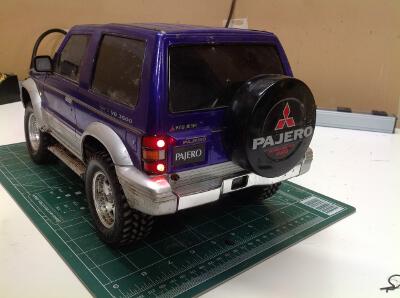
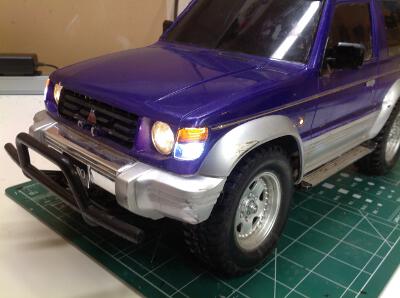
Here is same process performed on the front. I already had working headlights so those stayed the same. I added two lights to each side, a white marker light and an orange turn signal. I had to get rid of the fog lights. This is partly because I didn't have enough channels for them, and also partly because I was changing the front bumper anyway. Notice the little side marker lights behind the front fender. So far I have left these alone. They are still just sticking out of the body but don't look bad because they are so small. 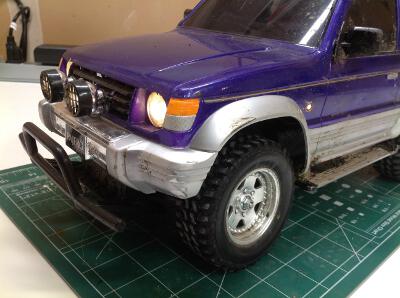
The before and after wiring. I already had a TLU-01 lighting unit stuck under the hood in the old version. On the right, I moved it to the roof to allow all the wires to reach. I hope to install an interior later which will move it down beneath that to be hidden. Looks reasonably neat though, and is not very visible with the tinted windows (which I also later plan to replace). I'm using all 8 channels of the TLU-01 for a total of 16 LEDs. 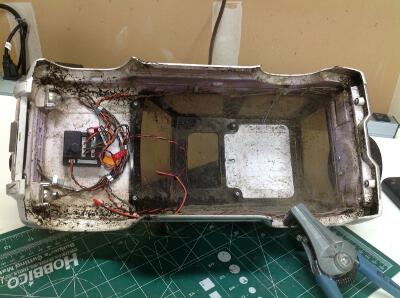
The following user(s) Liked this: stingray-63
|
|
|
Please Log in to join the conversation. |
Blakbird's 47331 Pajero Build 5 years 8 months ago #51462
|
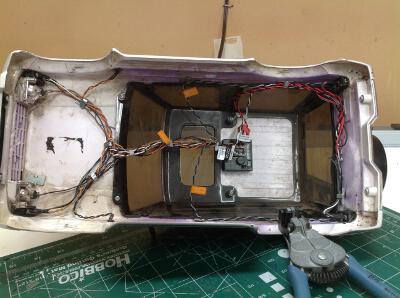
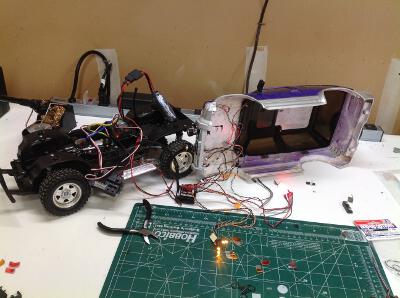
It is not enough to just install these lights in the body. Because I want them to be active, they need to be able to see throttle and steering signals. For this I installed a TLU-02 control unit in the chassis, wired directly to the battery and connected in series with the servo connections. The left hand image shows the mess when I was trying everything out, and the right hand after everything had been cleaned up. When the body is installed, the black ribbon cable on the far right needs to be plugged into it which takes care of all the connections.
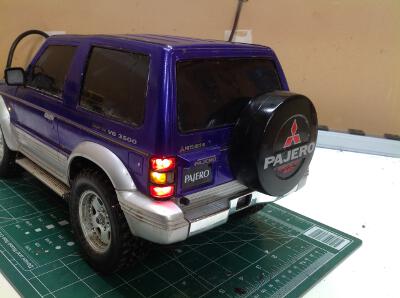
Next up is a nice steel brush guard. I removed the factory plastic bumper which was not scale at all and installed the new one shown above. It looks much better, but also partially blocks access for body installation so it means I need to loosen some screws every time. 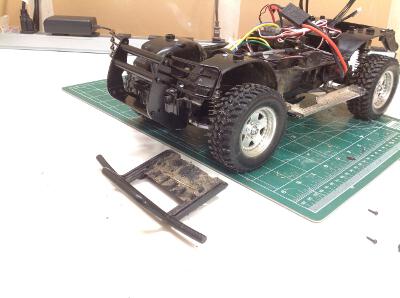
I also added a steel roof rack from the same company which has a nice ladder in back. The right hand image shows the final result. I really like the look of this Pajero now. It looks more ready for serious long trips off-road instead of just getting groceries. Next phase will be interior, clear windows, and maybe some scale accessories up top. This thing isn't done yet! 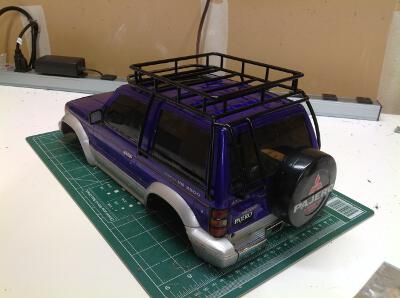
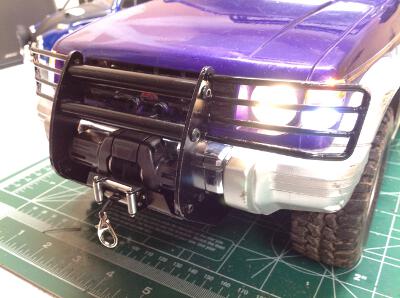
Phase 4: The next thing I wanted to do was install a tiny winch to the new steel front bumper. The pictures on the web site where I bought the bumper (n Czech Republic) showed a winch so I ordered it from them. It has an integrated chip controller and bolted right on to the bumper. I had to wire the power directly to the battery but the winch can be controlled from the transmitter. 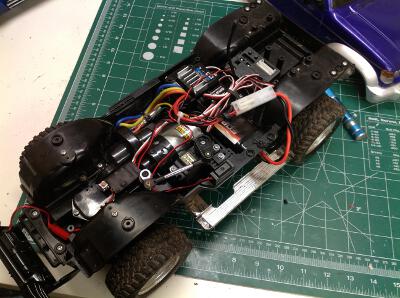
Although the steel bumper sat nicely in front of the plastic bumper on the body, this was no longer true once I added the winch. I had to trim away a big chunk of the stock plastic bumper to make room. It looks pretty ugly but is all hidden once the winch is installed. This winch doesn't have a lot of power but this is also not a very heavy vehicle. 
|
|
|
Please Log in to join the conversation. |
Time to create page: 0.263 seconds