Keyword
  • Page:
  • 1
  • 2

TOPIC:

Blakbird's 58646 Konghead Build 5 years 8 months ago #51539

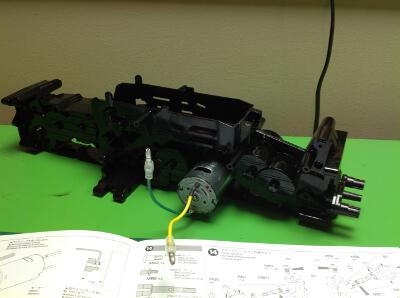
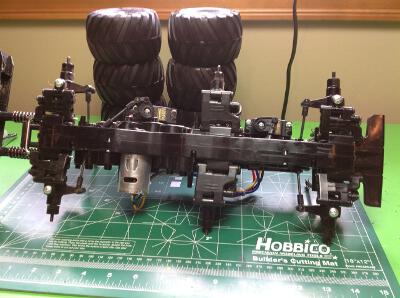
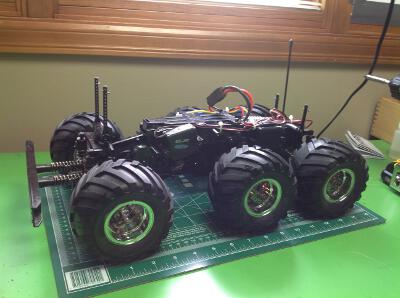
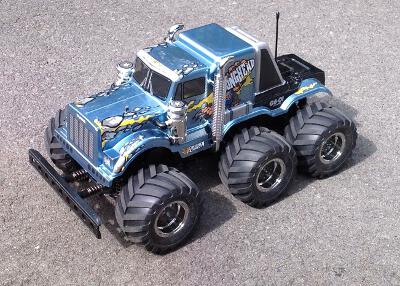
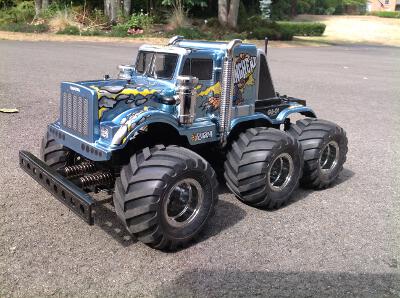
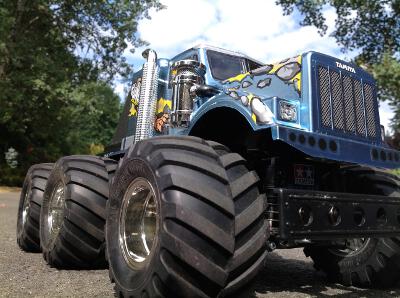
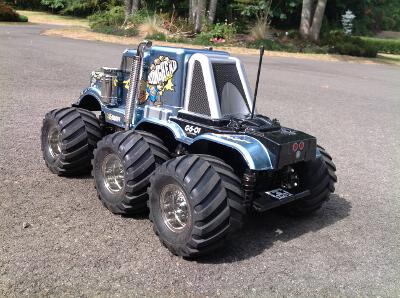
Now here's something you don't see every day. Scale trucks with multiple axles are not that uncommon in RC, but this is not exactly a scale truck. The 6x6 monster truck G6-01 chassis was new for 2017 and this is the first model to use it. It uses independent suspension on all 6 driven wheels with friction dampers on all corners. Both the front and rear axles are steered. Although the 6 wheeled chassis is new, it is based on the slightly older GF-01 chassis and simply adds an extra axle. The suspension uses the control arms from the CC-01. The frame is a continuous gearbox of spur gears which connect all three axles to the input pinion. Every axle has a differential, all open.
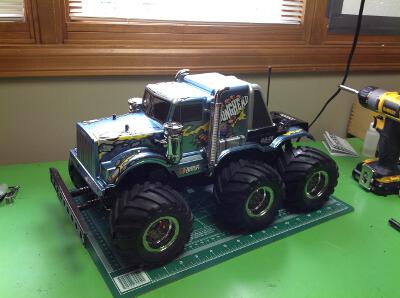
This is not a high technology vehicle. I suppose it is a bit of a gimmick, but it is successful in this regard. Even with the single brushed motor and the lack of oil filled shocks, this thing is super fun to drive. It is pretty quick and can even jump. The rear wheel steering is not strictly necessary since the turning radius is very good without it, but add the rear steering and you can do doughnuts all day long. Suspension travel is adequate for light off road use in gravel or grass, and with so many driven wheels it rarely gets stuck or high centered. The body, despite being a bit odd, is pretty good looking. The name is derivative of the 58089 Bullhead which also uses a tractor truck body on a monster truck chassis, albeit with 4 wheels. However, where the Bullhead uses the huge Clod Buster tires, this model uses much smaller tires and ends up only the size of a standard 1/10th scale model. Of course various fans have already made 6 wheeled Bullheads to look like huge Kongheads.

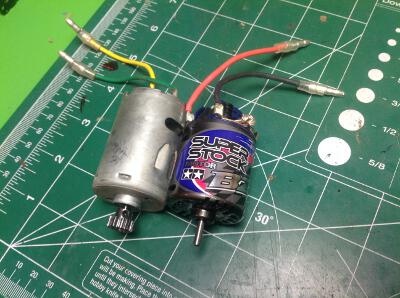
One nice thing about the newest generation of Tamiya chassis is that the battery compartment is finally square and a bit oversized so standard Li-Po batteries can be used. I used a pair of high torque analog Futaba servos for four wheel steering, and kept the stock ESC. I find it to be quite capable out of the box as long as you use it for what it is. It is designed for fun, and it is optimized for it.

The Konghead comes in a large box with a nice full color photo on the cover, but I kind of miss the old hand drawn art of the older boxes.
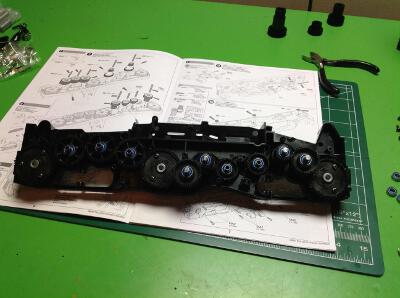
After adding a couple of trinkets to the chassis halves, assembly begins with construction of the 3 identical gear differentials. These are open, unsealed, bevel gear diffs which each use 3 spider gears. All of the internal gears are cast metal, but the outer ring gears are fiber reinforced plastic.
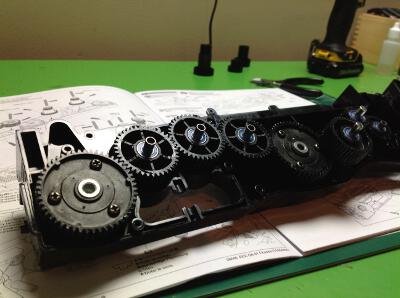
Time to build the "gearbox". In this case, the entire structural frame is the gearbox. The differentials go at the positions where the axles will be, and spur idler gears go everywhere else. One of these gears serves double duty as the spur for the motor pinion. Like I always do, I upgraded all the bushings to ball bearings, but in this case that's a big investment. There are 40+ bearings needed to support all these gears, and it probably doesn't even matter much on a model with performance like this one.
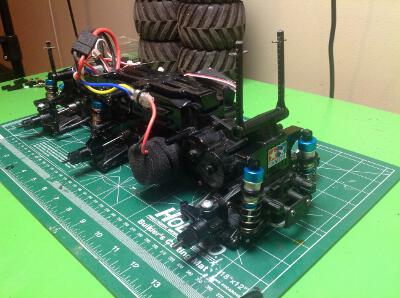
Please Log in to join the conversation.

Blakbird's 58646 Konghead Build 5 years 8 months ago #51540

Once the frame/gearbox is buttoned up, the motor can be installed which sticks unceremoniously out the side. The mesh is not adjustable, instead there are fixed holes for either 18 or 20 tooth pinions. I am using a steel 18 tooth pinion. After the motor is installed the suspension arms are built and the axles inserted. Dogbone type axles are used in all locations, and there are steering knuckles on the front and rear axles.
Next the "friction dampers" are installed. I was not impressed while building them. Instead of being filled with oil, they just use a rubber sleeve to produce friction inside the shock body. In practice, I was pleasantly surprised at how well it works. I'm sure it will generate heat and wear over time, but it actually works fine at these speeds. The front bumper is also spring mounted although it broke off immediately. The electronics come next. If you want to have four wheel steering then you need 2 separate steering servos mixed together. The servos and linkages are mounted at an odd angle and connected to a central bellcrank mounted in a pocket in the frame. Looks weird but it works. There is a large protected battery compartment with a cover and a latch.
The ESC and power switch are mounted in the rear. Both the receiver and the ESC sit on top of the gearbox reasonably protected from the elements, but the motor and servos are hanging right out there by the wheels. From the bottom you can see both servo positions and all the suspension arms.
There are 6 nice metal plated plastic wheels with chevron pattern directional tires (make sure to put them on the right way). I didn't bother gluing them and have had no issues. The chassis build was pretty simple, so decorating and assembling the body ended up taking the majority of the build time. I actually think it is a surprisingly good looking model for how goofy it is.

Please Log in to join the conversation.

Blakbird's 58646 Konghead Build 5 years 8 months ago #51541

The Konghead certainly doesn't need any upgrades given what it is made for, and that's what I told myself for a couple of months. Then my nature got the better of me and I bought some stuff anyway. I started by replacing the cheap plastic friction dampers with some aluminum oil shocks. These are actually made for the 4 wheeled version of the GF chassis so I needed to get two packs of four which left me with two extra. They are really nice and I'm sure I'll find a use for them somewhere.
Next up is the motor. The kit came with the standard 27 turn silver can motor. I got a 23 turn Tamiya Super Stock BZ with replaceable brushes. Besides the difference in turns, this is just a much nicer motor and makes the vehicle considerably faster while not being ridiculous.
These images show the chassis before and after the upgrades. The shocks are pretty obvious. The new motor is made for off-road use and comes with a small foam end bell cover to protect the brushes and contacts.
I really enjoyed the new speed and damping, but the model remained pretty bouncy due to the large tires with no inner support. I found some foams that were about the right size and they made a huge difference. This thing is much more stable over the bumps now. I highly recommend this change.

Please Log in to join the conversation.

Blakbird's 58646 Konghead Build 5 years 8 months ago #51542

I didn't want to paint it exactly like the box, so I used a blue anodized aluminum color. This is a difficult body to mask, and I concentrated all my efforts on the fuel tanks and rear slope and totally forgot to mask the grille so I ended up with a blue grille. Not terrible, but not right either. The body has some nice hard plastic metal plated accents which really make it looks nice, and there are extensive stickers as well. The spring loaded front bumper broke off the very first time I hit something. The screws which hold it on snapped and cannot be extracted, so it no longer has a bumper.
Attachments:

Please Log in to join the conversation.

Blakbird's 58646 Konghead Build 5 years 8 months ago #51544

You could go for the WR02 front Bumper Tamiya - 0005688 less massive

Please Log in to join the conversation.

Blakbird's 58646 Konghead Build 5 years 8 months ago #51545

You could go for the WR02 front Bumper Tamiya - 0005688 less massive


That's a possibility but because the screws are broken off there is no way to put on another bumper without replacing the F parts first. Since the original incident, I have actually started to like the way it looks with no bumper.

Please Log in to join the conversation.

Re:Blakbird's 58646 Konghead Build 5 years 8 months ago #51546

Oh you ripped off the whole front that is attached to the gearbox. Wow :O

Pictures! ;)

Please Log in to join the conversation.

Last edit: by waterbok.

Re:Blakbird's 58646 Konghead Build 5 years 8 months ago #51547

I am in Germany right now so I can't take photos until I am back home, but the image below shows a step from the manual. I broke both MC7 screws right at the step. The screws partially compress the spring so they are under a lot of strain. If you hit the bumper on one side instead of straight on, these screws bend and snap.
Attachments:

Please Log in to join the conversation.

Re:Blakbird's 58646 Konghead Build 5 years 8 months ago #51548

You are not near Frankfurt by any chance?
I thought you broke of the part where the MC7 screws go into, the bit that attaches to the gearbox.

Please Log in to join the conversation.

Last edit: by waterbok.

Re:Blakbird's 58646 Konghead Build 5 years 8 months ago #51549

You are not near Frankfurt by any chance?

Friedrichshafen this time. Last trip I was in Wiesbaden near Frankfurt.

I thought you broke of the part where the MC7 screws go into, the bit that attaches to the gearbox.

That part is still good but it has the broken threads of the screws in it and no way to get them out.

Please Log in to join the conversation.

  • Page:
  • 1
  • 2
Moderators: caprinutstingray-63AndyAus
Time to create page: 0.177 seconds
Cookies are required to make this site work. If you continue to use this site you permit us to use cookies.