Keyword
  • Page:
  • 1
  • 2

TOPIC:

Blakbird's 58552 Asterion XV-01T Build 5 years 7 months ago #51902

Note: This build log is excerpted from my web site . You can check there for larger versions of every photo or further reading.

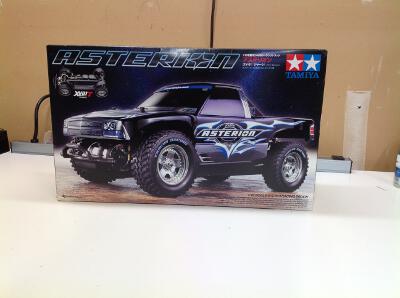
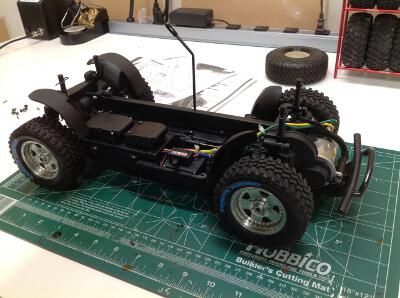
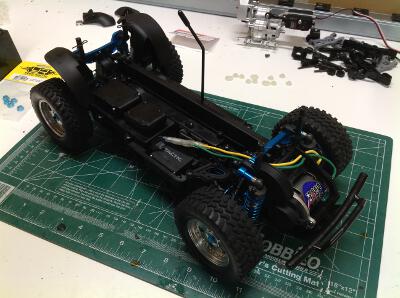
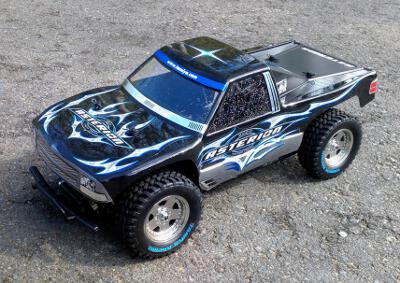
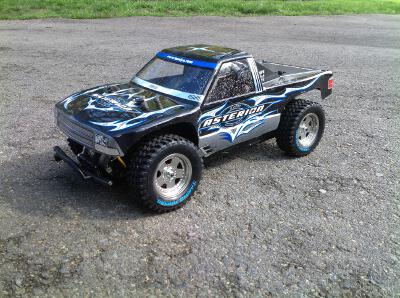
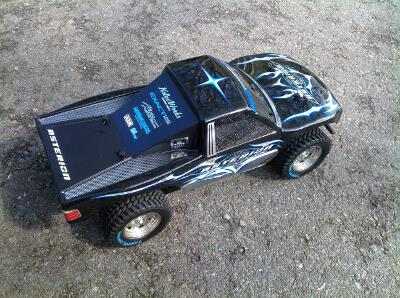
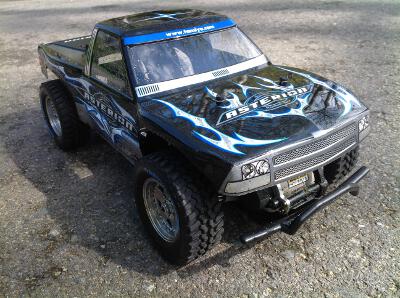
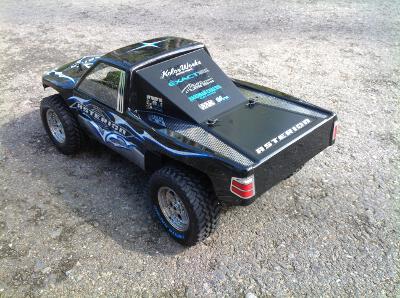
I'm trying to recall how I even found out about the Asterion and I don't know the answer. I probably saw an ad for it when reading back issues of RC Car Action. The layout of this thing immediately got me curious. A belt drive off road truck with a front mounted motor? Who ever heard of that? Only Tamiya would do such a thing. The XV-01 is just such a chassis, originally built for rally cars. It has 4 wheel double wishbone suspension with front and rear sealed gear differentials. The "T" in XV-01T presumably stand for Truck, and this is just a slightly lifted version of the original with longer shocks. Besides being totally unique in layout, I really liked the truck body and the chrome decals, so this one immediately went on my list. The problem was, this was the only XV-01T ever made and it had been out of production for a decade. Finding one new in box was no small task, but I managed to import one from Hong Kong.

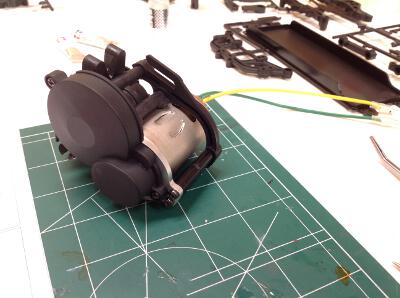
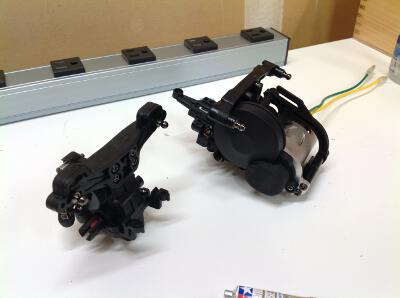
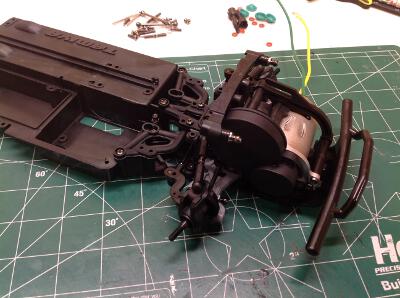
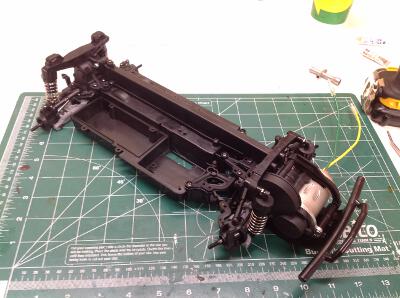
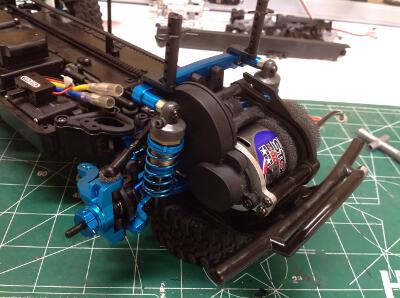
If you are thinking belt drive and front motor don't sound too good for an off road vehicle you are probably right. However, the belt and all the electronics are almost completely sealed from dust and rocks by an enclosed chassis compartment and protective wheel wells. Although the motor sits out in front of the front axle, it is well protected by an aluminum motor mount and sturdy bumper cage which is fastened at multiple locations.

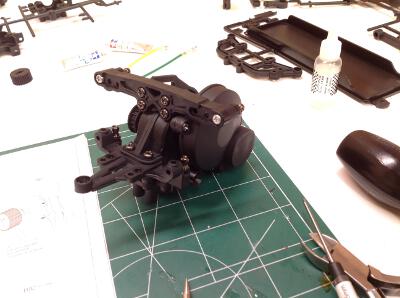
So how well does it work? Pretty darn good, actually. It is probably the fastest Tamiya vehicle I have seen on a stock silver can motor (which I upgraded anyway). It is incredibly stable in turns and so quiet you can hardly hear it. Traction is good on gravel or grass. The ground clearance isn't great and it certainly isn't a crawler, but for a dirt track I think it is excellent. I haven't tried any big jumps, but over smaller berms it flies nice and level. I imagine a nose dive off a triple would be a problem for the front motor, but I don't intend to try that.

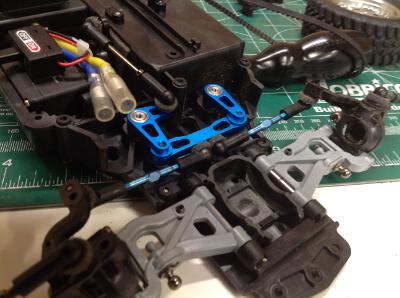
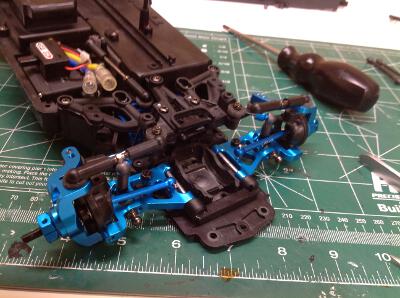
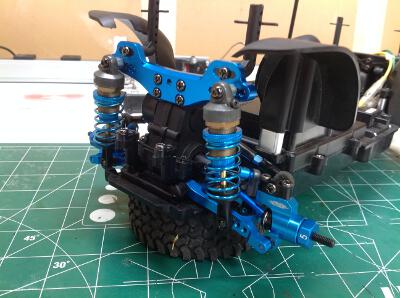
The model is so pretty that I knew from the start I wanted to deck it out with blue aluminum upgrades. The official Tamiya upgrades are hard to find so I went with a Yeah Racing kit with most of the suspension parts in it.

Here's the box. Unlike many Tamiya kits, it uses an actual photograph instead of the usual hand drawn art. I prefer the old way, but this is a pretty good looking truck regardless.
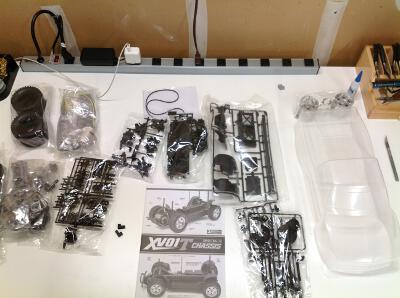
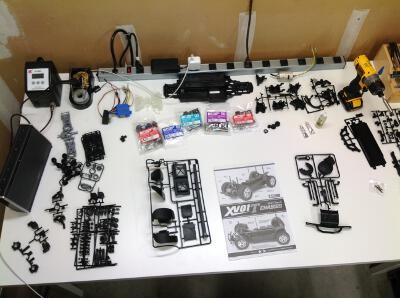
There was a lot of stuff in that little box! The first image shows everything unpacked in the way it is grouped in the box. The second image unpacks the bags of plastic parts trees and separates them. There are also five labelled hardware bags which correspond to portions of the instructions.
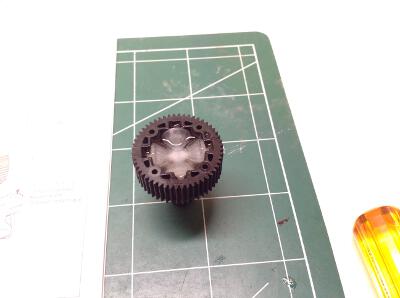
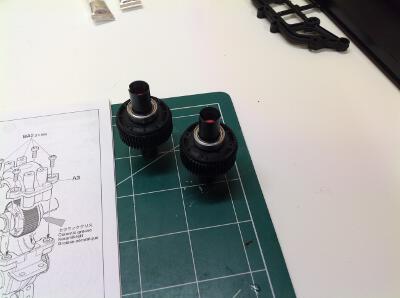
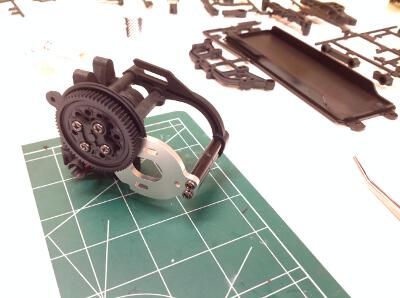
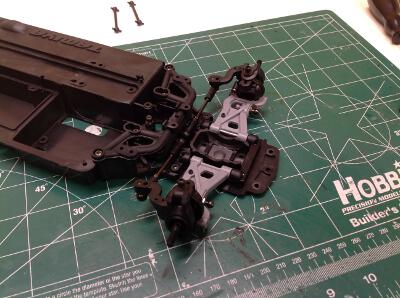
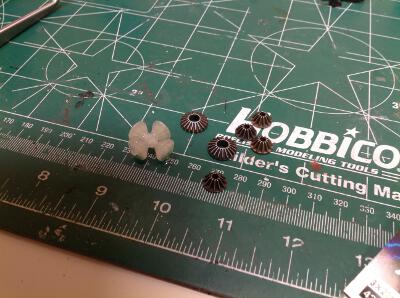
The model uses sealed gear diffentials with plastic bevel gears. The diff fluid is the clear "hard" variety from Tamiya which is also used for the shocks. The front and rear differential are identical.
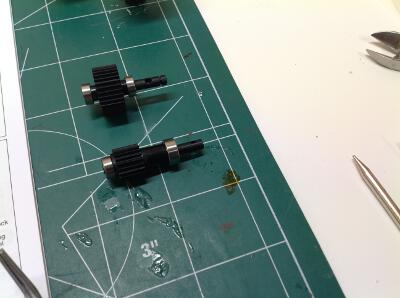
These geared shafts are for the transmission which will be located ahead of the front axle with the motor.
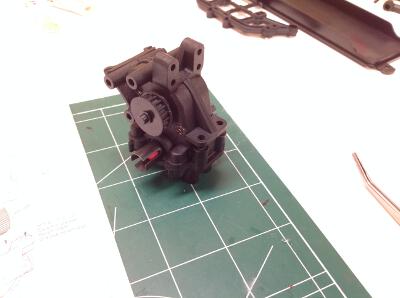
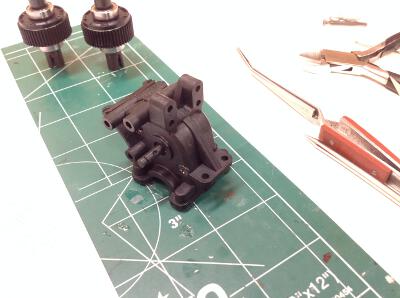
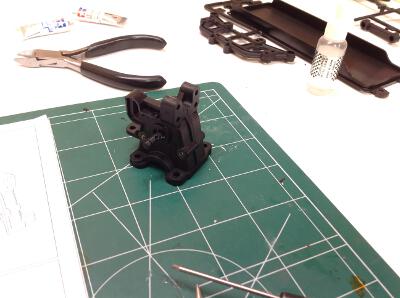
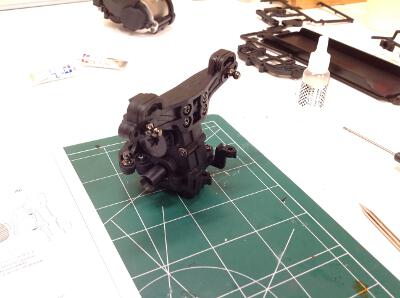
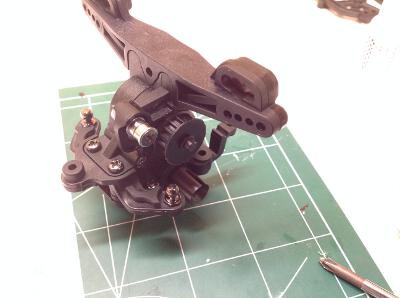
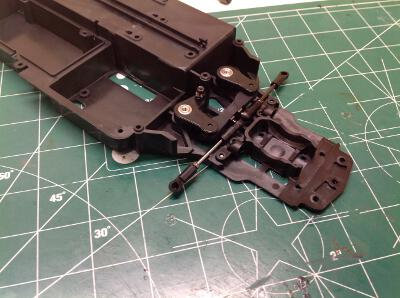
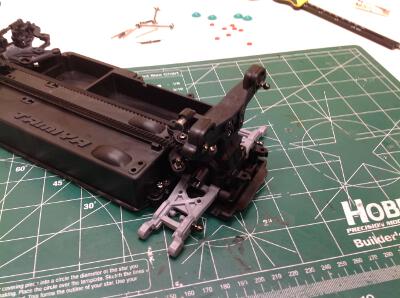
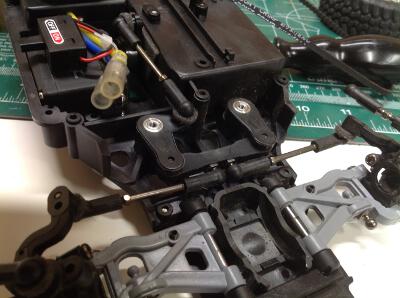
Here we see the front gearbox with the two gear shafts installed. You can see the differential units in the background. The diff is installed at the bottom side of the gearbox as shown on the right hand image. The sprocket for the belt drive is also visible here. This is a compact, sturdy unit.

Please Log in to join the conversation.

Blakbird's 58552 Asterion XV-01T Build 5 years 7 months ago #51903

Now the aluminum motor mount and protective bracket are installed. The gearbox is capable of supporting a slipper clutch, but instead a solid spur gear is included in the kit as shown.
Once the silver can motor is installed, a plastic dust cover is applied to protect the gear mesh. Then the shock tower and a front support bracket are installed. The bracket forms the top support for the double bellcrank steering.
This may look familiar but it is actually the rear gearbox. It is much like the front except that it does not contain the extra gear for the motor. It includes a couple of support arms for an optional sway bar.
The bearing you can see attached to the rear gearbox is used as a tensioner for the belt. When the belt is new you really don't need it but you can slide it down to engage the belt as it wears. The right hand image compares the completed front and rear gearboxes. Normally you'd expect the one with the motor to be the rear, but that's not the case here.

Please Log in to join the conversation.

Blakbird's 58552 Asterion XV-01T Build 5 years 7 months ago #51904

Here we see the double bellcrank steering being installed. The cranks ride on ball bearings supported by metal shafts.
In many cases the suspension arms are attached directly to the gearbox bulkhead, but in this case they attach to the chassis. The brackets which support the pivot axles are replaceable to get different toe angles. The lower arms are made from a very flexible and resilient plastic. The hubs seem to be fiber reinforced. The second image shows the completed front suspension with the gearbox attached.
Here the rear suspension is being built which is much like the front. The rear arms are reversible to give different shock mount points. In the second image the rear gearbox has been attached and the belt has been installed.
With the completion of the rear suspension the chassis is nearly complete. At the right the CVA shocks are added and the guard has been installed over the belt.
You can see here that all the electronics are hidden beneath a shroud. The battery is installed from the bottom behind a screwed hatch. The inner fenders don't completely seal the interior from thrown debris, but they help.

Please Log in to join the conversation.

Blakbird's 58552 Asterion XV-01T Build 5 years 7 months ago #51905

I'm not sure why I immediately wanted this car to be special, but perhaps it was the chrome. I needed something flashy inside to match the outside. I bought a Yeah Racing aluminum conversion kit which contained many blue aluminum suspension parts. I also decided to use the power system which I had tried in the Monster Beetle but which had turned out to be too much for it. The Tamiya aeration shocks were recommended for this model on the box, but turned out to not really be right as I'll discuss later.
The first thing I did was to replace the nylon gears in the transmission with steel. This is not an easy matter. To access the gears you pretty much have to tear down the whole model. That turned out to be fine since I was replacing so many other parts anyway.
I replaced the stock steering cranks and bridge with aluminum parts. The original parts were actually very nice ball bearing supported units so I'm not sure this added much, but it sure does look cool. You'll also see a little foam washer under the ball sockets. I have never seen these in another model, but they are there to keep dirt and grit from eroding the ball. Most of the joints in the model are thusly protected. You can also see my new blue titanium steering links.
The steering upgrades get mostly covered by the bulkhead support bracket. In this image you can see the new front suspension. There are lower aluminum arms and steering arms. I bought a set of titanium turnbuckles for the upper links which I thought was enough for the whole car, but it only contained two so I put them in the rear (not shown). A sway bar has been added which is a bit tricky to see since it faces back, but you can see the links connecting to the lower arms.
The following user(s) Liked this: stingray-63

Please Log in to join the conversation.

Blakbird's 58552 Asterion XV-01T Build 5 years 7 months ago #51906

These images show the front suspension before and after the upgrades. The changes to the steering hubs and shock tower are pretty obvious. I also changed the motor to a 23 turn Super Stock which makes a huge difference. Finally, you can see the new shocks. These did not really work out as hoped. They are actually made for touring cars but Tamiya specifically recommends them for the XV-01. When using the "T" version like I am, they are much too short. By changing the rod end to the extended length version they fit about right, but the springs are much too hard compared to the stock CVA shocks. The result of this is a truck that's pretty bouncy. They are so pretty that I can't quite bring myself to change back to the plastic variety, but I did replace the shock oil with a much thinner variety which helps a bit.
A similar process was conducted on the rear suspension. I replaced the differential gears, the lower suspension arms, the wheel hubs, the turnbuckles, the shock tower, and the shocks. I also added a rear sway bar. Looks really nice! I forgot to mention that I also replaced the dog bone axles with CVDs. This worked well except that one of the front parts had a defective thread and wouldn't take a wheel nut. I don't have any 5mm dies so it was a real struggle to get a nut on. I ended up having to cut off the last couple of threads. The Yeah Racing upgrade kit was cheap so I guess that's what I get.
Here is the pile of parts I replaced. Most of them will go in the trash, but I'll keep the flexible lower arms in case my aluminum arms ever bend after a jump.
Here are a couple of final before and after photos. With all the shields and covers installed a lot of it is not very visible. There is a new ESC under the cover that will manage the higher output motor. From a front, rear, or bottom view the aluminum parts are pretty obvious. The biggest noticeable difference comes from the motor which makes the car much faster. The shocks are smooth but too stiff. The other parts are not really noticeable in terms of performance, but they are theoretically more durable.

Please Log in to join the conversation.

Blakbird's 58552 Asterion XV-01T Build 5 years 7 months ago #51907

Despite the fairly extravagant appearance, painting this was pretty easy. The gun metal stripe on the sides is straight, and the grille masking is not difficult either. Everything else is black. The rear section is sprayed on the outside with flat clear to give it a matte appearance. Finally, there was a big sheet of chrome decals which are very striking. The shiny decals contrast with the matte clear though. Ideally they would have been applied beforehand. There are also lovely blue letters on the tires, but of course they came off the first time I drove it. The pictures were taken prior to my upgrades, but the only visible difference with the body on are the blue wheel nuts anyway.
The following user(s) Liked this: stingray-63, Mark-013

Please Log in to join the conversation.

Blakbird's 58552 Asterion XV-01T Build 5 years 7 months ago #51908

That body looks suspicious similar to the TA02 S10 one, maybe the same?

Never noticed that chassis before.

Those arms are they only used on the XV-01 chassis?
Gives me ideas for a custom build later...

Please Log in to join the conversation.

Blakbird's 58552 Asterion XV-01T Build 5 years 7 months ago #51910

Yep the body is a s10 one. But without chevy licence... tamiya is a pro with recycling....

Please Log in to join the conversation.

Blakbird's 58552 Asterion XV-01T Build 5 years 7 months ago #51916

Yep, this is the S10 body. The Toyota Prerunner, Chevy S10, and Ford F-150 Baja all have quite similar bodies and the same wheels and tires

Please Log in to join the conversation.

Blakbird's 58552 Asterion XV-01T Build 5 years 7 months ago #51918

Faces are differents.

Please Log in to join the conversation.

  • Page:
  • 1
  • 2
Moderators: caprinutstingray-63AndyAus
Time to create page: 0.255 seconds
Cookies are required to make this site work. If you continue to use this site you permit us to use cookies.