TOPIC:
Blakbird's 58650 MF-01X Rally Beetle Build 5 years 7 months ago #52020
|
Note: This build log is excerpted from my
web site
. You can check there for larger versions of every photo or further reading.
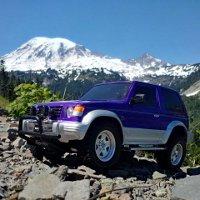
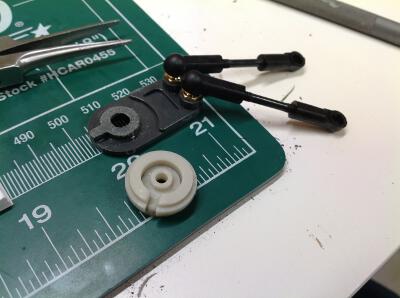
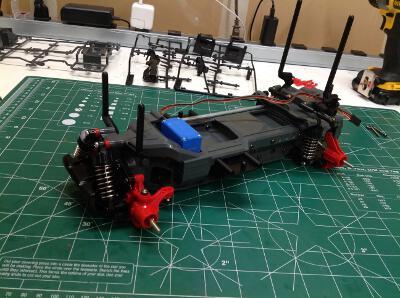
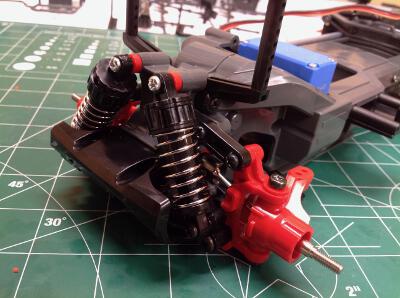
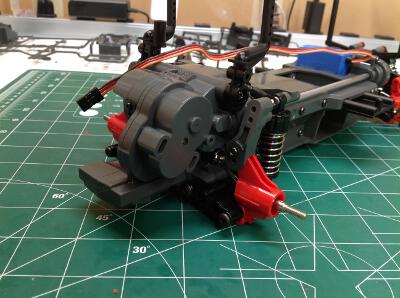
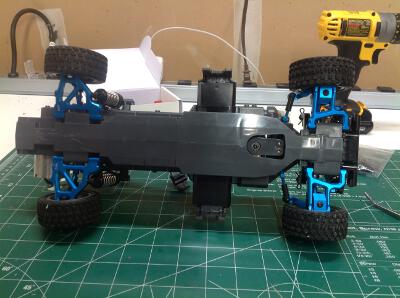
The MF-01X is a very recent chassis having debuted in 2015 with the 58614 Suzuki Jimny. The Rally Beetle is the third body offering after the original and the 58629 Mercedes Benz G 320 Cabrio. This is a 4WD chassis with independent suspension. What makes it unique is the modular build producing multiple wheelbases. The center chassis is built using a combination of long and short extensions which can achieve 3 different wheelbases: short (210mm), medium (225mm), or long (239mm). There are also two attachment points for the c-hubs which allow a high or low ground clearance option. Even the high option is pretty low though. This particular model uses the long, high combination. This is an entry level chassis with plastic bushings and friction dampers. Or course those had to go. It is hard to abide friction dampers on a modern vehicle, and plastic bushings should never be used on anything. As a modern design, there is actually room for a LiPo battery inside which is nice to see. The other upgrades I made to the suspension are less about performance and more about looking cool, although they do help with the steering lock. I decided not to go with the box art color on this one. I had just used orange for a couple of other models and wanted something a little different. Whenever I paint a new polycarbonate chassis I realize I had forgotten how brilliant and shiny they are when new (before I flip them over, scratch them up, and crack them). This model has a flat black hood, achieved by spraying flat clear on the outside of the body. The body also has a lot of nice plastic touches like mirrors, light bezels, and bumpers. All together it makes for a very appealing model. Sadly, the light lenses are not light buckets so adding LEDs would require substantial modification. I was really surprised at how well this drives for an entry level model even in stock form. It is quick, agile, and stable. The steering is pretty sloppy which makes it tough to go in a straight line, and the undamped suspension makes it really bounce on uneven ground, but it still composes itself very well. This build was a quick one: I finished it in a single long evening (not counting painting). The model is quite simple and comes in a box barely larger than the body shell. The box art is a photograph rather than the more traditional art. Inside the box is a pile of sprues, some hardware bags, the usual tools, instructions, masks, and stickers. There is also a Torque Tuned 25T motor and a TBLE-02s speed controller. The kit uses plastic bushings but I immediately built the model with full ball bearings. The build begins with the front and rear gearboxes. Because the model can be built with multiple wheelbases, the gearboxes are modular and just need to be bolted to the chassis center sections. Each gearbox houses a plastic bevel gear differential with the rear also containing the motor mount. The front encloses the steering assembly. The servo is almost totally encapsulated. I used a metal gear waterproof Savox servo which is complete overkill for this model but I happened to have it lying in my parts box from another model. There are no bellcranks, the links attach directly to the servo saver on the spline. The short wheelbase version uses a single long chassis plug, the medium uses both a long and a short chassis plug, and the long uses two long plugs. I've got the long version. It is really important to make sure the screws are quite tight because all structural loads are carried between these body plugs and they are only supported with 4 screws each. Different length prop shafts are needed to connect the front and rear gearboxes depending on what length you are using. The kit only comes with the long shaft. The stock steering is really bad. There is huge amount of wobble in the servo saver. I was able to remove most of the play by selectively sanding the servo saver parts until they clamp together more tightly. Not sure why Tamiya designed it so loose. The right hand image shows the completed suspension with the body posts attached. Here is the front and rear suspension. They like to call these things "friction dampers", but really neither word applies. There is no friction here except whatever is inherent in the shafts. There are no rubber sleeves or any other internal features to add friction. There is therefore no damping either. These are really just spring guides. On pavement that's actually good enough but on even moderate gravel you'll see a lot of bouncing. The front suspension arms are very short: less than an inch. This means hardly any suspension travel. The model can be built with two ride heights depending on which hole you use to attach the C-hub to the lower arm. The difference is probably 5mm. I used a white painted TEU-105BK extracted from my Dark Impact because I wanted to save the brushless capable controller for something else. The paint on it is ugly but can't be seen with the body shell in place. The battery mounts crosswise and the length is adequate for a LiPo. The tires are directional with a different inner and outer side tread so you need to make sure you install them right. There are no tire foams. The manual says to glue the tires, but there is no reason whatever to do so. There is no way they are coming off with the power of this model. |
|
|
Please Log in to join the conversation.
Last edit: by blakbird.
|
Blakbird's 58650 MF-01X Rally Beetle Build 5 years 7 months ago #52021
|
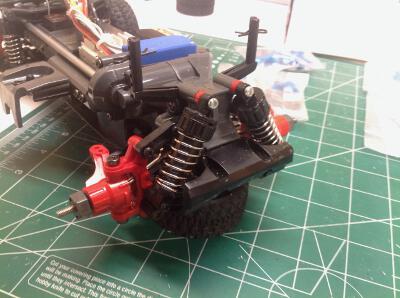
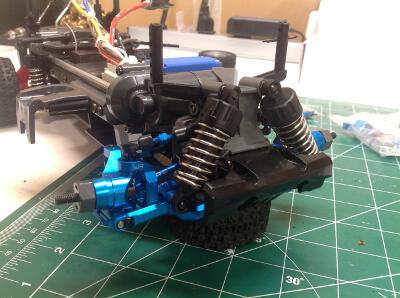
Yeah Racing has a nice aluminum upgrade kit that changes out most of the suspension parts so I picked one up. You can see how many parts were in the box. This does not merely change plastic parts to equivalent aluminum versions, it also move the outer suspension pivot point outboard without changing the wheelbase. More on that below. I also had a set of oil filled CVA shocks of the right size removed from another model so took the opportunity to swap out the horrible friction dampers.
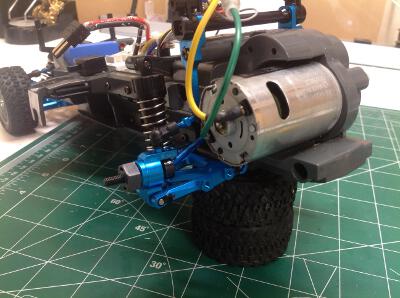
Here is a comparison of the front suspension before and after. Look at how short the upper arms were, for example. On the lower arms, you can see the new pivot point which will be inside the wheel. There are also CVD axles for good measure. Less obvious are the oil shocks which look a lot like the stock unit but sure perform a lot better. Now the rear suspension. We made basically the same changes as the front. The upper arms are now turnbuckles. There is also now a stiffening rod between the right and left body mounts which helps support the upper arms. From above the changes may not be all that apparent, but from below the aluminum gleams. The blue anodizing also looks good with the body coloring. You can see the toe in on the rear wheels which is fixed by the suspension geometry. Front toe can be adjusted with the steering turnbuckles. Camber is adjustable on all four corners. Here are all the parts which were replaced. The friction dampers will go in the bin but I'll keep the springs in case I need them on another project. I'll store the rest of the spare parts for now in case I break something.
The following user(s) Liked this: stingray-63
|
|
|
Please Log in to join the conversation. |
Blakbird's 58650 MF-01X Rally Beetle Build 5 years 7 months ago #52023
|
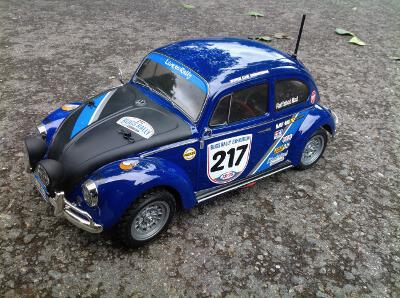
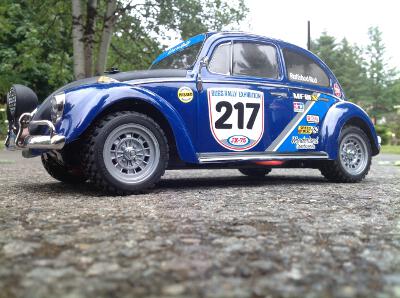
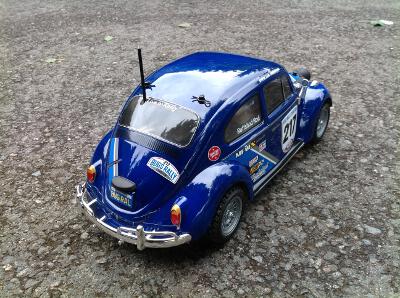
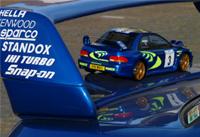
For this model I did go with orange as shown on the box, I decided to use PS-4 Blue that I had left over from my Proline Pro MT 4x4. The hood is PS-5 black with a layer of flat clear on the outside. I think it came out looking great. The chrome bumpers are attached to the body, not to the chassis. Behold those beautiful reflections! My only complaint is that the battery wires push out the body on the lower left side. Of course I could have skipped the antenna on a 2.4GHz model, but I actually think it looks good on a rally car.
The following user(s) Liked this: stingray-63, AndyAus
|
|
|
Please Log in to join the conversation. |
Blakbird's 58650 MF-01X Rally Beetle Build 5 years 7 months ago #52024
|
I love this beetle
|
|
Please Log in to join the conversation. |
Blakbird's 58650 MF-01X Rally Beetle Build 5 years 7 months ago #52031
|
The YR conversion kit is awesome.
|
|
Please Log in to join the conversation. |
Blakbird's 58650 MF-01X Rally Beetle Build 5 years 7 months ago #52037
|
That seems to be a sentiment you've expressed on most if not all of your builds ... It may well be true on this chassis, but it's not true of all one piece wheels, certainly not on the Big Wheelers (Lunchbox etc). It's not so much to stop the tyre coming right off the rim (I've only ever had that with hard tyres on a very overpowered drifter) or even partially (had that on an M-chassis, locking the rears up actually improved the steering A bit of water, dust of dirt gets in & the tyre slips just the tiniest bit, then a bit more, then the lip on the tyre & the groove on the wheel start to wear a bit more, and sooner or later, your RC car is pulling away with all the alacrity of a 1:1 car with a failing clutch & the noise of a slipping alternator belt Just a tiny dab at the cardinal points on one face of the wheel (don't use the CA straight out of the tube, apply to a cocktail stick or similar first) at build time is usually enough to stop the process starting in the first place. ps- that's a very nice looking car |
|
Please Log in to join the conversation.
Last edit: by Jonny Retro.
|
Blakbird's 58650 MF-01X Rally Beetle Build 5 years 7 months ago #52059
I glue when necessary. My TB-03 NSX with a brushless system certainly needed it. I also glued the tires on my TXT-1 after I put the dual brushless system in it. It would spin the wheels in the tires before, but now it does wheelies. I did not need to glue the tires on my Midnight Pumpkin, at least not yet. I have checked by holding the model still and the motor will stall before the wheels spin in the tires. I really hate to make a perfectly good set of wheels single use by putting glue on them, but I understand the utility in some cases. Not a huge fan of lexan myself, but it makes a lot of sense on touring cars. Lexan on a CC-01 really bothers me. The new Land Rover is the closest to being acceptable, but I much prefer the older Pajero or Wrangler bodies. |
|
|
Please Log in to join the conversation. |
Time to create page: 0.189 seconds
