Keyword
  • Page:
  • 1

TOPIC:

Blakbird's 58275 Mad Fighter Build 5 years 7 months ago #52070

Note: This build log is excerpted from my web site . You can check there for larger versions of every photo or further reading.

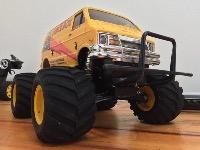
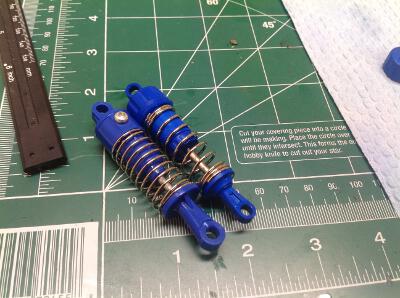
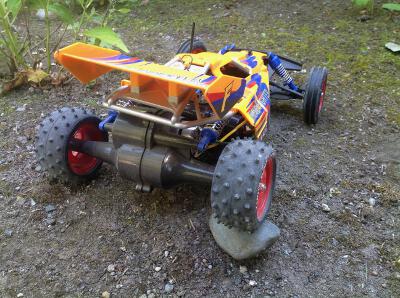
The DT-01 chassis is not impressive. DT apparently stands for "Dirt, Two Wheel Drive" which is accurate enough. But with a solid rear axle, swing arm front suspension, and friction dampers this thing is not exactly stable. It bounces all over the place like a Clod Buster. I suppose that means it hones your driving skills. With some oil shocks and a different motor it might be a different animal though. Time will tell.

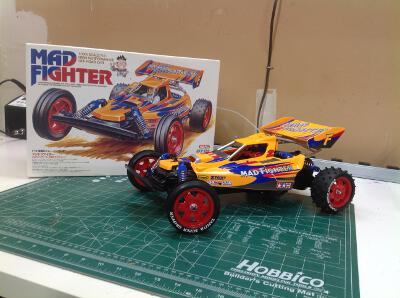
This is the first model I ever bought used and already built. "Used" is a strong word since it had never been run. It was in absolutely pristine condition and I got it for a good price with the original box and instructions. This allowed me to tear it down and rebuild it which was nearly the same experience as building it new. I did find there were a couple of missing parts but it was kind of fun tracking them down.

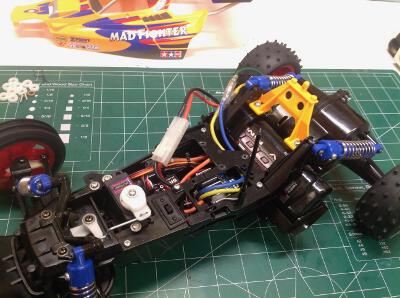
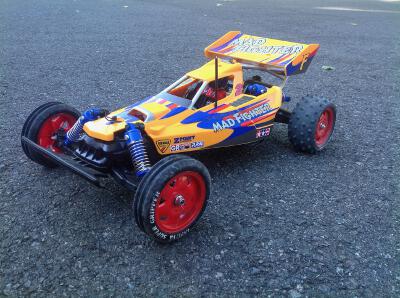
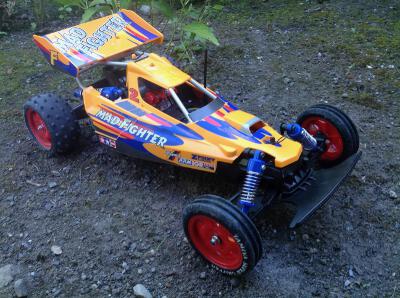
The DT-01 is a beginner off road chassis which seems to be descended from the Grasshopper. It was first available in 1991 with the oddly named 57501 Rookie Rabbit. This was a RTR model, not a kit. Other models later followed with the 58275 Mad Fighter first showing up in 2001, ten years after the birth of the chassis. In another 10 years it was released again with exactly the same number and no changes. This makes it a little tricky to know for sure which version I have, but the labels on the box confirm mine is the re-release. This is a very simple model with only a handful of parts and no complex building steps. This shows in the handling which is far less than refined. It is pretty quick though, and very sturdy so just right for a newbie. The body shell is hard plastic and comes molded in color so it does not need to be painted.

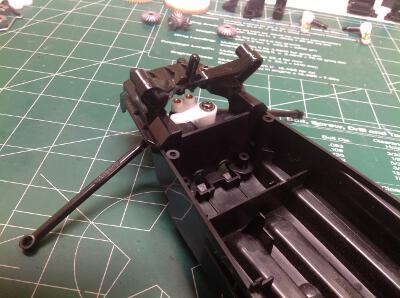
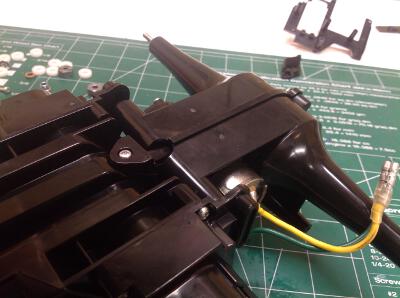
It is very rare for me to buy a kit already assembled, but that is the only way I could find this particular model. It was clearly in pristine shape and had never been driven, so I just tore it down to the bones and started over. As you can see, the list of parts is pretty small for this simple model. I did end up finding that a few parts for the servo were missing since one had never been installed, and that caused me a few challenges.
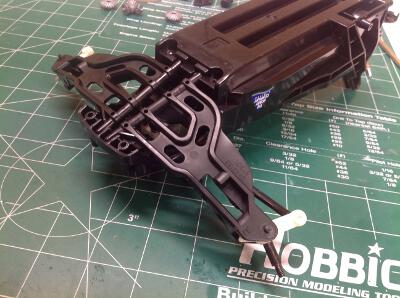
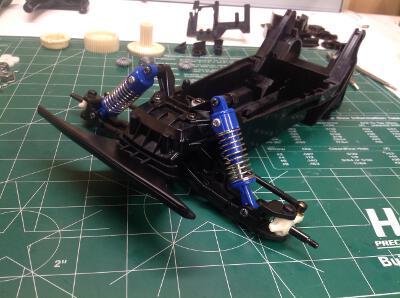
The build starts with installing the steering crank in the one-piece bathtub chassis. The steering links are solid and cannot be adjusted. The lower suspension arms are installed with a kickup angle and also with the arm pivot angled. They are retained by the bumper lower plate. The hubs are one-piece (apparently) nylon with integral spindles.
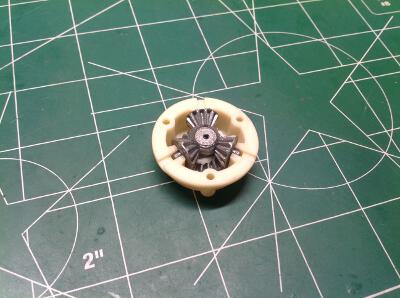
This image shows the internal construction of the open differential. Nice strong metal gears here.
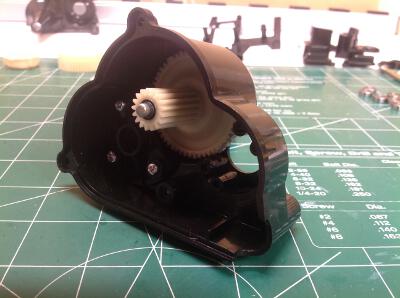
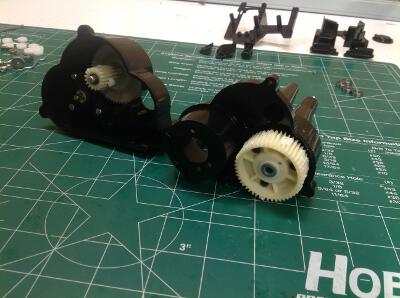
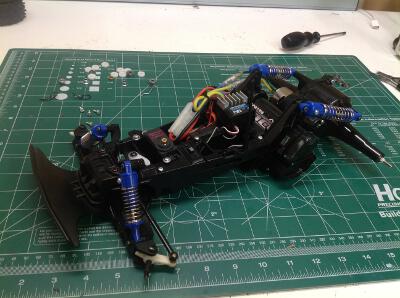
Time to build the gearbox. I took the opportunity to install ball bearings while I was rebuilding. You can see the size of the gears here. I suspect I could add substantially more power to this model and have no problem at all with strength. Once everything is buttoned up it is reasonably well sealed against the elements.

Please Log in to join the conversation.

Blakbird's 58275 Mad Fighter Build 5 years 7 months ago #52071

This may or may not be the motor that came with the kit originally. The previous owner had not installed one and threw this Johnson motor in. It was only by chance that I counted the teeth and noticed there was an 18 tooth pinion on here. The mesh is not adjustable on this model so the only options are 17 and 19 teeth. Luckily I had a Mad Bull new-in-box and was able to steal the pinion from that one while I wait for a new one to arrive.
Is there anything worse than friction dampers? Not much. Maybe Ebola. The previous owner had actually installed aluminum no-name shocks on this but I asked him to put the stock versions back on for historical reasons. Feeling foolish now. I really want them to stay blue though. I'll have to see if there is any option. Note that there is no upper front suspension arm which makes this a swing arm type, changing the camber with travel. The rear axle is a solid axle with a center pivot allowing it to rock side to side.
Now the chassis is nearly complete with the shocks and electronics installed. The part to clamp the servo to the right side of the chassis was missing as was the servo saver tree. I had to steal these from the Mad Bull for now. The left hand image shows the electronics installed per instruction. The ESC interfered with the driver and was also very visible. I found that with a little trimming I could put everything down in the open bathtub and free up all the top space which looks much better. Note the longitudinally mounted battery just ahead of the rear axle.
The hard body pops on with just two pins. The spoiler is part of the body so it all comes off together. Because the two pins are on the centerline, the body rocks back and forth over every bump and makes a lot of noise.

Please Log in to join the conversation.

Blakbird's 58275 Mad Fighter Build 5 years 7 months ago #52072

This is not a high performance model, but one thing I could not abide was the friction dampers. The problem is that they are blue so if you want to maintain the appearance there are no blue CVA options. I decided to make my own by using some white dampers I had left over from my DF-03 (which I replaced with aluminum) and dyeing them blue. I got some blue Rit dye at the fabric store and boiled it in water. I immersed the parts for about a minute and this is what I got.
Here you can see the old and new dampers together. I got a pretty good color match. The next problem is that the CVA springs are much too stiff so I reused the softer springs from the friction dampers. The buggy is now transformed. I drives 10x better and is actually controllable now.
Attachments:
The following user(s) Liked this: stingray-63

Please Log in to join the conversation.

Blakbird's 58275 Mad Fighter Build 5 years 7 months ago #52073

I can't take any credit (or blame) for the appearance of this one since I bought it assembled. If I had built it myself I would have painted it even though it is already molded in orange, but since the stickers were already applied there was no way to do so. The white letters on the tires look nice but I expect that they will wear off promptly. This is certainly a colorful model with the orange body, red wheels, and blue shocks.
This final photo was taken after I added the new oil shocks.

Please Log in to join the conversation.

Blakbird's 58275 Mad Fighter Build 5 years 7 months ago #52076

Top work on the dampers again :y: :)

Please Log in to join the conversation.

Re:Blakbird's 58275 Mad Fighter Build 5 years 6 months ago #52095

Looks really good!

My Fighter Buggy RX (DT01 chassis) came with a 4-slot Johnson in 1997.


Sent from my iPhone using Tapatalk

Please Log in to join the conversation.

  • Page:
  • 1
Moderators: caprinutstingray-63AndyAus
Time to create page: 0.152 seconds
Cookies are required to make this site work. If you continue to use this site you permit us to use cookies.