Keyword
  • Page:
  • 1
  • 2

TOPIC:

Blakbird's 58361 Thunder Shot Build 5 years 5 months ago #52450

Note: This build log is excerpted from my web site . You can check there for larger versions of every photo or further reading.

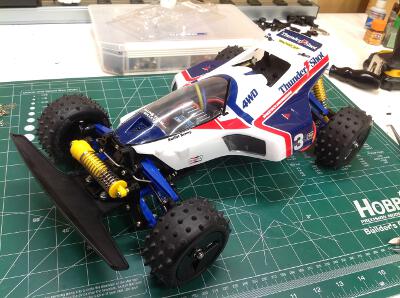
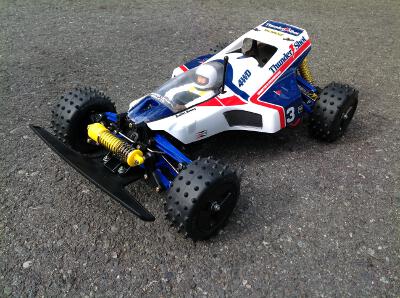
The original 58067 Thunder Shot came out in 1987 as the 4th generation Tamiya 4WD buggy chassis after the original Hot Shot, Boomerang, and Bigwig. It had only been 2 years since the 58047 Hot Shot had brought 4WD to the masses. This new chassis would be used for several other buggies for the next 2 years before being relegated to history until the Thunder Shot was re-released in 2005 with minimal changes. It was 2018 before I found myself looking for the model that was merely 13 years old rather than the original which would be 31 years old. Even so, it proved impossible to find and I was forced to resort to heroic measures to reproduce this beauty.

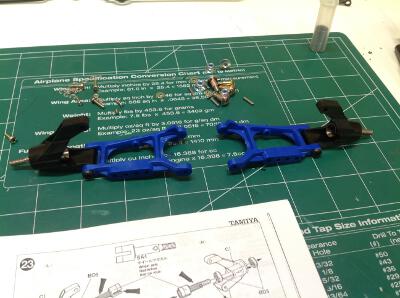
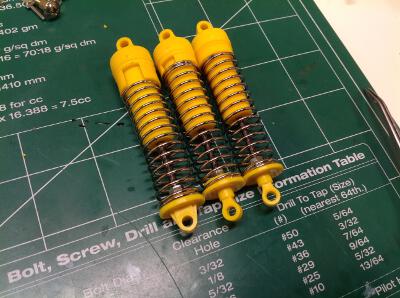
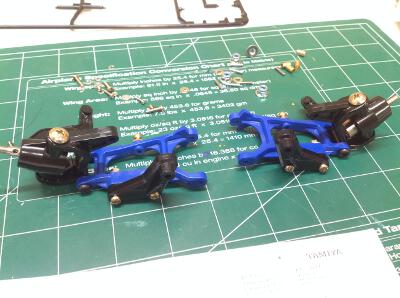
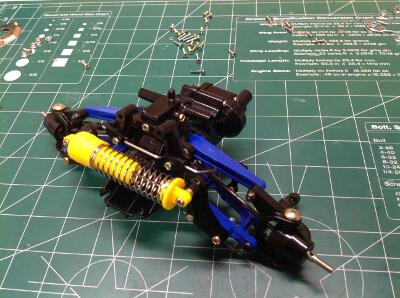
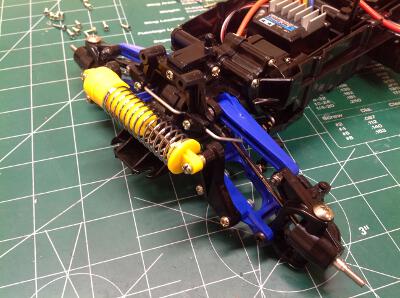
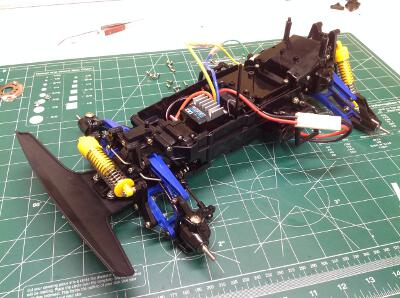
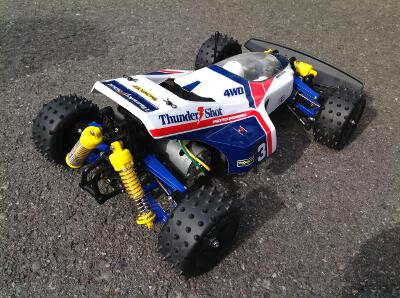
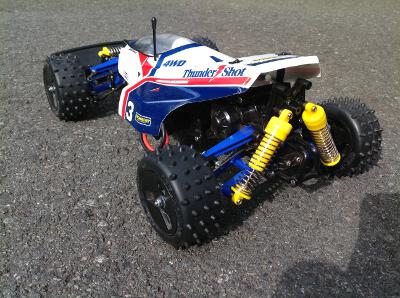
This model has four wheel double wishbone suspension, but the front is not quite independent since the left and right sides share a single shock absorber. The main chassis is a bathtub type with front and rear modular gearboxes which assemble to it. The suspension arms are made from a softer blue plastic to absorb impacts. The shocks are early plastic CVA oil filled type. There is a front sway bar supplied as stock, but no ball bearings. Like most early buggies, there is a driver included.

I found the model to be quite quick and responsive for it's age with excellent traction. However, it only took me two days to break my first part. I really shouldn't be jumping vintage chassis cars, but I tried anyway and broke the front inboard suspension arm support. An easy part to replace, but it requires buying the whole A-part tree. I'll be more careful with this one in the future.

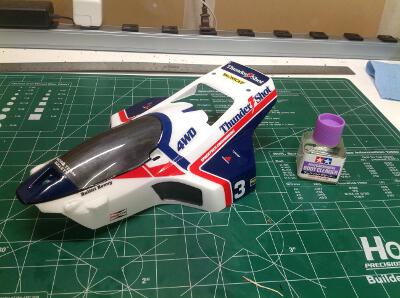
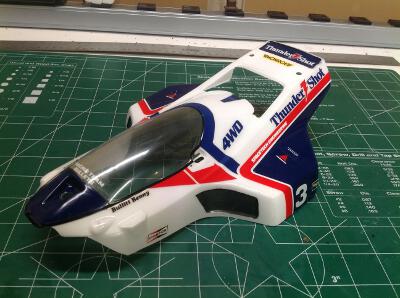
Having not known this model as a kid and now looking at the pictures as an adult, I never found this to be a particularly appealing model. But now that I've built one I've changed my mind. I really like the color scheme and the body shape. I also like the contrast provided by the blue suspension arms and yellow shocks.

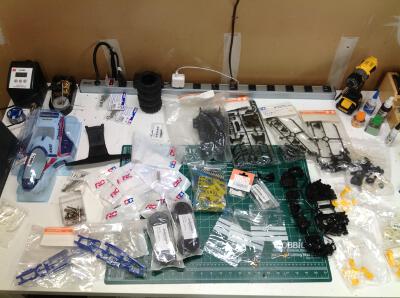
This model involved a whole new procurement process for me. After several months of searching, I was completely unable to find an un-built Thunder Shot kit at any price, anywhere in the world. It's hard to believe it is that rare and maybe I just wasn't looking in the right place. In any case, I finally found a seller who had collected a substantial number of the parts required to build a re-re kit. I bought that and had it shipped to me, then did an inventory from a downloaded set of instructions to find out what was missing. From there I scoured the globe for the missing parts. A few I could still order directly from Tamiya, and most of the others I was able to find individually on eBay. It was only a set of 3x14mm hinge pins that I was never able to find and had to make some substitutions. Not bad at all. The right hand picture shows the vast pile of individually packaged spare parts which will make up this model.
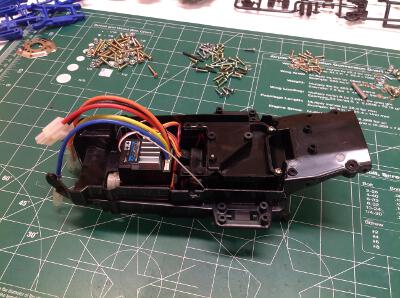
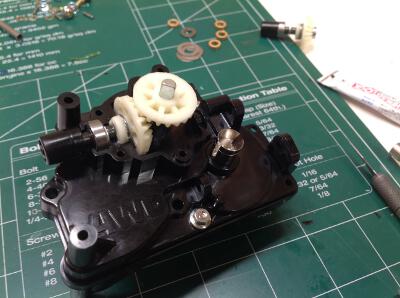
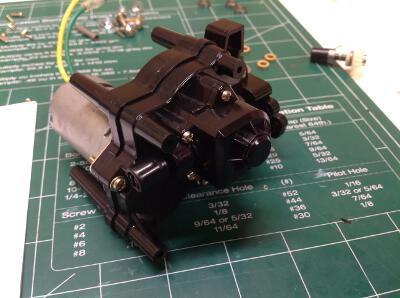
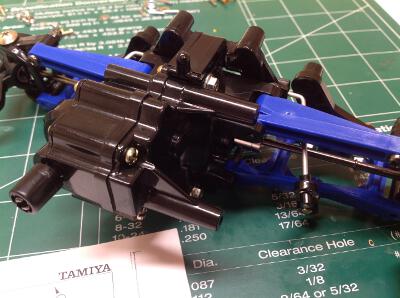
The build begins with the chassis bathtub. I had to provide my own ESC and happened to have a surplus Tamiya TBLE-02s sitting around. The steering servo is sitting under the ESC, and in fact the ESC is mounted directly to it. Although this is a re-issued set, it is unchanged from the original and still has the original instructions (with an addendum sheet) and therefore is still provisioned for a mechanical speed controller. The space in the middle of the bathub is for the throttle servo and MSC. Seen from the bottom, the servo saver protrudes and connects to a set of dual bellcranks. This is the first time I have seen bellcranks which are outside the chassis. They will later be protected by the bumper.
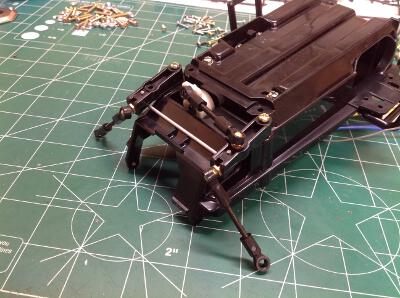
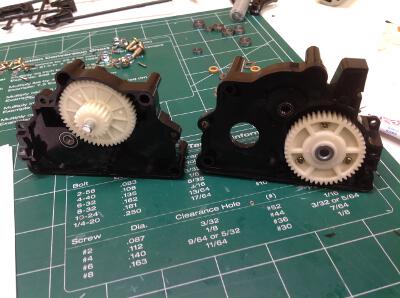
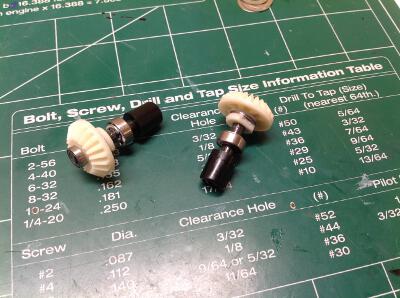
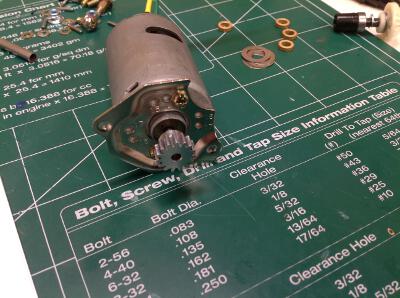
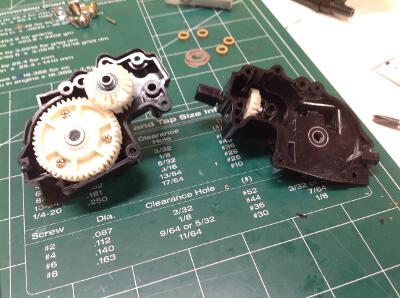
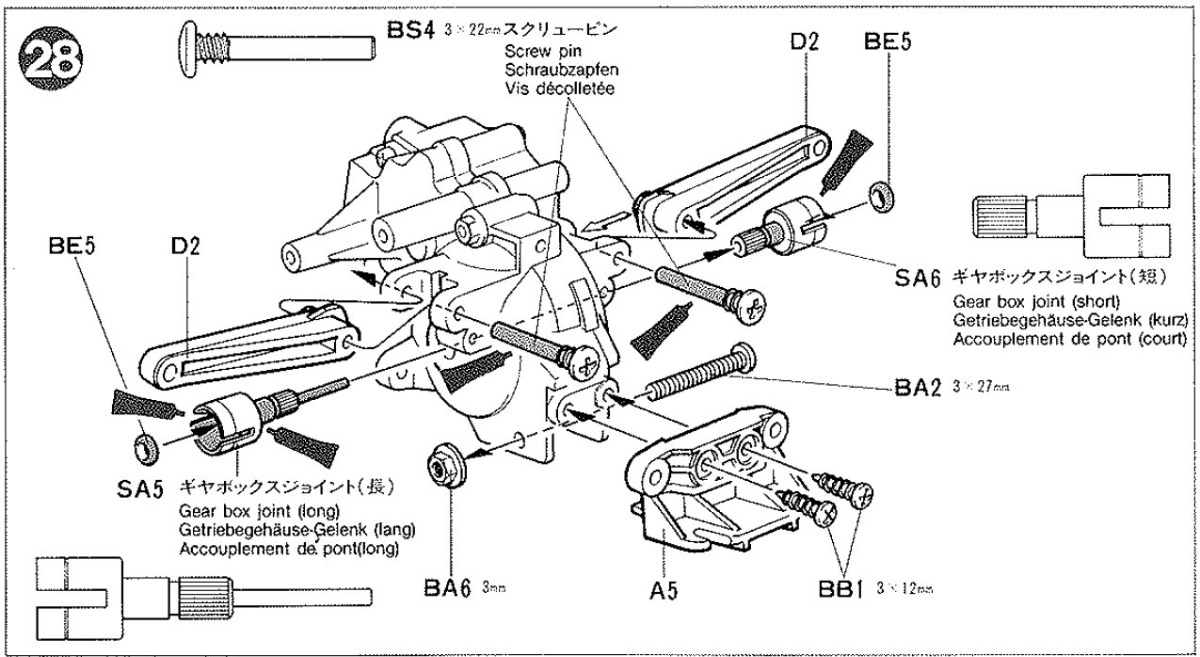
The rear differential is built next. The internal parts are metal bevel gears. The assembly then is installed into the gearbox halves with some ball bearings (my upgrade, the kit came with bushings).
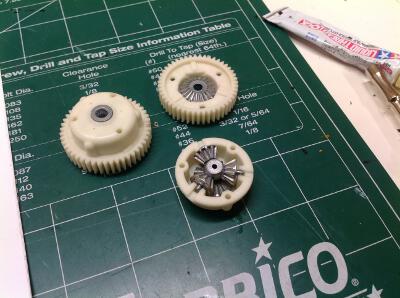
These bevels gears are used to turn the axis of rotation 90 degrees for the propeller shaft. One is used in the front and one in the rear. The mating bevel gear is attached to the counter shaft which is integral to the spur gear. Since the reduction is downstream of this point, the prop shaft spins very fast and it is important that it not be bent.

Please Log in to join the conversation.

Blakbird's 58361 Thunder Shot Build 5 years 5 months ago #52451

The gear mesh cannot be directly adjusted, instead there are holes in the motor mount for five different pinion sizes: 13T, 14T, 15T, 16T, and 17T. The kit comes with the medium speed size: 15 tooth. Installation of the motor completes the rear gearbox assembly.
The front gearbox is the same thing without the spur gear. We have the same differential and bevel gears.
Time to start adding the suspension directly to the rear gearbox assembly. All 8 arms are made from flexible blue plastic. The lower arms are A-shaped and the upper are tapered beams. Neither are adjustable. Outdrives are dogbone type.
At the time these photos were taken I hadn't found any link pins of the right size, so you can see the upper hub pivot is just a screw. I don't like this solution because it puts the threads in bearing and will gradually damage the holes. I later found that 3x15mm link pins from the Avante were close enough with some washers used as spacers.

Please Log in to join the conversation.

Blakbird's 58361 Thunder Shot Build 5 years 5 months ago #52452

The shocks were a bit of an adventure. The "kit" that I bought from eBay had some partial X and Y parts trees but no springs, shock shafts, or seals. Finding the individual parts was difficult, but I found sellers selling complete shock bags for other models which seemed the same. I bought one of these advertised for the Boomerang. This had all the hardware I needed, but came with two long shocks and one short. Using the parts I already had, I was able to cobble together 3 short shocks as shown. However, you can see that only one of them has the right rod end which has a hole for a straight bushing mount. The other end types are for ball studs. Back to eBay for one more shock set, this time for the Fox. From this I was able to steal the remaining parts I needed with plenty left over for another time.
Here's the completed rear suspension assembly with the shocks installed. Nice independent, double wishbone suspension with smooth action. Just four screws lock the whole assembly to the chassis.
The front suspension is a bit unusual. The shocks do not attach directly to the lower arms, instead there are black cranks attached. These convert the vertical arm motion to lateral motion. The steering uses traditional C-hubs. I found that part A5 which supports the lower inboard screw pins to be a weak point. The screw pin broke out during a minor jump.
The front suspension is not strictly independent. Firstly, the left and right sides share a single shock absorber which is mounted laterally as shown. Additionally, there is a sway bar linking the sides. In my experience, sway bars tend to be optional upgrades but this one comes with the kit.

Please Log in to join the conversation.

Blakbird's 58361 Thunder Shot Build 5 years 5 months ago #52454

The front suspension assembly is attached to the chassis with four screws from the sides. An additional four attach the bumper which protects the front gearbox and the steering bellcranks.
Rolling chassis complete! All that is left to do is attach the wheels, tires, and body. The tires are quite difficult to stretch over the wheels so I hope they last for a long time. The body was already finished (with the exception discussed below) so I was able to drop it right on. I have an alternate body that I will probably paint myself. At this point I had not painted and installed the driver figure yet.
This shows what I had to do to the painted body. The wind screen had been painted black from the inside which is not how it is supposed to be. The canopy should be clear so you can see the driver. I spent many hours stripping that layer of pain with Tamiya Polycarbonate Cleaner.

Please Log in to join the conversation.

Blakbird's 58361 Thunder Shot Build 5 years 5 months ago #52455

This is a pretty good looking buggy. I admit that I did not paint this body; it arrived finished and painted. I only stripped the paint from the canopy. I have a second body (reproduction) with another set of stickers that I may decide to finish myself and keep this original in good condition. Some of the stickers are not placed correctly which increases my desire to go that way.
Attachments:
The following user(s) Liked this: stingray-63

Please Log in to join the conversation.

Blakbird's 58361 Thunder Shot Build 5 years 5 months ago #52458

I am not fan of these chassis but they are fun to build.

Please Log in to join the conversation.

Blakbird's 58361 Thunder Shot Build 5 years 5 months ago #52459

Great model, and a great build!
Also great to read that you care for the details, like decals in correct place.! Good to know there are others with this OCD. :D
Signature now gets correct formatting if you edit it in your Profile. Use normal BBcode if you want.
www.tamiyabase.com was formatted automatically.

Please Log in to join the conversation.

Blakbird's 58361 Thunder Shot Build 5 years 2 months ago #53831

I found the model to be quite quick and responsive for it's age with excellent traction. However, it only took me two days to break my first part. I really shouldn't be jumping vintage chassis cars, but I tried anyway and broke the front inboard suspension arm support. An easy part to replace, but it requires buying the whole A-part tree. I'll be more careful with this one in the future.


Having now had more time to read about this model (and the rest of the family), it appears I am not the first to have problems with the A5 part that supports the front suspension. It is a notorious weak point. When a front wheel hits anything the hinge pin breaks off one of the ears on A5. This could be very easily fixed by having some sort of reinforcement like a sheet metal plate to support the hinge pins. Does anyone make something like this?
Attachments:

Please Log in to join the conversation.

Blakbird's 58361 Thunder Shot Build 3 years 10 months ago #60104

I'm pretty sure you know by now since this is an old post but they make a reinforcement plate and some people now do 3D prints of them.
Been running the reinforcement plate for over a year with no problems. Recently a friend of a friend printed 2 of the 3D prints for me. Installed one yesterday and just clipped my son's Plasma Edge and broke again.
So I may install the 3D print and the reinforcement plate to help strengthen it.
If not there's another guy who does a 3D print with metal but printing takes 20 days.

Please Log in to join the conversation.

Blakbird's 58361 Thunder Shot Build 3 years 10 months ago #60106

I'm pretty sure you know by now since this is an old post but they make a reinforcement plate and some people now do 3D prints of them.

Thanks for the update. Since I originally wrote this topic I found a place making a steel sheet metal reinforcement which I now put on all my Thundershot chassis cars. I haven't built the Terra Scorcher yet, but I plan to put it on there as well.
The following user(s) Liked this: Al

Please Log in to join the conversation.

  • Page:
  • 1
  • 2
Moderators: caprinutstingray-63AndyAus
Time to create page: 0.213 seconds
Cookies are required to make this site work. If you continue to use this site you permit us to use cookies.