Keyword
  • Page:
  • 1

TOPIC:

Blakbird's 58498 Blackfoot III Build 5 years 4 months ago #53287

There are many Tamiya kits which have born the name of Blackfoot. It all started with the 58058 Ford Ranger Blackfoot in 1986 using a derivative of the Frog chassis and a licensed Ford step side body. In 1992 we got the 58110 Super Blackfoot which appeared very similar but featured an updated gearbox and used the same body without the Ford badging. Five years later we got the 58192 King Blackfoot with a slightly different body without a narrow bed and looking like a newer model Ford. They didn't stop there. In 2003 we got the 58312 Blackfoot eXtreme now on the new WT-01 chassis and using a body mostly like the King Blackfoot but with a new grille and hood scoop. At long last we come to the model at hand, the 58498 Blackfoot III which again uses the WT-01 chassis. So why call it the Blackfoot III if it is the fifth iteration? Probably because it is the third model to use the original body, though the chassis shares almost nothing with the original.

As you might surmise from the above history, the Blackfoot must have been pretty popular to have been updated so many times. All of these iterations are distinct in some way so I wouldn't necessarily consider any of them a re-release, though the Blackfoot III is sometimes considered an update of the Super Blackfoot.

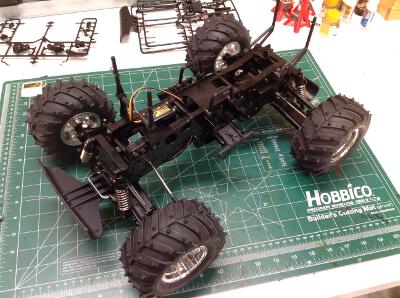
This is a very simple monster truck chassis. Unlike any real monster truck, it is rear wheel drive but this is consistent with the whole history of the Blackfoot line. It has four wheel independent suspension and simple friction dampers. The WT-01 chassis is very simple and durable so will survive a lot of harsh treatment, but with those big tires with no foams and no dampers you can expect it to bounce around like crazy.

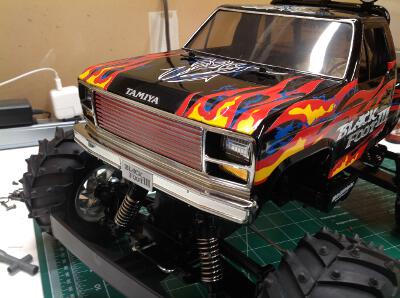
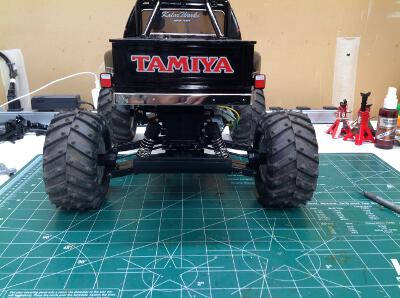
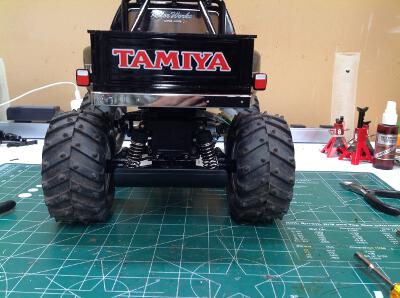
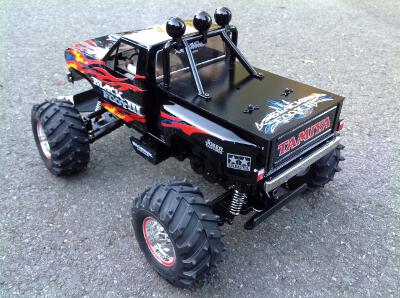
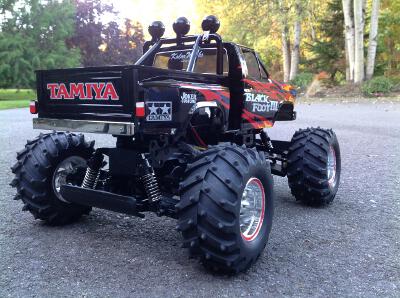
There was something that bothered me about the appearance of the Blackfoot III from the start and I wasn't immediately sure what it was. After some thought, I decided that the track width was much too large compared to the body and made the chassis look like the wrong proportion. With a bit of research, I found that the 58603 Volkswagen Amarok used the same WT-01 chassis but in a narrower version so I decided to order the parts and make the conversion. I like the look of the updated model much better, and I did not notice any significant loss of lateral stability from the narrowed track width.

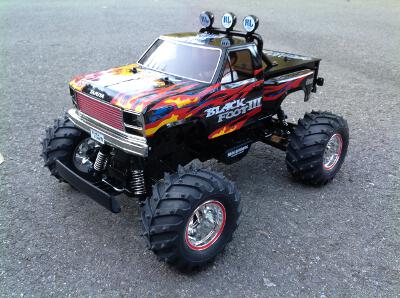
After the updates I really like this truck. It is nearly bulletproof and looks great. I was initially tempted to increase the power system since the gears can handle it, but later changed my mind since it seems perfectly powered as it is.

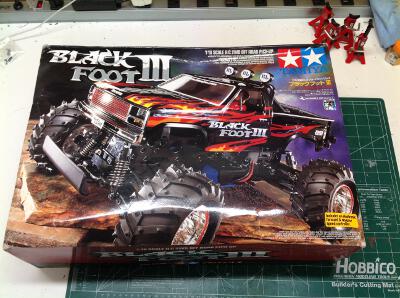
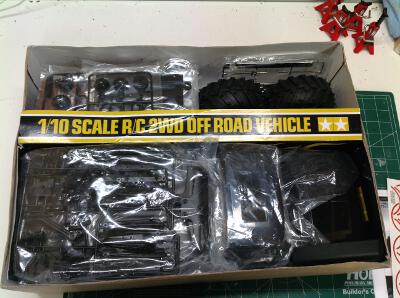
The Blackfoot III comes in a huge box; much larger than you might expect for the size of the model. Once opened, however, the box seems fully stuffed so all that size was required. The tires, wheels, and body take up the majority of the space with plastic parts trees crammed wherever they can fit and an internal box for the hardware. A good chunk of what you see here was not actually in the box since this model was not complete as purchased. I got the rest of what I needed part by part.
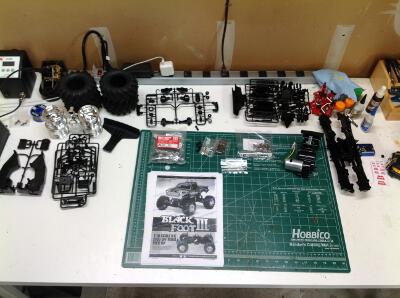
Here is everything from the box (apart from the body) unpacked on my building table. Almost everything in this model is plastic including the metallic looking wheels. You can see that I only had the "A" hardware bag and had to find the rest of the hardware more piecemeal.
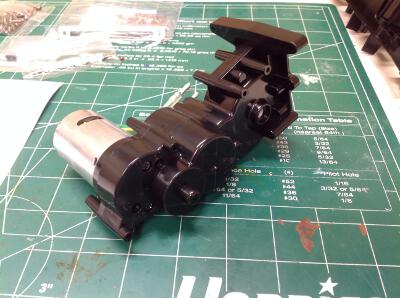
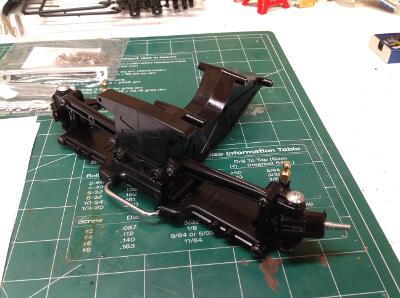
This kit must be intended for beginners because the motor and gearbox assembly are prebuilt. The instruction booklet does include steps for rebuilding and/or repairing it though, so the first thing I did was tear it apart and replace all the plastic bushings with ball bearings. I found all the gears to be nicely greased already so I didn't need to add any lubrication. There are a lot of gears in this transmission and they are huge. There should no concern about breaking anything. The largest gear on the left is the differential housing.
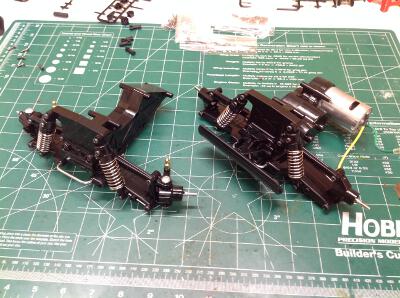
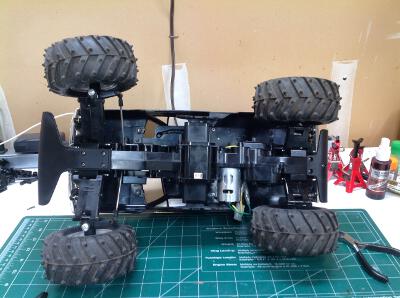
Here we see the front and rear suspension assemblies. They are effectively identical except that the front uses a dummy gearbox. All the control arms and links are the same. This means you could technically choose to build this model as front wheel drive, or even add a second gearbox assembly to make it four wheel drive with dual motors.
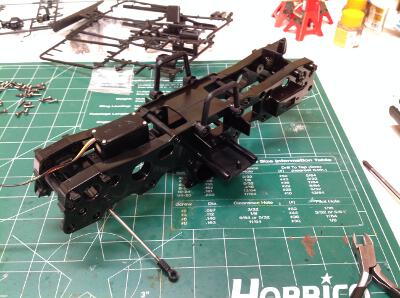
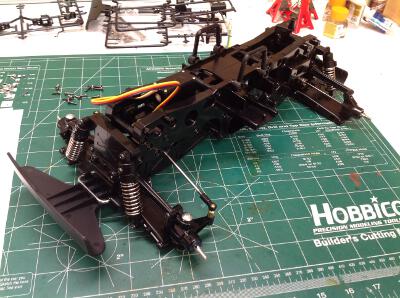
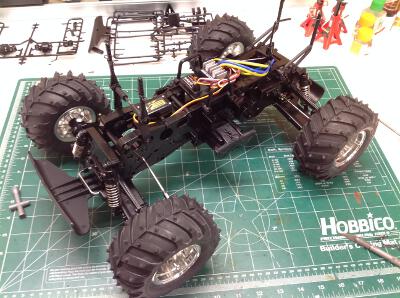
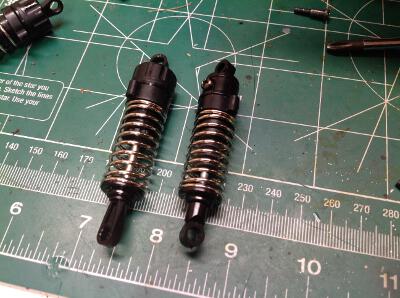
Now the shocks have been built and installed. These are the infamous "friction dampers" which I cannot abide, so it won't be long before they are replaced. Seen side by side, you can see how similar the front and rear assemblies are.

Please Log in to join the conversation.

Blakbird's 58498 Blackfoot III Build 5 years 4 months ago #53288

The main frame consists of two massive side plates with a servo in the front and a battery slot crosswise in the middle. Such a system provides for very high strength and rigidity. In the right hand image I've added the front and rear suspension assemblies which simply slot into place.
The most obvious addition on the left is the wheels and tires, but I've also added the body posts. On the right I've added the electronics which have plenty of space on top of the chassis. Because the battery is low, it can be installed without removing the body.
The body is only one color, so you might think that decorating it would be a small task. I know I thought that. The painting of the main body shell was just plain gloss black, but then there is a lot of detailing to do. As can be seen from the front view, I painted the insides of the headlight and turn signal bezels black like the real Ford truck. I also painted the markers with transparent orange. Finally, I painted the grille slats red with a paint pen. I only realized later that this is backwards and it is actually the pits that should be painted rather than the lands. On the right you can see the driver figure as well as the chrome trim I painted around the windshield.
In an overall view you can see the extensive decals. Since my copy did not come with decals I got these aftermarket from MCI. The quality is excellent. Among the more difficult to install were the thin red rings seen on the wheel rims.

Please Log in to join the conversation.

Blakbird's 58498 Blackfoot III Build 5 years 4 months ago #53289

The very first thing that had to go were the stock friction dampers. I happened to have a surplus set of plastic CVA shocks from another model (which I had replaced with aluminum) and they were a perfect fit. This simple change made a tremendous difference in handling and reduced the bouncing considerably. The shock on the left is oil filled compared with the simple spring holder on the right.
Below you can see the parts I used to narrow the track width. The left hand image compares the original upper control arm with the newer, shorter version. It is even more obvious in the right hand image. Instead of protruding far beyond the body, the tires are now tucked partially into the wheel wells. I also had to install a new front bumper since the tires would hit the old one when turning. Of course this radical decrease in suspension arm length comes with a commensurate decrease in travel, but I have not found the effect to be a problem.
Here you can see the completed truck before and after. It looks completely different now. I much prefer my new modified version shown on the right since it looks much more how a Ford monster truck might really appear.
My final, updated truck. I spent very little money on the upgrades but the result is huge.

Please Log in to join the conversation.

Blakbird's 58498 Blackfoot III Build 5 years 4 months ago #53290

These original outdoor photos were all taken before any upgrades.


This final pair of photos shows the new, narrower chassis.

Please Log in to join the conversation.

Blakbird's 58498 Blackfoot III Build 5 years 4 months ago #53292

  • Al
  • Al's Avatar
  • Offline
  • Impressive Numbers
  • Impressive Numbers
  • Posts: 1496
  • Likes received: 1734

The very first thing that had to go were the stock friction dampers. I happened to have a surplus set of plastic CVA shocks from another model (which I had replaced with aluminum) and they were a perfect fit. This simple change made a tremendous difference in handling and reduced the bouncing considerably. The shock on the left is oil filled compared with the simple spring holder on the right.
Below you can see the parts I used to narrow the track width. The left hand image compares the original upper control arm with the newer, shorter version. It is even more obvious in the right hand image. Instead of protruding far beyond the body, the tires are now tucked partially into the wheel wells. I also had to install a new front bumper since the tires would hit the old one when turning. Of course this radical decrease in suspension arm length comes with a commensurate decrease in travel, but I have not found the effect to be a problem.
Here you can see the completed truck before and after. It looks completely different now. I much prefer my new modified version shown on the right since it looks much more how a Ford monster truck might really appear.
My final, updated truck. I spent very little money on the upgrades but the result is huge.


That looks so much better, really nice with the narrowed track width.
Nice work sir.

Please Log in to join the conversation.

Blakbird's 58498 Blackfoot III Build 5 years 4 months ago #53293

Love these WR/WT chassis, if you find the servo a bit wobbly, I did a improved servo mount. It's on shapeways and I have some spares in white.

Attachments:

Please Log in to join the conversation.

Blakbird's 58498 Blackfoot III Build 5 years 4 months ago #53294

Love these WR/WT chassis, if you find the servo a bit wobbly, I did a improved servo mount. It's on shapeways and I have some spares in white.

Wow, that does look a lot stronger. So far the model has been too bouncy for me to even notice if the servo is wobbly.

Please Log in to join the conversation.

Blakbird's 58498 Blackfoot III Build 5 years 4 months ago #53295

Please Log in to join the conversation.

  • Page:
  • 1
Moderators: caprinutstingray-63AndyAus
Time to create page: 0.201 seconds
Cookies are required to make this site work. If you continue to use this site you permit us to use cookies.