Keyword
  • Page:
  • 1
  • 2

TOPIC:

Blakbird's 58657 Defender (CC-01) Build 5 years 3 months ago #53494

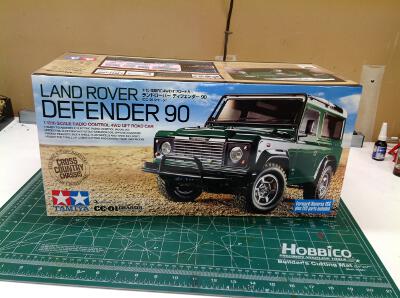
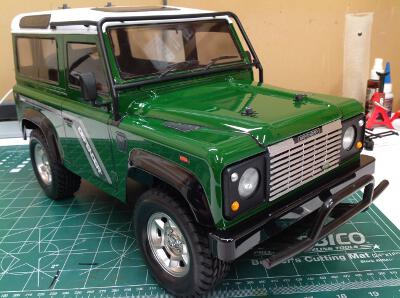
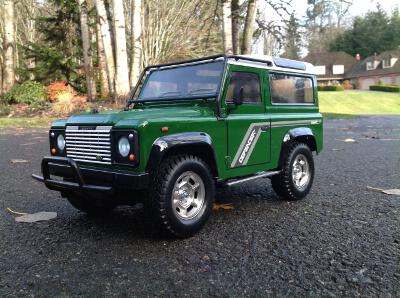
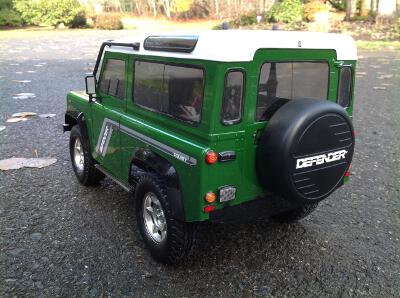
The Tamiya CC-1 (Cross Country) chassis was originally released in December of 1993. Most chassis configurations evolve over the years and are incremented with new numbers, but the CC-01 has stayed the same for 25 years and is still for sale. I count at least 14 different bodies which have been used on this chassis in that time, and that does not count another 10 color or trim variations. The hard shell Pajero body was the first and was sold as 58132. Despite the Land Rover Defender being one of the best known off road vehicles of all time, it didn't show up until 2018 as set 58657.

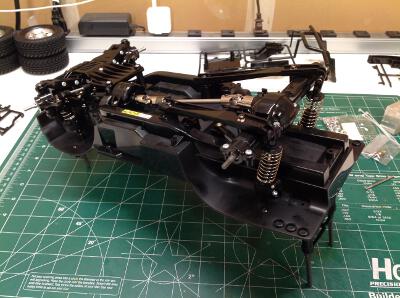
This is a 4WD shaft driven chassis with independent front suspension and a solid axle on trailing arms in the rear. It is a pretty small model so the 540 silver can motor is plenty to move it along as fast as you would reasonably want a vehicle like this to go. It is one of my favorite to drive in that I can pretty much stay at full throttle all the time without worrying about anything. With relatively little ground clearance and open differentials, it isn't excellent off road. On gravel or low cut grass it is really at home. Trying to crawl over anything it will get stuck pretty quickly. The rear differential can be locked, but only by opening it up and replacing the spider gears with a plug. The model has proven exceptionally durable without any needed repairs so far. I am still using the stock motor and ESC along with a cheap analog Futaba servo which seems to be just fine. Battery space is limited so a 7.2V NiMH works best.

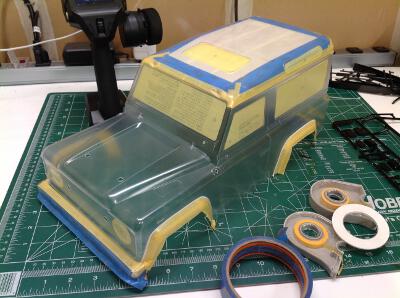
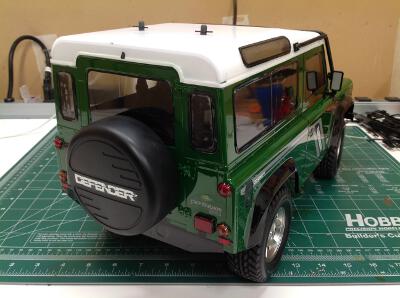
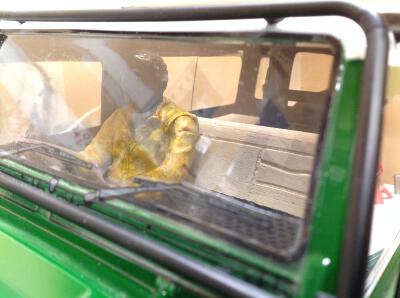
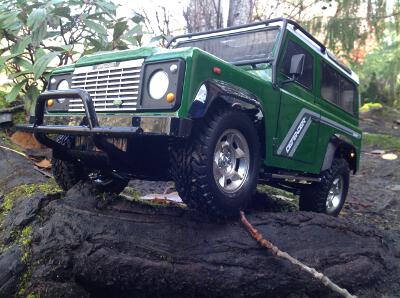
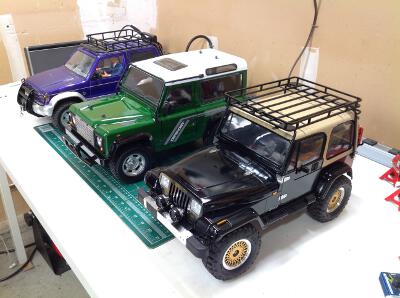
I've have several CC-01 models and some are heavily upgraded while others aren't. This particular example is completely stock apart from a lighting system and the addition of a driver figure.

The Defender comes in a pretty small box, but it is slightly larger than other CC-01 boxes probably due to the tall body. Inside you'll find the one piece chassis tub along with a moderate collection of plastic parts trees and 5 hardware bags. This set also comes with a TBLE-02s electronic speed controller and a standard 540 silver can motor. At the lower left you can see the set of Fast Eddy ball bearings that I'll be adding during the build.
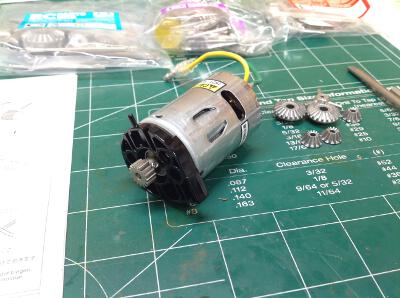
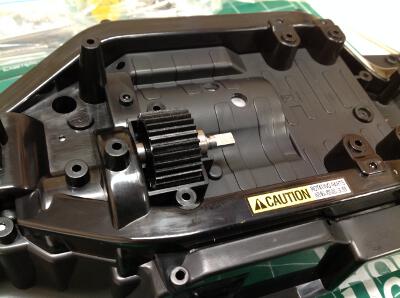
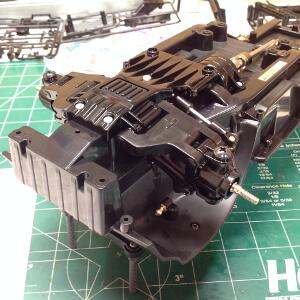
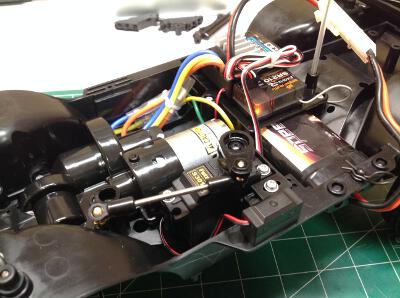
The motor mount is a non-adjustable indexed type. You can attach the motor positioned for either of two pinions: 16T or 20T. The kit comes with a 16 tooth pinion. The optional use of a 20 tooth pinion would make the model much faster, but it would actually be nicer to be able to go the other way for better crawling torque.
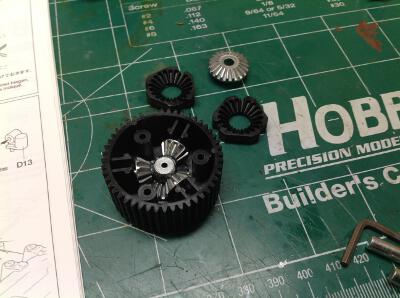
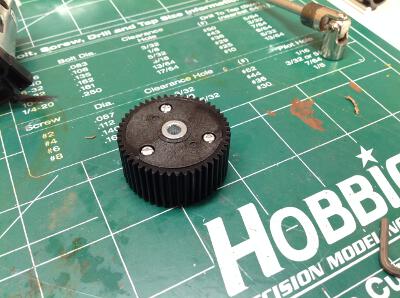
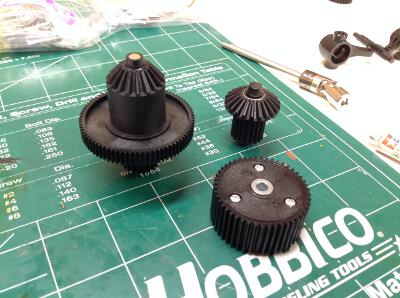
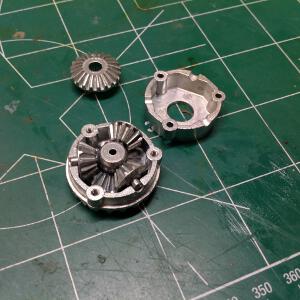
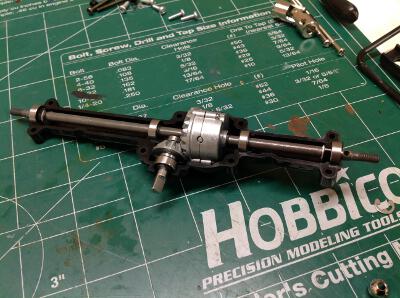
The front differential uses a large plastic spur gear housing a set of cast metal spider gears. As you can see, the spur gear teeth are enormous and shouldn't strip under any power that could reasonably ever be applied.
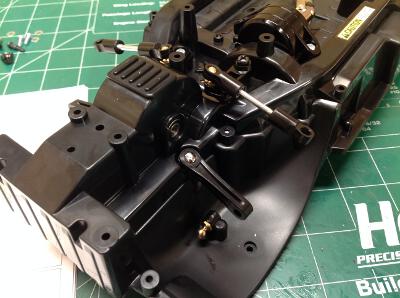
The spur gear which mates with the motor pinion shares a shaft with a large bevel gear. On the right you can see the path from the motor to the front differential (which you may recall is housed in the large plastic gear at the front). The pinion drives the spur which then makes a right angle turn before another set of reduction. The gear which you can see next to the motor will be used for the rear axle. All of the gears are nestled tightly in the chassis tub safe from debris.

Please Log in to join the conversation.

Blakbird's 58657 Defender (CC-01) Build 5 years 3 months ago #53495

This view from the bottom of the chassis tub shows another gear which sits beneath the main spur. This will be used to drive the rear wheels. On the right the cover has been installed and the rear drive shaft attached. This is a nice steel telescoping unit. In this picture you can also see the provisions for different wheelbases. The brass ball joints shown will be used for the upper links. The holes further forward are for the lower links, and the holes further back are for the shocks. In each case you can see two sets of holes which allow variable wheelbases.
Here are the ball joints for the front suspension viewed with the chassis inverted. The balls at the top of the wheel well are for the shocks, and the others are for the upper control arms. Just behind those balls you can see the hole in the side of the differential where the axle shafts will come out.
Next we'll install the front suspension and steering. The left hand image shows the dual bellcranks for the steering. The right hand image shows how the lower front suspension is built. Each control arm is built in two parts and is pinned at the inboard and outboard ends. A C-hub is used to hold the steering knuckles.
The lower control arms (which are just fixed length rods) and steering assembly are installed into the chassis tub. Then the lower suspension assembly is installed which doubles as a skid plate. Dogbones drive the stub axles. The kingpins are large step screws.

Please Log in to join the conversation.

Blakbird's 58657 Defender (CC-01) Build 5 years 3 months ago #53496

The rear differential is quite different than the front. It uses the same metal spider gears, but they are installed into a metal bevel housing instead of a plastic spur housing. Because the rear has the extra reduction at the ring and pinion compared to the front, it is tricky to get them to have the same overall ratio. The plastic gears you see in the background can be used to lock the rear differential.
Now we'll build the rear axle. The first image shows the ring and pinion gears installed along with the solid axle shafts. After the axle housing is buttoned up, the plastic lower suspension links are installed. These are nice and wide to slide on rocks without catching or breaking.
Now the rear suspension is complete. The upper links are much shorter fixed links and are more greatly triangulated to keep the axle centered. The overall articulation angle is quite large.
Time to build the shocks. These are plastic oil filled shocks but are not quite the same as standard CVA shocks. The main difference is that they do not have interchangeable pistons attached with E-clips. Instead, the piston and rod are a single, monolithic metal part so the only adjustment possible is fluid viscosity. The right hand image shows the shocks installed. I find them quite capable.
The last thing to do to get a rolling chassis is install the electronics. The battery sits crosswise with an electronics platform over the top. Only a 6-cell NiMH pack or something of similar size will fit. The steering is the weakest point of the model. Since the servo is on top but the bellcranks are on the bottom, the torque must pass down through a long shaft which introduces quite a bit of play. This is a really new kit though, and the parts seem to fit better than on some older CC-01's. Perhaps they updated the mold. On the right you can see the completed chassis with body posts, wheels, and tires.

Please Log in to join the conversation.

Blakbird's 58657 Defender (CC-01) Build 5 years 3 months ago #53497

Sometimes I forget how much work it is to properly prepare a Tamiya polycarbonate body. In general I much prefer hard bodies for their detail and accuracy, but this particular clear body has a lot of scale detail and attached parts. You can tell by how many holes I had to ream. There are 22 holes to make per the instructions, by far the most of any Lexan body I've made so far. The picture below shows a dry fit of the body before any preparation.
After cutting out the body and drilling the holes, the next step is to install the 19 window masks as shown on the left. That's right, there are 19 windows if you include the tail light lenses. On the right you can see my additional masking. I not only masked the roof for white as shown in the instructions, I also decided to mask the fenders and bumpers for black. The instructions call for doing the black with stickers, but paint looks a lot better and will be more durable. These areas were also pretty simple to mask.
The photo at the left shows the body after the application of the first color: PS-22 Racing Green. After that I removed the masking from the roof and sprayed the white. The photo on the right shows how I stupidly removed the window masks before I had done the black. I had to fish them out of the garbage and reapply them so I could paint the black. The final paint step was then to put PS-31 Smoke on the windows to tint them, but not on the light lens transparencies.
With the paint done I removed the overspray film and test fitted the body to the chassis. These two pictures compare the model with and without detailing. The picture on the right has added the decals, the grille, the window cage, the mirrors, and the spare tire. It made a huge difference. I added black trim tape to outline the door.
This is one of the best looking Lexan truck bodies I have seen. I went to a lot of trouble to paint the grille slats silver with a paint pen and also painted the indicators. The headlight lenses are actually part of the body. I'm not a big fan of using stickers for the tail light lens coloring. They are really hard to apply to the compound curves without gaps and peeling. For now they look OK, but I assume that will change the first time they get wet. The body includes reinforcing parts for the large flat rear bumper to make it stiffer. I've also installed the light buckets and an LED system.

Please Log in to join the conversation.

Blakbird's 58657 Defender (CC-01) Build 5 years 3 months ago #53498

The downside to a really realistic Lexan body is seeing the electronics through the window. It looks 100x better with something to block that view and even better yet with a driver. I used a flat metal sheet as a floor, carved some simple bench seats out of balsa, and installed a Tamiya 4WD driver. I even installed him on the right (wrong) side since this is a Land Rover. My daughter decided that he needed a name and is a huge Marvel fan so she came up with "Benetom Hollabatchton" Bonus points if you know who we combined to get that.
A Defender uses side bench seats in the back, so I tried to make something that simulated that. I was able to install the LED controller beneath the floor so you can't see the wires.
Attachments:
The following user(s) Liked this: stingray-63

Please Log in to join the conversation.

Blakbird's 58657 Defender (CC-01) Build 5 years 3 months ago #53499

Here are some outdoor photos of the Defender. These were all taken before the driver was installed.

Please Log in to join the conversation.

Blakbird's 58657 Defender (CC-01) Build 5 years 3 months ago #53500

Here is a real Defender for comparison to show just how realistic the model looks.
I am starting get a pretty good collection of CC-01 trucks.
Attachments:
The following user(s) Liked this: stingray-63, Al

Please Log in to join the conversation.

Blakbird's 58657 Defender (CC-01) Build 5 years 3 months ago #53506

Fun. The first cc01 had white nylon gears.

Please Log in to join the conversation.

Blakbird's 58657 Defender (CC-01) Build 5 years 3 months ago #53507

Your scaled cc collection is awesome

Please Log in to join the conversation.

Blakbird's 58657 Defender (CC-01) Build 5 years 3 months ago #53543

Exellent work !
I love the end result !
Proud owner of the Bruiser Family

Please Log in to join the conversation.

  • Page:
  • 1
  • 2
Moderators: caprinutstingray-63AndyAus
Time to create page: 0.254 seconds
Cookies are required to make this site work. If you continue to use this site you permit us to use cookies.