Keyword
  • Page:
  • 1
  • 2

TOPIC:

Blakbird's 56307 Mercedes 1850L Build 3 years 9 months ago #61069

Painting the mostly cubic cab was way more work than I expected because all the window trim (and some other details) needs to be black. I started by painting the whole thing cobalt blue on the outside, then masked everything that didn't need to be black. This involved a lot of trimming as you can see. I also painted the whole inside surface black so no white plastic could be seen. The final result is on the right. This was a couple of days of work.
The striped decals in this kit come in two colors: silver and maroon. Presumably the colored versions are intended to be used with a more neutral paint scheme. With the stickers applied, I put several coats of clear over the top. The picture on the right shows the completed wind deflector. This picture does a good job of showing the reflectivity of the clear coat.
The completed cab includes the main "cube", the wind deflector, a sun screen, side mirrors, and the grille. The interior is also attached directly to the cab (rather than to the floor) so it tips up with the cab. On the right the whole truck has been painted and assembled.
Here are closeup views of the front and rear of the truck. You can see that I've fixed the wrongly painted yellow fog light and I've also added windshield wipers (taped in position while they dry). From the back you can see the bumper, mud flaps, tail lights, and the door latching mechanism.

Please Log in to join the conversation.

Last edit: by blakbird.

Blakbird's 56307 Mercedes 1850L Build 3 years 9 months ago #61070

Like my other tractor trucks, a Multi-Function Control unit was installed here to add lights, sounds, and vibration. I used the MFC-03 "Euro-Style" unit here. I've covered the installation of these before so I'll keep the details here to a minimum. The parts which come with the kit are shown on the right. The vast bulk of the plastic parts are options which allow the MFC to be installed in any tractor truck, but for any given truck only a tiny handful of them are used. The rest are surplus. For this truck I used some headlight buckets, a speaker box, and a fuel tank to house the control panel. This truck has no fifth wheel so none of those parts were needed.
Here I've attached all the lights that I intend to use for a functional test. Note that the Delivery Truck only uses a fraction of the possible lighting configurations, so many channels are left unused. Seems like a shame.
The picture on the left shows the difference between the headlight bucket that came with the truck verses the replacement that came with the MFC. The Delivery Truck is old enough that the original light kit available for it used incandescent lights and the lower light openings were just slots. The newer MFC uses LEDs: 5mm for the main light and 3mm for the bottom lights. The MFC light bucket (far left) also includes additional mounting points for the LED clamping brackets. The picture on the right shows the front bumper lights all installed. There are a total of 8 lights in the front.
Here is a test of the lights in the completed front bumper. The yellow tint to the outer for lights is just paint that I chose to apply for some contrast.

Please Log in to join the conversation.

Last edit: by blakbird.

Blakbird's 56307 Mercedes 1850L Build 3 years 9 months ago #61072

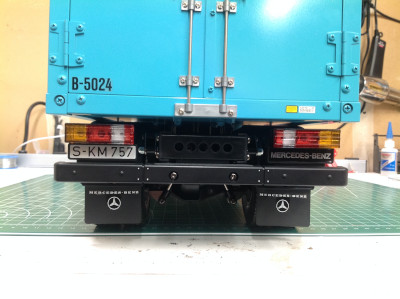
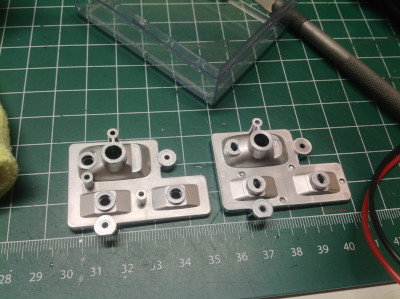
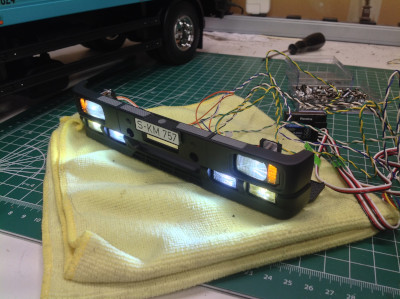
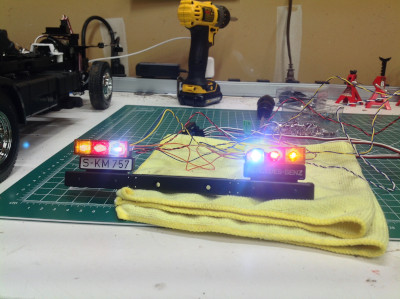
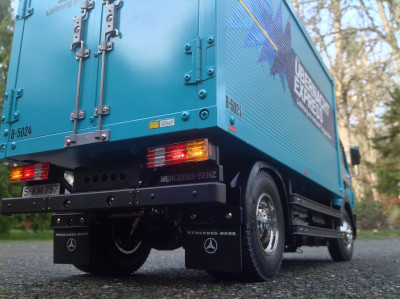
The rear light buckets need to be modified to work with the MFC. There is no hole for the reverse lights, but it is easy to drill a couple of 3mm holes to make them work as shown. There are a total of 6 lights in the rear.
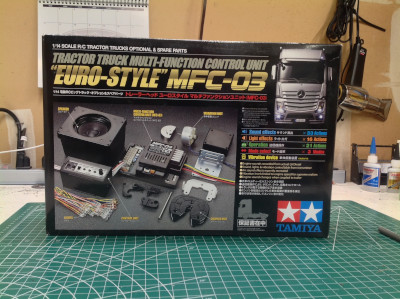
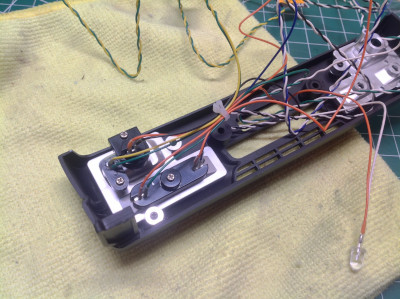
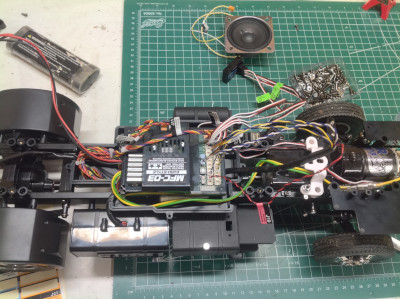
The Delivery Truck was designed to use the ancient 56501 "electrical unit" which included a bunch of claptrap such as a circuit board, rear terminal, front terminal, roof terminal, beeper, switch case, and a bunch of lights. The truck is therefore provisioned with mounting points for all of these including a tray that fits between the chassis rails, under the floor of the box. The MFC ignores all of this and tells you to install the MFC and speaker in the cabin, but this prohibits the use of an interior since the cabin would be full of electronics. I decided to modify the existing mounting features for my needs. I placed the MFC in the tray intended for the circuit board and ran the wires under the floor. I also relocated the battery inside the box as shown to make it easier to install and make the wires neater.
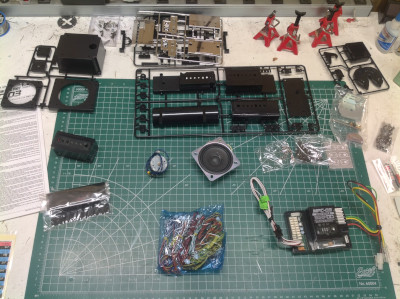
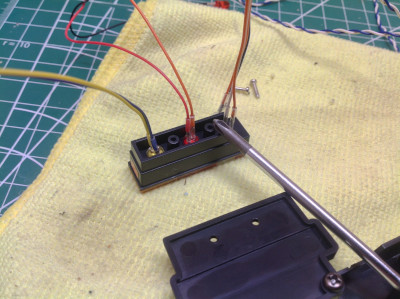
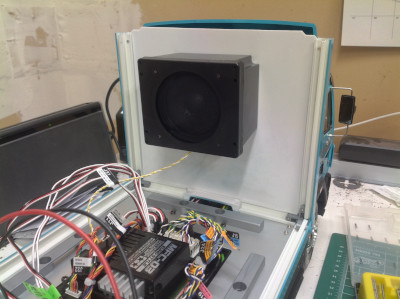
Instead of putting the speaker under the roof of the cab without an enclosure, I built the speaker box and mounted it to the front wall of the cargo box. This way the entire box can be used as a resonance chamber. It worked pretty well.
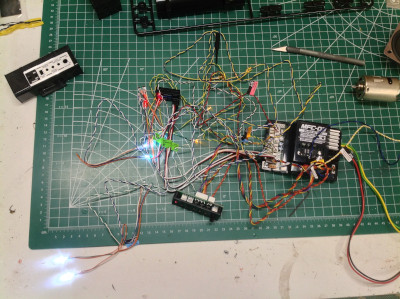
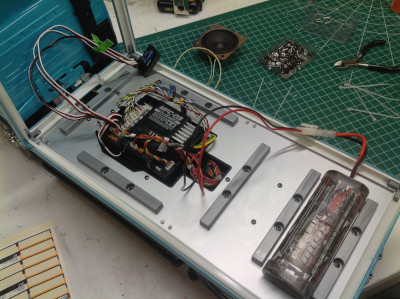
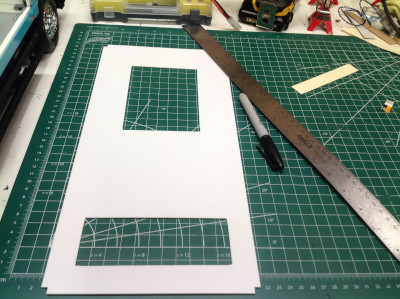
The MFC unit is too tall to fit under the floor like the old electrical unit, so I cut rectangular slots out of the floor for both the MFC and the battery as shown. This allowed me to have the neatest wiring solution I've ever done with an MFC. I mounted the radio receiver below the speaker and the vibration unit to the floor. This last item proved the most troublesome because the aluminum side walls of the box buzz like crazy when the vibration motor is running. I'm exploring ways to isolate them so they don't rattle.
The following user(s) Liked this: Jonny Retro, stingray-63

Please Log in to join the conversation.

Blakbird's 56307 Mercedes 1850L Build 3 years 9 months ago #61073

This Coral Blue isn't a color I would have been likely to choose if I hadn't seen it on the box art and approved. The box trucks we have in the USA don't look quite like this so the appearance is a bit foreign to me, but I really like it nonetheless. The corrugated panels and striking decals make for a very impressive appearance. As always, the lights make it even better.
Here is a real truck for comparison. It even uses the same stripe scheme as the Tamiya model. My decision to paint the outer fog lights yellow was based on this image.
The following user(s) Liked this: Jonny Retro, Edou, stingray-63, Al

Please Log in to join the conversation.

Blakbird's 56307 Mercedes 1850L Build 3 years 9 months ago #61074

Absolutely top class work :y: B)


... but if I could add one little thing - wetting the decals & the surface with water with a bit of hand dish washing detergent gives you a bit of time to reposition :)

Please Log in to join the conversation.

  • Page:
  • 1
  • 2
Moderators: caprinutstingray-63AndyAus
Time to create page: 0.222 seconds
Cookies are required to make this site work. If you continue to use this site you permit us to use cookies.