Keyword

TOPIC:

Blakbird's 56020 Leopard 2A6 Build 3 years 7 months ago #61790

Quite impressive the beasts B) Are the metal tracks on there?

No, the tracks are plastic with rubber pads. Metal tracks are available, but I think they would make it worse.

Correction: metal tracks were once available, but they seem to be long since discontinued.


How would they make it worse? I have no experience with these.
If you can't fix it with a hammer, you've got an electrical problem mate :)

Please Log in to join the conversation.

Blakbird's 56020 Leopard 2A6 Build 3 years 7 months ago #61791

Andy, they are heavier and don't give anything more realistic. And they are very very expensive

Please Log in to join the conversation.

Blakbird's 56020 Leopard 2A6 Build 3 years 7 months ago #61792

Tanks are absolutely awesome. My father built 3 of them. King tiger, sherman and leopard. But this last one hasn't smoke effect. For the king tiger tamiya recorded the sound of the last KT wich works in France.

Please Log in to join the conversation.

Blakbird's 56020 Leopard 2A6 Build 3 years 7 months ago #61794

Excellent write-up as always, blakbird :y:

Please Log in to join the conversation.

Blakbird's 56020 Leopard 2A6 Build 3 years 7 months ago #61795

Tanks are absolutely awesome. My father built 3 of them. King tiger, sherman and leopard. But this last one hasn't smoke effect. For the king tiger tamiya recorded the sound of the last KT wich works in France.

Several of the tank sounds were recorded from the real thing. It is interesting to go through the list of tanks (which isn't that large) and see which DMD control units (or MF unit) each is using. Presumably any that use the same unit also share the same sounds. The Leopard 2A6 uses the DMD T-07 which is unique to this model. I haven't built any other tanks (yet), but I know the Abrams uses a turbine sound and the Russian KV-1 and KV-2 share a sound unit. Here's what I have been able to find so far (incomplete):
  • MF-01: King Tiger and Panther
  • MF-02: Sherman
  • MF-03: Pershing
  • MF-04: Jagdpanzer
  • MF-05: Panzerkampf
  • MF-06: KV-1, KV-2, JS-1
  • MF-07: Super Sherman
  • DMD-T07: Leopard 2A6 (integrated sound)
  • DMD-T09: JGSDF (integrated sound)
  • DMD-T10: Abrams (integrated sound)
  • DMD-T11: Sheridan (integrated sound)
The following user(s) Liked this: stingray-63, 1972 LeMansGT Jim

Please Log in to join the conversation.

Blakbird's 56020 Leopard 2A6 Build 3 years 7 months ago #61796

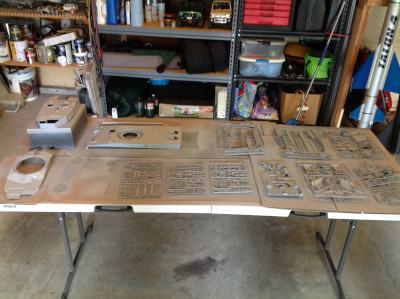
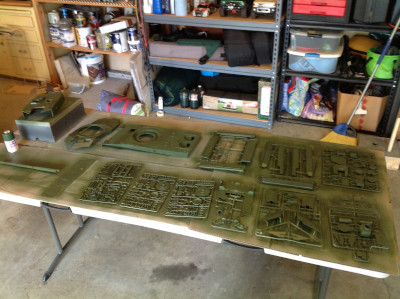
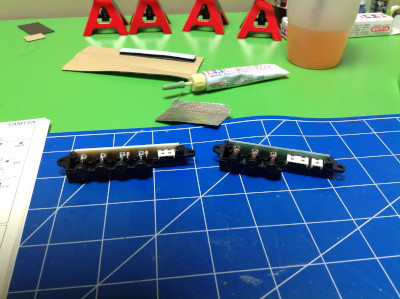
Since almost the entire model is NATO Green, my plan had been to build the whole thing and then spray paint it. However, as I built I realized there were too many little bits that were not green, such as the road tires, for this plan to work. So at this point I broke down and primed and painted all the remaining parts and trees as shown. This is not very efficient because you waste a lot of paint on open space. I needed 7 small cans of Tamiya paint, more than my local hobby store carried so I had to drive across town to another store to get more.
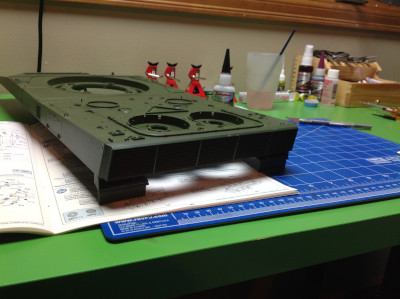
It has nothing to do with building, but I found this photo fascinating. This is the bottom of the hull plate after painting. The bottom did not get painted, but it appears that some residual particles were drawn up onto the surface. The pattern you see here was invisible in the part as it came out of the mold. I surmise that there was some sort of local static charge which preferentially attracted the primer, revealing the flow lines from the injection gates. Cool!
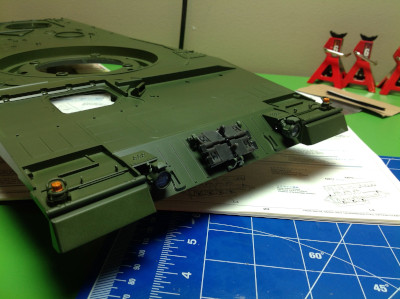
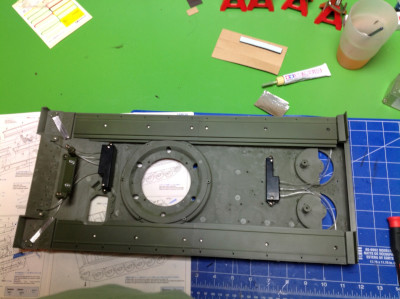
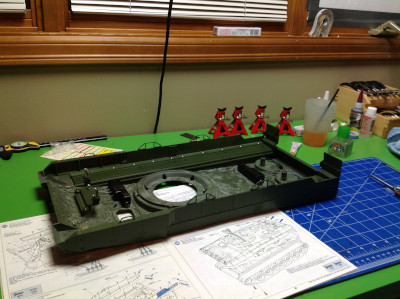
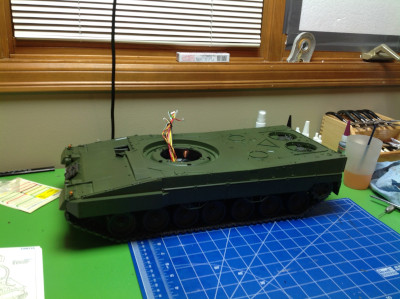
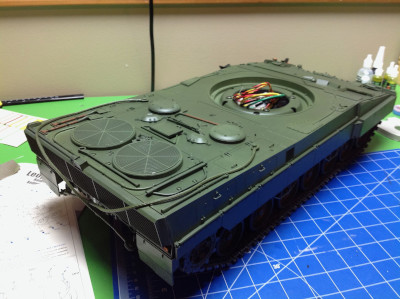
Time to start building the hull plate. The back grill is not fastened but is only attached with cement. This turned out to be a bit of an issue because it can catch on obstacles while driving and then it rips right off. I had to go back and install it with CA which turned out a lot messier than I would have liked. At the time of this photo, it is still pristine.
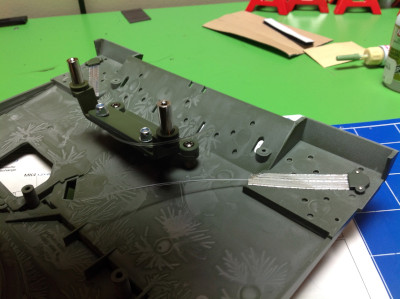
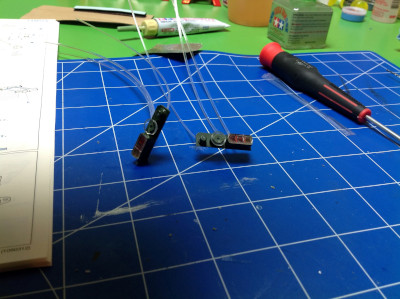
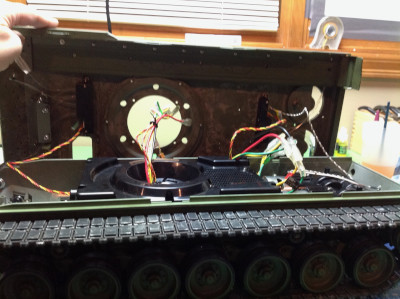
Despite the large scale of this model, the areas that need to be lit are still too small to reasonably install an LED. For this reason, all the lights are handled with fiber optics. Here I have installed fibers to the front marker lights and secured them with aluminum tape. The fibers come in two diameters in long spools which must be carefully cut to length without damaging the ends and interrupting light transmission.
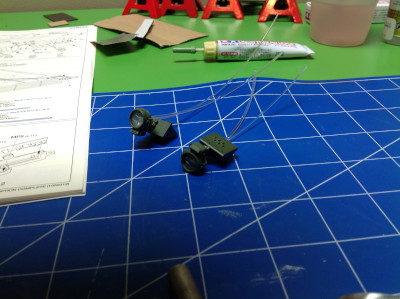
Step 29 took forever. This is headlights. Each square of my cutting mat is 1 square inch, so that gives you an idea of the size. Inside each light it needs to be painted silver and then two fibers need to be installed. The larger diameter fiber sticks right out in the center. The smaller fiber needs to be sharply bent and angled toward the tiny vent hole on the top. The large fiber will be the main light, and the smaller will be the camouflage running light. Each of these little assemblies has 8 parts are all must be cemented without getting any glue on the transparent lenses or breaking any fibers.
Step 30 installs the headlights, some spare tracks, and some side marker shields on the front hull plate. The lights cannot be tested at this point because the light source has not yet been installed. The spare tracks did not fit very well and took a long time to successfully glue into place.
The following user(s) Liked this: stingray-63, 1972 LeMansGT Jim

Please Log in to join the conversation.

Blakbird's 56020 Leopard 2A6 Build 3 years 7 months ago #61797

If you thought the headlights were fiddly little bits to assemble, wait until you see the tail lights. Each assembly has 3 fibers, and all are tail lights. The outermost is the standard tail light, the middle is the brake light, and the inner is the camouflage tail light which is smaller, dimmer, and shielded from above. The 4th round lens does not contain a functional light, nor does the outermost amber. The kit contains no colored transparent parts, so the lenses needed to be painted with trans red and orange, and silver in the well behind to aid in reflection. In the right hand photo, you can see the tiny glass fiber poking out of the inner most light.
Step 32 assembles the light sources. There is a front and a rear unit. The front light board has 4 LEDs which control the marker lights, the head lights, and the camo head lights. The dimmer lights share an LED while the headlights each have their own. All are white. The rear light board has 3 LEDS which control the tail lights, the brake lights, and the camo tail lights. All control two fibers and all are red. The extra connector on the rear board is for the NATO convoy marker which has its own LED and does not use a fiber. This is the brightest light on the tank. The lights can never all be on at once but have have peacetime and battle modes which correspond to those on the real tank. The lighting mode can be set from the transmitter. There are 7 options: 4 peacetime and 3 battle. Two (off) are the same.
Step 33 installs the light modules and attaches the 12 optical fibers to them. The armor is also installed above the tracks.
The side skirts are screwed on in Step 34. These protect the majority of the track sides from enemy fire. The rubber mud flaps are also installed here. The instructions call for a warning label to be installed on the side skirts telling people to keep their fingers out of the sprocket. While this is no doubt good advice, I can't imagine anyone putting this huge ugly label on such a beautiful scale machine. In fact, if you look at the pictures on the box Tamiya didn't install it either.
Now it's time to install the hull plate on the hull. This is trickier than it seems. Step 35 just has you route the wires but the actual installation isn't done until Step 36. It is important not to pinch anything, and all the wires for the control unit need to be passed up through the center. You also need to be able to remove this later to access the drive system for maintenance. Four screws attach the top plate to the hull, and another four attach the top plate to the speaker box. However, since the speaker box is not attached to the hull it can be lifted out with the top plate. The wires you see sticking out are 2 for each motor and two harnesses going to the light units. It looks pretty tidy with that cover on!
The following user(s) Liked this: stingray-63

Please Log in to join the conversation.

Blakbird's 56020 Leopard 2A6 Build 3 years 7 months ago #61798

Pattern on the underside of the hull plate is caused by mould release agent - and why you're supposed to wash plastic kits before building/painting :)

Please Log in to join the conversation.

Blakbird's 56020 Leopard 2A6 Build 3 years 7 months ago #61799

Steps 37 and 38 attach a whole bunch of tiny bits to the front of the hull plate. There are grousers, rear view mirrors, spare track pads, tow hooks, cleaning rods, and a driver's hatch with windows that slides open. This takes the relatively smooth, flat hull and adds a lot of detail.
Steps 39 and 40 install the rear hull detail. The first photo shows the installation of a couple of intake towers and some radiator grilles. These are photo etched parts installed with care. The right hand photo shows a lot of tools, not all of which I can name. Looks like there are a couple of shovels, a saw, a breaker bar, a pick axe, and a jack among others. I considered painting all of these in metal tool colors, but real tank operators usually camouflage right over the tops of the tools so I figured I would do the same. A couple of tow cables are also installed here. They are not functional (too weak) but they are flexible and can be detached for accessing the hull. That box you see in the middle top of the back is a rear view camera. Though hard to see in the photo, there are also a bunch of little handles averaging about 4mm in size.

Much of what you see on the back top here will be hidden by the turret except when it is rotated.
Attachments:
The following user(s) Liked this: stingray-63, 1972 LeMansGT Jim

Please Log in to join the conversation.

Blakbird's 56020 Leopard 2A6 Build 3 years 7 months ago #61805

Great work Blakbird. I never really realized what went into building one of these. I wonder how they run and if they leave a trail of pieces behind them...

Sometimes the Semi's shed their chrome as they go down the road. :lol:

Please Log in to join the conversation.

Moderators: caprinutstingray-63AndyAus
Time to create page: 0.196 seconds
Cookies are required to make this site work. If you continue to use this site you permit us to use cookies.