Keyword
  • Page:
  • 1
  • 2

TOPIC:

Ford Ranger XLT resto 7 years 5 months ago #41459

Hi,
I recently became the proud "custodian" of an old Ranger XLT.
It had been sat in a garage for many many years and as far as the guy could recall it wasn't working very well when it went into hibernation.


First it needed a good strip down, clean and determining what bits needed replacing and what could be salvaged and also what was missing.
Generally it wasn't in too bad condition - 2 front lower arms were needed and a couple of brass ball screws.
The tyres were only very lightly cracked, so I restored them and they've come up a treat!

All the metal parts were cleaned, sanded, buffed and polished:


then the chassis was reassembled and work started on the very dull and scratched radio boxes.
After hours and hours of sanding and polishing, I got them as good as I think I ever will:

I'm just working through restoring the wiring now and getting it all back in the box, then it will be onto the body!!!
The following user(s) Liked this: AndyAus

Please Log in to join the conversation.

Last edit: by allhailoptimus.

Ford Ranger XLT resto 7 years 5 months ago #41460

There is something wrong with the linking of you photos.
We only see a cute kitten :-)
Signature now gets correct formatting if you edit it in your Profile. Use normal BBcode if you want.
www.tamiyabase.com was formatted automatically.

Please Log in to join the conversation.

Ford Ranger XLT resto 7 years 5 months ago #41461

Really? I see a load of funny looking stuffed animals on photobucket :whistle:

Please Log in to join the conversation.

Last edit: by waterbok.

Ford Ranger XLT resto 7 years 5 months ago #41462

Attachments:

Please Log in to join the conversation.

Ford Ranger XLT resto 7 years 5 months ago #41467

OK! So it's not a technical problem! :laugh:

Please Log in to join the conversation.

Ford Ranger XLT resto 7 years 5 months ago #41469

Ooops!!!!
Should all be ok now - sorry!!!

Please Log in to join the conversation.

Last edit: by allhailoptimus.

Ford Ranger XLT resto 7 years 5 months ago #41474

WOOOOOHHHH! Shiny alloy :y: Nice work!
And you have 4 ranger wheeles :blush: :P :P :P

Please Log in to join the conversation.

Last edit: by stingray-63.

Ford Ranger XLT resto 7 years 5 months ago #41501

:blush: I like shiny....
Yeah - I'm glad for originality sake that they are correct, but aesthetically they really are terrible.
Don't be surprised if I move this over to "modified vintage...." and you see it with a different set of wheels.....
I will of course keep the originals and put them back in their restored tyres and think up some way of displaying them, but the backwards offsets really upset me!!!! :S

started fixing the wiring - yum - that looks nice......

Please Log in to join the conversation.

Ford Ranger XLT resto 7 years 5 months ago #41508

:blush: I like shiny....
Yeah - I'm glad for originality sake that they are correct, but aesthetically they really are terrible.
Don't be surprised if I move this over to "modified vintage...." and you see it with a different set of wheels.....
I will of course keep the originals and put them back in their restored tyres and think up some way of displaying them, but the backwards offsets really upset me!!!! :S

started fixing the wiring - yum - that looks nice......

No shame to like shiny :)
Wires look to be more than worn :pinch:

Please Log in to join the conversation.

Ford Ranger XLT resto 7 years 3 months ago #41982

ello ello - thought I'd better do an update. :P
So I spent a long long time polishing the rest of the plastic cases and sorting out the wiring and got it all put together finally.
Now - confession should be made here - I've not stuck to original, so really I guess this should move to the other forum......... :whistle:


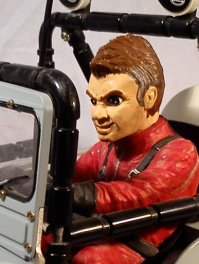
I still have all the original parts and they will be restored properly, but I have decided I want this to look like my perfect interpretation of what it should've looked like, not a faithful restoration just because. Therefore I've replaced the front bumper with the black version off my re're Sand Scorcher, the shocks are from the 'bay as are the wheels and the rear shock mounts are my own design printed via shapeways. They just clamp onto the roll hoop, so no drilling or modification is needed. I did add a hole on the inner plane so they could be linked with a tiebar, but I don't think it's needed to be honest. The tires are the originals that I've restored, but they are a little cracked so I will probably change these for new items and put the originals on the original wheels once I've restored them.

So the next step is the body.........


As you can see, it's not painted in the original colours.....
The shell itself looked to be in reasonable condition. I knew there was a crack right across the roof, but that is easily fixed and there was a dodgy repair to the front post mount area. The quarter light posts have gone, i guess they went when the roof got broken, but they should be easy to replace. So off I went with the Mr. Muscle oven cleaner.....

left that for about a day and a half expecting to be able to basically wash the paint off as I have done a few times previously...... but no. Not a sausage. Didn't even touch it. :S
Tried it again, this time giving it a good sand down first to see if that made any difference, but nope, nada.
I was getting desperate now, and nearly went at it with paint stripper but managed to hold off. Tried brake cleaner and all that did was clean it up :cheer:
So I took a trip to B&Q and got a can of De-Solv It Graffiti Remover, as I'd read several peeps had had good results with it.
Erm, No.... :angry:
It took the yellow paint off where it had evidently gone on a bit thinner, but didn't even look at the primer.
I decided something fishy was going on by now, so I called the guy I got it off to see if he could shed any light on it. Turns out, the paint was a 2 pack auto paint (he owns a car body shop so I guess I should've known) a plastic primer and a really hard, thick, shiny filler under that. He said there was no way I'd get that filler off - they don't even use it any more because it was too expensive.
And so the challenge was made..... :silly:
I went back to B&Q for another look around and found this stuff:

non toxic, safe on plastic and claims to get rid of everything.
Slapped it on good and thick and left it for a day and low and behold i saw some bubbling!!!!! So I gave it a scrape and the paint and some of the primer came off!!!!!!!!! :woohoo: Encouraged, I gave it another coat and left it another day and got it to this stage:

A big improvement, but I was still struggling with the filler.
I gave it another couple of coats of the next few days and finally it started to come off. It seemed that it didn't want to bubble and lift off as normal (to me) or scrape off, it lifted off in chunks using a blade underneath it, guess it maybe just released the bond enough to let it come away but not soften it much.
So, about 2 weeks after starting, lots of fumes (not all from the paint strippers) lots of sanding and a full set of fingertips later I got to this stage:


Next step is to fix the roof, bonnet and all the little bits of damage and then I can start with the primers :y:
The following user(s) Liked this: stingray-63

Please Log in to join the conversation.

  • Page:
  • 1
  • 2
Moderators: caprinutstingray-63AndyAus
Time to create page: 0.133 seconds
Cookies are required to make this site work. If you continue to use this site you permit us to use cookies.