Keyword
  • Page:
  • 1
  • 2

TOPIC:

Blakbird's 42301 TRF 419X Build 2 years 10 months ago #67280

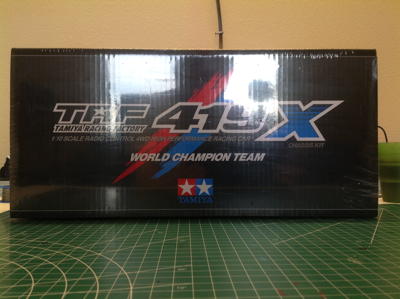
I've always been interested in owning one of the TRF (Tamiya Racing Factory) touring car chassis but they were prohibitively expensive (~$1000), especially since I couldn't really see what made them so much better than their much cheaper cousins and, without any intent of racing, I couldn't claim the difference would really matter to me.  However, when the 42345 TRF420 was about to be released the 42301 TRF419X went on sale for about 65% off and there was just no excuse not to buy it.

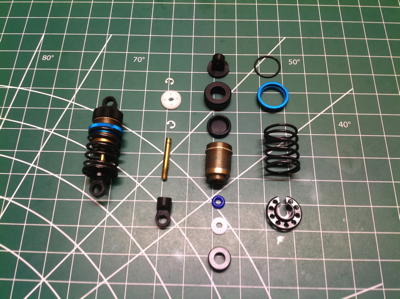
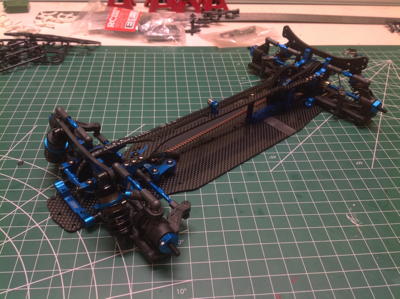
So what's all the fuss about?  Well, this chassis is magnificent.  The deck, stiffener, and shock towers are all carbon fiber and pretty much everything else is aluminum.  Even the hardware and bearings are better than the usual kits.  After every step I found myself thinking "Wow, those parts were really nice".  The TRF aluminum shocks are legendary.  About the only plastic parts are the lower suspension arms and the uprights, but even those are glass filled with exceptional tolerances.  If you are not racing, there is a good chance none of that really matters, but if you love quality just for the sake of its existence, then you will undoubtedly enjoy this build.

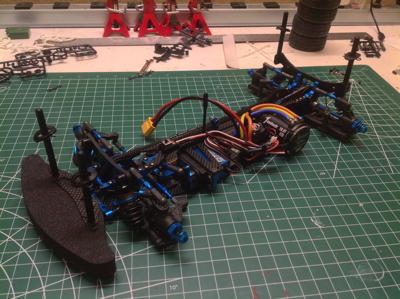
Apart from the price, the drawback to TRF kits is that they don't come with anything.  It is not surprising that this chassis doesn't come with a pathetic silver can motor, but there is no ESC either.  You are completely on your own for electronics.  The same goes for wheels, tires, and a body.  You have to fully equip this model to your own specifications.  I chose a 10.5T Hobbywing sensored brushless system which is more than powerful enough for any driving I will ever do with this car.  I got a nice fast Protek digital steering servo with a blue anodized case to match the chassis components.

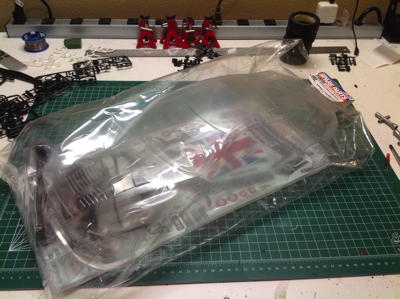
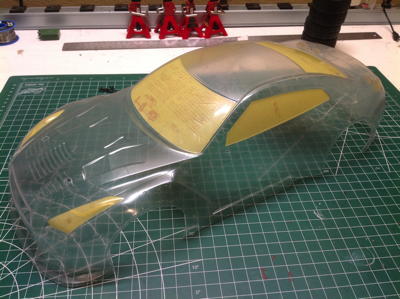
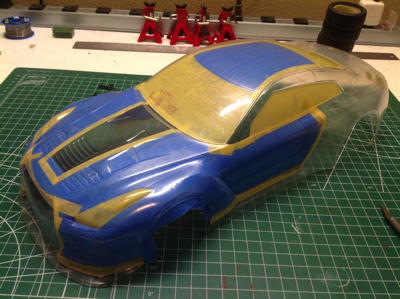
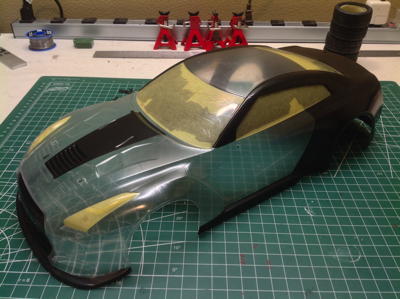
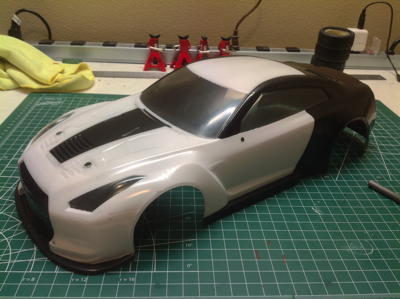
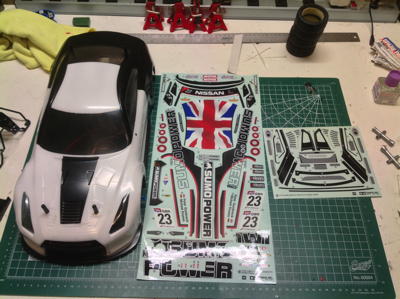
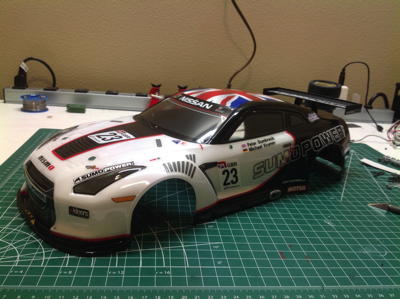
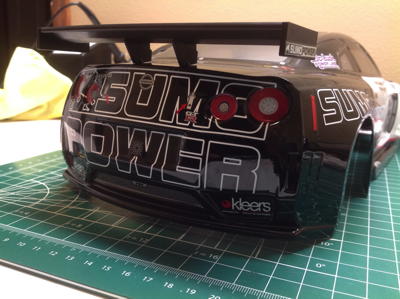
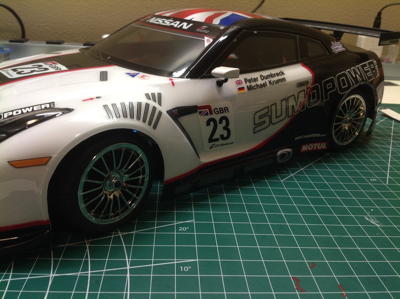
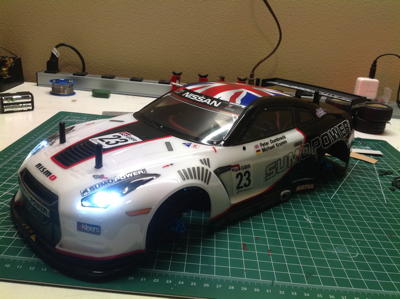
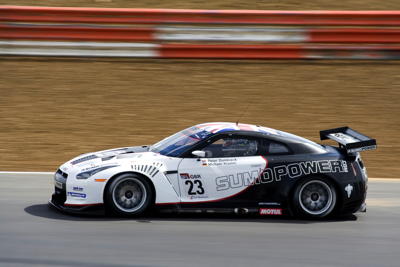
I'd been interested in the Nissan GT-R Sumo Power body for a long time but wasn't too keen on getting it on a TT-01E chassis so it seemed like the perfect fit.  If you don't live in Japan, there's a good chance you've never even heard of this car.  Sumo Power is a British touring car modification company specializing in Japanese cars.  This particular model raced in the short lived GT1 World Championship which was only held from 2010-2012.  Regardless of its pedigree, it is just a really good looking body with an excellent livery.  I'm very happy with it.

The chassis drives exactly as well as you'd expect, though my qualifications for making that claim are admittedly limited.  It is fast, tight, and accurate.  A real joy to drive.

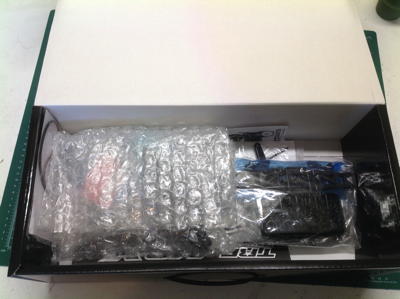
TRF kits come in pretty small, unadorned boxes because they do not include a body, wheels, tires, or electronics. Even with the small size of the box, it is about half empty inside.
   

You can see that there are hardly any plastic parts trees here. Usually that happens for a very simple chassis, but this is not simple. Most of the parts are metal or carbon and are contained within the labeled hardware bags.

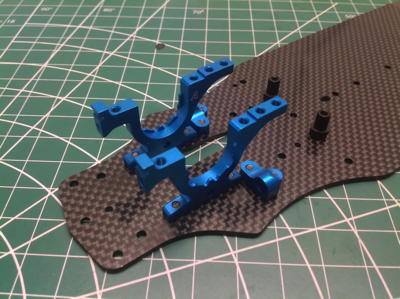
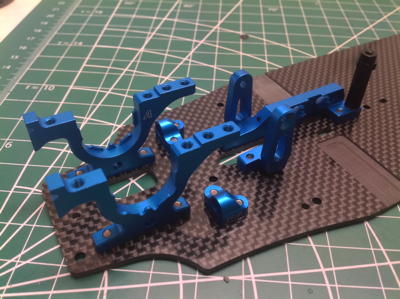
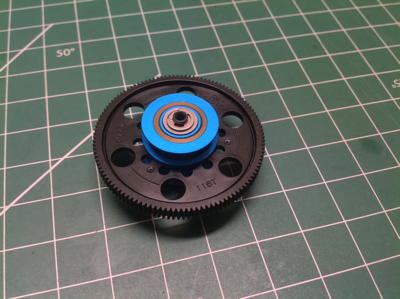
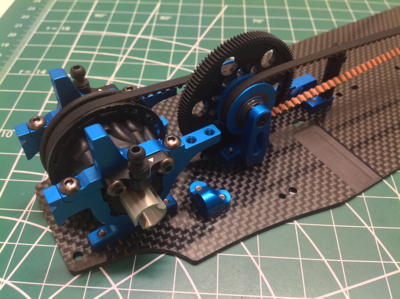
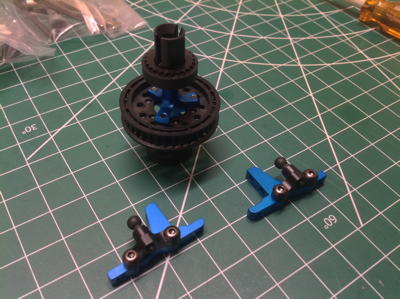
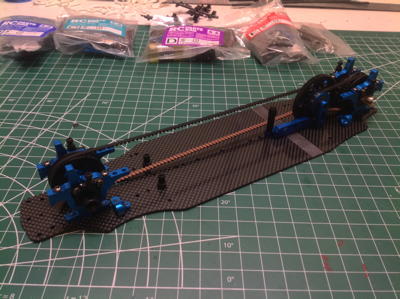
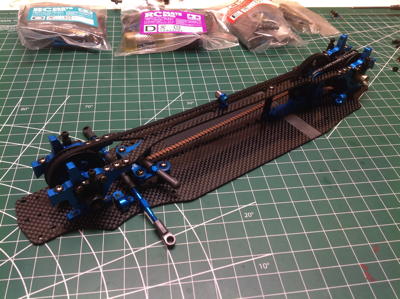
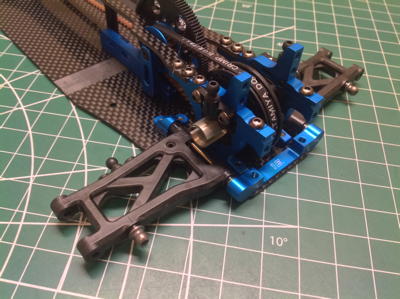
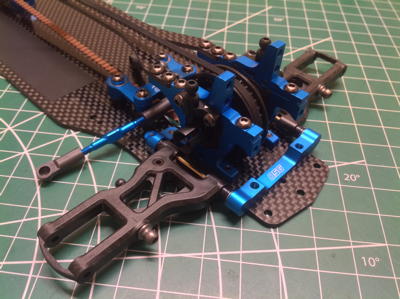
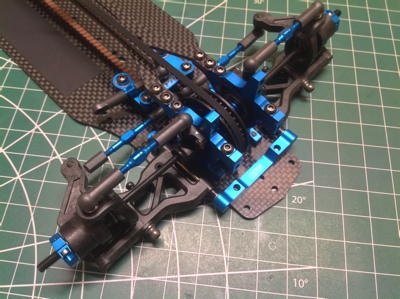
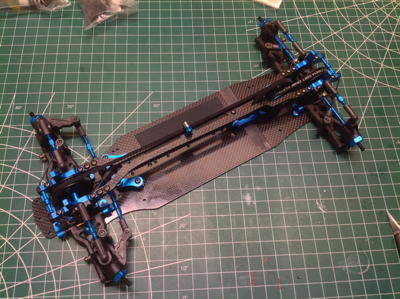
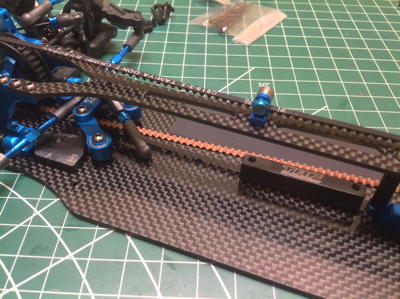
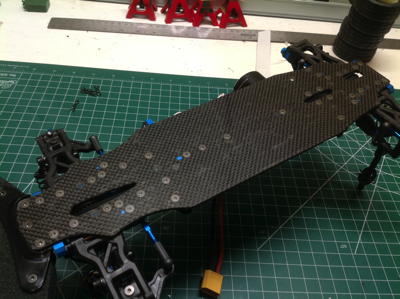
The build starts with the carbon fiber (CFRP) chassis plate and the anodized aluminum rear bulkheads. This model uses all hex hardware, and most of the bolts are countersunk to sit flush with the bottom of the chassis. The left hand picture also shows the rear-forward suspension mounts which partially control the rear toe angle. These parts (05g) in combination with rear-aft mount 1E and the stock 0° uprights result in 3° toe angle. In the right hand picture I've also added the supports for the rear pulley and spur gear. Note that everything is carbon or metal at this point.
   

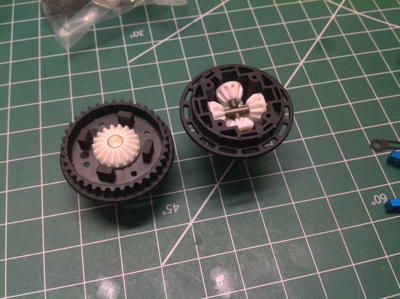
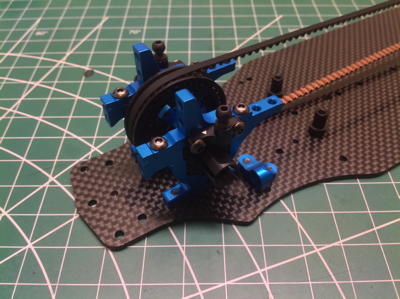
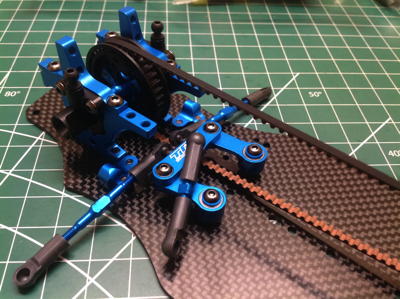
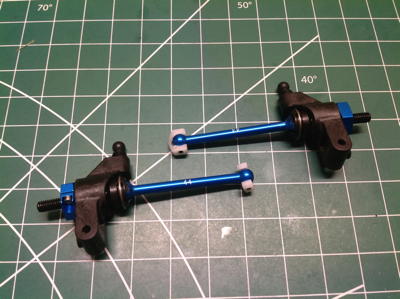
The rear differential uses the first plastic parts. The housing appears to be glass reinforced. You might be surprised that the internal gears are plastic, but these run quiet and wear slowly and are plenty strong for a touring car. They are white but they are not Delrin. They seem to be something much stiffer. The cross shafts are metal, possibly titanium. This is a sealed differential and the kit comes with the clear shock fluid (900cSt kinematic viscosity) to use for filling. The outdrives appear to be aluminum. The completed diff is shown on the right. The teeth surrounding the outdrive are eccentric indexes. The whole diff can be rotated to move the diff back and tighten the belt.
   
Attachments:
The following user(s) Liked this: stingray-63, jord001

Please Log in to join the conversation.

Last edit: by blakbird.

Blakbird's 42301 TRF 419X Build 2 years 10 months ago #67281

The aluminum caps are used to enclose the bearings which mount the differential and also contain the ball joints which support the upper suspension arms.  They are shown mounted on the right with the shorter rear belt installed.
   
    
The spur gear is 64 pitch (tiny teeth) and uses 116 teeth.  Smaller 113T and 111T versions are available for more top speed.  A pulley is located on either side of the spur to drive the front and rear belts in parallel.
   
    
The front uses a solid spool instead of a differential so assembly is much simpler.  The spool just bolts to the front pulley as shown on the left.  Note the toothed cams for tension adjustment just like the rear.  The completed front bulkhead assembly is shown on the right.
   

Here's an overall view showing the completed front and rear bulkheads with both belts installed and tensioned.  Belts have a lot of rolling resistance compared to gears, but they sure are smooth and quiet and, best of all, have zero backlash.  The pockets milled into the chassis plate are to provide clearance for the motor and make it as low as possible.
Attachments:
The following user(s) Liked this: jord001

Please Log in to join the conversation.

Blakbird's 42301 TRF 419X Build 2 years 10 months ago #67282

Now we can install the dual bellcrank steering which is all aluminum and equipped with ball bearings.  This is an extremely well made steering system with virtually no slop.  On the right you can see that the upper carbon chassis brace has been installed.  This significantly increases the stiffness of the whole chassis.  It also supports an idler bearing for the long belt which helps to reduce slap.
   
    
Now the lower glass filled plastic suspension arms can be installed.  The rear is shown on the left and the toe angle can be seen.  There is no toe on the front arms.  The aluminum suspension mounts capture the ball joints which support the arms.


The rear uprights are also plastic and support aluminum CVD axles.  Because the inboard dogbone end mates with an aluminum drive cup, a Delrin slider sits over the pin to prevent it from digging into the drive cup.  This results in very smooth action with no slop.  The upper suspension arms are turnbuckles which allow easy adjustment of camber angle.
   
    
The front knuckles and C-hubs are also glass filled plastic.  The front axles uses a dual cardan design which allows for increased steering angle without jitter.  On the right you can see the completed front suspension with the upper arms and steering links attached.
   
Attachments:
The following user(s) Liked this: stingray-63, jord001

Please Log in to join the conversation.

Last edit: by blakbird.

Blakbird's 42301 TRF 419X Build 2 years 10 months ago #67283

This picture shows the completed front and rear suspension installed on the chassis.  A close look will reveal the stabilizer bars installed also in both the front and rear.     
TRF shocks are always a thing of beauty and these are no exception.  These shocks have very short travel, but that doesn't change the number of parts.  The shock body, both end caps, and spring perches are all aluminum.  The piston head and rod guide rings are Delrin for smooth action.  The picture on the left compares a completed shock to an exploded view.  The shocks are the same at all four corners.  They are shown installed on the right which completes the suspension entirely.  Note the thick carbon shock towers.
   
    
The kits comes with a couple of front and a single center ballast weight which I installed as shown on the left.  On the right I've installed the foam front bumper which will help protect the body.  Note that even the bumper support is made from carbon fiber and also supports the front body posts.
   

This rubber sheet cushions the battery.  Unlike most Tamiya kits, this one is intended to use a rectangular Li-Po race pack.  I quite hate the method for securing the battery though.  The slots shown are for adhesive glass tape which much be replaced every time.  I don't really see what this buys you in a race setting.  I just use a duct tape strap I made.
Attachments:
The following user(s) Liked this: jord001

Please Log in to join the conversation.

Blakbird's 42301 TRF 419X Build 2 years 10 months ago #67284

On the left the last few parts have been installed including the carbon steering servo holder and the antenna tube.  The kit thankfully comes with a high torque servo saver, but I also added an aluminum horn.  On the right all the electronics have been installed.  I used a Hobbywing sensored brushless motor and ESC with a blue Protek steering servo.  Note that even the wheel hexes and lock nuts are blue anodized.


As a final detail, I installed this hard, clear adhesive sheet to the bottom of the chassis.  It will serve to protect the carbon from minor scrapes and gouges.
   
Attachments:
The following user(s) Liked this: stingray-63, Al, 1972 LeMansGT Jim, jord001

Please Log in to join the conversation.

Blakbird's 42301 TRF 419X Build 2 years 10 months ago #67288

Here's the Nissan GT-R Sumo Power body that I got for this model.  I started by trimming the body and test fitting it to the chassis as shown.  Luckily, everything seems to fit perfectly.  The wheelbase and width are just right.
   
    
Next I applied the window masks which include the headlights and tail lights.  Since this is a two-tone paint scheme, I had to manually mask off all the areas that will be white.  This was quite a challenge because many of these lines do not follow body lines but still need to look smooth and symmetrical.  The picture on the right shows my final masking.
   
    
The first couple of paint coats applied were black.  The picture on the left shows the body after the black was painted and the tape removed.  You can see a couple of bleeds but I was able to clean those up before proceeding to the white.  The right hand picture shows the body after the white was applied and the windows smoked.  I put on many coats of white so I could back them with black and still look bright.  I like the inside to be black to hide the electronics better.
   
Attachments:
The following user(s) Liked this: jord001

Please Log in to join the conversation.

Blakbird's 42301 TRF 419X Build 2 years 10 months ago #67289

This model comes with two sticker sheets with over a hundred stickers including the massive Union Jack that covers the entire roof.  Applying these stickers took forever, but this is one of the best looking liveries I have ever done.  It is so detailed.  There are some wrinkles in the flag on the roof which was just too large to apply totally smoothly.
   
    
Probably the most complex area to decorate was the rear which required matching the edge lines of many stickers as well as wrapping them down into the tail light recesses.  I think it came out really well.  Note the good looking rear wing as well.  The right hand picture shows some more detail of the side of the car including the vents over the front wheel arches.  It took me a long time to find some wheels that I was happy with and had the right offset.  I chose these chrome spoked wheels because they seemed to be the best match for the real car.
   

Finally I installed some cheap LEDs into the light buckets to add a whole other level of realism.  They look great.
Attachments:
The following user(s) Liked this: stingray-63, TamiyafanTrieste, jord001

Please Log in to join the conversation.

Blakbird's 42301 TRF 419X Build 2 years 10 months ago #67290

You can't tell from looking at this car that it is a TRF419X.  It could be a generic TT-01 version.  But it isn't.  This car is glorious both inside and out and I couldn't be happier with it.


Attachments:
The following user(s) Liked this: stingray-63, 1972 LeMansGT Jim, TamiyafanTrieste, jord001

Please Log in to join the conversation.

Blakbird's 42301 TRF 419X Build 2 years 10 months ago #67291

Here's a picture of the real car for comparison.
   
Attachments:
The following user(s) Liked this: 1972 LeMansGT Jim, jord001

Please Log in to join the conversation.

Blakbird's 42301 TRF 419X Build 2 years 10 months ago #67293

This body style is not my favourite (I prefere r32 33 34) but the livery is awesome.
The following user(s) Liked this: jord001

Please Log in to join the conversation.

  • Page:
  • 1
  • 2
Moderators: caprinutstingray-63AndyAus
Time to create page: 0.243 seconds
Cookies are required to make this site work. If you continue to use this site you permit us to use cookies.