TOPIC:
Re: Tamiya Holiday Buggy - Project Beach needs help! 11 years 3 months ago #17525
|
@Edou Okay, I will look into it. I quite like the look of the LRP motors. Little worried about the quality of the etronix. Seem quite cheap
 I will try and youtube rebuilding motors, but doesn't look too difficult. I will try and youtube rebuilding motors, but doesn't look too difficult.Got a feeling the standard esc doesn't go very low on turns. I have a spare esc from my kyosho sandmaster, but no idea what this can go to. @EddrickWow, thanks for the incredibly depth answer. I've had to read this a few times to get my head around it all. Yes it is the rerelease, can't believe I forgot to mention it before. I've had a look for those dyes, but can't find it anywhere. Any chance you an remember where the forums were that talked about it? Thanks for the advice on waterproofing etc. Didn't think about the salt attacking the aliminium. Maybe I should hold off the hop up for a bit then...  By strange coincidence, I already had the servo you advised. Although I have been finding it a little slow, and was considering upgrading it. |
|
Please Log in to join the conversation. |
Re: Tamiya Holiday Buggy - Project Beach needs help! 11 years 3 months ago #17535
|
Sorry for all the blurb, I do tend to get carried away....
Don't be put off the project, just be aware of the problems salt water & sand can cause, & mod the car accordingly. Have a look around it for materials that are likely to be attacked, & either replace with plastic, or just make sure you clean them properly after playing. As for the dye, I think it was on Tamiyaclub I read about them dying Holiday Buggy bodies, but there's definately vids on youtube where people are dying nylon wheels etc. Fablon can be had from most craft/needlework type shops. A slow AS12 is usually because the rubber shaft seal hasn't got any lube on it - have the top off & give it a grease, preferrably with silicone grease rather than automotive stuff. Don't over grease the gears, too much will make them stiff & could even break the smaller teeth. A trick for quickly waterproofing standard servos - trap a soft O-ring between the servo top & the horn, grease it well. Foam rings also work. Also, silicone seal the cable entry if it doesn't look well sealed. If you plan to buy a new one, buy a ballraced one, that way you can replace the ballrace with a rubber sealed version, which again, will waterproof it
Custom F2
...
Hilux crossmember drawing
...
F2 axle drawing
...
Quattro radio lid
...
Holiday Buggy motor bracket drawing
...
Quattro resto
...
HitnMiss engine
...
Wild Willy resto
...
Mardave Cobra resto
...
Thunder Dragon resto
...
Grasshopper resto
...
XR311 resto
...
Modded XR311
...
Carbon 25th scratch build
|
|
|
Please Log in to join the conversation. |
Tamiya Holiday Buggy - Project Beach needs help! 11 years 3 months ago #17616
|
Okay, a little update. It's been a busy couple of days with work etc, so haven't had as much time as I would like to work on the car.
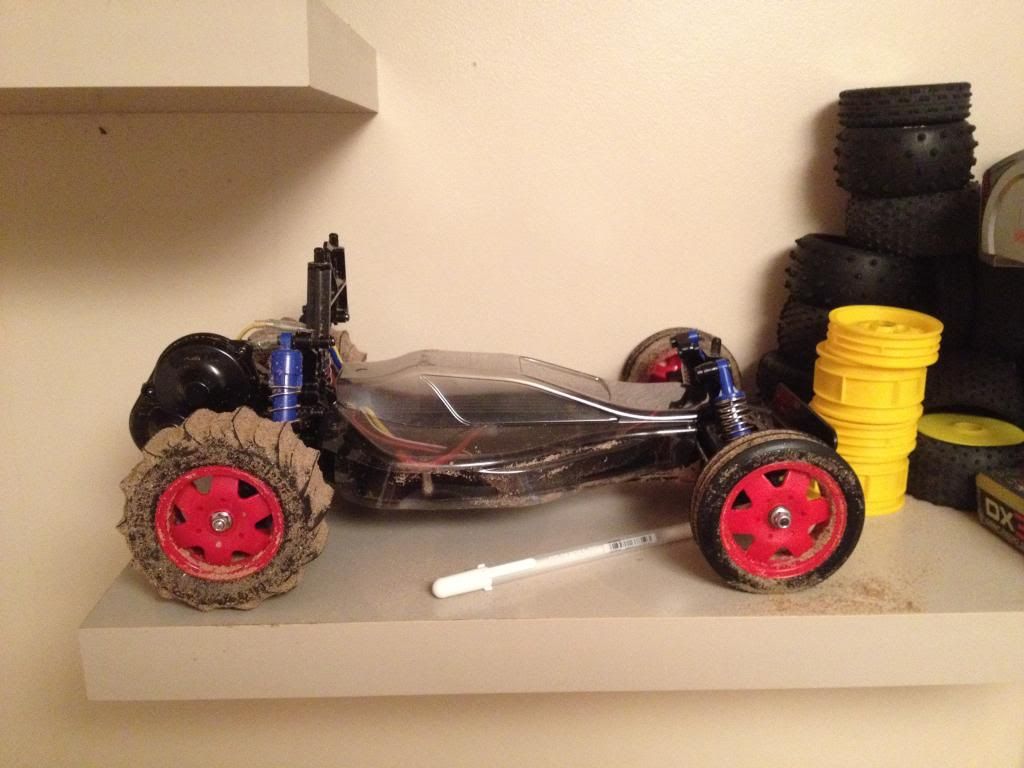
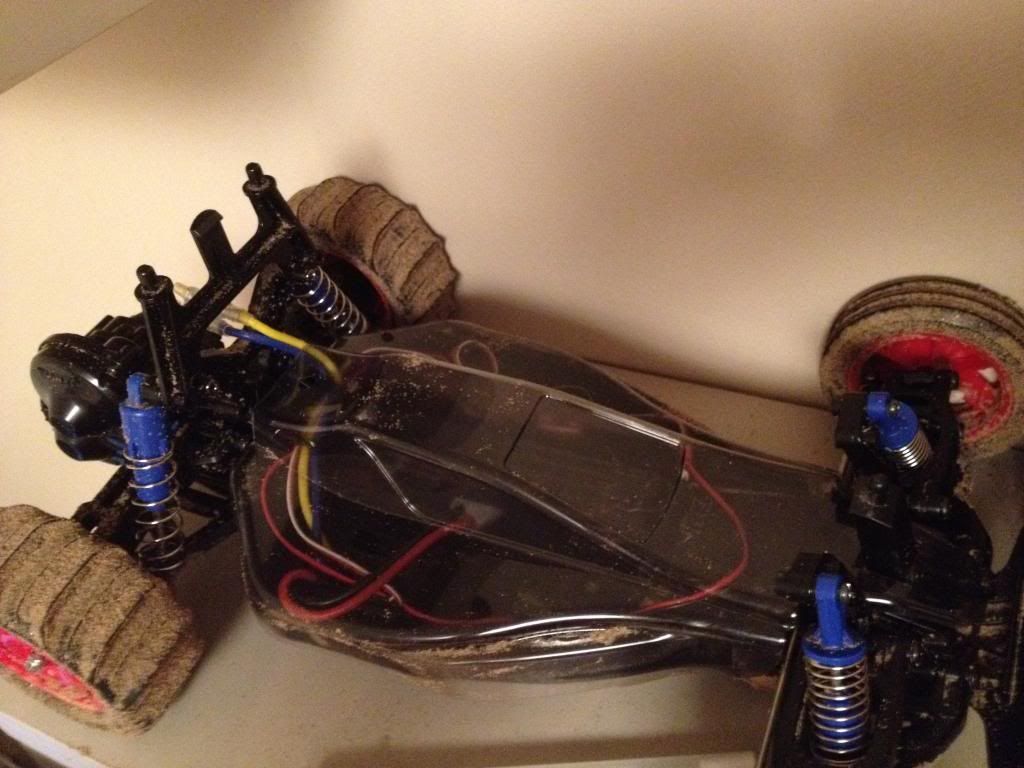
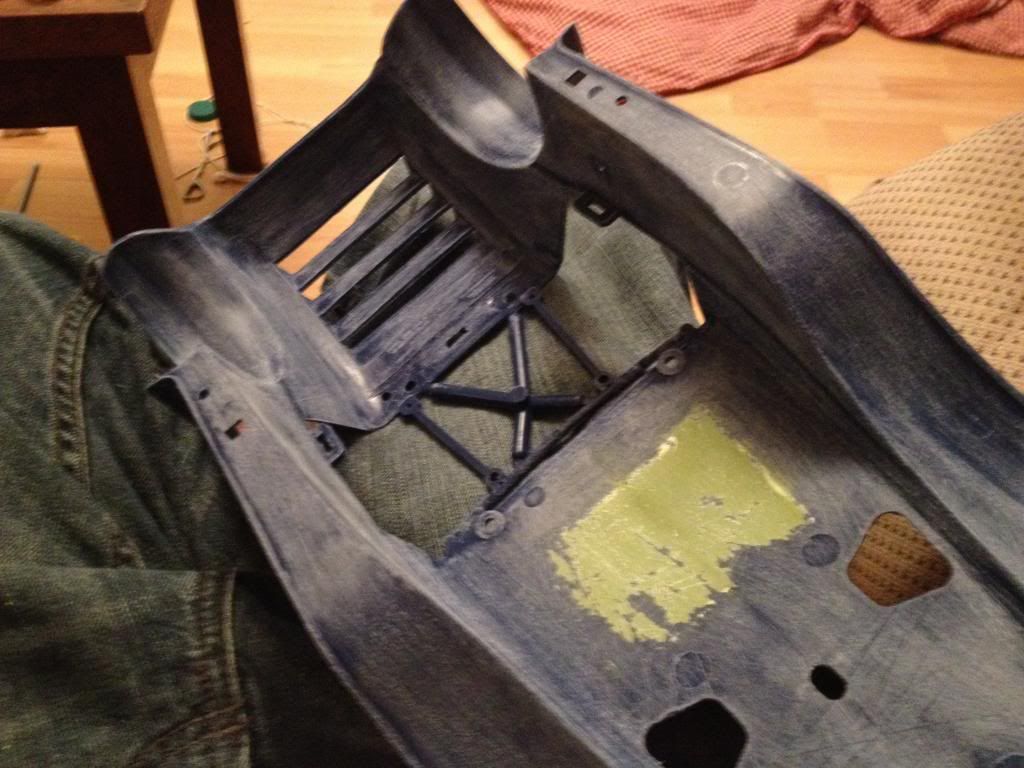
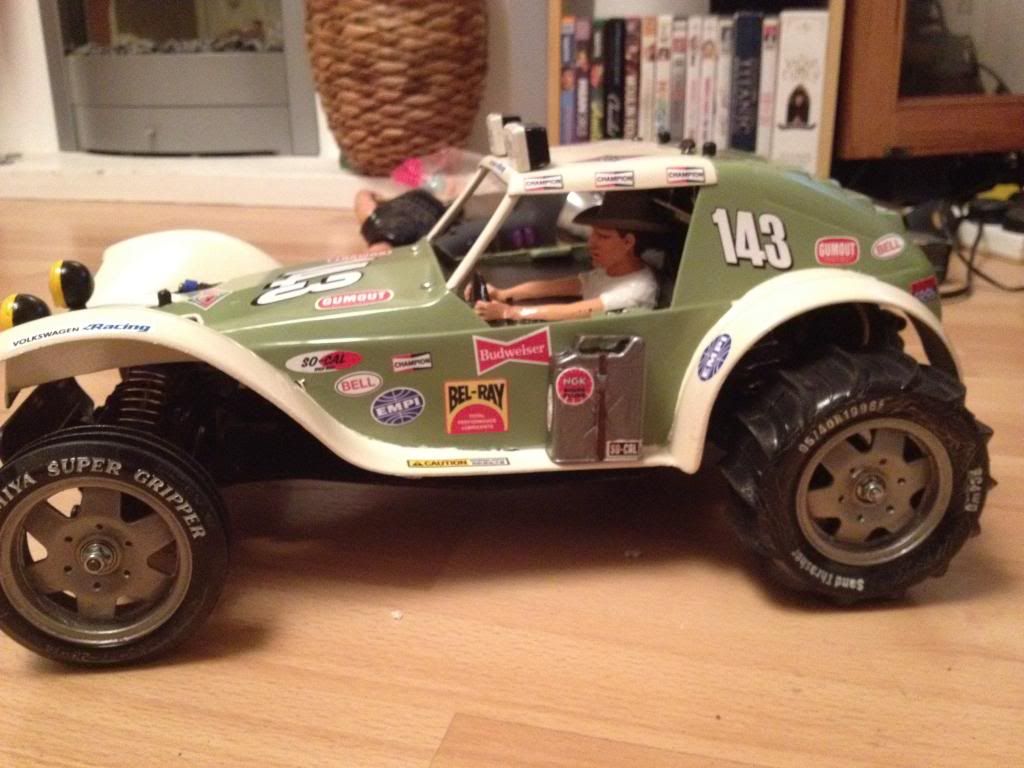
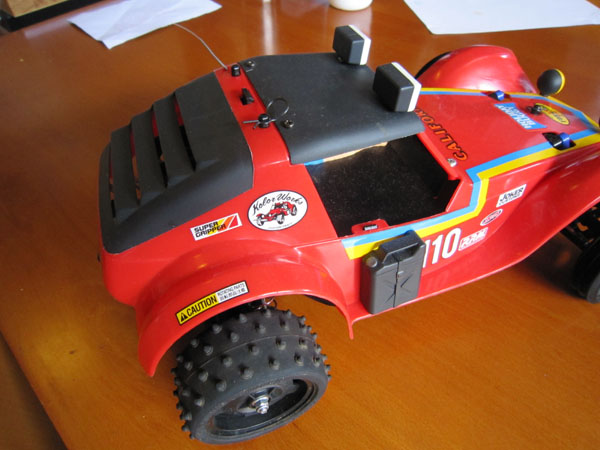
 I thought I would 'finally' add some photos of the car so far. Unfortuately, I haven't got any of it on the beach, which is a shame cause that's where it really looks it's best!  First off, a fairly generic photo of the pieces all spread out after being taken out of the box 
I decided not to take any build photos, as they can get rather samey, and are already a lot out there for this model. Here is some very blurry photos of the finished project 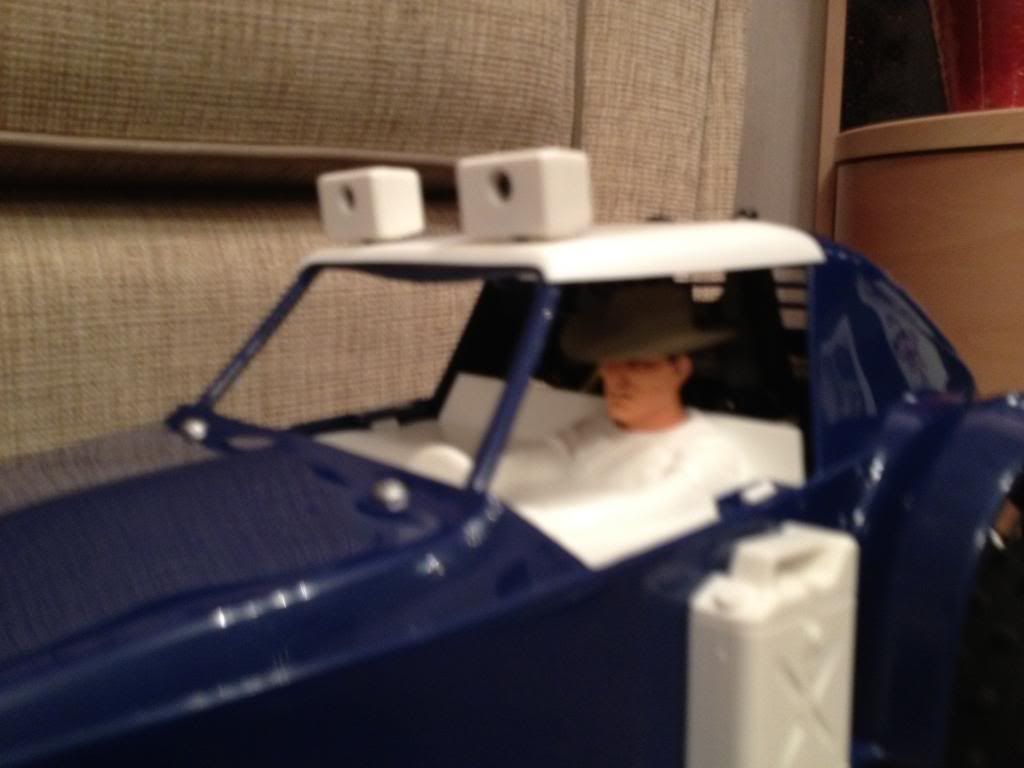
For some reason it looks like I forgot to take some photos of the finished boxart look (except I went with a yellow roof. The next stage wasn't easy. Trying to find a set of paddle tyres. This is something that I was determined to have, and only bought the model because I wanted a car with paddles, and thought they would suit the body. My first choice were proline sling shots. These were short course tyres. Originally thought they would work well, but after a bit of research online, found out that the external diameter was really quite large. Here is a mockup that I made out of cardboard. The inner circle shows where the main rubber of the tyre ends, and the paddles begin. 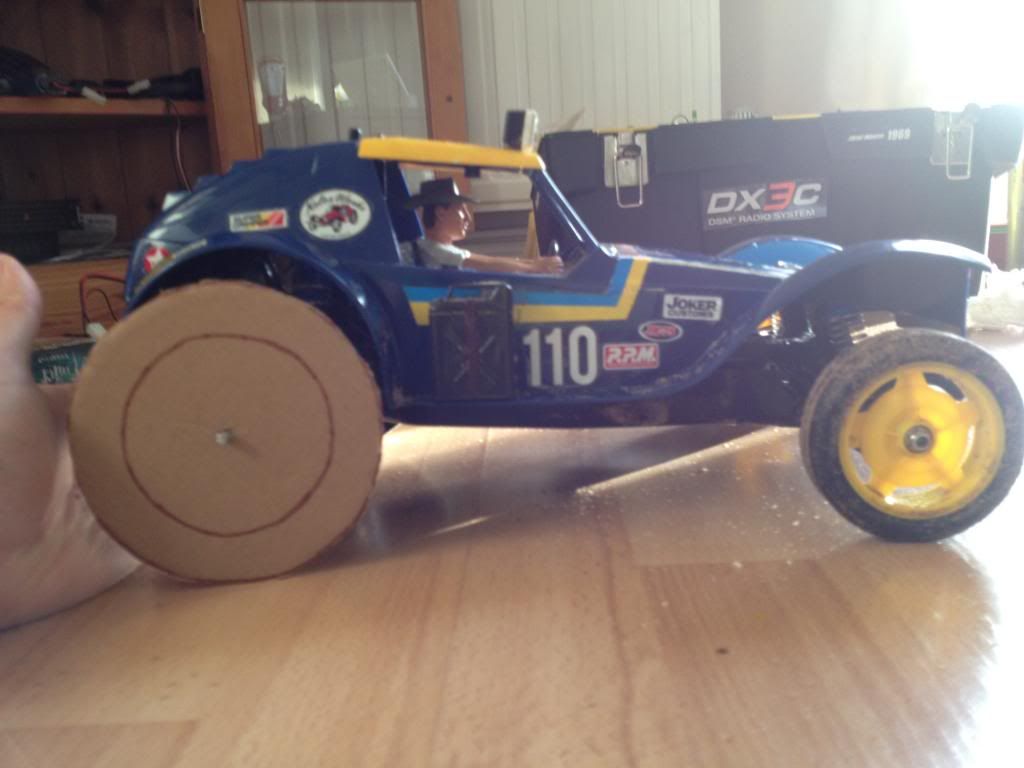
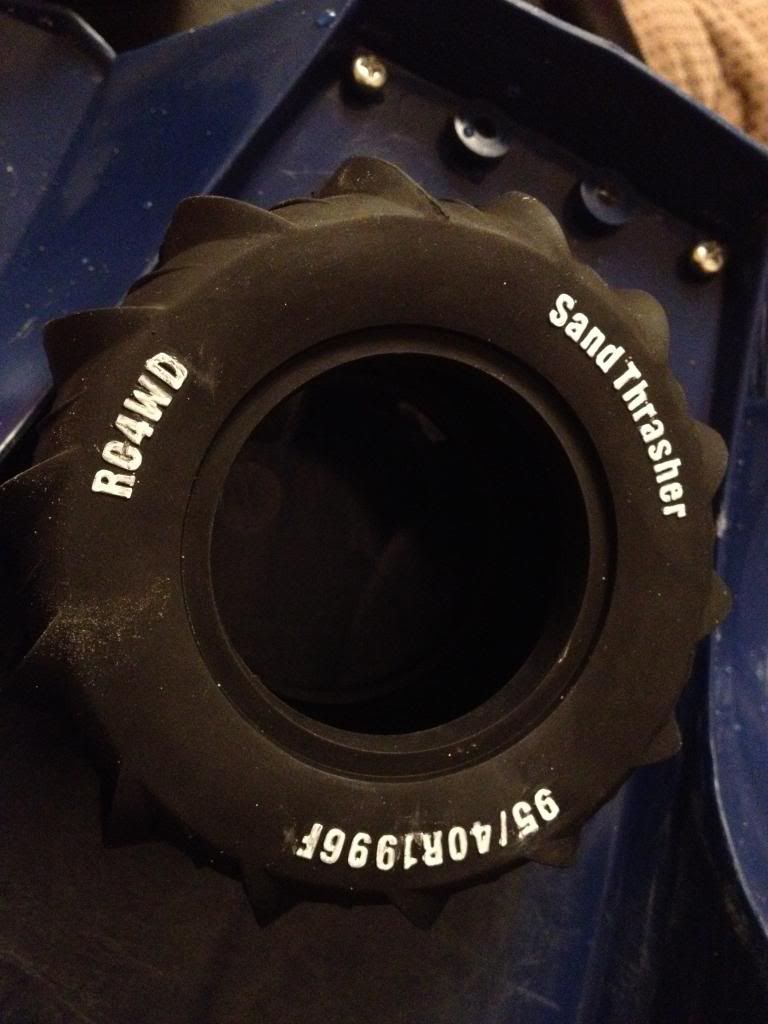
As you can see they really were a little large. I then managed to find the hpi sand thrower. I wasn't a massive fan of the look, but at least the diameter was a lot smaller. Unfortunately they turned out to be truck tyres, and would really have been too wide. 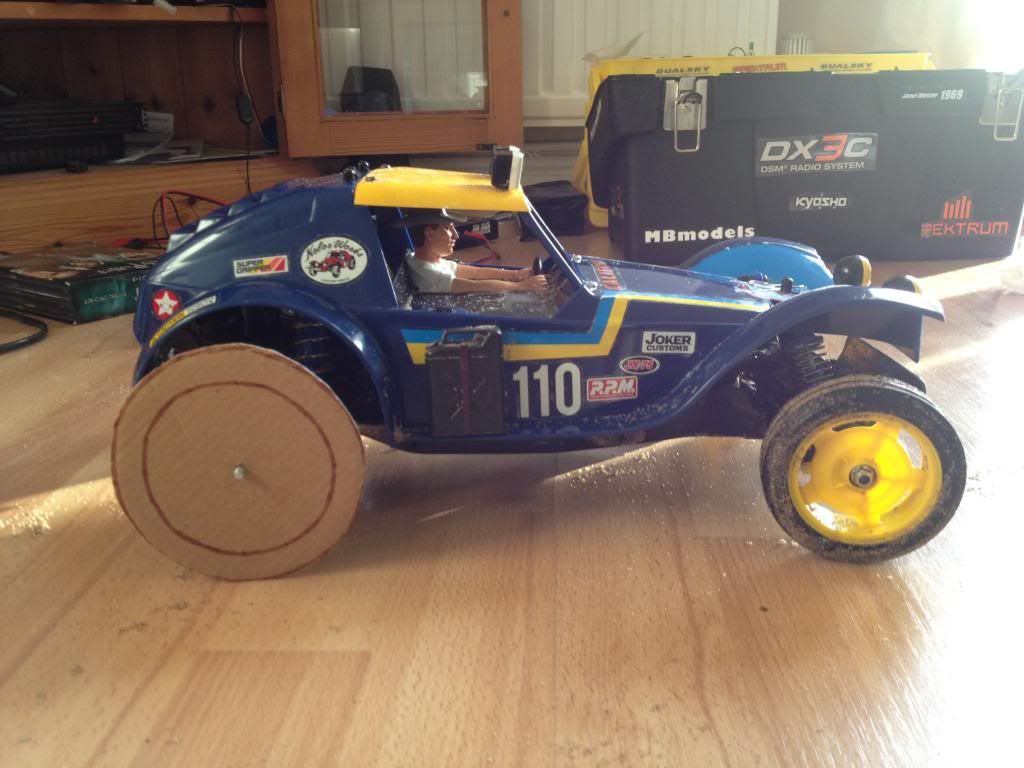
It was around this point that I found this forum. I had found the RC4WD Sand thrashers but was concerned about finding small enough wheels. Either way, I did another cardboard mockup, and they looked good to me. 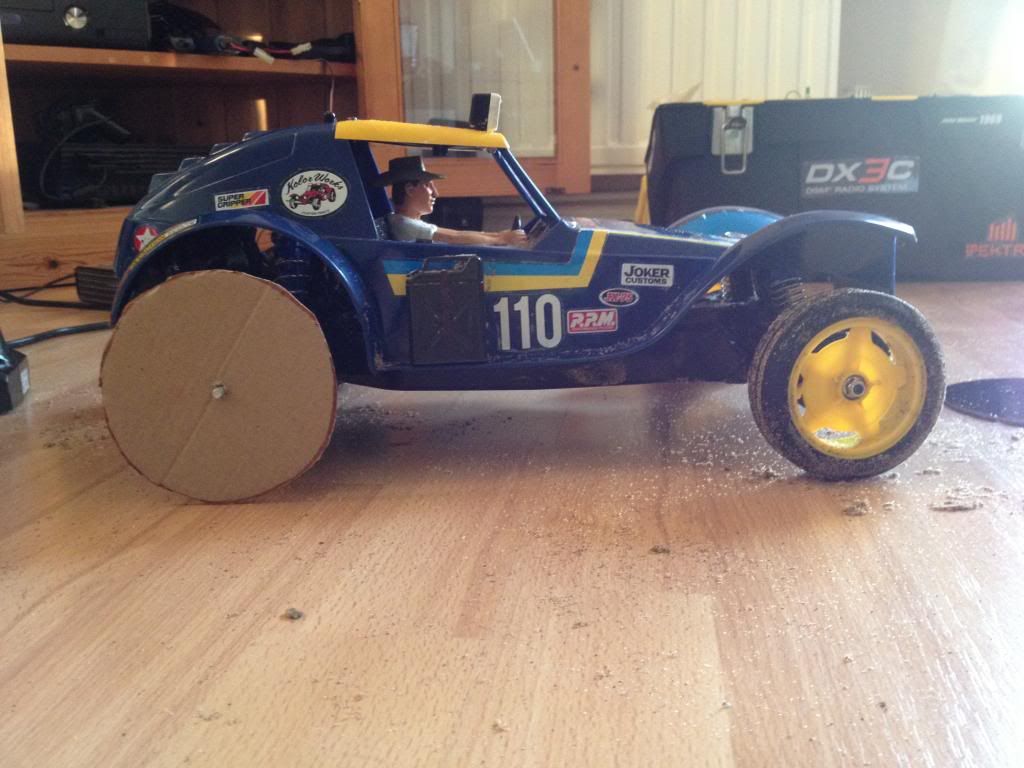
Here's another photo, where I put on some crawler tyres that were meant to have the same diameter. 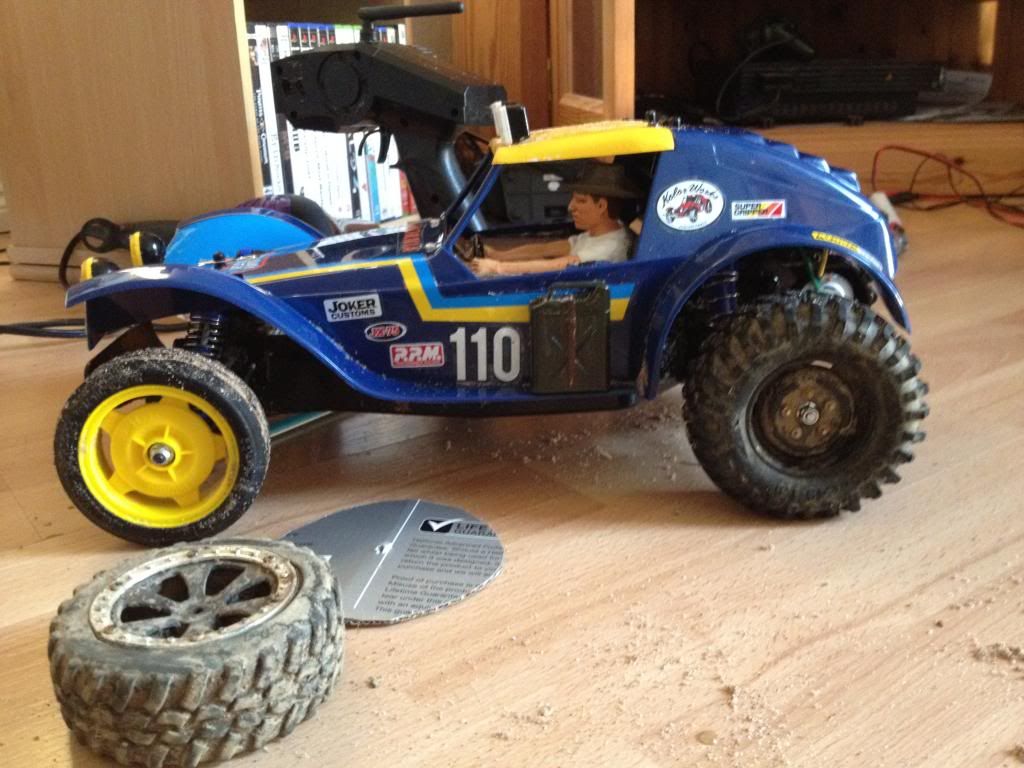
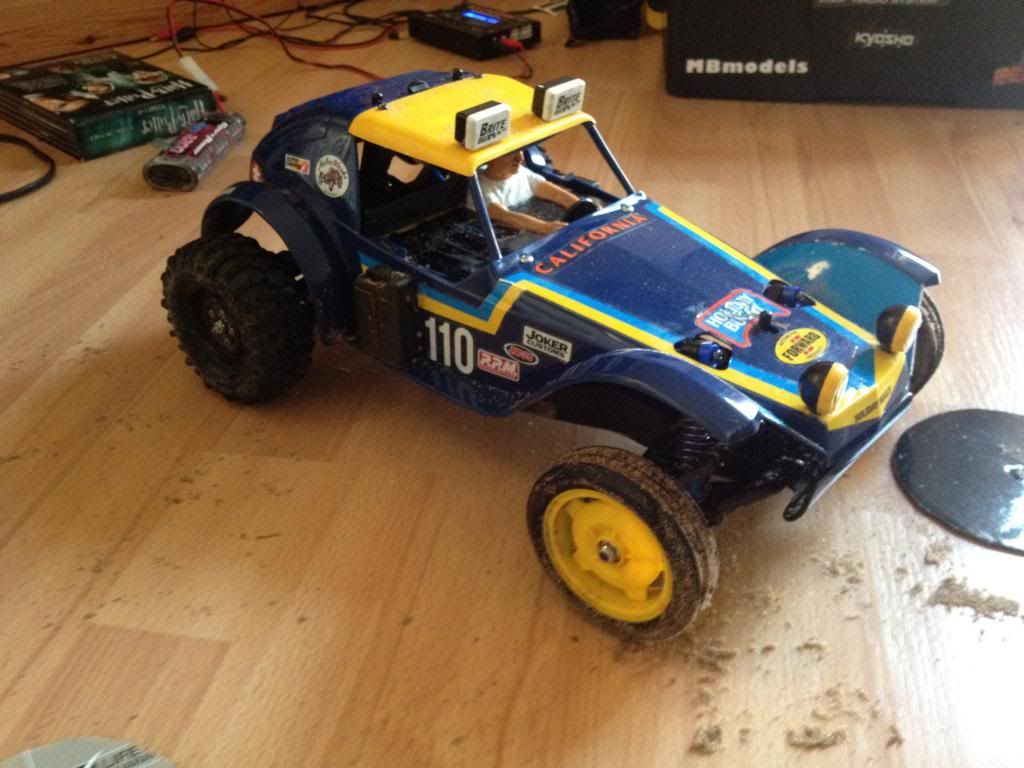
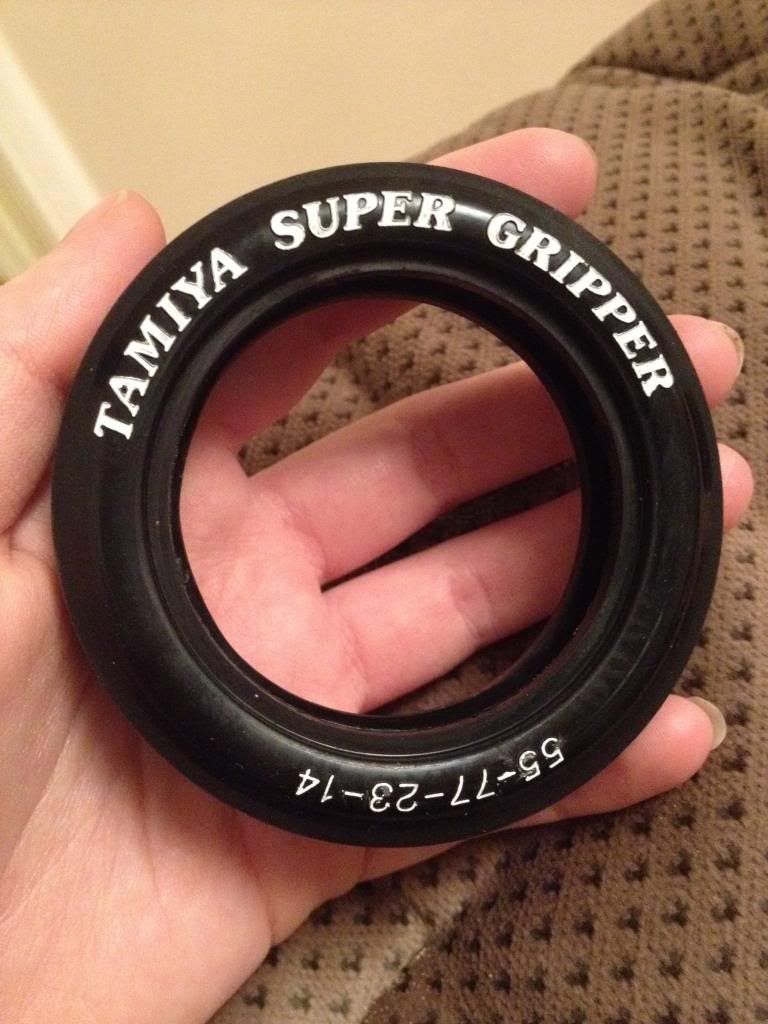
I had hoped to have the front and rear wheels the same, but was beginning to give up. By a strange conincidence I had heard about mad fighter wheels fitting after a bit of an adaption. There wasn't a lot on them, but I was under the impression they had a diameter of 2" (turns out the front are 2.16", same as the standard holiday buggy). Anyway, after much consideration, I eventually bit the bullet and bought the set. After nearly 2 hours of sanding and cutting out the inside of the rims, they eventually fitted, and so did the tyres, result!  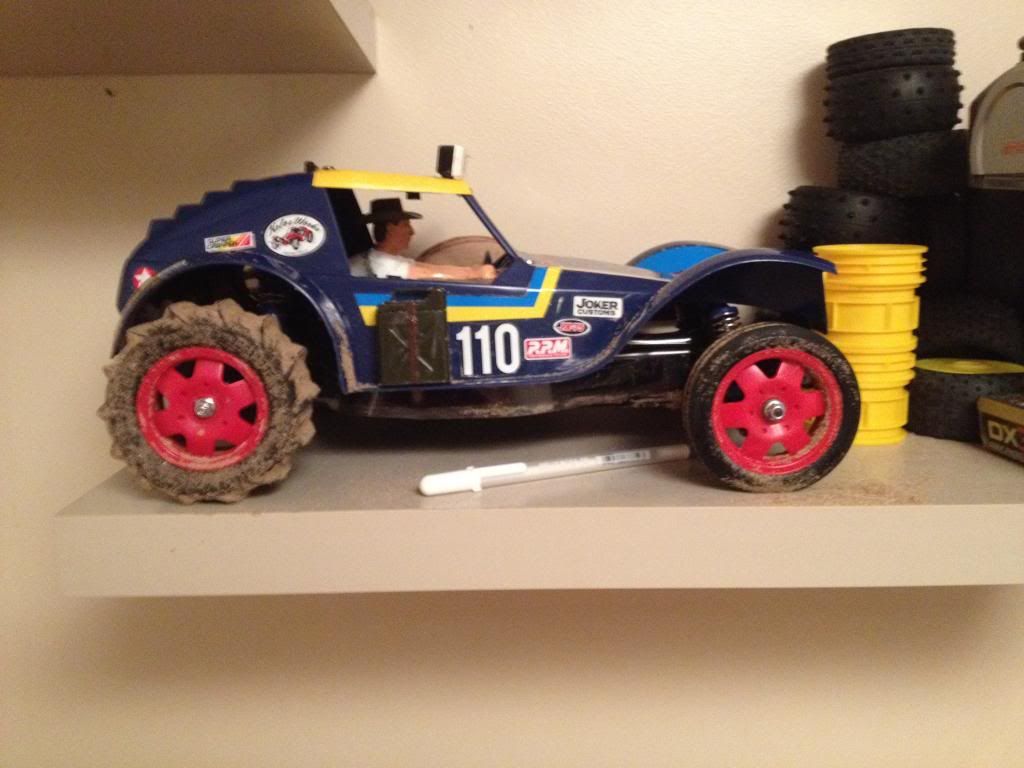
Also, this isn't exactly the right order, but I had managed to make an inner shell to protect the electronics out of a cut down tamiya sand viper shell, which I also lightly tinted. This seems to work surprisingly well, and keeps nearly all the sand out. I've used velcro to fix down the side, which I think helps to keep it sealed. 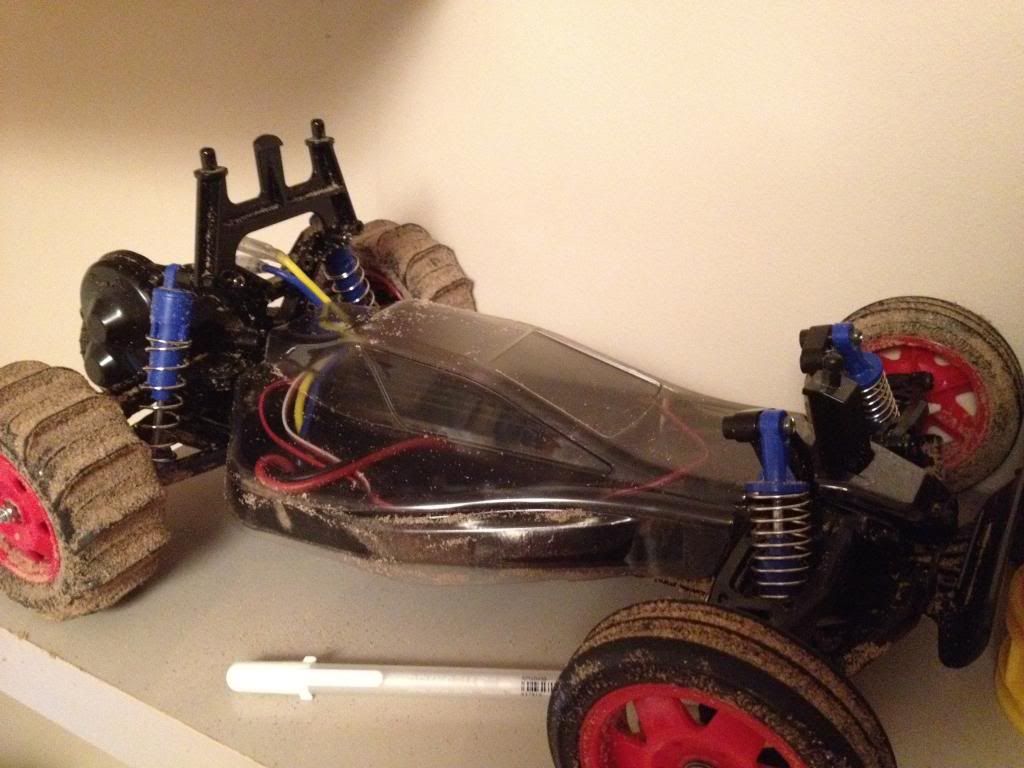
@Eddrick Still can't find the thread on dying the shell. I plan to look into the nylon wheels. My ideal would be to have something a little less shiny looking, and in this sort of colour www.culpitt.com...e/5967.jpg Maybe with some cream to go with it. Also, can you recommend a reasonably cheap esc that's lipo compatible. I've been told the standard esc doesn't have a low voltage detection, so wouldn't be lipo compatible  Not sure exactly how low I want the turns to go down to, maybe 14 or 17? I want something with more power, so I have to feather the throttle round corners etc, but obviously don't want to shred the gear box. I will probably go with one of those LRP motors. Not sure exactly how low I want the turns to go down to, maybe 14 or 17? I want something with more power, so I have to feather the throttle round corners etc, but obviously don't want to shred the gear box. I will probably go with one of those LRP motors.So far the car doesn't seem to be getting wet (probably because I keep it out of the water  ) so not sure how necessary a waterproof etc would be, especially as I'm using that inner sand viper shell. ) so not sure how necessary a waterproof etc would be, especially as I'm using that inner sand viper shell.I plan to completely rebuild it tonight/tomorrow, as it was originally done in a bit of a rush and little plastic tabs etc need sanding down. Also I'm going to paint the wheels, probably a silver, and redo the room in the boxart blue. So that's everything for now. Bloody badword, it felt like a long post!  |
|
Please Log in to join the conversation. |
Tamiya Holiday Buggy - Project Beach needs help! 11 years 3 months ago #17619
|
Great update. The car kinda looks cool with the inner shell alone (if you think away the shock tower)!
Loving the new tyres - they match well.  The TEU-104BK has a Lipo cut off so that should be compatible. Or you do have a different ESC? I think you can only put on a 23T max though. Low voltage buzzer could be a cheap alternative... |
|
|
Please Log in to join the conversation.
Last edit: by Edou.
|
Tamiya Holiday Buggy - Project Beach needs help! 11 years 3 months ago #17628
|
Cool idea with the chassis cover, I like it!
A cheap alternative to more power for an unruly back end would be to lock the diff up, this should make it want to be sideways. Other option is gear it down (Smaller pinion), which will get the torque up & have it breaking traction, fit a tuned motor as well to make it really lively - it's not about top speed, it's about how viciously you try to lay the power down. Can't help with ESC/lipo, I don't use them & don't know much about them, other than they have a relatively short life & don't like being laid up doing nothing (Which is why I don't use them). It also seems a bit of a hit-n-miss affair getting good ones (Played that game with my heli)
Custom F2
...
Hilux crossmember drawing
...
F2 axle drawing
...
Quattro radio lid
...
Holiday Buggy motor bracket drawing
...
Quattro resto
...
HitnMiss engine
...
Wild Willy resto
...
Mardave Cobra resto
...
Thunder Dragon resto
...
Grasshopper resto
...
XR311 resto
...
Modded XR311
...
Carbon 25th scratch build
|
|
|
Please Log in to join the conversation. |
Tamiya Holiday Buggy - Project Beach needs help! 11 years 3 months ago #17782
|
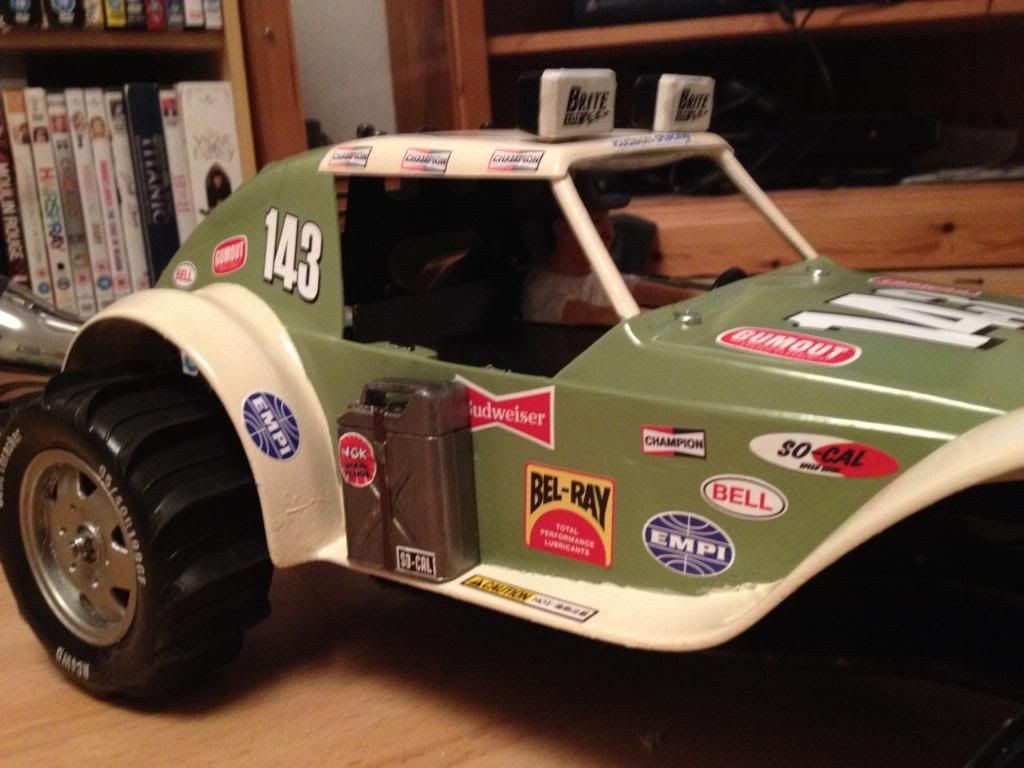
Okay, so new websites back online (and looking very nice
") ) and i've certainly been busy since my last update. ) and i've certainly been busy since my last update. I bought one of those special gel pens to try and do the white lettering of the tyres. Wasn't looking forward to this as I really don't have a steady hand. Fortunately, my girlfriend got all curious about the random white pen ("why would you ever need a white pen?!") and once I had explained decided for the first time ever, she wanted a go on the car. I should add, she is very artistic and I think did rather a good job! 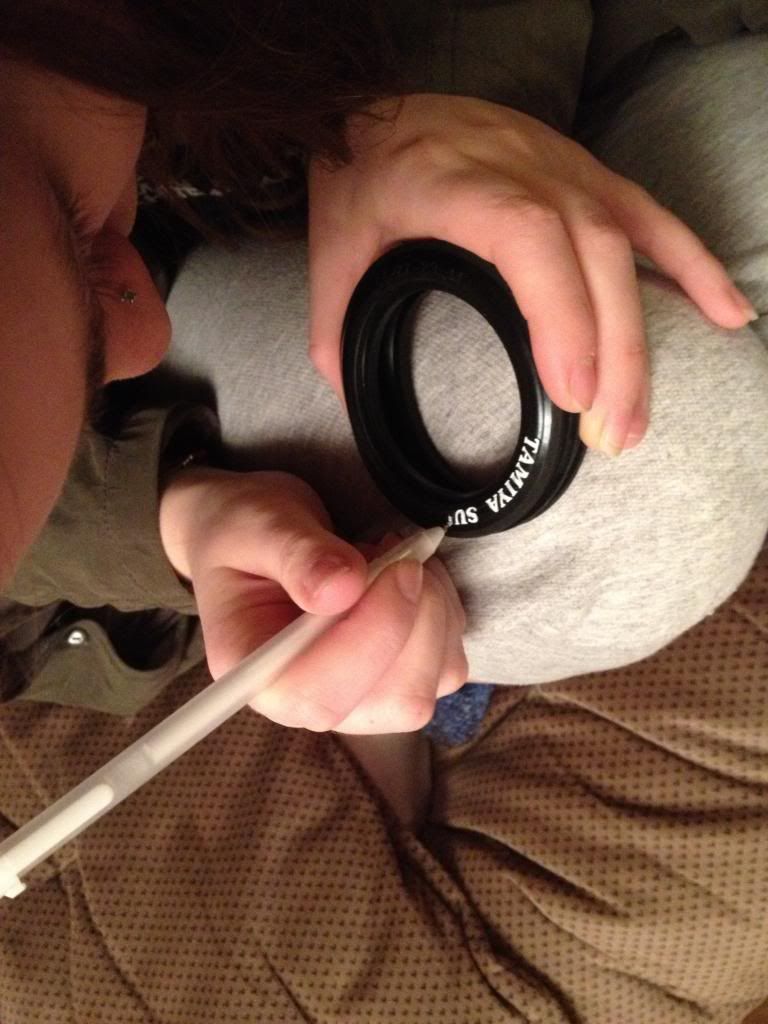
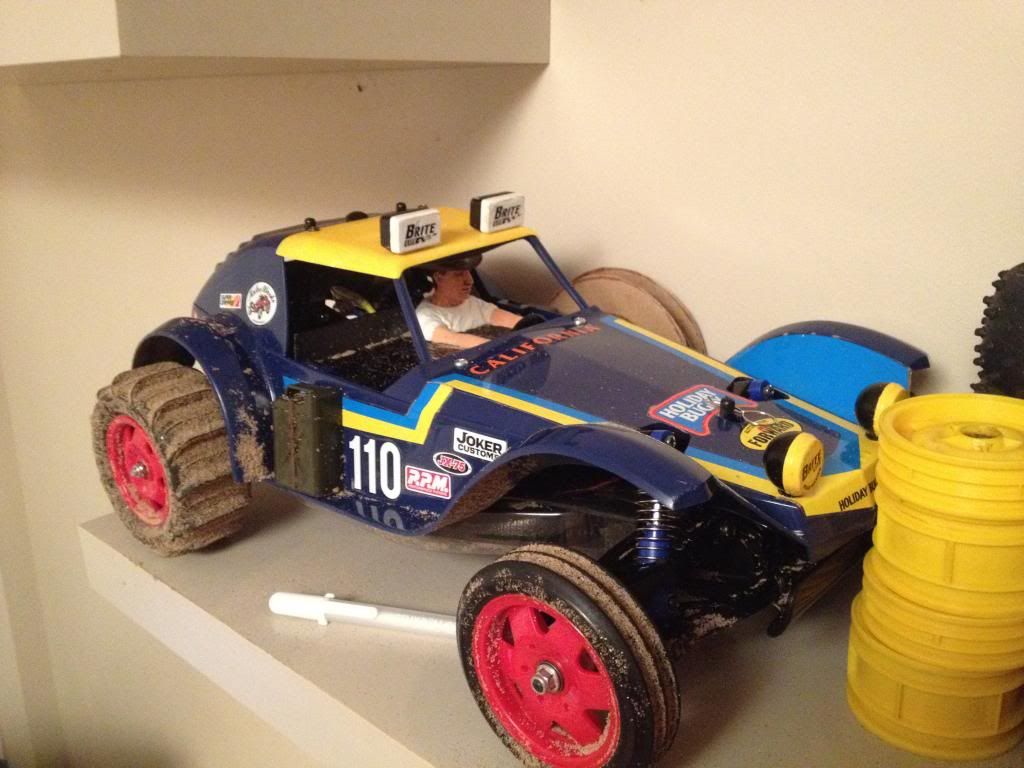
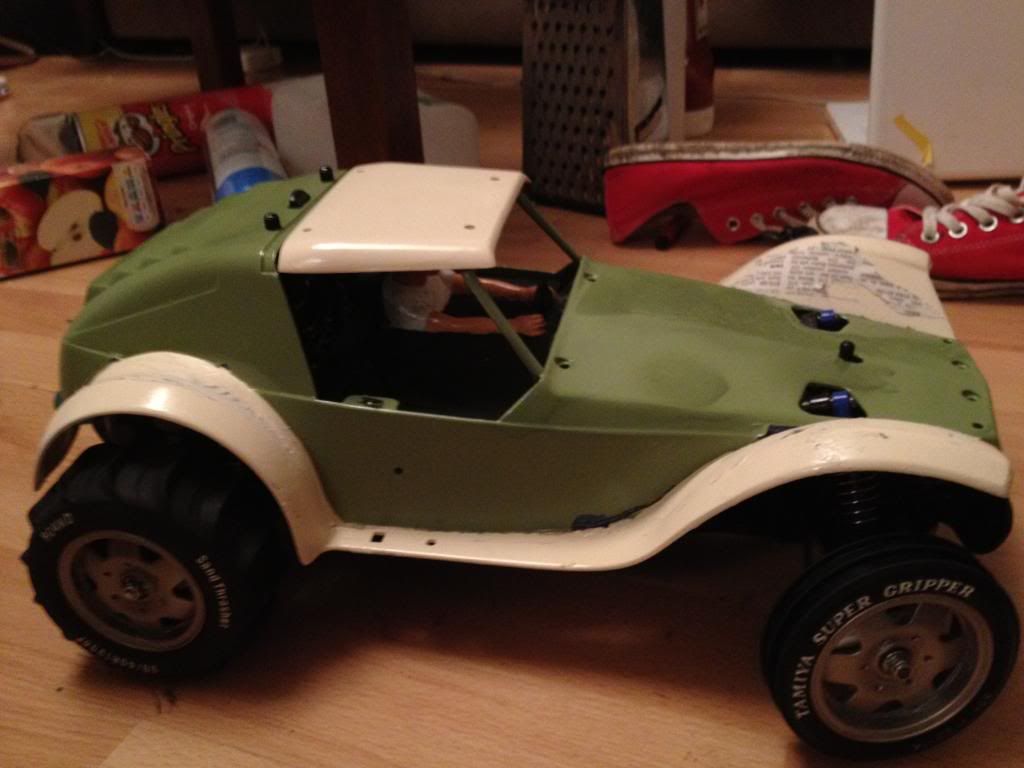
Here are some photos of it with the shell. 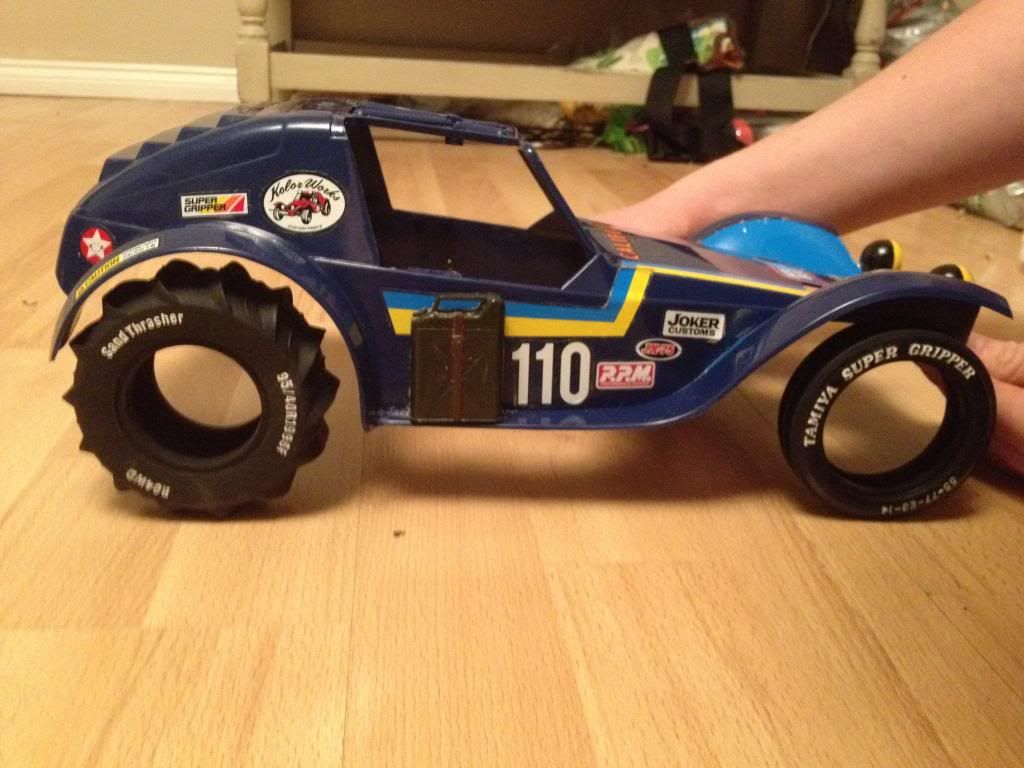
Spraying up the wheels. I wasn't very happy with the finish, and after a few attempts really screwed them up. I did plan on buying a new set and having another go, but once they're all sandy you can't notice anyway. 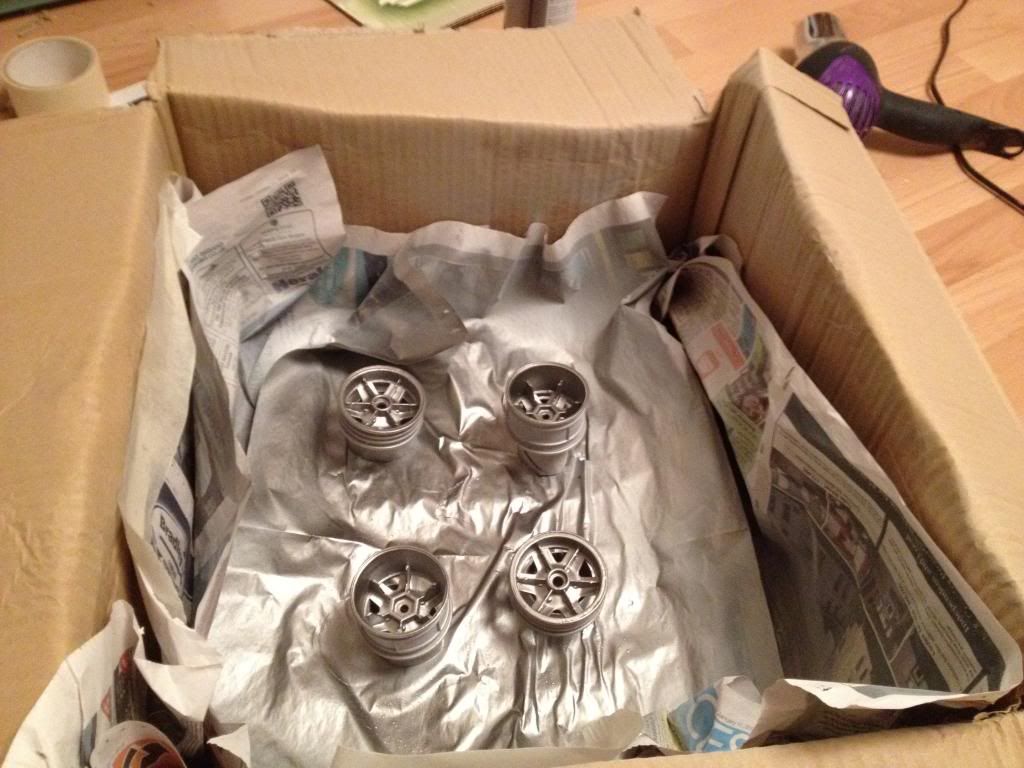
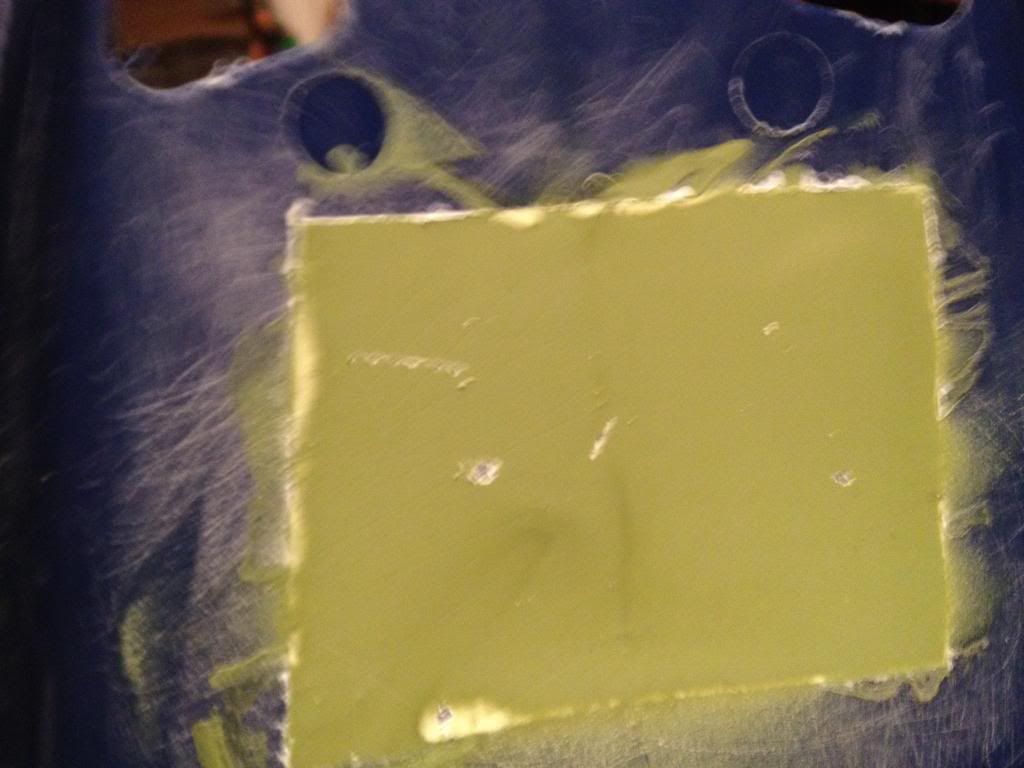
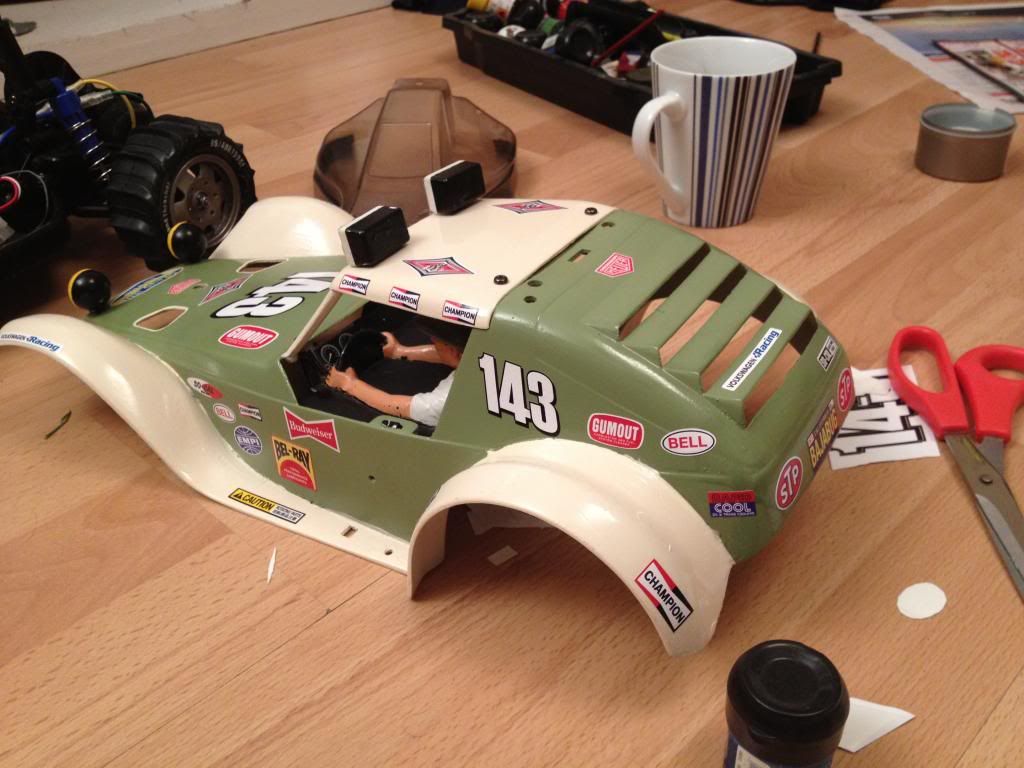
It was at this point I got a bit bored, and decided "just to try" painting a small section of the underside of the shell. I then gave it quite a good beating with screwdrivers etc to get an idea of how well it stuck and was suitably impressed. 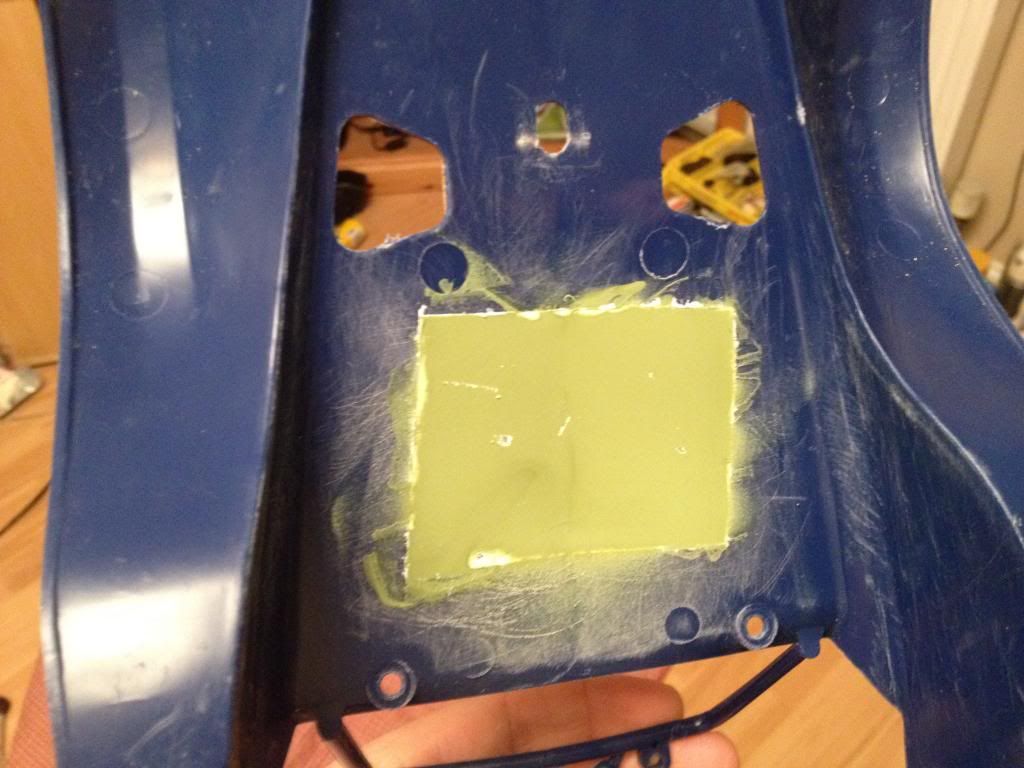
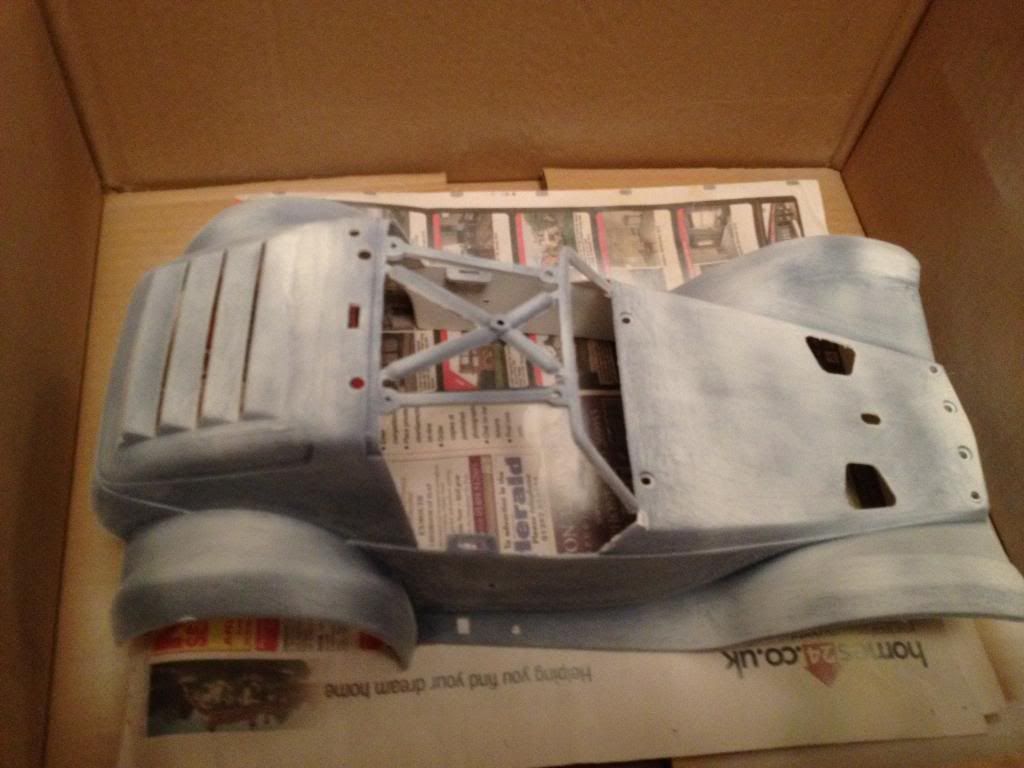
After a few glasses of wine ") , and being told by the girlfriend to "stop talking about it, and just go get on with it. You can always buy another shell" decided against all the advice and my better instinct to have a go at spraying the shell up. I knew if I didn't try, I would always wonder what it could have looked like. This is a very rough photoshop mockup of the colour scheme I had in mind. Although it will be slightly paler. , and being told by the girlfriend to "stop talking about it, and just go get on with it. You can always buy another shell" decided against all the advice and my better instinct to have a go at spraying the shell up. I knew if I didn't try, I would always wonder what it could have looked like. This is a very rough photoshop mockup of the colour scheme I had in mind. Although it will be slightly paler.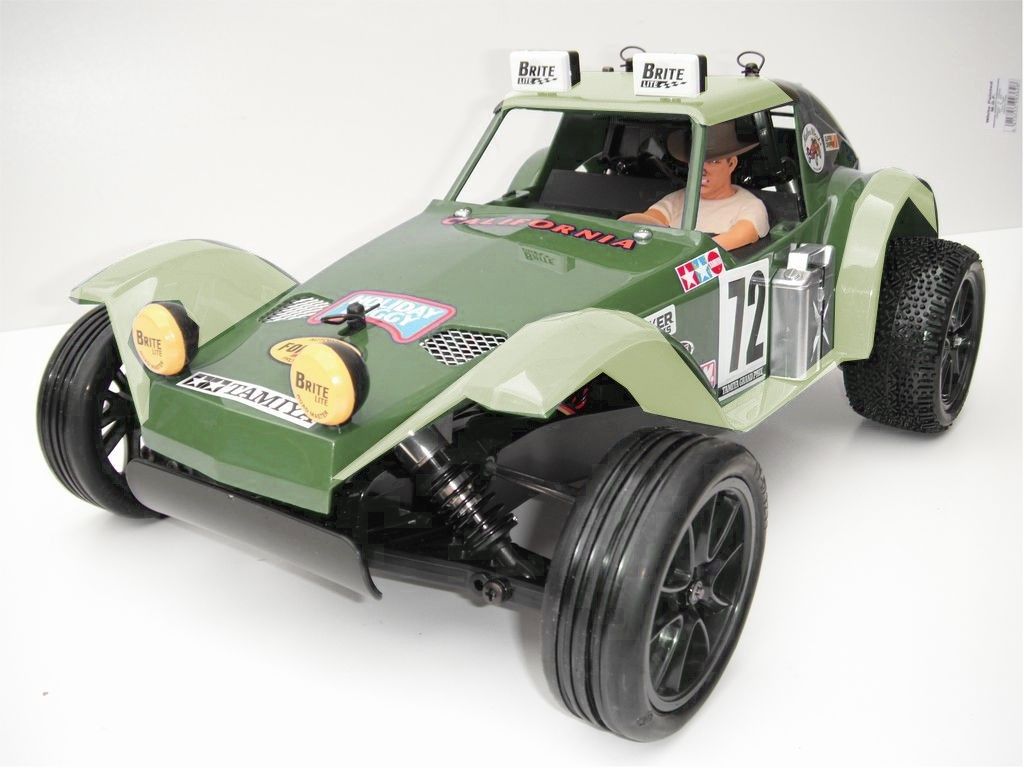
This is it after a few hours sanding. I've read that any shiny blue left will result in the paint just falling off, so really didn't want to skimp on this stage. 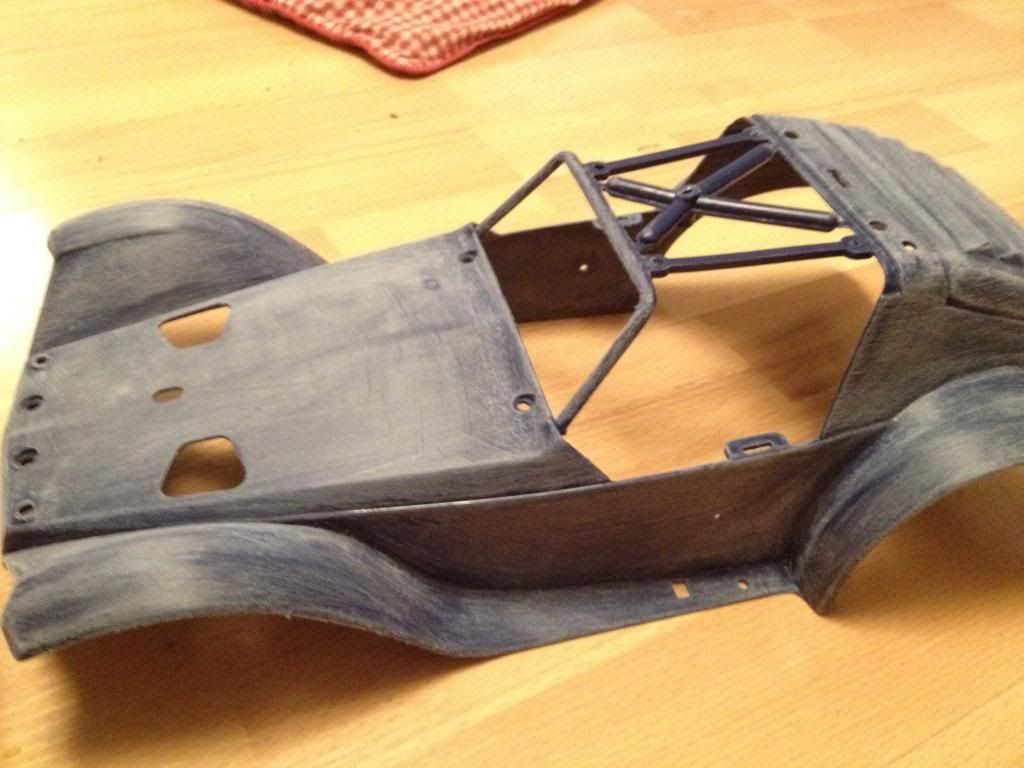
The car in my mockup spray booth getting first coats. 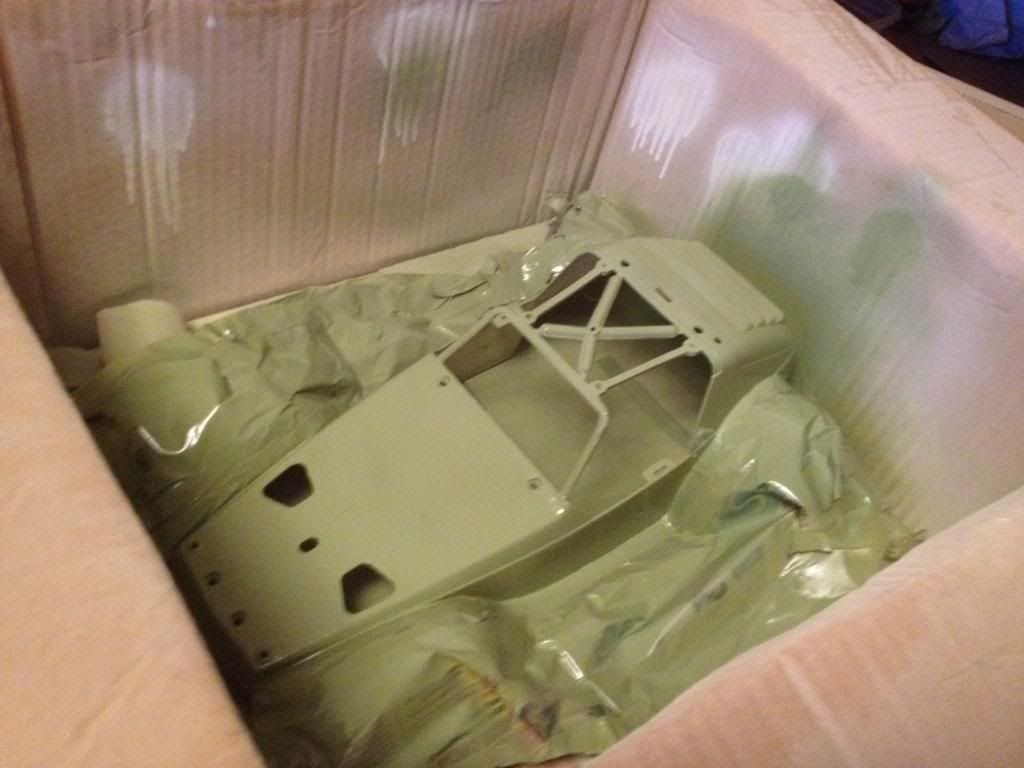
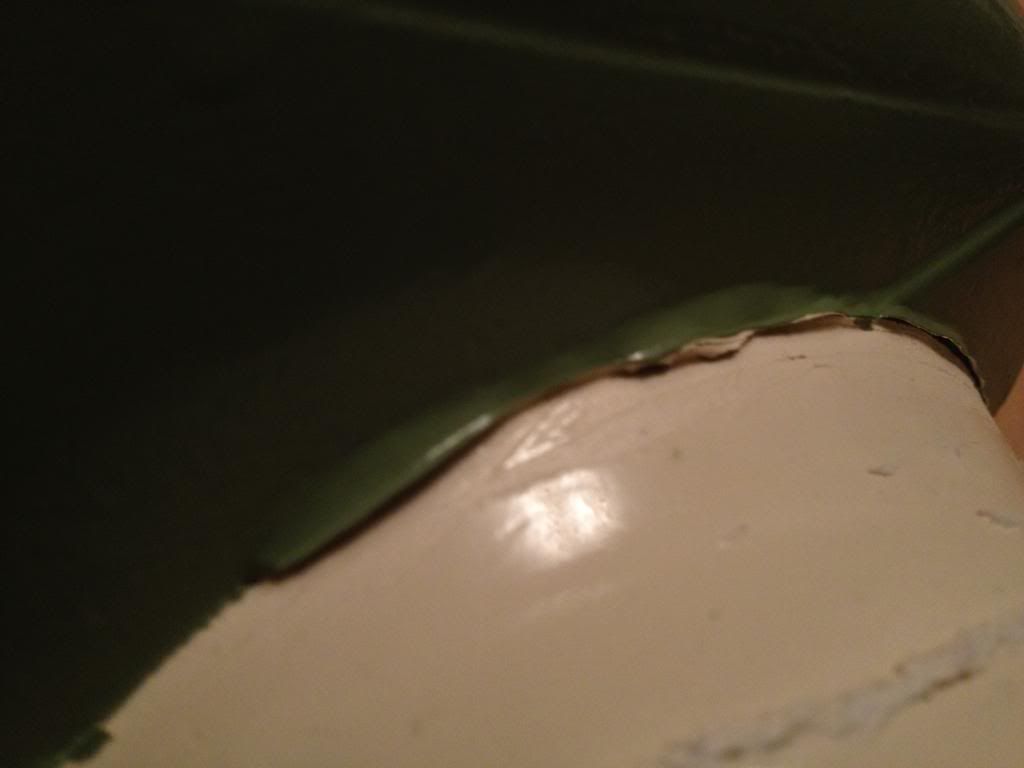
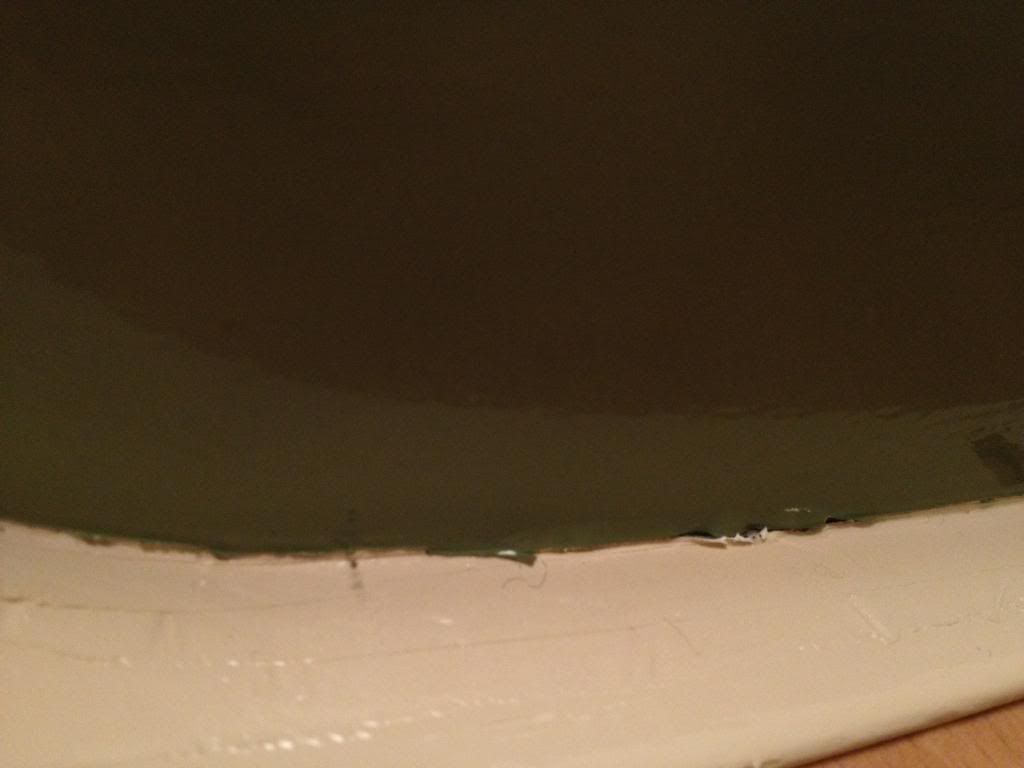
So here's how it turned out. As you can see there is quite a bit of pealing around the joins for the two colours.  I learnt the green (a halfords paint), takes ages to dry. I only left it for about 12 hours and it was still a bit gooey. As you can imagine very gutted at this stage and decided to go away for the weekend and "not think about it". I learnt the green (a halfords paint), takes ages to dry. I only left it for about 12 hours and it was still a bit gooey. As you can imagine very gutted at this stage and decided to go away for the weekend and "not think about it". 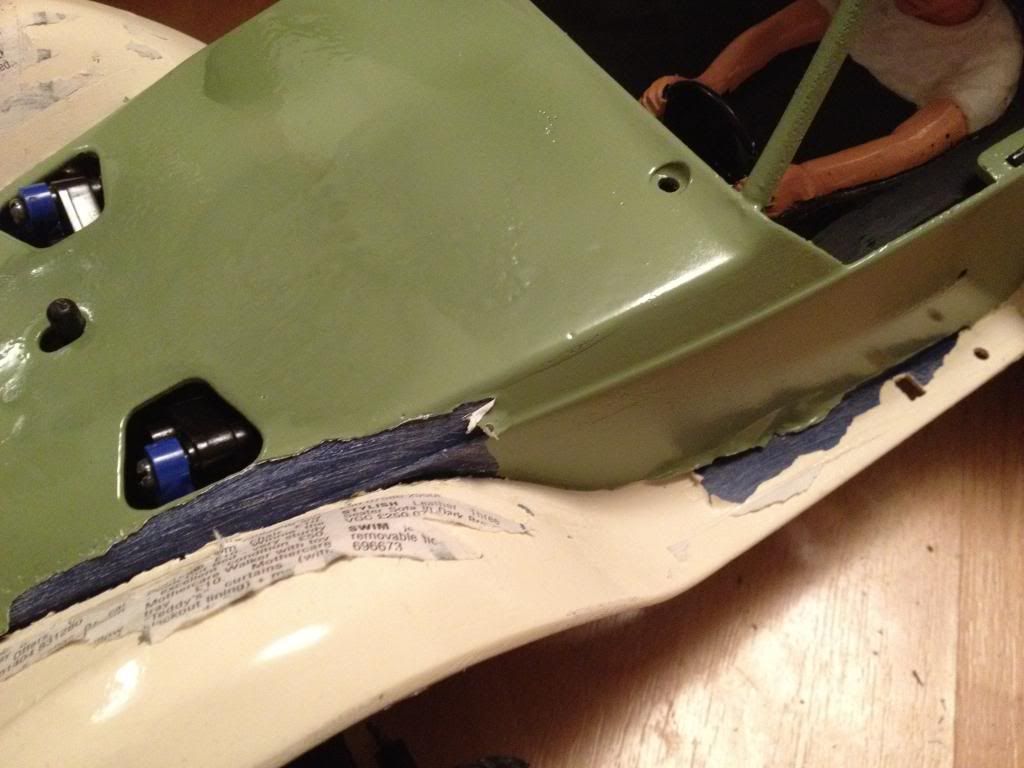
Surprise, surprise, I ended up thinking about it...ALOT! I remembered that with the initial sample I used plasticote primer, whereas for the main attempt I used the cheaper halfords primer. This, coupled with the realisation I needed a longer drying time, I decided to man up, and try again. A few hours (again) of sanding and the paints all off. (Isn't it typical, when you want it on, it's off. When you want it off, it stays on?! 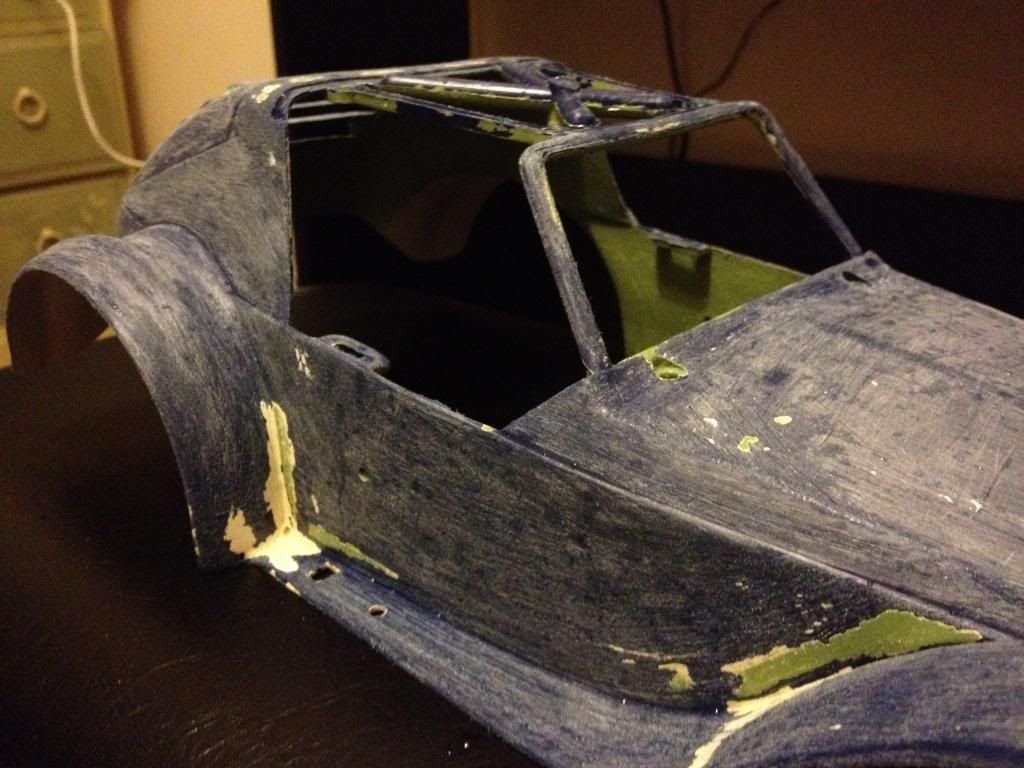
So about five days later, the paint has all been redone, and this time left for much longer to dry. Here's the moment of truth...  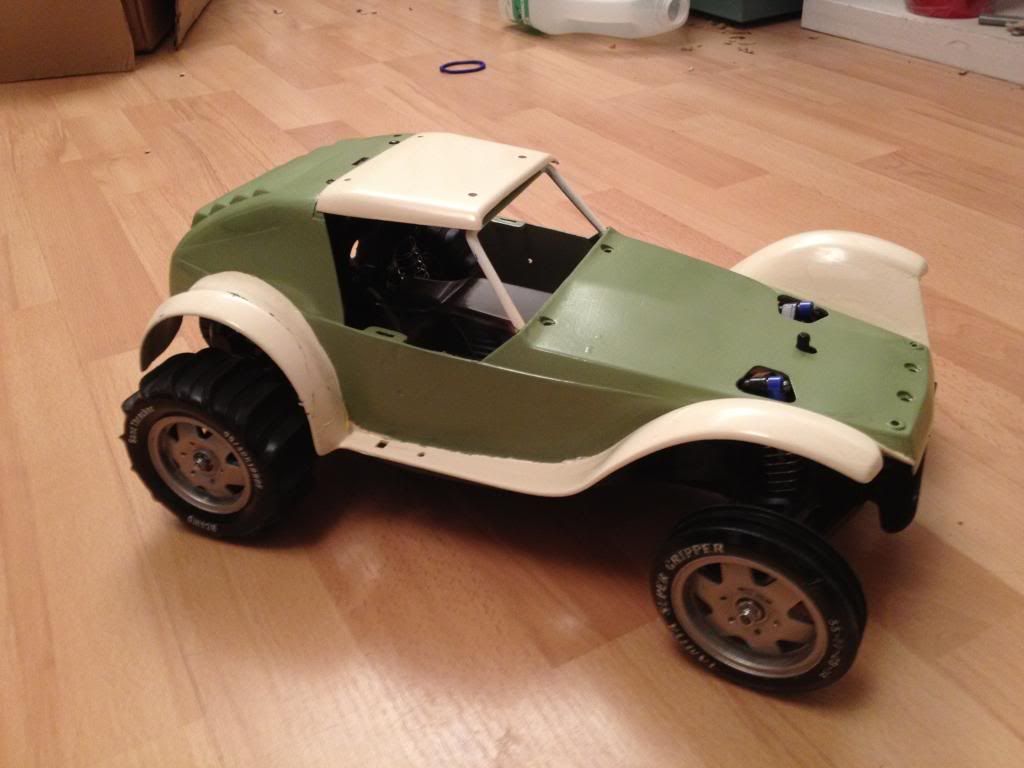
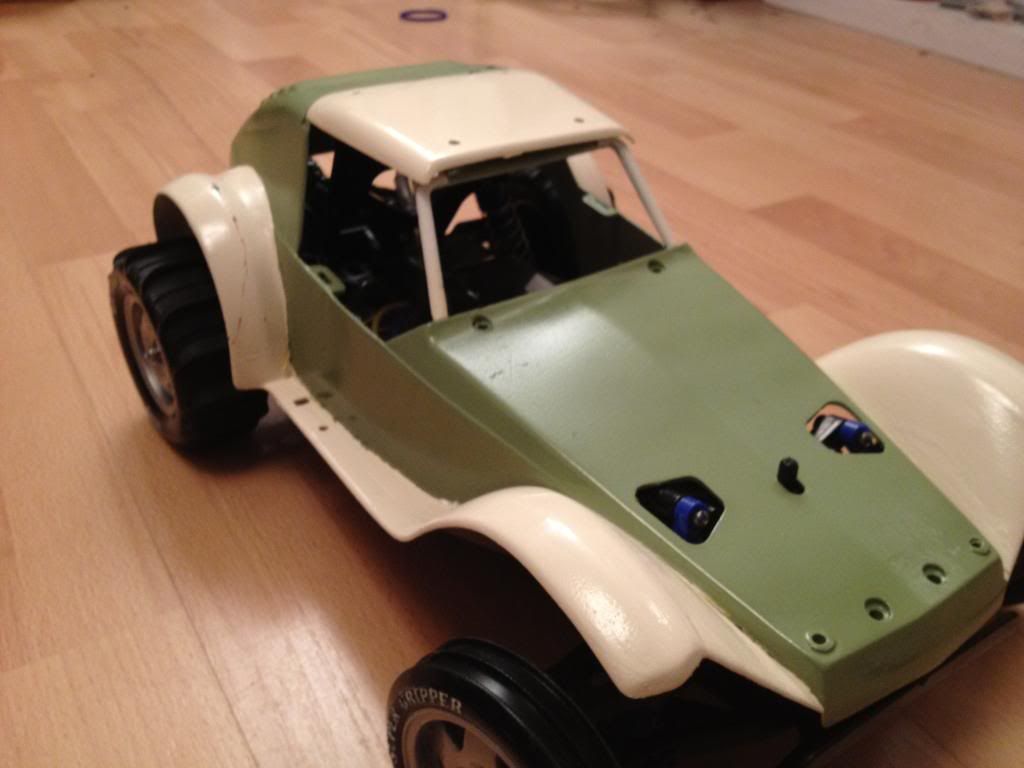
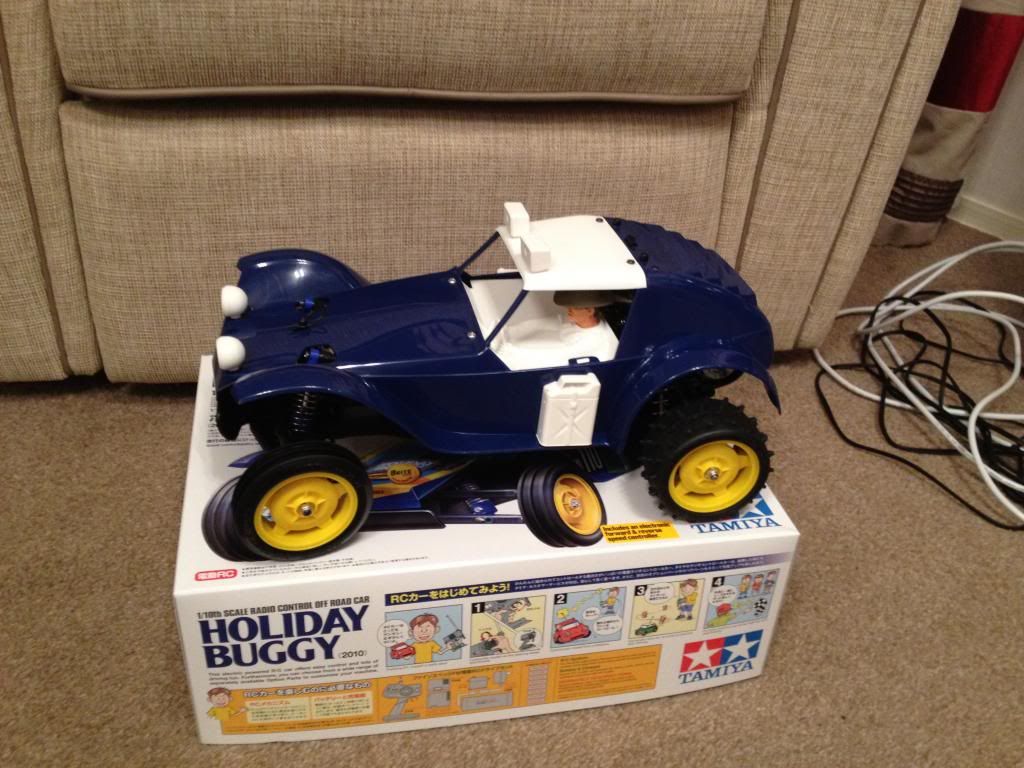
As you can see, there is a little bit of flaking still where the paints join, but overall, not to shabby. Probably not up to shelf queen standard (some of the sanding really was quite deep and at occasional parts show) but for a runner covered in sand, I think it looks nice. Here are some with decals on. Think I got a bit carried away 
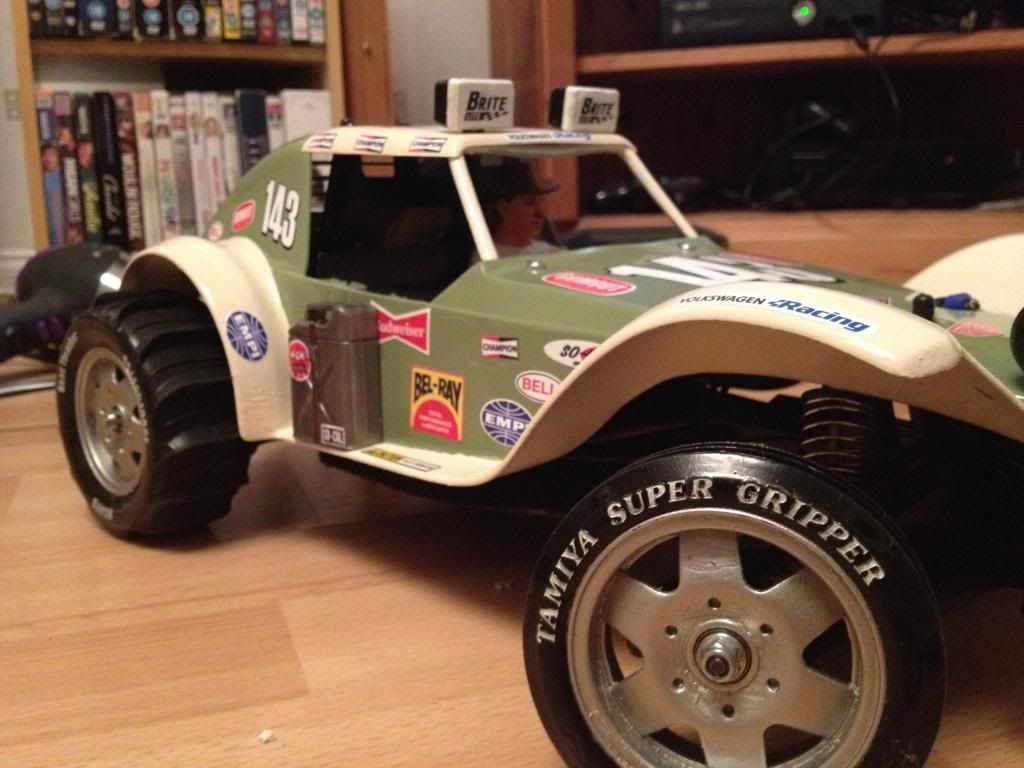
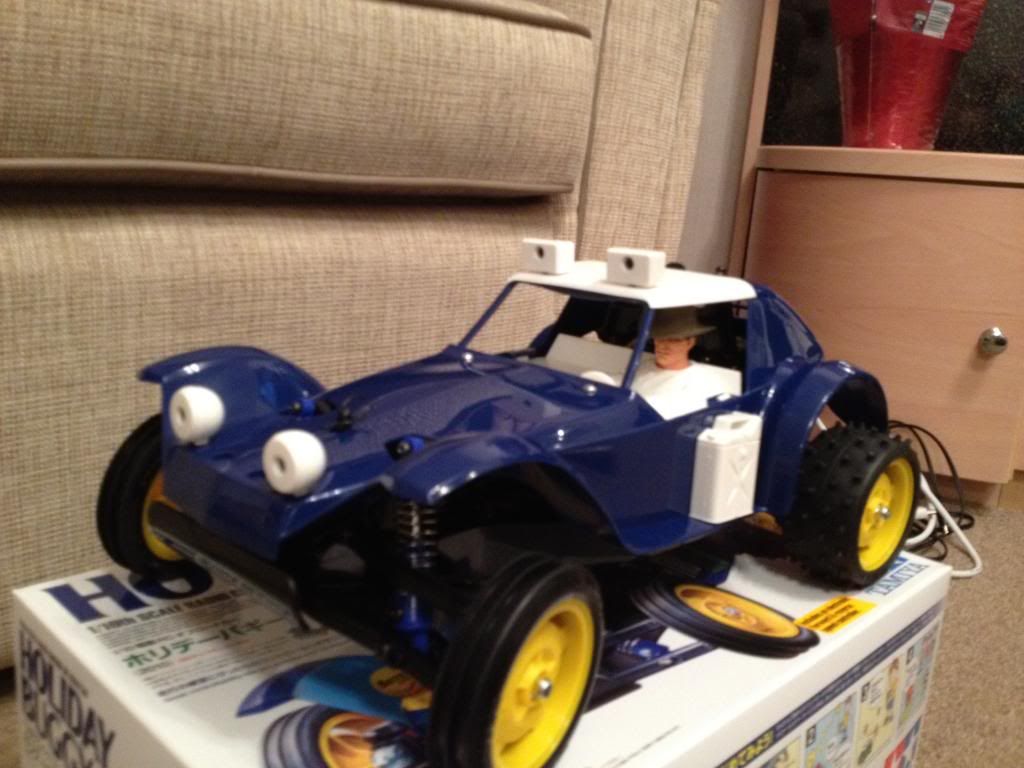
Trying with a spare wheel. I think it looks nice, but can't be bothered to fork out on another wheel. Plus I always add spare wheels, and think it would be nice to have a change. 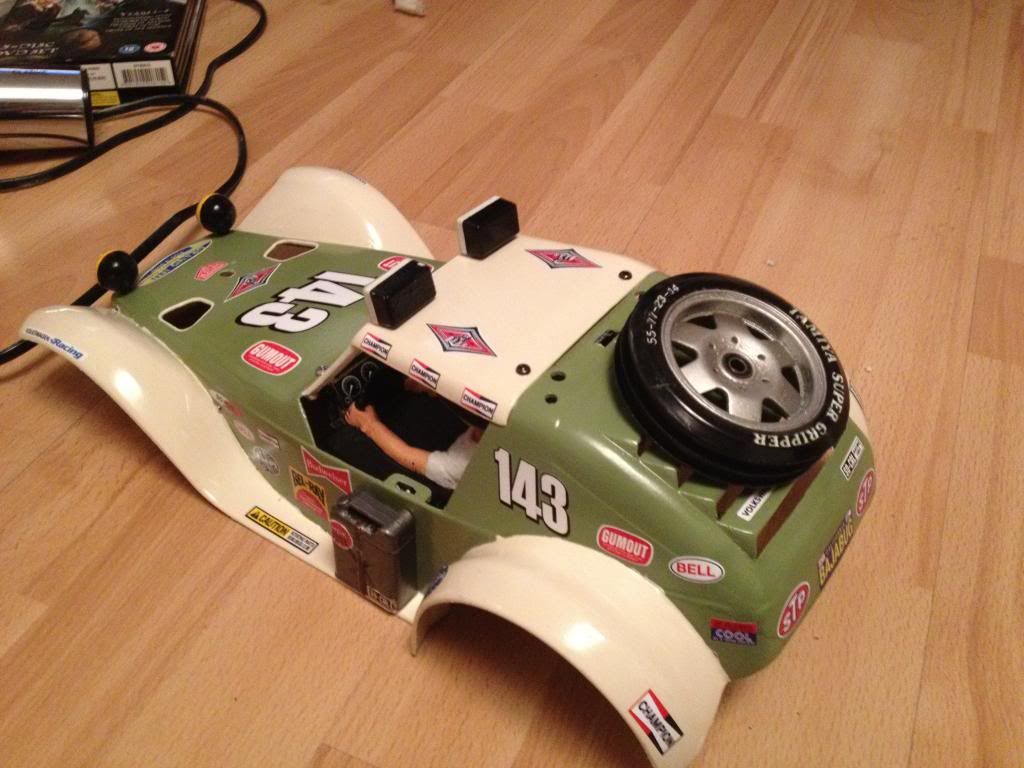
So that's the first update. I've also fiddled with stuff on the inside, but still need to take a few more photos. Will hopefully update tonight/tomorrow night ") |
|
Please Log in to join the conversation. |
Tamiya Holiday Buggy - Project Beach needs help! 11 years 3 months ago #17792
|
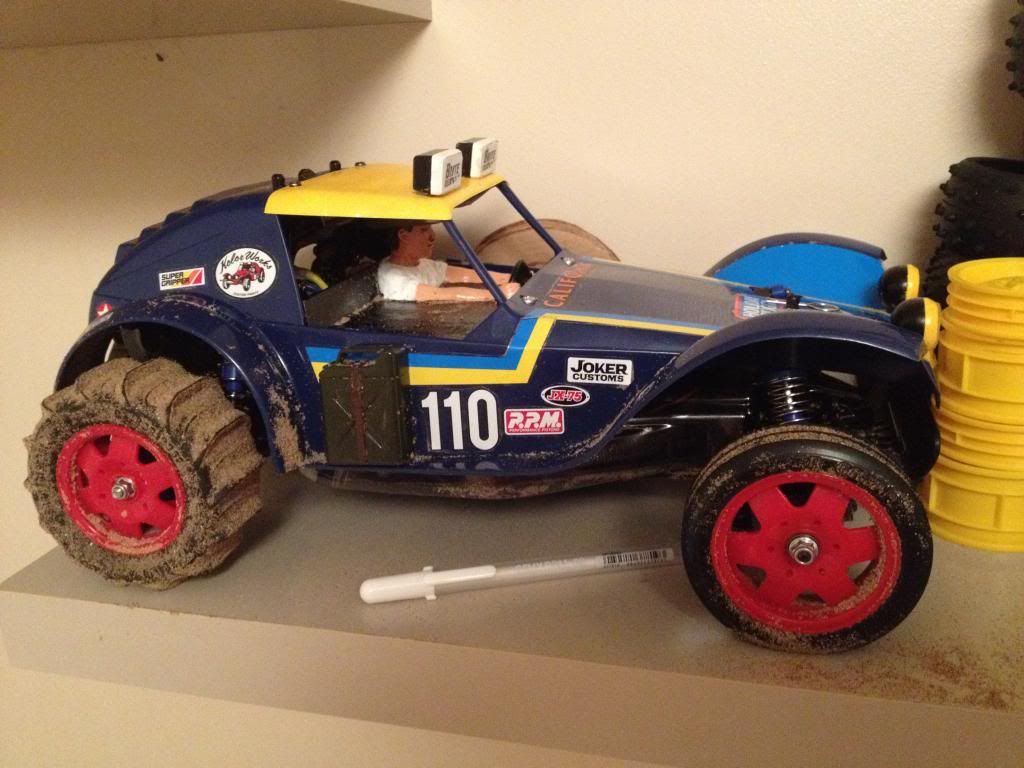
Okay, so what's changed 'under the hood'
I decided I wanted to have a go with lipos, see how they changed the performance and run times. Was very impressed by the difference it made, and I think I would struggle to go back. I settled for a modelsports sniper esc. Decided to get one that can take motors down to 12 turns just to give me a bit of freedom. 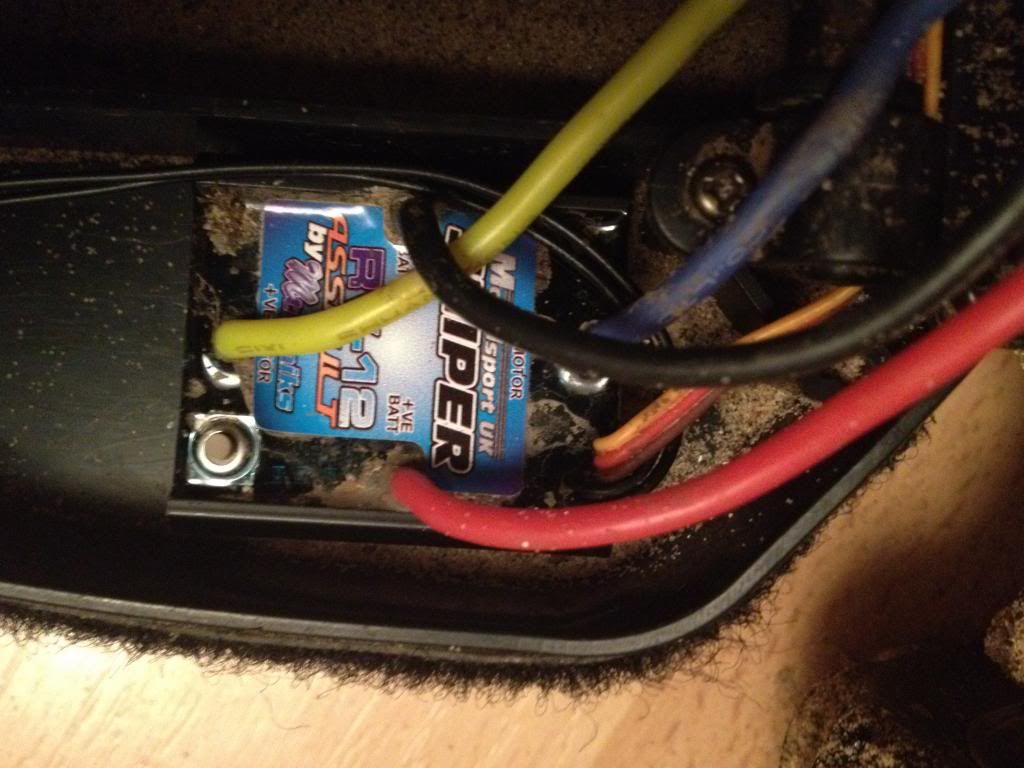
Overal it's worked quite well. Except originally didn't have any brakes and would go straight into reverse, despite how much I played with the settings. A couple of days ago I had receiver issues, and now it will only brake and can't reverse? Very odd and can't work out why this is. Played with trims etc, and had no luck. Need to spend some more time on that one... I've ordered a 14x2 turn LRP motor, but not sure if this will be torquey enough. Got a feeling I might have to try maybe a 19? I also installed some new shocks. I ended up buying some ansmann aluminium threaded ones from ebay. Only £25 and work an absolute treat. Very impressed with the quality and performance. 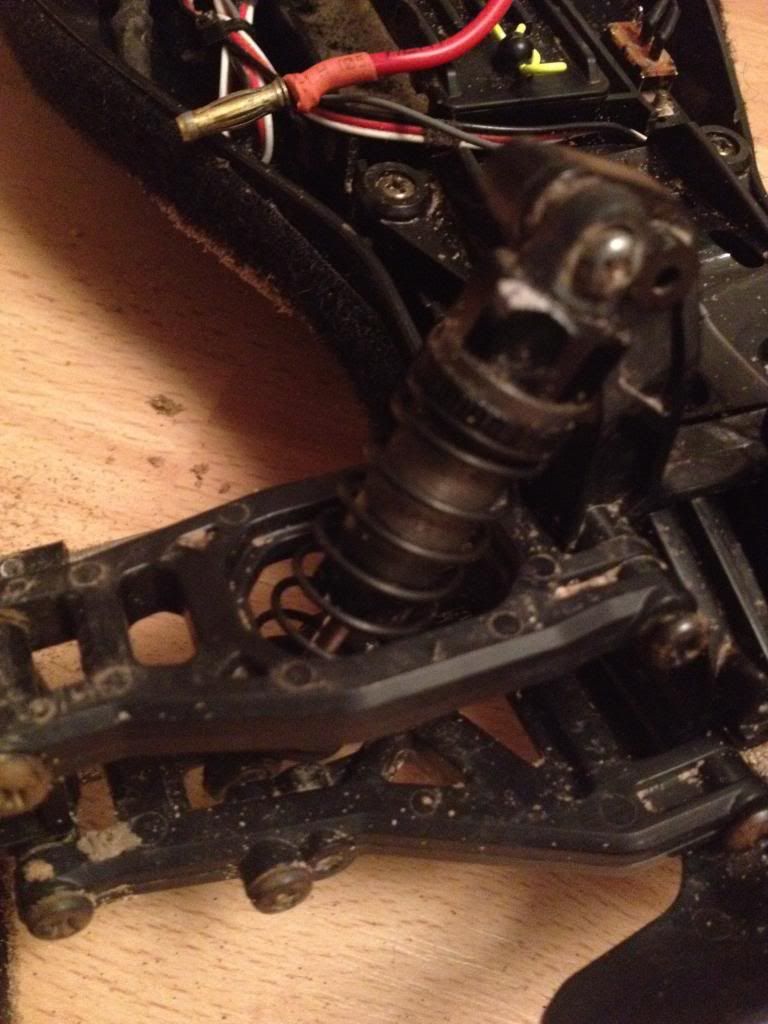
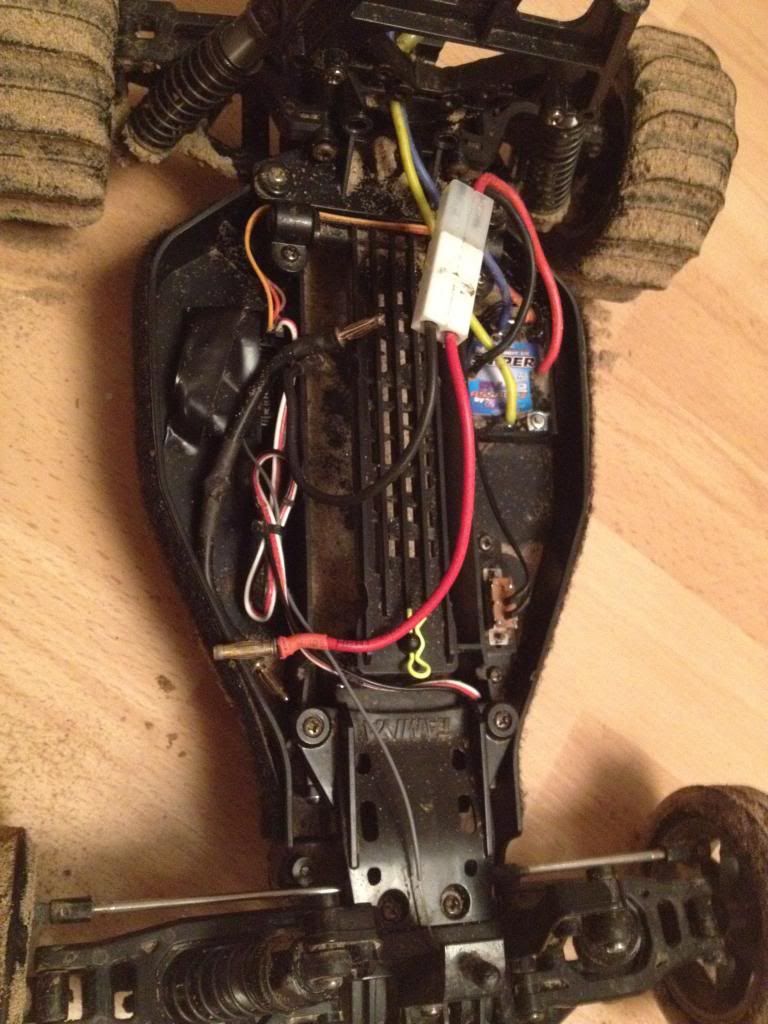
I've read online a lot about carson all terrain rims. Back when I first bought the car, I had ordered some. These finally arrived so I thought I would try them out. Really like the black look against the bodyshell, but was a bit disappointed with performance if i'm honest. On tarmac the thing understeared horribly, and on dirt just no traction at all. Very strange, and would probably use the standard tyres over them if I ever did any future off-roading. 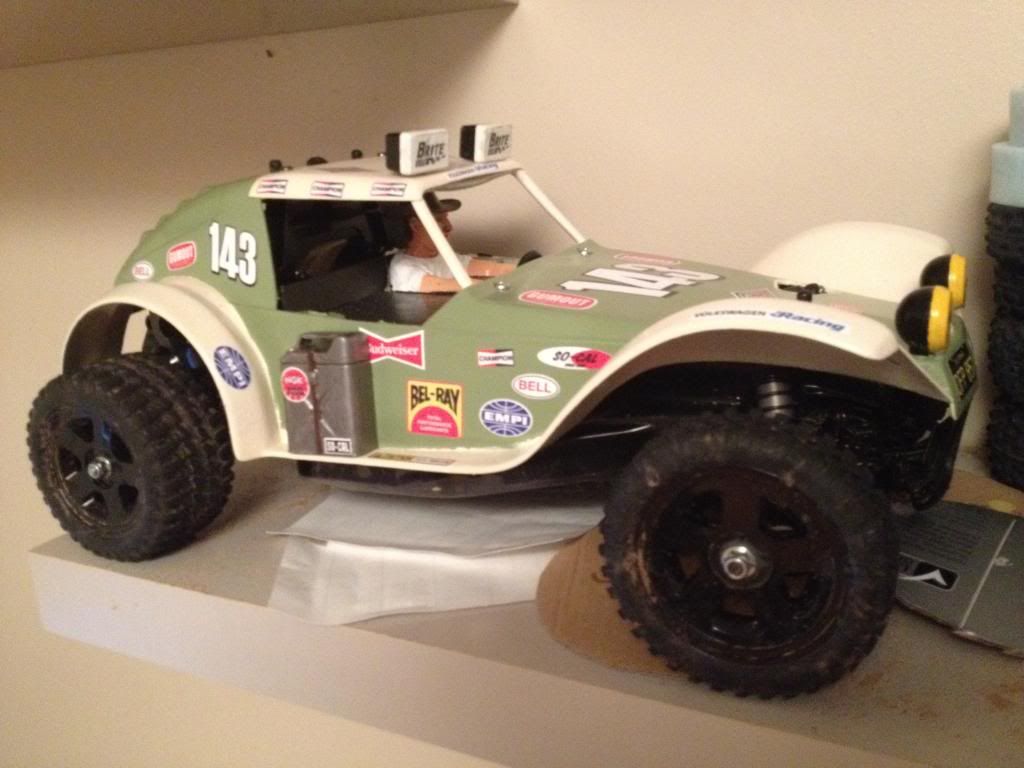

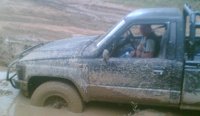
In total now I've probably put about 4-5 hours worth of hard well used running time onto this shell. About 2.5 hours of these were on sand, an hour on dirt/mud, and about half an hour to an hour on tarmac. I haven't been particularly careful, but on the other hand, haven't been purposely rolling it etc. The paints held out reasonably well, but there are a few small areas where it's starting to flake. I would definitely recommend anyone who is considering it just to go for it, but don't expect a perfect finish or one that will stay 'new' looking. I'm certainly very pleased I did it, and it truly does look amazing on the beach (will try and take some photos next time). I'm definitely one happy camper! 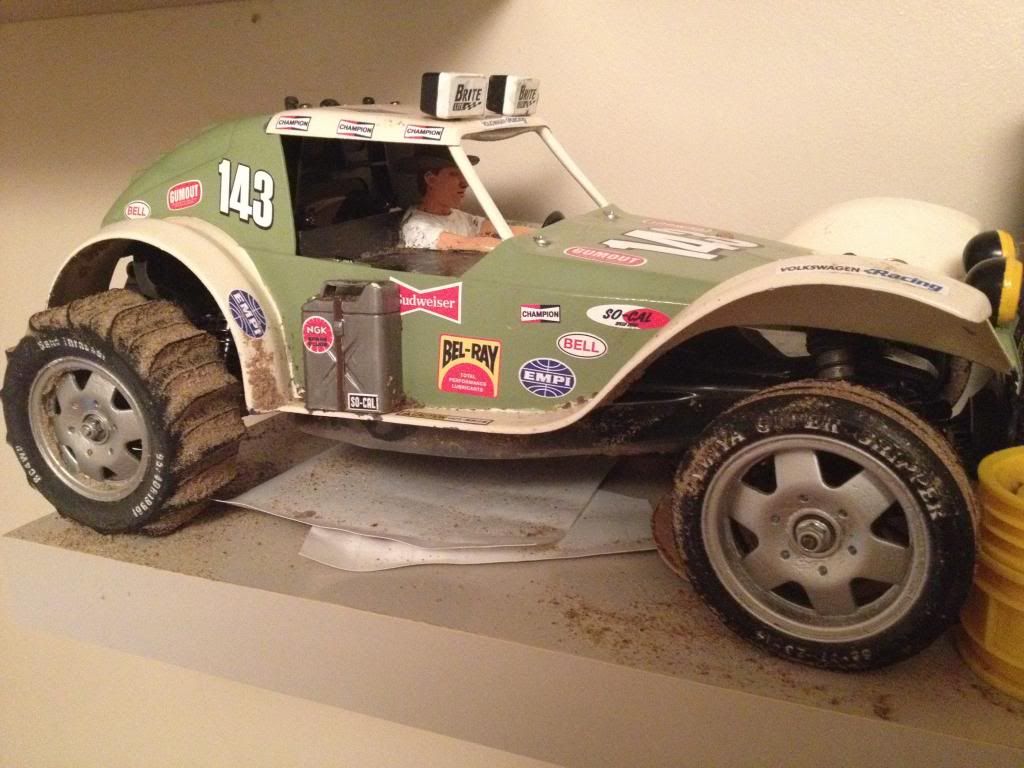
|
|
Please Log in to join the conversation. |
Tamiya Holiday Buggy - Project Beach needs help! 11 years 1 month ago #19603
|
I'd agree with that - but a simple/cheap workaround is to get a suitably "S" rated warning buzzer & plug it in to the balance lead on the battery. |
|
Please Log in to join the conversation. |

Tamiya Holiday Buggy - Project Beach needs help! 11 years 1 month ago #19665
|
Fantastic job on the HB, great to see someone pushing the limits and doing something original
I had sucess hitting the body with a gas torch after the sanding (I read somewhere that it changes the chemical structure of the polyethylene plastic) 
You can see the plastic changing colour and getting darker as you do this I was surprised how easy it was, you can be very accurate with the torch I started very gently, but by the third go I was giving it a good blast with the flame A good wash down, let dry A good plastic primer, let dry a few days, then a few coats of TS In my case rubber black (matt to hide the poor paint job) 
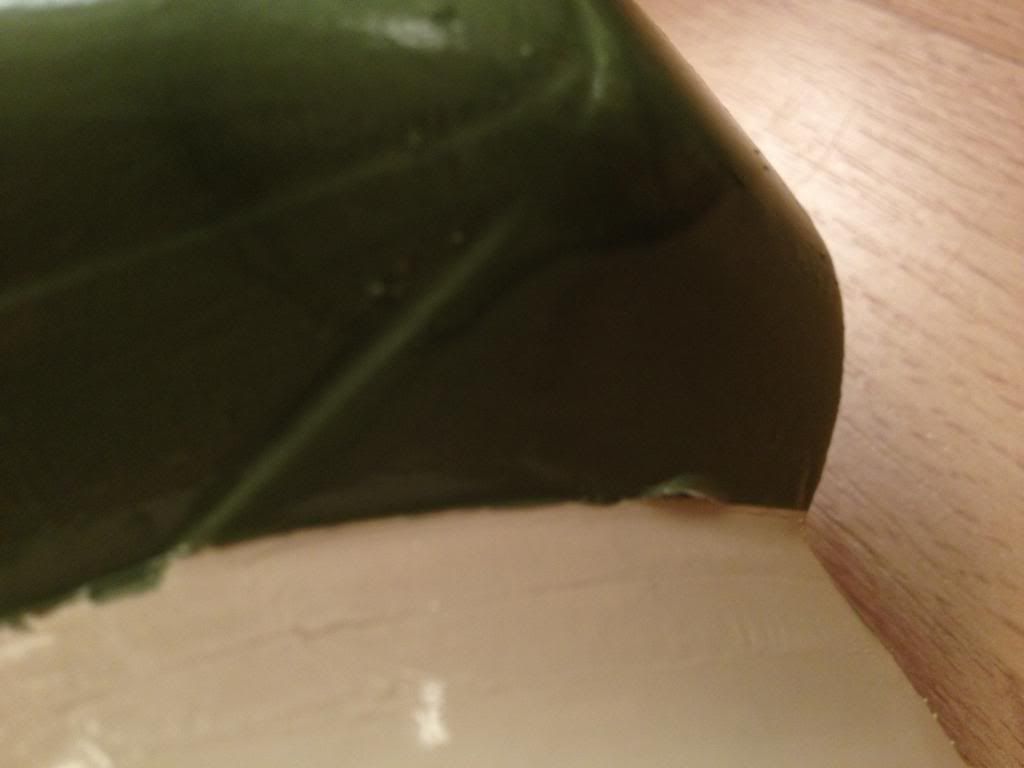
This is my son's car, he has rolled it many times, and split the front wheel arch from the body by driving into a pole Now glueing polyethylene, that is another story Terragni |
|
|
Please Log in to join the conversation. |
Time to create page: 0.188 seconds