According to the motto "wintertime is crafts time" and i still have enough material to build the project, was after a short discussion a Ken block Subaru Impreza 2008 STI Replica born.
Then by chance that I am still a "real" Ken block autograph has come, and so the idea has been further strengthened.
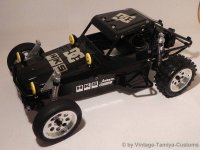
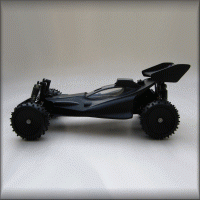
I use as a basis the tamiya DF-03 Ra Rally Chassie, since it is i think the best (also of the kit already is since three quarters of a year on the shelf and waits for the assembly)
In the network are already to be found some alterations to the theme, with all on the body, the limit will be different here. The replica will be virtually from a single mold.
Here the orginal with driver Ken block:
Here is a small video on the you can see what the drivers and car so on the asphalt to bring:
The tamiya manuals are great, but i have a slightly different system in the building (only for the case that some should be surprised)
With the rear ball diff was started:
But these will be immediately replaced by one-piece diff joints from steel
The most important thing in a ball differential is clean and carefully to work. Then it will be with a soft current and quite durable diff will be rewarded.
The first diff joint is cleaned and degreased
Then, on the surface of the pressure plate fat applied a thin layer, as glue (ball diff fat use)
Then was the bearing washer mounted
The same approach in the second diff joint
Both sides were now.
On the small diff joint (with the cones) are now pushed the ball bearings
The pressure plate is also mounted with a thin layer ball diff fat
And the diff gear setting up
The Diff ball is best prepared in a small bowl, since they can be lost quite quickly. There must be at the assembly no ball is missing!
With an allen key the man in the ball diff fat dips, can the balls right now simply be used
A thin layer fat again...
...And the second diff joint setting up
It is now the diff bolted together, the small thrust bearing also fats (ball diff fat or Asso black)
The diff is now caution to-bolted, and "under pressure" brought
With the help of a scissors and a Inbus is the ball diff now set.
-With the scissors, the diff joints held, it is now trying to turn the gear. The turning should not be difficult or be possible!
-Without scissors is now the gear and recorded on a diff joints turned, this should be easily and without hooks be possible.
Sticking it, or is the turn very difficult possible? The Diff clamping screw a quarter turn.
Then the diff again held with the scissors and try to turn the gear etc. (always alternately)
The goal is the diff so firmly as necessary (gear should not or very difficult to turn his) attract and so relaxed as possible (diff disposals should be gently rotate)
Finally come in the diff joints still PU stopper
The action at the front ball diff is the same
Now be pushed the Shimm slices and ball bearings on
And in the transmission housing positioned
Then the cover of the housing will be assembled and bolted together. I again for V2A screws with green U-slices decided (in keeping with the theme)
The diff housing has been further stocked
Here in the picture the short standard shaft is not installed
Instead, the length Slipper shaft to use
Instead of the standard output for the propeller shaft that I am here for a alloy variant decided
The cover of the housing was established and bolted
Assembly of the motor plate
and the Slipper
It was at the time the swing arms...
.. And wheel carriers to assemble
Instead of the standard drive bone..
...CVD shafts come to use
The CVD's will be supplied with plastic blades
The blades fit perfectly in the diff joints, thereby running the shafts better and not the disposals wear out, but the blades (and this can easily be removed)
In the next step should be the carbon dampers bridges mounted, unfortunately (in this case) are the Blue anodised alloy base.
And so the institution ent anodised aluminum
Then, you could be mounted
Of course must be in the model as in the orginal a monster engine be installed (V2, 17x2)
Finally came the dampers to your place yet
Die Arbeiten am Chassie standen als n


")
")


