TOPIC:
Blakbird's 58372 Ford F-350 Highlift Build 5 years 7 months ago #51762
|
Note: This build log is excerpted from my
web site
. You can check there for larger versions of every photo or further reading.
The High Lift series of ultra-realistic solid axle truck kits was first released in September of 2006 and the Ford F-350 was the first version. The 58397 Toyota Hilux would follow in 2007 and the 58415 Toyota Tundra in 2008 along with a range of pre-painted versions of each. All the base versions have been available continuously since. This is a 4WD solid axle chassis with steel ladder frame construction and leaf springs. It features a 3-speed transmission which is highly based on the version from the 1/14 scale tractor truck series. Each of the truck versions has different wheels and slight variations in the frame for mounting positions. The detailed hard shell body includes light buckets and a roll cage. The body does not need to be removed for battery access. Instead, the bed can be tilted back to access battery tray which sits sideways under the chassis rails. The kit includes "friction dampers" rather than oil filled shocks. They are less effective but look good and are perfectly adequate for this kind of speed. The kit also has a four wheel steering option, but to me this makes no sense on a scale truck so I didn't use it. 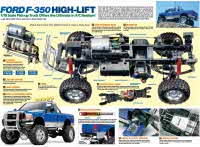
This was designed to be able to use the MFC-02 Multi-Function Control Unit which adds many lights, a vibration motor, and V-8 (or V-6) engine sounds. Naturally I chose to incorporate this option. To get all the features to work you need to use an older style 2 stick radio with manual trims which is not ideal for driving ease, but the added functionality makes up for it. Without the MFC you can easily use a standard 3 channel pistol grip radio. With a 4 channel you can access many, but not all, of the MFC features. You need the manual trims for that. Update: I did eventually figure out a way to use the MFC with my Spektrum programmable pistol grip radio. I can't quite access everything, but almost and it is much easier to drive with this type of radio. The key is using mixing of the 5th channel to input "trim level" inputs. The primary selling point of this truck is the appearance. With a silver can motor it is not very fast even with the 3-speed transmission. With open differentials it is not that great off road, although the diffs can be locked manually by inserting a set screw. The leaf springs don't offer much articulation, and the ground clearance is terrible with the transfer case hanging way down below the rails. So why bother? Well, it looks great. With the MFC added, it also sounds great. You have headlights, fog lights, turn signals, reverse lights, a horn, and engine sounds. Although the engine sounds are nice, I don't like the way they've programmed the throttle. A real V-8 cruises around at low throttle, but at even 50% this thing sounds like it is at redline. I wish the throttle sounds were exponential with throttle position so you only got the high end scream at the very top. This thing was a blast to build and detail and it certainly gets a lot of attention despite the lack of tire shredding performance. I left it mostly stock with only a couple of body add-ons, but eventually went and upgraded the tires and wheels for more traction. The box is very nice, but it does not have the excellent hand drawn artwork of most of the older models. The angle and perspective make it look very imposing though. The box for the Multi-Function Control Unit is very sizable in itself, and is also quite heavy. The speaker magnet makes up the bulk of the weight. 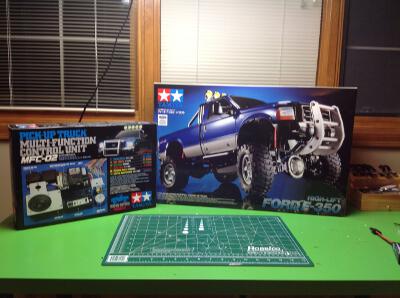
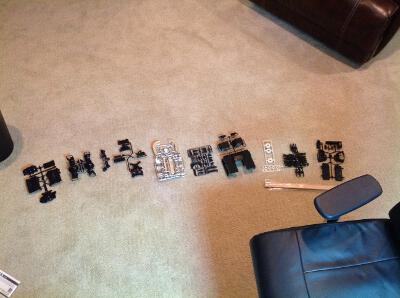
Wow, there is a lot of hardware in this kit. Upon first opening the box it looks like everything except the chassis rails is plastic, but that's only because all the metal parts are in the hardware bags. The second image shows the array of plastic sprues. 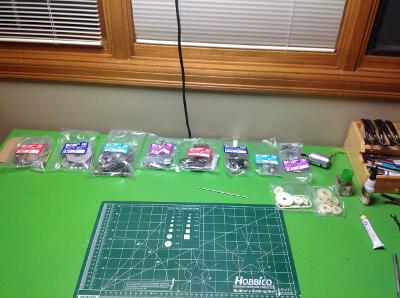
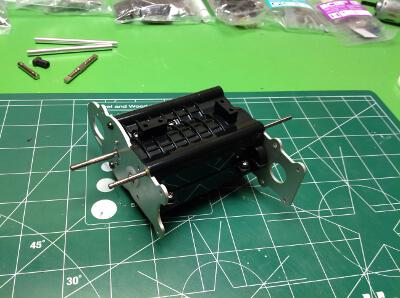
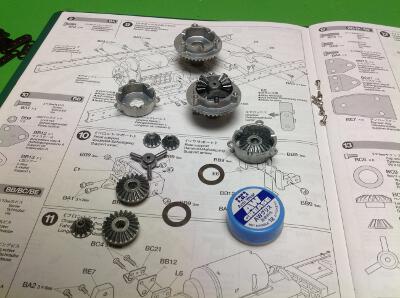
Construction begins with the 3-speed transmission. Gear Shaft A (on the left) is the input and contains a driver for each speed. Each gear (13, 20, and 27 tooth) is splined to the shaft. Gear Shaft B (on the right) is the driven gear. Each gear (44, 37, and 30 tooth) rides freely on bearings. Only the driving rings are splined to the shaft and they can engage the various gears via driving dogs. Most of the gears are Nylon but the smallest are metal. The 20 tooth appears to be aluminum and the 13 tooth brass. 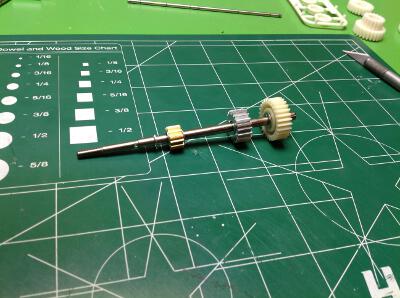
3 shift forks engage the driving rings and control the shifting of gears. Shafts A, B, and the shift fork axle are locked between two metal end plates with some aluminum standoffs. A set of springs bias the shift forks toward the middle (2nd gear). 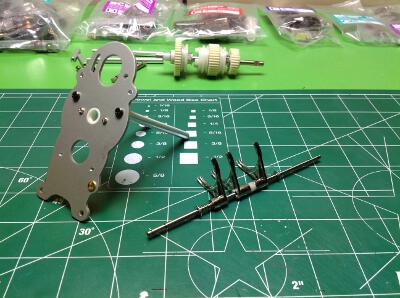
|
|
|
Please Log in to join the conversation. |

Blakbird's 58372 Ford F-350 Highlift Build 5 years 7 months ago #51764
|
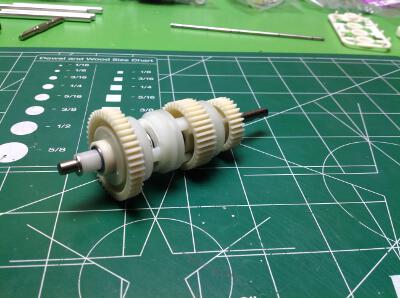
The gears are now enclosed in a pair of plastic housings after being properly greased and tested. Since this is a 4WD vehicle, we need a transfer case to send the output to both the front and rear axles. The gears in the right hand image handle this and also provide a further two stage reduction between the transmission and the drive shafts. The first set is 16:25 and the second set is 17:23.
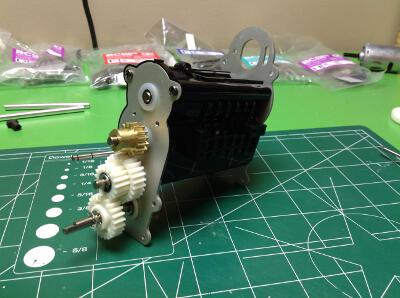
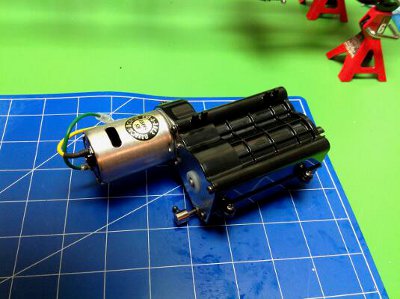
The final step in the transmission assembly is the installation of the motor, pinion, and spur gear. The motor goes up top and sits over the housing. The pinion is 16 teeth and the spur is 54. The spur gear incorporates a slipper clutch which is a good idea for an off-road truck that can get the wheels stuck. Very few Tamiya kits have slippers. 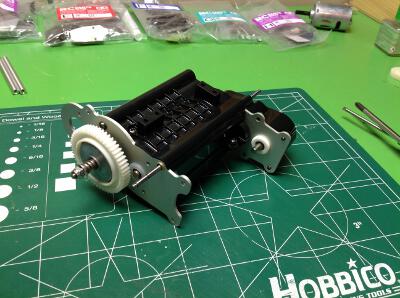
At this point I'd like to compare the Highlift transmission to the 3 speed transmission from the King Hauler and other 1/14 scale tractor trucks. They are actually almost the same. All of the internal gears on Shafts A and B are the same. The obvious difference between the Highlift on the left and the King Hauler on the right is the position of the motor. A side effect of this is that the Highlift spur gear is outside the gearbox and the King Hauler spur is inside. The Highlift also adds the transfer case. The shift mechanism is the same. This is NOT the same transmission used in the Bruiser which is considerably more complicated and includes a 2WD-4WD selector and a planetary set.
Let's derive the final ratios using what we know. Don't forget the differentials which use a 40:15 ratio.
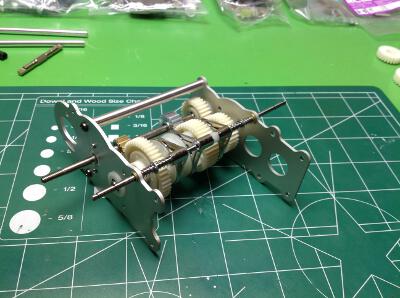
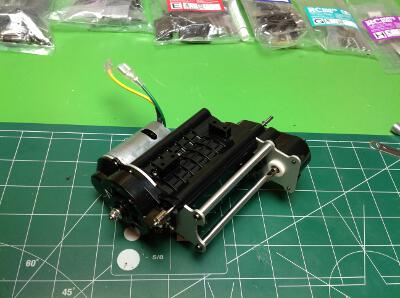
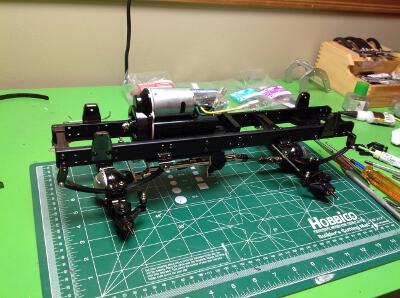
Now the transmission can be installed between the chassis rails. It hangs down considerably and forms the primary structural cross member of the frame. More plastic cross members are added front and rear. In the second image, shock mounts and shackle hangers have also been installed. 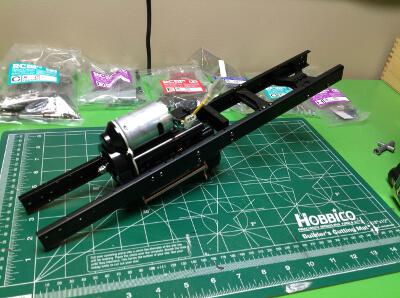
The following user(s) Liked this: Purple_rob
|
|
|
Please Log in to join the conversation. |
Blakbird's 58372 Ford F-350 Highlift Build 5 years 7 months ago #51765
|
Time to start building the axles. The front and rear open gear differentials are all metal and are the same units on the 1/14th scale tractor truck series. I packed them with Anti-Wear grease to provide a bit of resistance so the diff doesn't unload so easily.
The diffs and axles are installed into plastic housings which are then attached to the chassis with leaf springs. Each spring stack comes with 5 leaves, but the instructions call for using only 3 of them in standard build configuration. Oddly, one of them is actually installed on top of the primary leaf instead of below it which is not a usual configuration. Even with only 3 leaves the suspension is quite stiff which limits articulation. I later changed the primary leaf for the soft red versions from RC4WD which work much better. They are a direct drop in. The Tundra and Hilux versions of the Highlift use shorter springs so require modification to use the red versions. The drive shafts are very nice telescoping steel units. 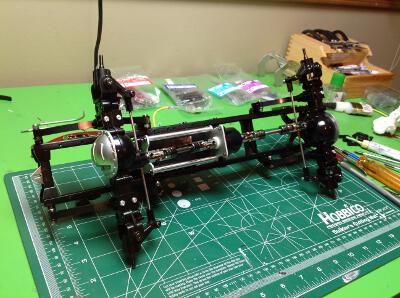
The shocks are unusual. They don't have any oil inside and they don't have any springs either. OK, there are springs but they only extend the piston rather than support the truck. The leaf springs provide the suspension and these shocks exist just to provide damping. They do this only through the friction of some grease inside. The housings are aluminum and the rods steel. Not much damping is needed since the truck is not very fast. 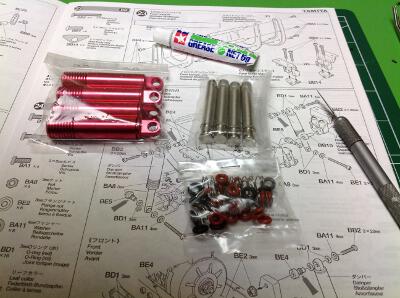
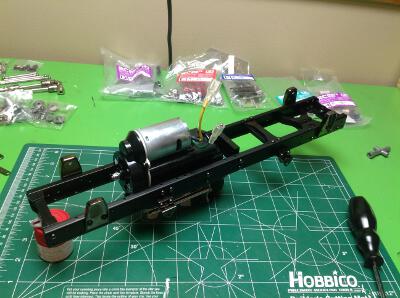
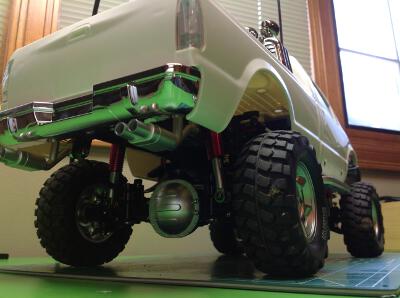
Now the shocks have been installed onto the chassis along with the big front brush guard. You can see how low the clearance is beneath the skid plate under the transmission. 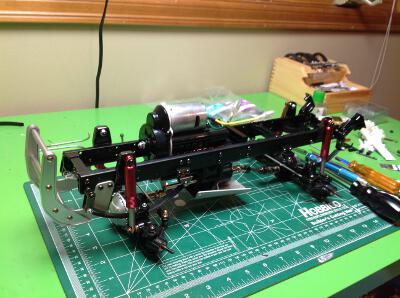
|
|
|
Please Log in to join the conversation. |
Blakbird's 58372 Ford F-350 Highlift Build 5 years 7 months ago #51766
|
Finally all the radio gear is installed. I first built the model stock using a steering servo, a shift servo, a brushed ESC, and a receiver. This allowed me to use my standard Spektrum pistol grip transmitter. Later I changed to a 2-stick to use the MFC. I like the driving feel a lot better with the pistol grip, but the concession is worth the price to use the MFC. The servos are hidden under the plastic box, and battery is mounted transversely behind it. The wheels are a really nice scale design, and the tires even have printed white lettering on the sides. Many people will replace the tires because they are pretty stiff and have no inner foams, but they sure look good.
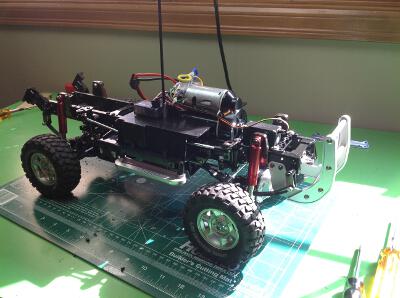
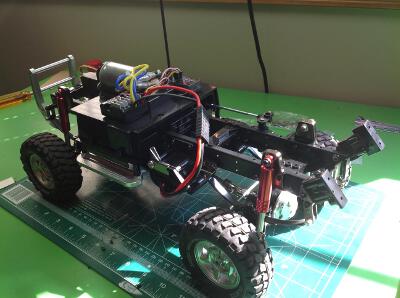
I set the unfinished body on top just to get an idea of what this would look like. It looks so good I can hardly believe it, but paint is going to make it even better. 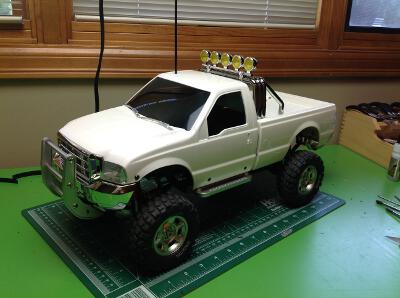
|
|
|
Please Log in to join the conversation. |
Blakbird's 58372 Ford F-350 Highlift Build 5 years 7 months ago #51767
|
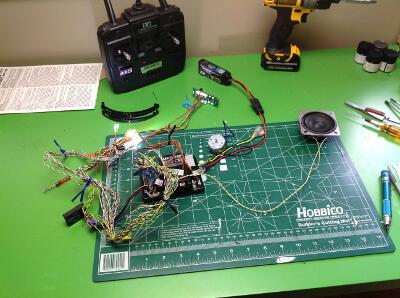
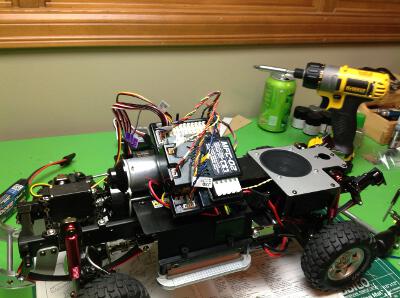
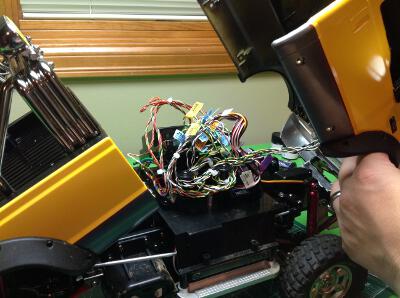
The MFC-02 Multi-Function Control Unit is an electronic system which adds sounds, lights, and vibration to any of the High Lift truck kits. It is very similar in principle to the MFC-01 system for 1/14 scale tractor trucks, but with slightly different features and sounds targeted at pick-up trucks. The system takes the place of an ESC and includes 21 lights, a vibration motor unit, a speaker, a control unit, and a control panel. The first picture shows everything hooked up for testing. It looks like quite a mess and it is hard to imagine how it would all fit, but when cleaned up it is not so bad. The picture on the right shows the built enclosures for the control panel, speaker, control unit, and vibration motor (left to right). In the front row are a post tower for bundling the wires and a 4 channel receiver. All of the plastic bits for these boxes are included in the MFC kit along with the electronics. 4 receiver channels must be connected to the control unit, then the steering and shifting servos can be attached to it as well. You must supply your own 4 channel receiver. You can drive the truck with only 3 channels, but you can't access all the MFC functions.
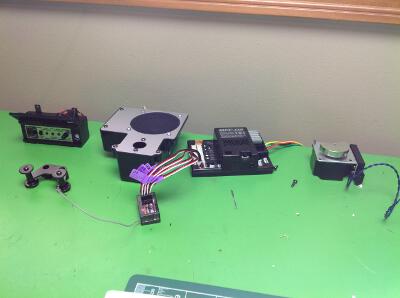
The speaker unit sits in the back between the frame rails and under the bed. The kit is already provisioned for it so it is very easy to install. Immediately ahead of that goes the box for the vibration motor which works by spinning a small offset weight. The MFC itself sits in the cab, but that space is already occupied by the motor so it needs to be mounted on a bracket at an angle (right image). There is still plenty of room for the receiver. The control panel fits in the box under the MFC and above the running board on the left side. It can be easily accessed from below even with the body on. At this point all the control wires are installed and only light wires remain. 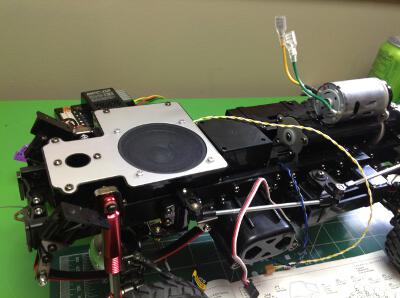
Now all of the lights need to be mounted. There are 5 lights on the roll bar. Each of them has its own circuit because they can do interesting sequential patterns in demo mode. In regular mode, they all light up together. The LEDs are white but the lenses are yellow. The tail lights consists of a red brake light, an amber turn signal, and a white reverse light on each side. The wires all need to be routed to the back so they do not pull when the bed is hinged open for battery access. You can also see how the exhaust pipes hang down from wires so that they shake when the vibration motor is turning. 
Once the bed is attached to the vehicle I routed the wires to the MFC. I tried to run them behind and under the speaker so they would not tangle on anything when the bed opened, and also so they would be protected from obstacles. Plugging them into the MFC is an easy matter if you remembered to label them all with the included stickers. Just follow the diagram in the instructions to see where everything goes. 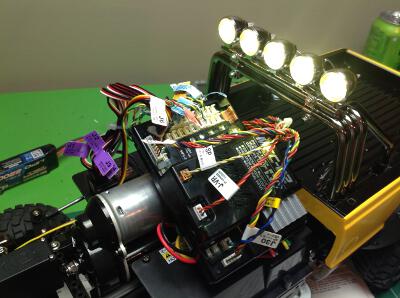
The front of the body has headlights, passing lights, marker lights, and turn signals on each side. The right photo shows everything connected. The extra wires wrap around a set of posts to get out of the way. Once the front is screwed on, you shouldn't need to open it again. 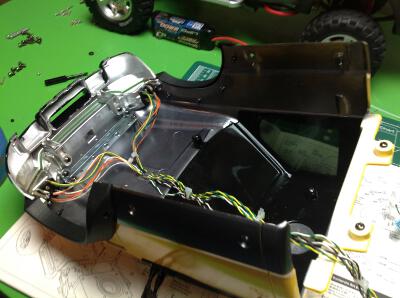
The F-350 uses 19 lights which is not everything that comes with the kit. The lighting configuration on the Toyota kits is slightly different with fog lights on the bumper. The instructions also indicate that there are features which support a number of "games", but there is no information on what these games are and I found nothing on the Internet either. I guess this was an optional future feature that they never released. There are several demo modes which run through all the features without any user input, and some include some really mesmerizing light effects including "Knight Rider" type sequential movement of the fog lights. |
|
|
Please Log in to join the conversation. |
Blakbird's 58372 Ford F-350 Highlift Build 5 years 7 months ago #51768
|
Given what this truck is and what it does, it doesn't necessarily benefit from a lot of upgrades. But there are a couple of things that can really boost the off road performance so that's what I went for.
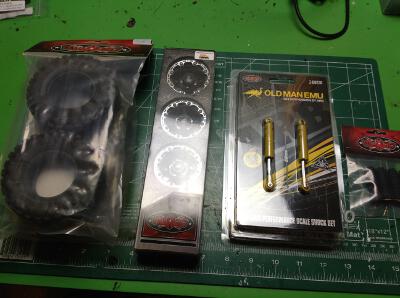
I had read that the suspension was too hard, so during the initial build I replaced the first (and largest) leaf spring with a softer red version from RC4WD which worked really well. I found that later after the springs broke in they were actually bottoming out under the weight of the truck, so I took the first intermediate spring and moved it from above the red spring to below (which looks better anyway). This made it just right. In the image below the leaves on the top (right side of truck) have been arranged in the new way and those on the bottom in the old way so you can see the difference. 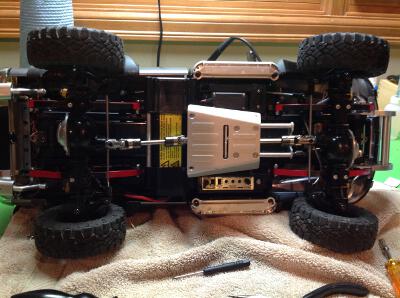
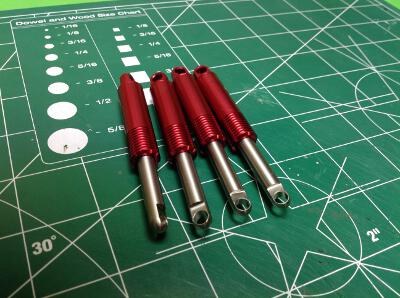
The next thing I did was upgrade the shocks. The stock shocks are nice aluminum units, but they are just friction dampers with no oil. At slow crawling speed they probably don't make much difference to performance, but it bothered me not to have oil shocks so I got some scale versions from RC4WD which look really nice. Before and after are shown above. Can you tell which is which? 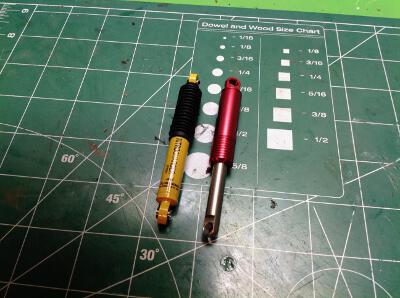
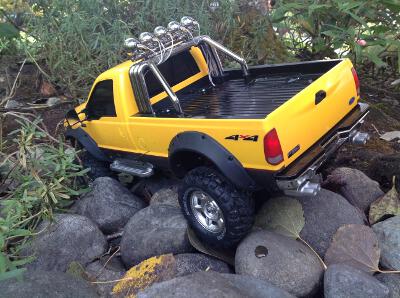
The final and most important upgrade is the tires. Although I like the look of the stock tires with raised white letters, the compound is quite hard and doesn't grip very well. I chose some Dick Cepek beadlocks from RC4WD along with a set of scale Goodyear Wranglers. You can see how nice they look and the traction is infinitely better. In the final photo you can also see the rubber fender flares and mirrors that I added during the initial build. 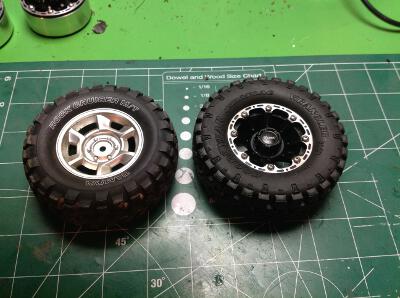
The following user(s) Liked this: stingray-63
|
|
|
Please Log in to join the conversation. |
Blakbird's 58372 Ford F-350 Highlift Build 5 years 7 months ago #51769
|
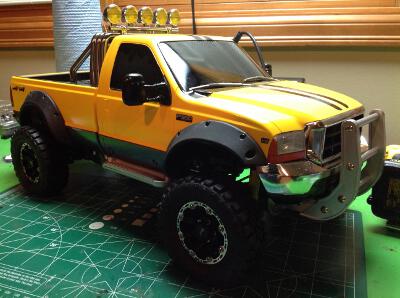
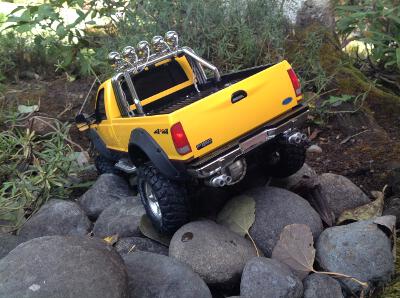
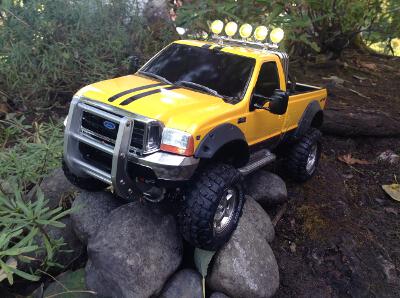
This thing looks great. I chose a Tamiya chrome yellow and a gloss clear coat. I used some stickers that were made for the sides of the bed as racing stripes which worked out great. I painted the inside of the bed black. I replaced the stock hard plastic mirrors with rubber that should be more durable, and I added a set of black rubber fender flares from RC4WD. The only thing I don't like about the appearance is that the amber and red light lenses are stickers rather than colored parts. This looks fine when they are not lit, the amber looks really fake with a white light behind it when illuminated. The photos below are from the original build before upgrades.
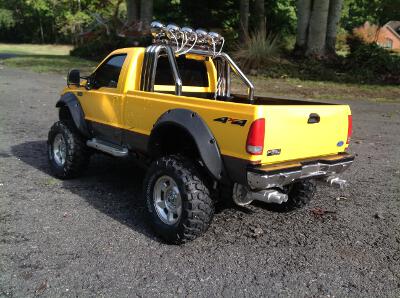
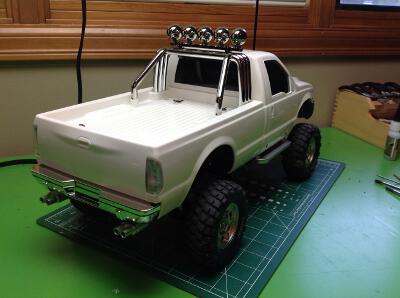
This photo shows the final version of the truck with the new wheels. 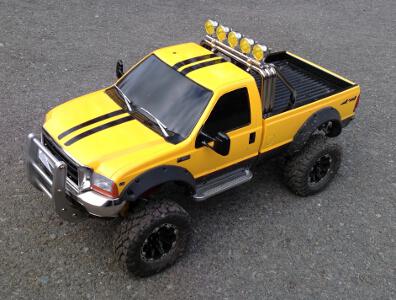
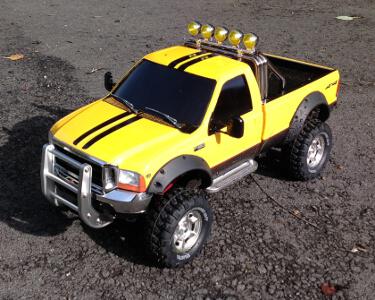
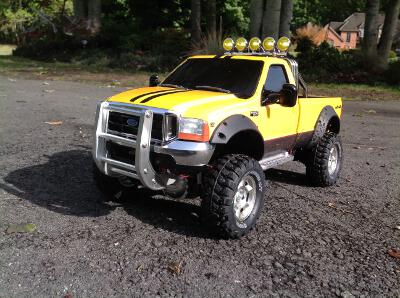
I tried to find a photo of a yellow F350 for reference, and I found this one looks pretty close. 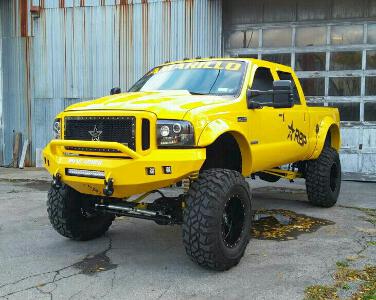
The following user(s) Liked this: stingray-63, stefan042
|
|
|
Please Log in to join the conversation. |
Time to create page: 0.376 seconds