TOPIC:
Blakbird's 56336 King Hauler Build 5 years 1 month ago #54415
|
Blackbird you miss the roof deflector
|
|
Please Log in to join the conversation. |
Blakbird's 56336 King Hauler Build 5 years 1 month ago #54423
On both Scania build I simply moved down the rear suspension after drilling new holes. As for front I use the factory suspension mount location since I use TLT based axle (axle is expensive from Getriebedoktor in Germany, the rear is too with operational diff lockers) Here from the first build when I moved the rear suspension 
Second build 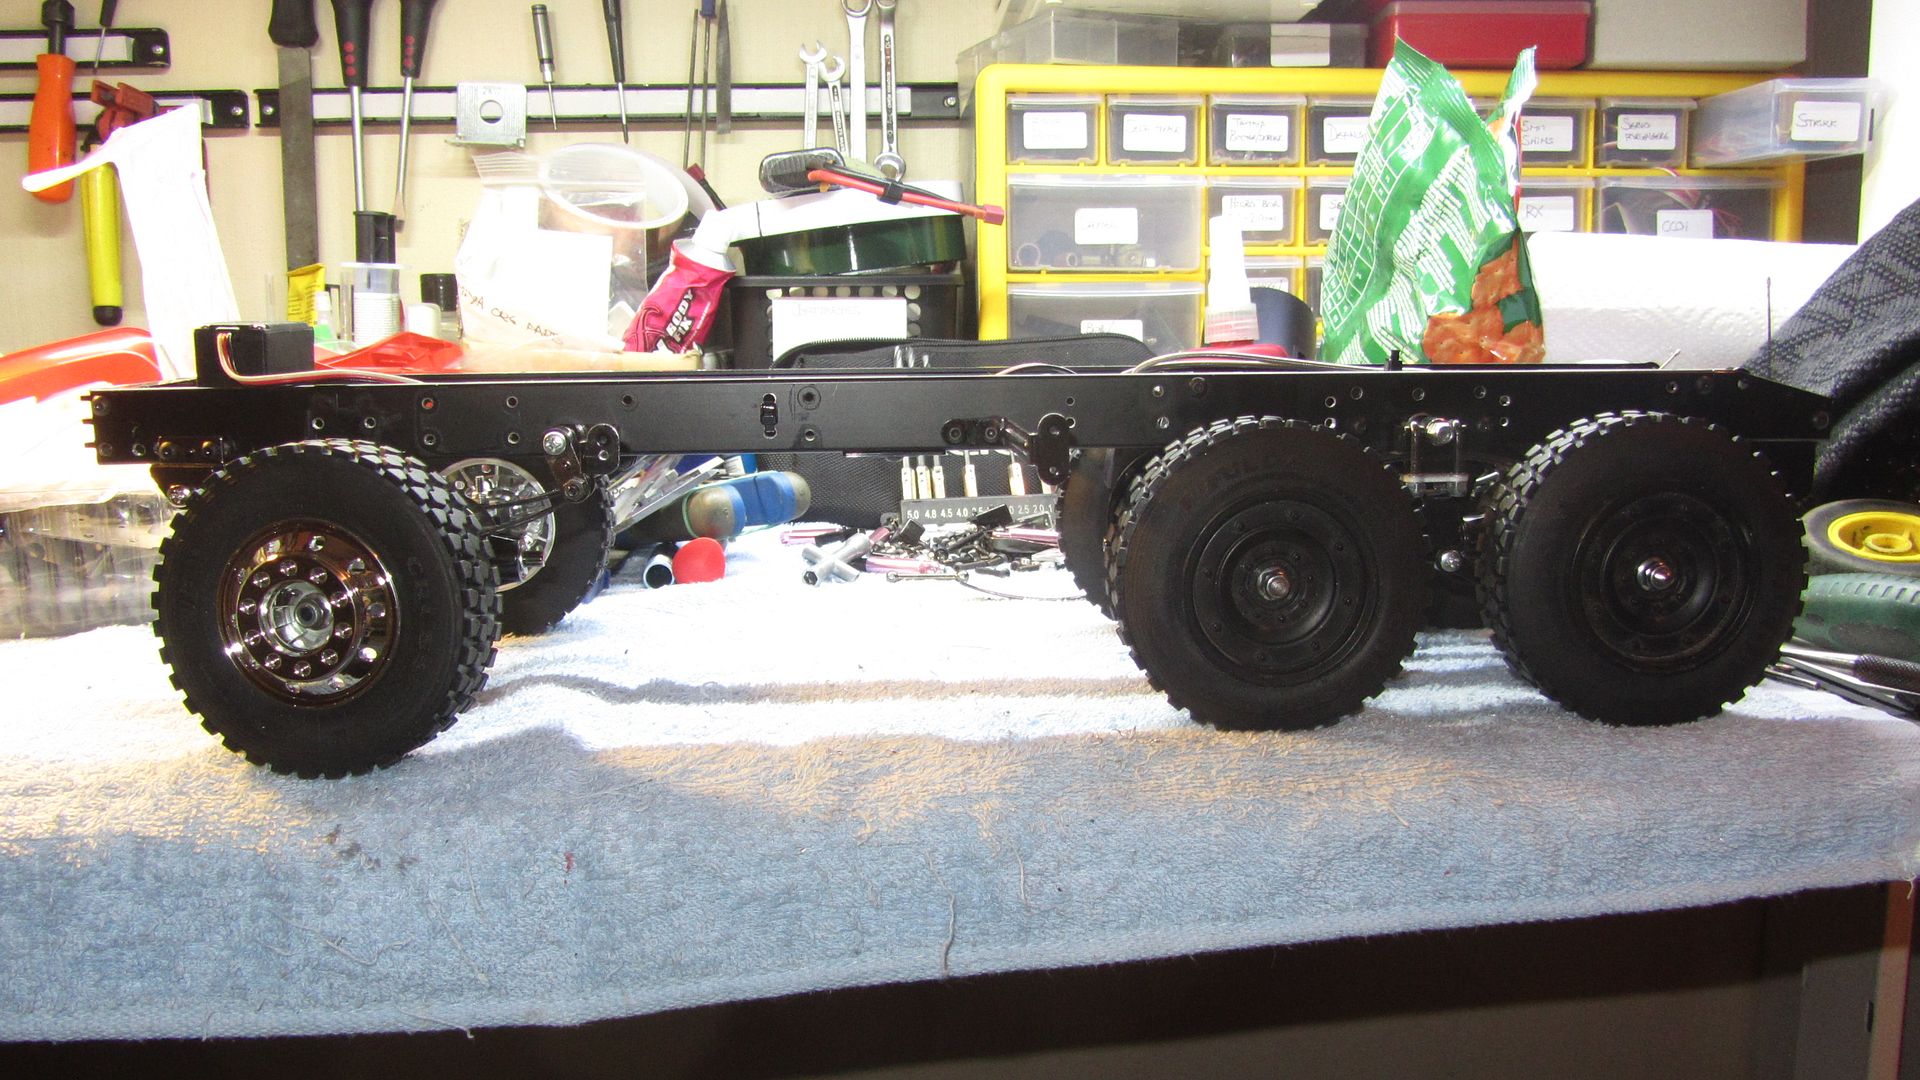
Front axle. Tried several setups regarding hight and springs, thus the extra holes in frame.. The Hi-Lift Toyota Tundra has the right lengt srings with holes for the TLT axle mounting, but are a bit hard to come by. 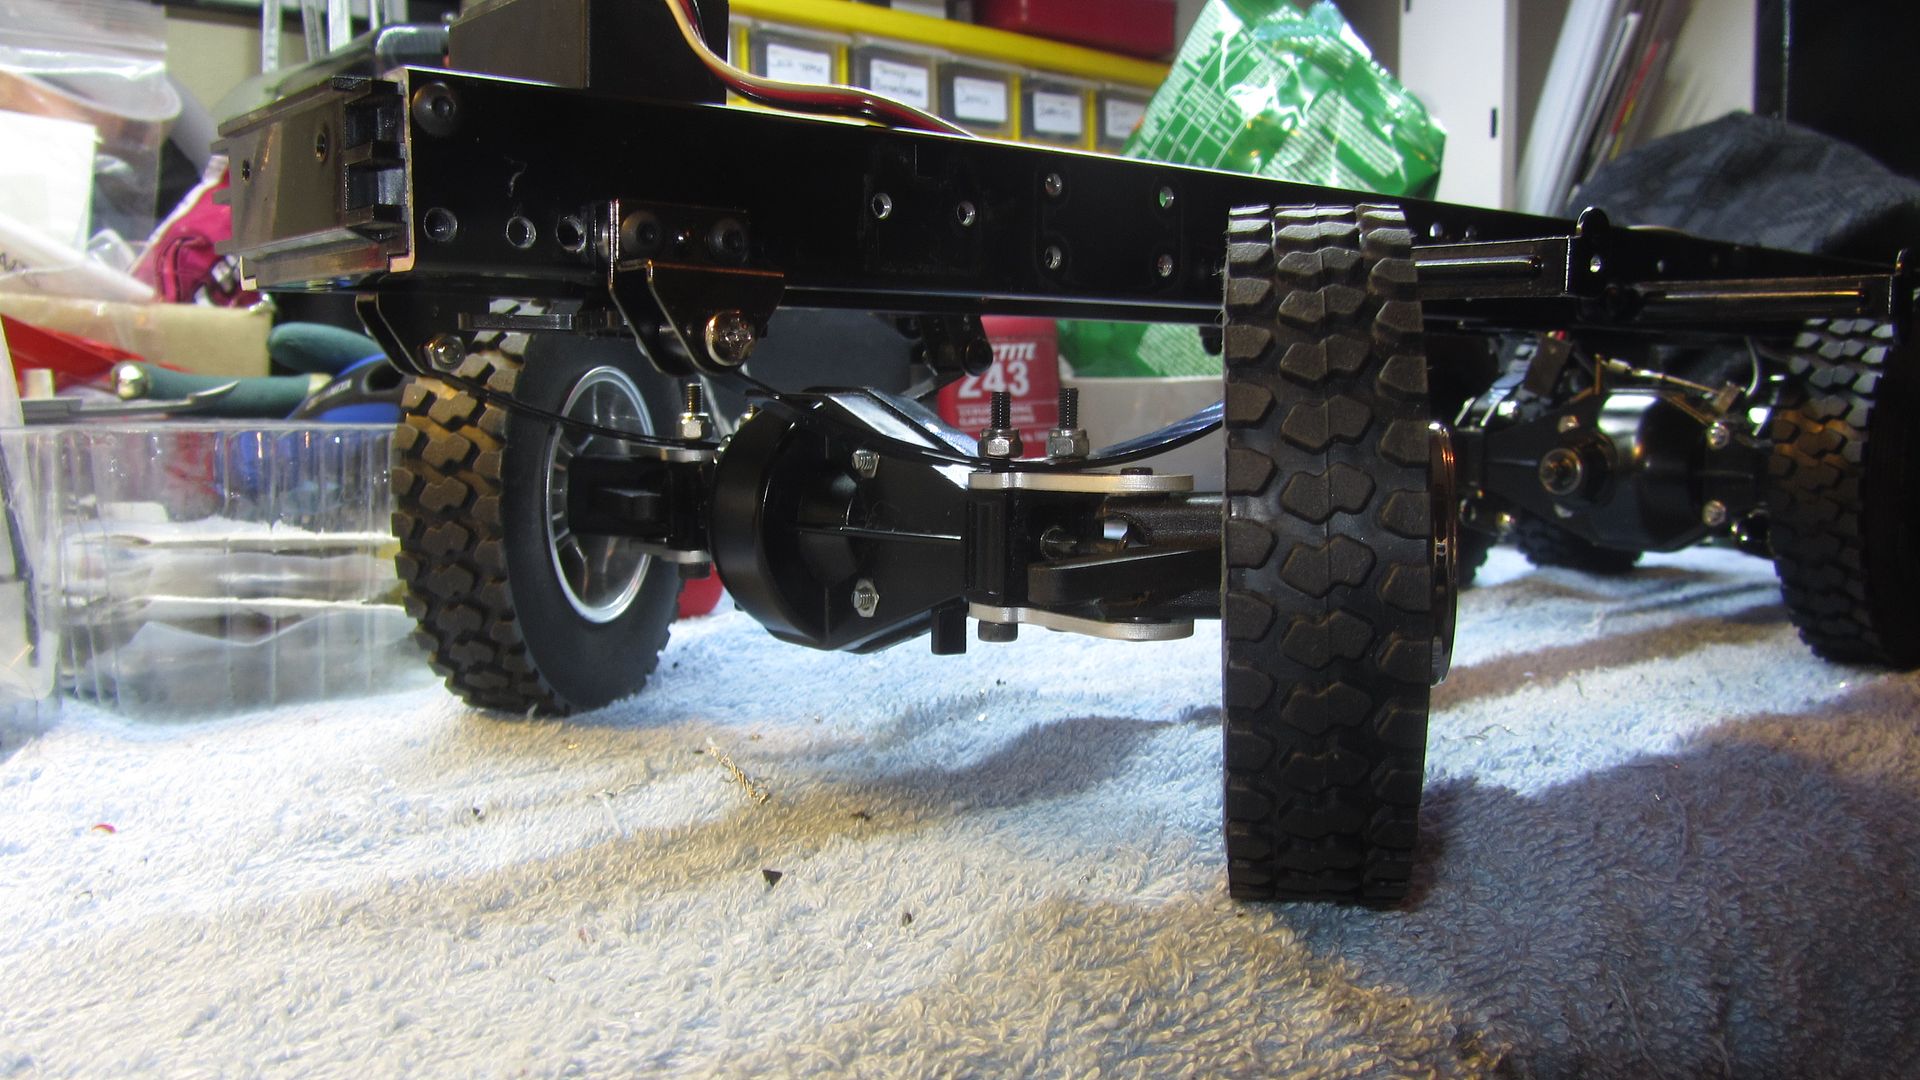
|
|
|
Please Log in to join the conversation.
Last edit: by caprinut.
|
Blakbird's 56336 King Hauler Build 5 years 1 month ago #54424
I have done a lot of trailer backing in 1:1 so it is not a big problem. Hooking and unhooking the trailer is some of the most fun part! Now I need to get an OB1 system so I can do trailer lights without wires. I didn't even know about that optional part at the time. I think I like the King Hauler without it, but I might use it when I build the Globe Liner. Thanks for the advice. I have built both a TLT-1 and the Highlift Tundra recently, but they are already using their axles and springs so I don't have any in spare. LESU seems to have some nice offerings. The biggest mystery is how to do a transfer case for driving the front wheels. |
|
|
Please Log in to join the conversation.
Last edit: by blakbird.
|
Blakbird's 56336 King Hauler Build 5 years 3 weeks ago #54770
|
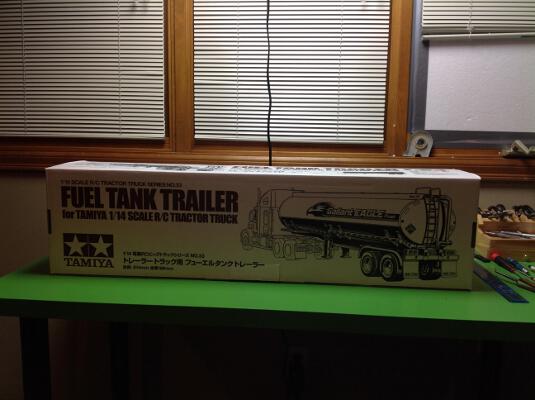
You can't have a 1/14 tractor truck without a matching trailer, so let's get started on that next. The 56303 Fuel Tank Trailer was the second 1/14th trailer ever released by Tamiya and came out in 1994 with a Shell logo on the side. It was in production until 2012 when it was replaced with the unlicensed 56333 "Gallant Eagle" version of the same trailer. This is a large and lovely polished metal tube attached to huge frame rails on top of tandem dually axles. Almost everything is metal. The inside of the main tube is completely empty apart from any wires you might install for lights. There isn't really any access to the interior without removing screws, so it is not designed to haul anything. This is a really beautiful trailer if you can manage to keep your fingerprints off of it.
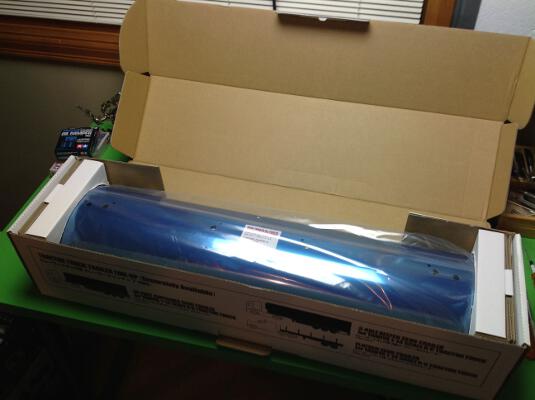
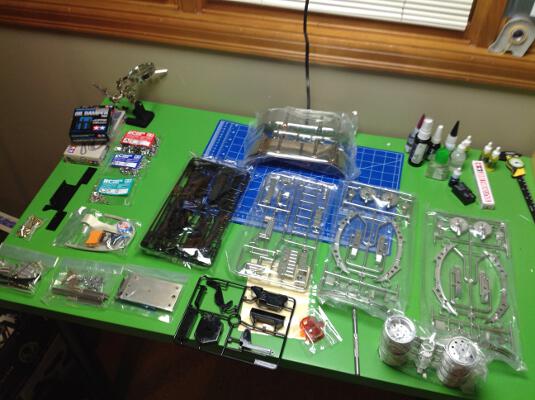
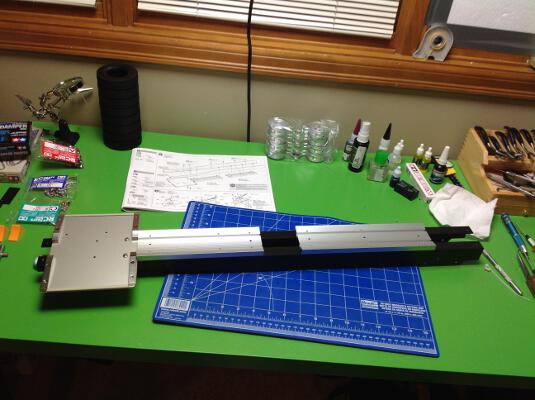
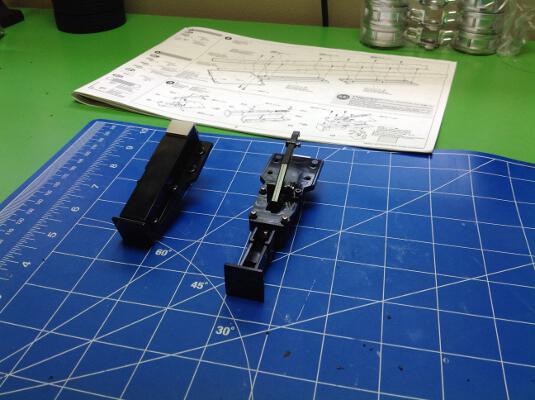
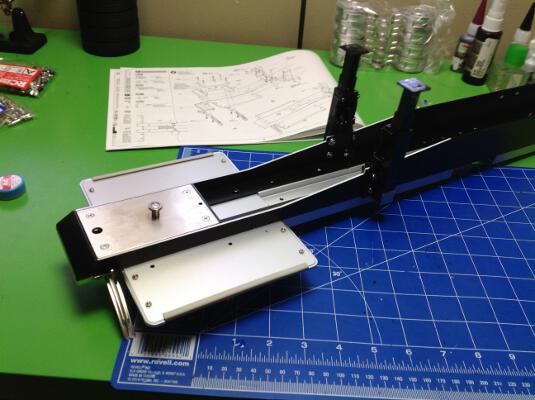
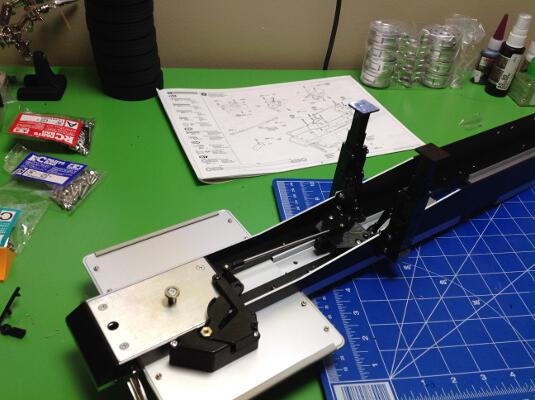
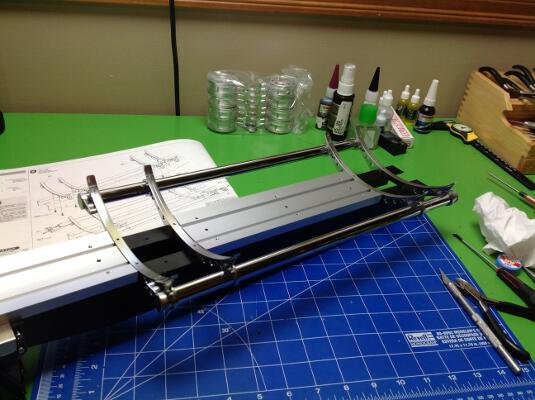
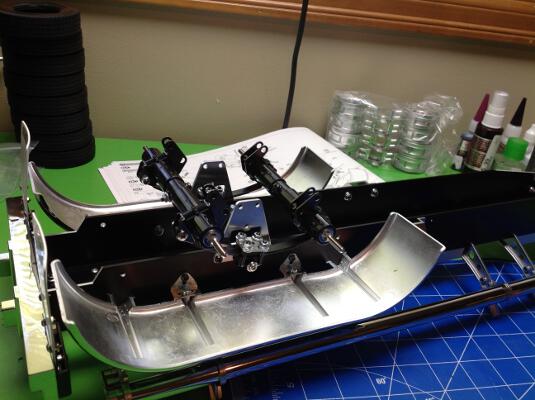
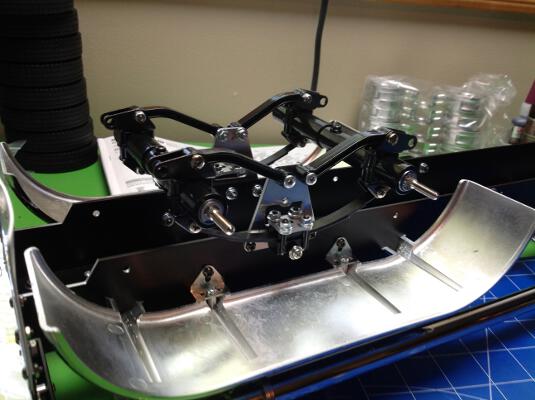
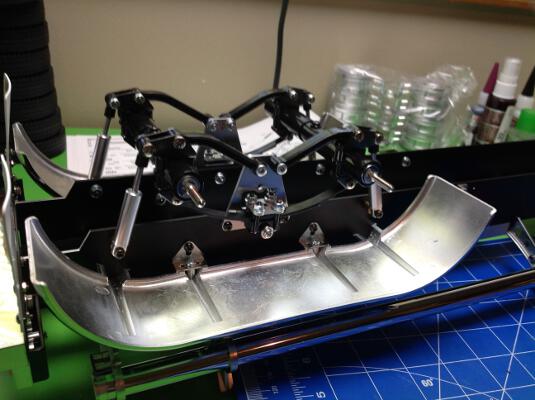
This is the first trailer I ever got and was intended to be used with my King Hauler behind which it looks fantastic. I added the motorized support legs and the trailer lights to work with the MFC in the King Hauler. The build was quite straightforward after having built a tractor truck. The rear axles are similar except they have no differentials or gears. The assembly of the motorized support legs was probably more work than the trailer itself. The box for the fuel tanker is much smaller than that for the truck, and of course the trailer is just a dead weight with no motor or control so I figured it would be pretty easy compared to the truck. It ended up being much more complicated than I expected. At first glance it looks like there isn't much in the box. Just a big metal tube protected with blue film like a new airplane fuselage. Most of the parts are actually packed inside the tube. The second image shows the considerable pile of parts and hardware, not including the metal parts which are elsewhere. Step 1 is the forward deck which is an aluminum plate with some attached plastic stiffeners. The side rails are long aluminum L-channels pre-drilled and tapped. To this base the front deck is attached along with some complex extruded aluminum supports for the tank. Step 3 is the spring loaded support legs or "landing gear" for the front of the trailer. They are quite sturdy even with a heavy trailer load. Now the legs are attached to the frame in Step 4 along with a bunch of other plates and the kingpin. One thing you can start to notice is that virtually the entire trailer is metal. The only plastic parts are the support legs and the bumper. The rest of the coupling mechanism is installed in Step 5, and it is pretty slick. When the kingpin engages with the 5th wheel it pushes a rod which triggers the spring loaded support legs to retract. This means you can back up to a trailer and couple all remotely without ever touching the model. You do need to manually disengage the coupler and extend the legs when disconnecting though. |
|
|
Please Log in to join the conversation.
Last edit: by blakbird.
|
Blakbird's 56336 King Hauler Build 5 years 3 weeks ago #54771
|
Step 6 is the installation of the cradles and also the long tubes along the edge. These are usually used to hold flexible ribbed hoses for unloading the fuel into underground tanks.
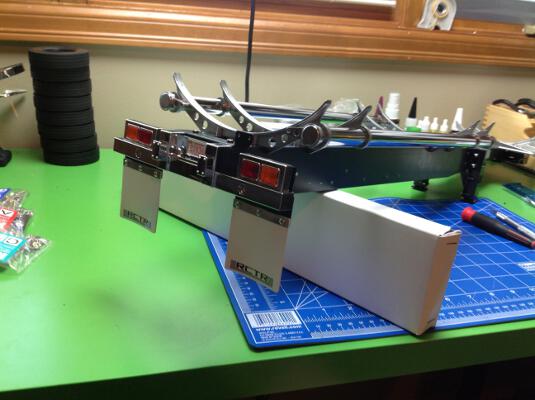
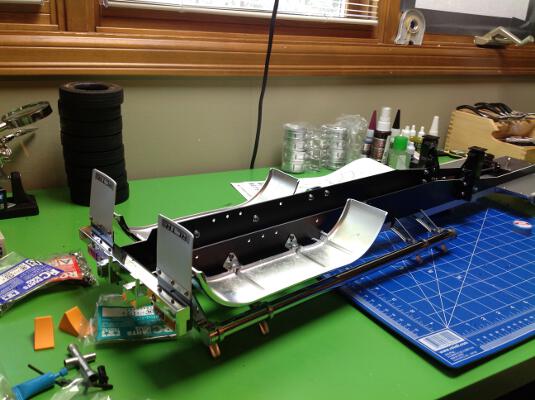
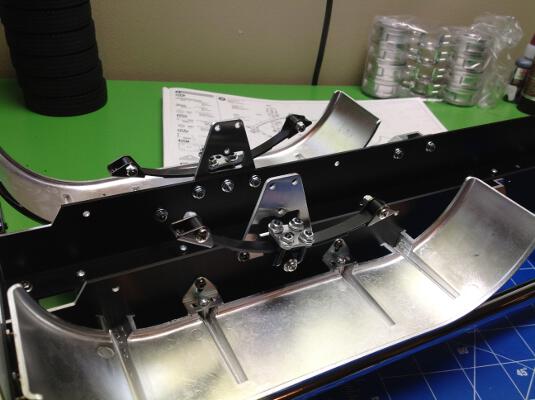
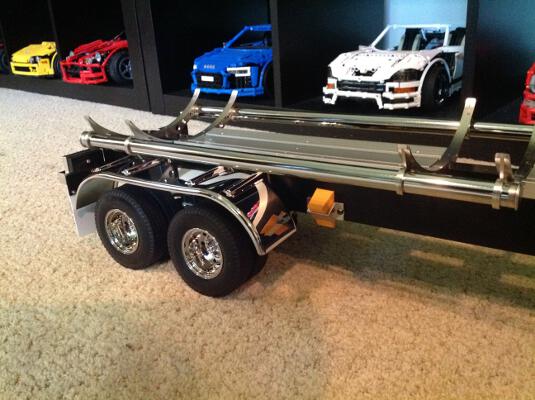
Step 7 is the rear bumper and the mud flaps. Notice that these match the shape and style of those on the truck. I'll also be installing trailer lights here which will plug into the truck MFC and operate accordingly. Step 8 installs the long chrome fenders. There are also a pair of brackets which support the wheel chocks. The chocks end up being important because you need to secure the trailer from rolling backward when you back the truck into it. Now we start the suspension. Step 9 builds the leaf springs and installs them onto the frame rails. This should look very familiar. The system and many of the parts are the same as used on the tractor. Next come the axles. Unlike the tractor axles, these are not driven so there's no differential or pinion gear. The left and right sides are independent axle shafts so they can turn at different speeds. Like with the tractor, I upgraded the metal bushings to ball bearings. Step 11 installs the radius arms which are plastic. There is actually quite a bit of articulation here: certainly plenty for a trailer. Step 12 doesn't actually build anything, it just explains how the legs operate. Why they chose to put that step here in the middle of the suspension build instead of with the legs I'm not sure. The final step in the suspension (Step 13) is the construction and attachment of the dampers. I had intended to upgrade to oil dampers here, but they were out of stock and after seeing that I wouldn't really have needed them on the tractor I decided to stick with the stock units. Although the tractor dampers were a pink color, these are neutral silver. Step 14 attaches the wheels and tires which means the trailer is built enough to try. I attached it to the truck and commenced merriment. I confess that there comes a point in most projects at which I become so excited to finish that I forget to take any more pictures. This is that point. All that is left is attaching the tube and ladder (steps 15-17) and then applying the stickers. You'll have to skip forward to the final photos to see the result. The stickers on the side of the tube were hard because they are very long so it will be very obvious if they are not straight. Additionally, since the tube is so lustrous any bubbles or wrinkles will be quite obvious. I managed to avoid any of those pitfalls but instead tore a couple of the big stickers when removing them from the backing. Not very noticeable though. |
|
|
Please Log in to join the conversation. |
Blakbird's 56336 King Hauler Build 5 years 3 weeks ago #54772
|
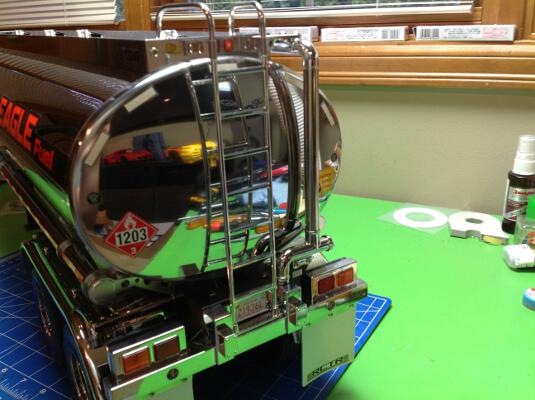
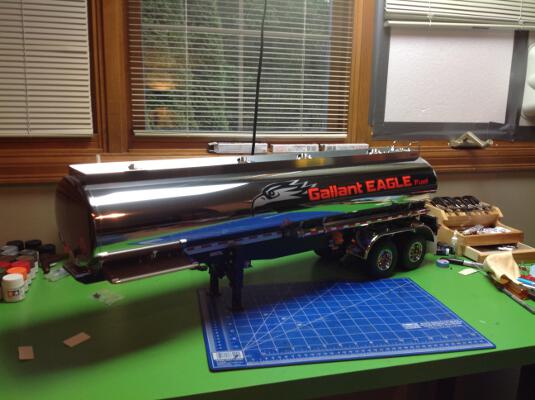
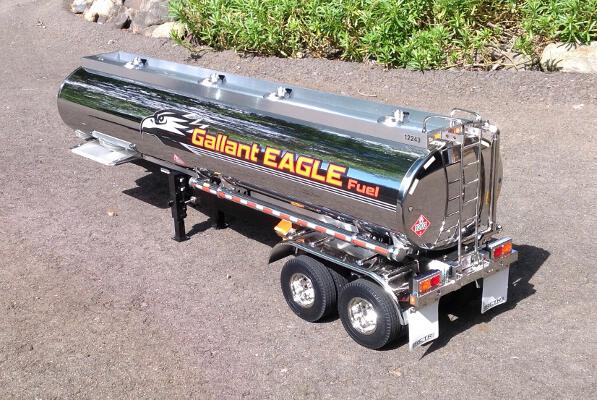
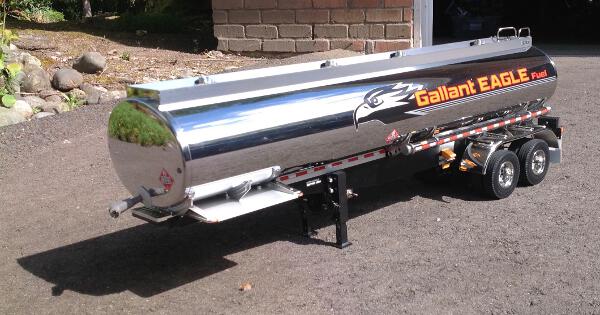
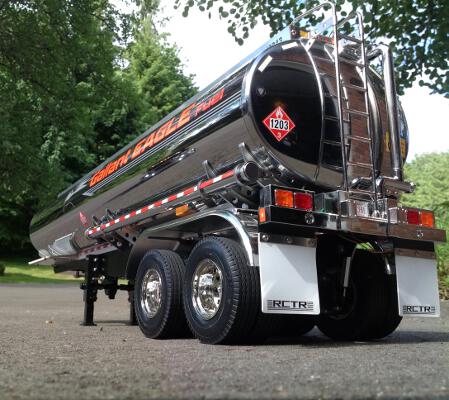
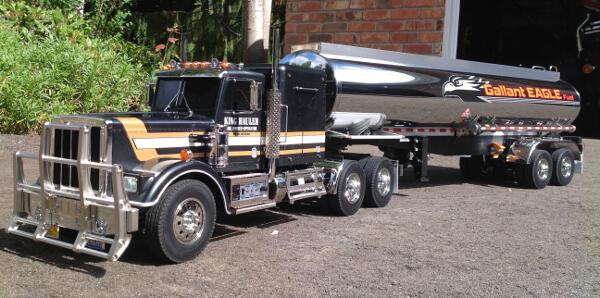
Final photos of the completed trailer taken weeks later. The metal main tube is highly polished and hard to keep clean. The wire for the lights has to be run through the inside of the can. The back is nicely detailed with a ladder and some piping. The top rail has some access points for filling. The stickers tie everything together and make it real.
|
|
|
Please Log in to join the conversation. |
Blakbird's 56336 King Hauler Build 5 years 3 weeks ago #54773
|
The trailer is completely done and usable at this point, but I still have one more accessory to add: motorized support legs. This will allow me to control the trailer legs from the transmitter and therefore couple and decouple without ever touching the truck. Considering that all the electronics are in the tractor, controlling legs on the trailer is no small feat. The way it is accomplished is quite ingenious.
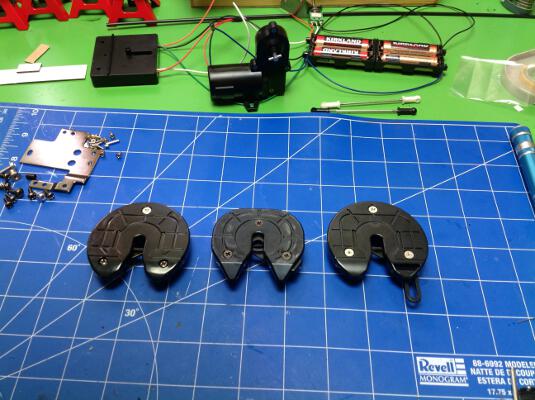
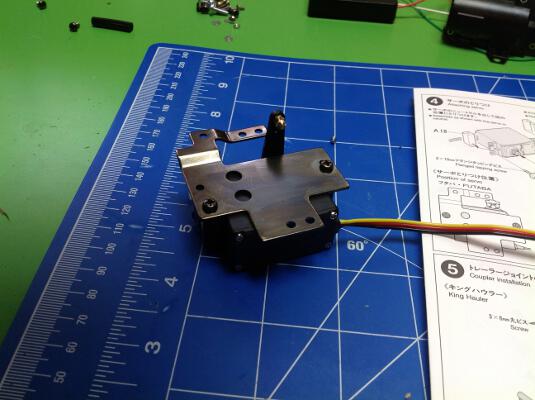
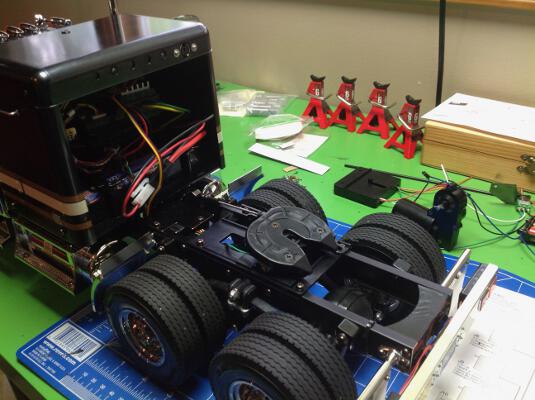
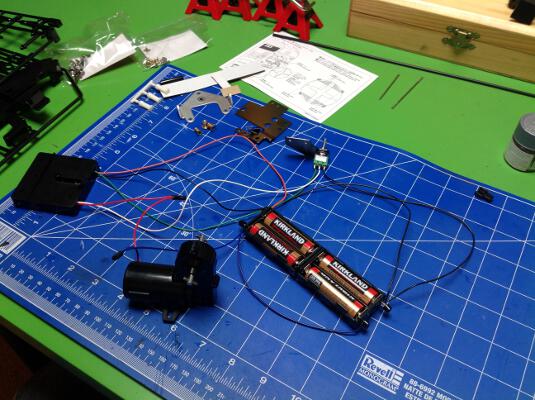
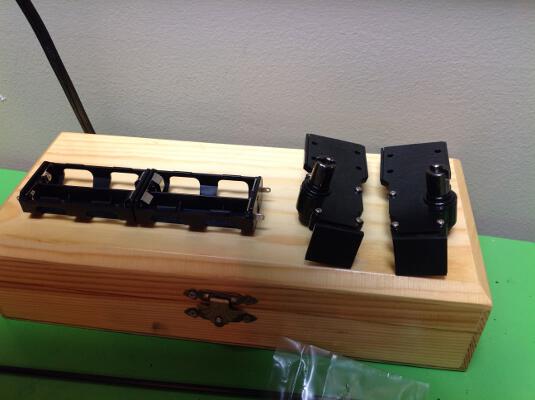
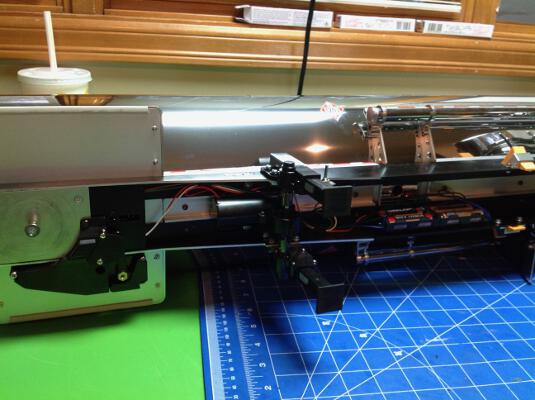
The first steps are actually performed on the tractor. Step 1 is removing existing parts. At this point I've built three different 5th wheel units. The first, on the left, is the stock unit which uses a manual release. The second, which is shaped differently, came with the MFC and adds a micro-switch so the controller knows when a trailer is coupled. The third comes with the support legs and looks like the first except that it has a slotted link as you can see on the lower right. This is the part that mechanically interacts with the trailer to send commands to the legs. It has little serrations on the end to keep it from slipping against the trailer trigger. There's also a fourth coupler option, the one I actually used. You see, you don't need the MFC to use the motorized legs, you can just control them with a Channel 4 servo. However with the MFC you get extra functions, so that means I need to move the micro-switch from the 2nd coupler to the 3rd. This was not at all obvious from the instructions so I was frustrated for a bit whilst I figured it out. Here is the mount for the 4th channel servo. This will go right behind the cabin, hidden between the frame rails. If will actuate the slider on the 5th wheel. A small motion back tells the legs to retract. A large motion back tells the legs to extend. The trailer distinguishes the two by having two micro-switches and looking at the relative states of the two. There are no circuit cards involved though, just simple wiring. Movement of the servo forward releases the coupler. There's enough lost motion in the slider that aft movement doesn't affect the coupling hook. The hook itself locks over center so that thrust loads on the kingpin do not tend to release the hook. Here in Step 5 the coupler and servo have been installed on the tractor. The servo needs to be wired into the MFC. The port you see at the upper right of the sleeper opening is for trailer lights which, sadly, still need to be attached manually. Since this is how real trucks do it though, I can hardly complain. Step 6 removes the old trailer legs and associated mechanism (a bit of a shame) and Step 7 builds the battery box. That's right, you actually have to build the 4AA battery box including putting in the terminals and attaching the wires. They have a clever solderless system which uses little bits of rubber tubing. Step 8 builds the micro-switch can. I didn't take pictures of any of that. This is Step 9 which is the gearbox. You can see a little motor (370 sized) driving a worm gear. Using a worm gear is important so weight on the legs can't backdrive the motor. There are 3 total stages of gear reduction not counting the rack gear on the legs themselves. At this point Step 10 tells you how to wire everything together and it isn't trivial. We have two micro-switches, leads to 4 batteries, a 3 position toggle switch for manual operation, and a motor. All these wires need to be carefully routed and hidden within the trailer frame. Wouldn't want anyone to know it's a model! Here is the battery box and the completed motorized legs from Step 16. Inside each leg is rack and pinion gear along with a spring loaded clutch system which allows the pinion gear to slip if you keep driving after you reach the end of travel, but without dropping the trailer. This bottom view of the completed trailer shows the wiring, battery box, and motorized support legs. The wires can't be seen when the trailer is upright. |
|
|
Please Log in to join the conversation. |
Blakbird's 56336 King Hauler Build 5 years 3 weeks ago #54774
|
The following user(s) Liked this: stingray-63
|
|
|
Please Log in to join the conversation.
Last edit: by blakbird.
|
Blakbird's 56336 King Hauler Build 5 years 3 weeks ago #54793
|
Thank you for the build details. It's interesting to see builds of something i've never done/seen myself.
The end result is massive bling, and looks great! Signature now gets correct formatting if you edit it in your Profile. Use normal BBcode if you want.
www.tamiyabase.com was formatted automatically. |
|
|
Please Log in to join the conversation. |
Blakbird's 56336 King Hauler Build 5 years 3 weeks ago #54794
|
Nice to see the trailer build too!
My shell trailer came assembled from the former owner. But one thing I did to improove the scale driving was to fit 2x 1.5litre soda bottles filled with water (fitted neck to neck so they fit inside or else they was too long) So much more fun driving around with some weights on it! For that reason I luster after the tiber truck with some real wood. But don't think I can afford it for a good while yet. Proceed sir, good writing |
|
|
Please Log in to join the conversation. |
Time to create page: 0.288 seconds

