TOPIC:
Blakbird's 47432 Clodbuster Black Build 2 years 3 months ago #70057
|
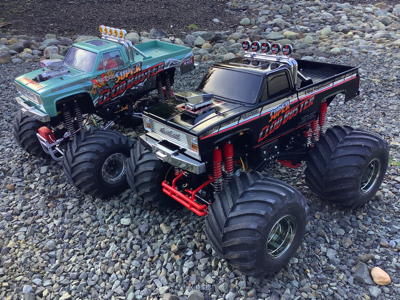
The Special Edition 47432 Clod Buster Black Edition is exactly the same as the 58518 Super Clod Buster which I already have, so why did I buy one? The old Clod was one of my earliest builds and I went straight to massive upgrades without ever really trying the stock version. In fact, I changed so many parts and added so much weight that it can't really be claimed to handle anything like a stock Clod Buster. I figured I should probably take the opportunity to get the black version and build it completely stock just for comparison. That's my excuse anyway.
Like the original Clod Buster, this is a real scale monster truck with solid axles, four wheel drive, four wheel steering, giant tires, 8 huge shocks, and a scale body that looks an awful lot like a 1983 Chevy truck (the body was originally a licensed Chevy, but no longer uses the logo in the latest incarnation). It uses a single chassis mounted servo for 4WS and the power system is a pair of 540 sized motors mounted directly to the axles. The overall layout is pretty accurate to a real monster truck. After all my complaints about the handling of my previous build, I actually find the stock version to be completely acceptable without the pounds of upgrades I put on my other version. I think the super heavy aluminum wheels launched the biggest torpedo into the handling. This stock version, on the other hand, is pretty fun even with silver cans and a cheap analog servo. The Clod box is huge. It is among the biggest Tamiya boxes I have seen, equivalent to those of the 1/14th scale tractor trucks. A look inside reveals that much of this space is consumed by the tires. The box of the black edition is considerably more plain than the standard Super Clod Buster with no hand drawn art. A dark, grayscale photograph is used instead. 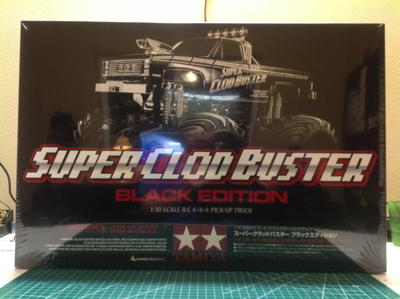
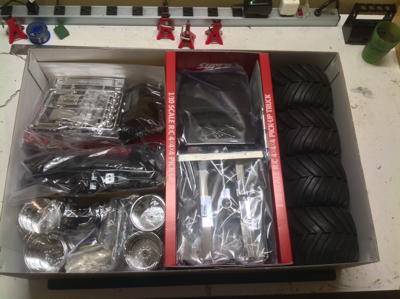
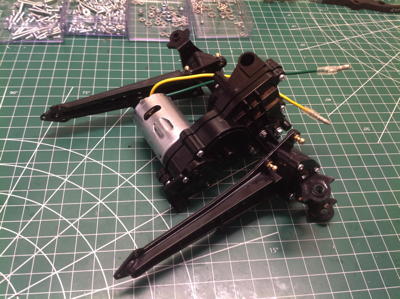
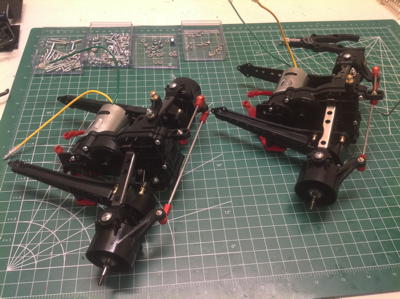
Here are the parts laid out on my build table. Everything is identical to the regular edition except that the suspension parts which are blue on the original are red here. 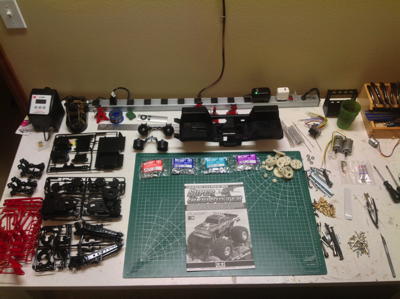
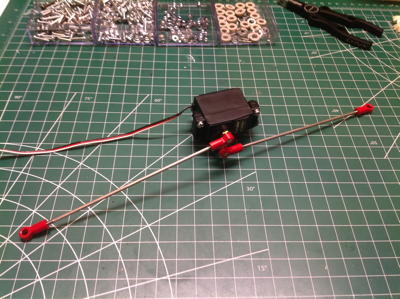
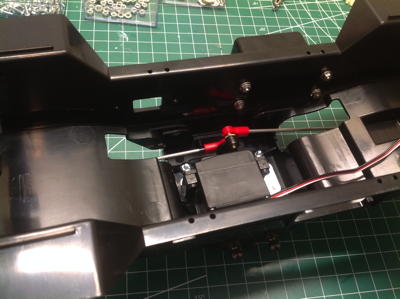
I was using a pathetic Futaba S3004 servo as a placeholder until I got something better, but I found that it actually works just fine. Given that the steering system has been unchanged for 30 years and there really wasn't any such thing as a "high torque" servo back then, the truck was actually designed for something like this. Yes the torque is low and the tires are huge, but the natural forces on the steered back wheels tend to balance the forces on the front wheels such that very little torque is actually required. In addition to that, the sloppy servo savers make a stronger servo moot anyway. This single servo will sit in the middle of the chassis and steer both axles. See the picture on the right for the long steering links. 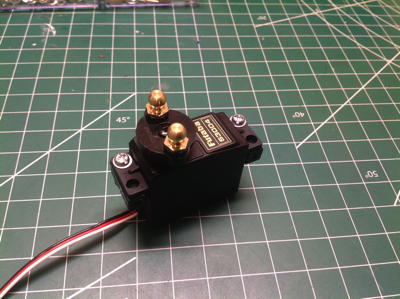
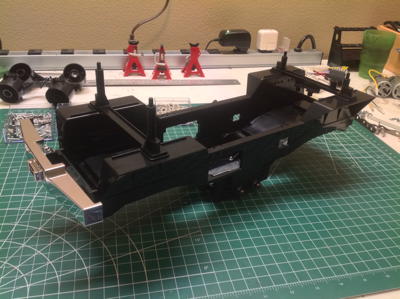
Yes, the chassis is the same molded part from all the way back in 1987. It is used slightly differently since there is no mechanical speed controller now, but the basic part is the same. 
The link attachment points were a known weakness in the original model, so these metal plates have been added to the newer editions as reinforcements. The ball connectors are much larger than your standard Tamiya. The brass colored balls on the bottom of the chassis are 6mm and are for the upper links. The silver colored balls on the sides of the chassis are 8mm and are for the trailing arms. 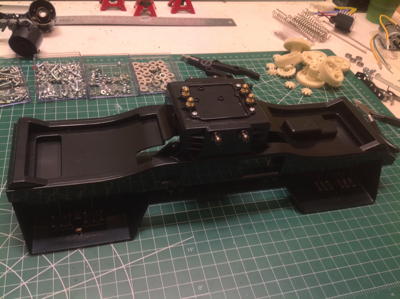
Attachments:
The following user(s) Liked this: caprinut, Jonny Retro, stingray-63, Al, 1972 LeMansGT Jim, silvertriple, jord001, Ducksnuts
|
|
|
Please Log in to join the conversation.
Last edit: by blakbird.
|

Blakbird's 47432 Clodbuster Black Build 2 years 3 months ago #70058
|
Now a couple of cross members can be installed by the shock attachment locations. This will stiffen the chassis against flex when the shocks absorb an impact. The body posts are built into these same locations. The front chrome bumper is also installed now. Note the faux winch fairlead. On the right you can see the installed steering servo.
Time to start building the massive axles. The outer hubs are massive and come in two lengths. The kit includes ball bearings for use at the inner axle support and plastic bushings for the outer support. Plastic bushings are clearly unacceptable. I wanted to leave this build as close to stock as possible so I grabbed some unused bushings for the outer supports. The axles are steel dogbones. On the right you can see the hubs attached to the gearbox housings. There is a lot going on in these axles. 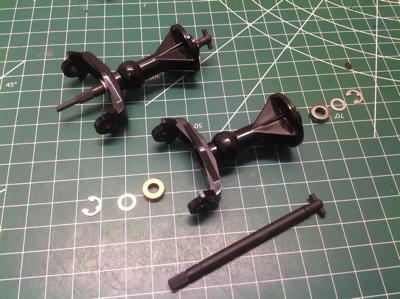
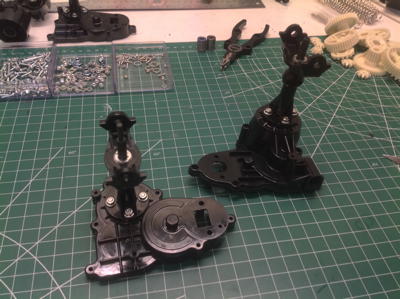
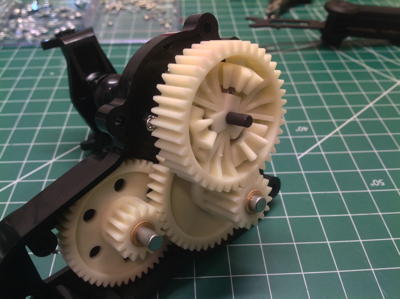
Most RCs have a gearbox mounted somewhere on the chassis, but the Clod Buster uses two identical but independent gearboxes attached to the axles. These are some truly massive gears that can handle a lot of power. Look at the size of the three spider gears in the differential on the right. All of this seems unchanged from the original Clod as far as I can tell. 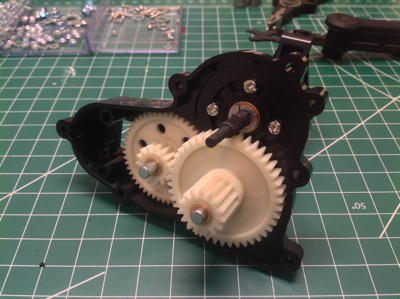
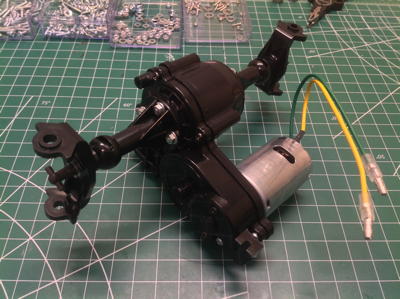
After greasing the gears, the two gearbox halves can be joined with five screws as shown on the left. All of the screws use nuts so they don't thread into plastic. On the right you see that the motor has been installed. This is a standard silver can with a 13T aluminum pinion (which I replaced with steel). No other pinion size is possible. Note that the Clod runs one of the two motors backward so it is not easy to change to motors with advanced timing since one of them will actually be retarded instead. To use timed motors, you need to use a variety that allows reverse timing. I'm sticking with the stock motors on this model. 
Attachments: |
|
|
Please Log in to join the conversation. |
Blakbird's 47432 Clodbuster Black Build 2 years 3 months ago #70059
|
Now the gigantic trailing arms can be installed. You can see the hemispherical sockets in the ends of the link. These fit onto the balls on the axle housings which can be seen in previous photos.
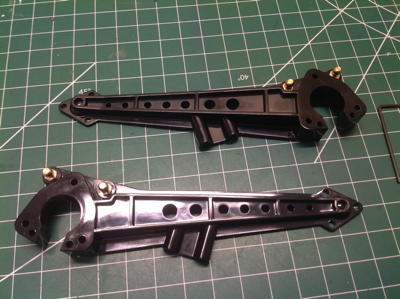
The Clod uses a strange suspension type because the upper triangulated arms actually attach to the lower arms, not to the axle. The red upper arms are easily seen on the left. One effect of this geometry is that the suspension is technically kinematically locked. Twist of the suspension can only happen by deforming the red parts. On the right you can see that one of these links is also used as an inboard support for the motor. This results in less articulation on one side. Also see the metal diagonal braces which help support the steering hub. The two smaller ball joints on the top of the arm visible on the right will be used as shock supports. 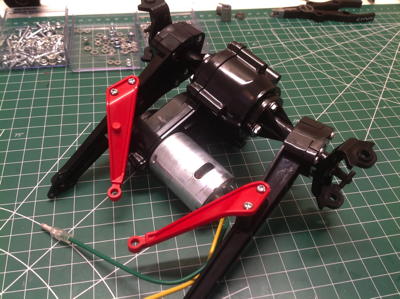
The steering knuckles on the Clod Buster are without peer. They are simply massive. You may notice that the steering link ball joint is actually quite a bit inboard of the kingpin. Normally, this would result in Ackerman correction (the wheel on the inside of a turn has a larger steering angle than the wheel on the outside). However, because the steering link is actually installed in front of the axle instead of behind, this correction is backwards (same on the rear axle in reverse). This is partially responsible for the terrible steering of the Clod Buster. The picture on the right shows the nearly identical front and rear axles. The only difference is in the direction of the crank on the servo saver. Because both of the steering links from the servo are on the same side of the chassis, the cranks also need to end up on the same side. The servo savers are notoriously weak, so I cranked them down much further than recommended. 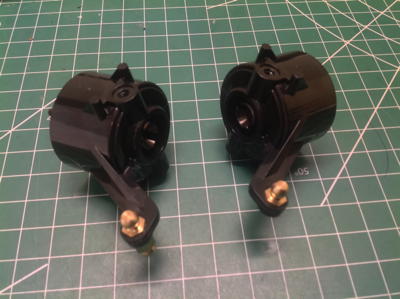
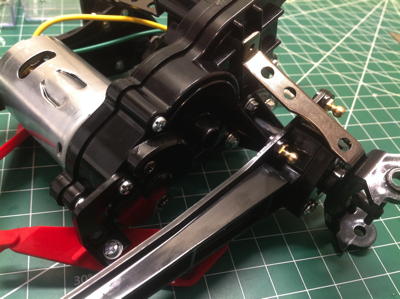
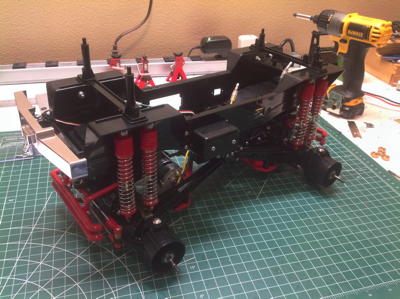
The red bumpers actually form a structural reinforcement for the gearboxes as well as providing impact protection. On the right you can see that I've snapped all the links onto the ball joints on the chassis, installing the axles. The black trailing arms don't snap onto the 8mm balls. Instead they are captured by a metal cup fastened from behind the ball joints so nothing needs to be deformed on installation. There are no drive shafts! Very odd. 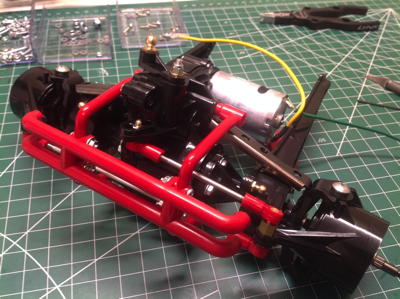
Attachments:
The following user(s) Liked this: stingray-63, jord001
|
|
|
Please Log in to join the conversation. |
Blakbird's 47432 Clodbuster Black Build 2 years 3 months ago #70060
|
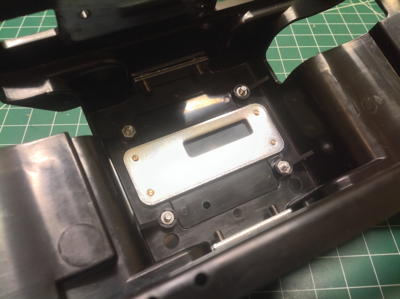
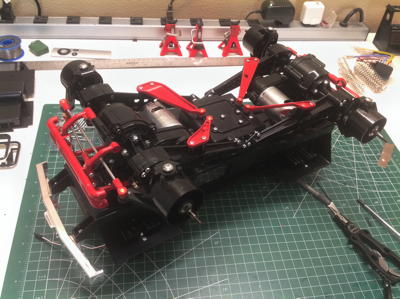
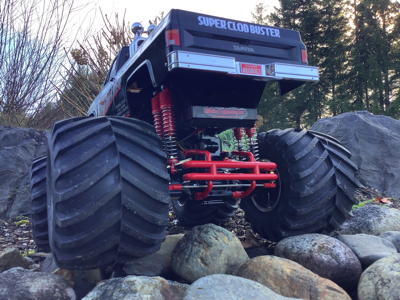
While it is cool that the Clod uses eight shock absorbers, it is not cool how pathetic they are. There is no oil and not even any rubber tubing for damping. These are just pogo sticks. Still, the undamped bouncing is part of the charm of driving a Clod Buster. You can see the installed shocks on the right. The rectangular "pods" sticking out the side of the chassis are the covers for the laterally mounted battery. In the original version, there would have been an upper plate on the chassis tub holding the MSC, the receiver, the receiver battery, and the resistor.
Clod Buster wheels use 12mm hexes, but not in the normal way. A 12mm brass hex adapts to the output spline. This model does not use cross pins which is a good thing for strength (holes are weak). The wheel does not have a 12mm hex recess. Instead, the black wheel adapter mates with the 12mm hex and provides five holes which grip studs on the inner face of the wheels. This spreads the torque over a much larger diameter. Finally, the massive tires can be installed on the wheels. The black edition uses the same tires as always, but the wheels use a different type of blackened chrome finish. 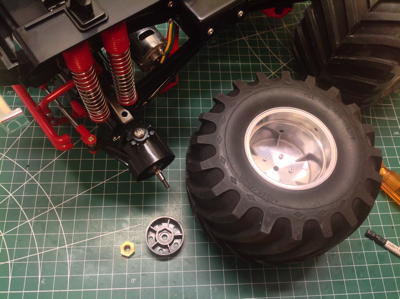
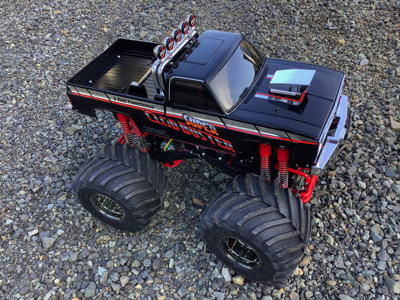
I painted the body in standard black and then put a clear coat over the stickers. The stickers are unique to the black edition. This is the same body as the original Clod but lacking the Chevy bow tie like the Super Clod Buster. Other than that, everything is like the original. 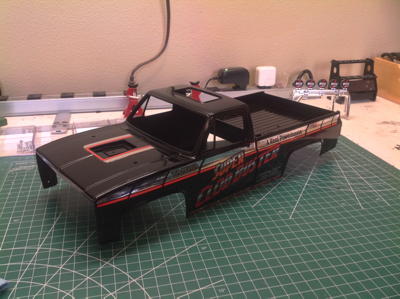
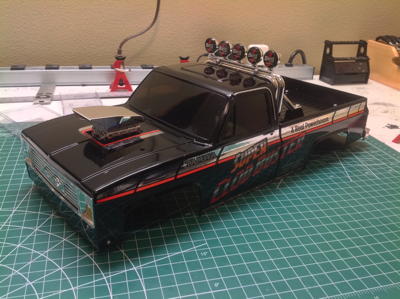
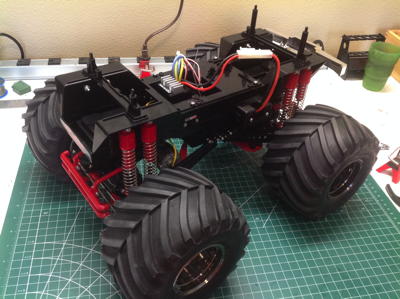
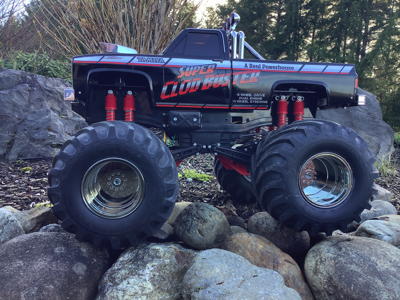
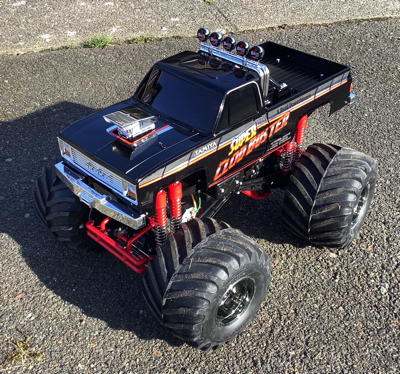
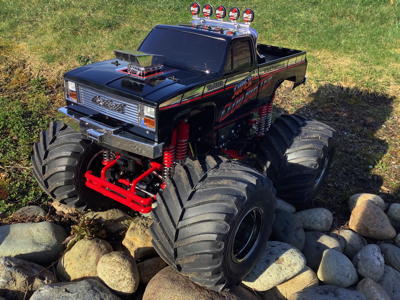
And here's the completed truck in all of its historical (and now limited edition) glory. 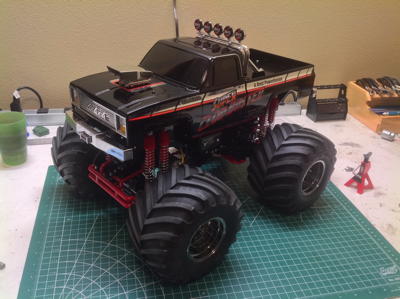
Attachments: |
|
|
Please Log in to join the conversation. |
Blakbird's 47432 Clodbuster Black Build 2 years 3 months ago #70061
|
I have to admit, this thing looks really good in black. Apart from color, it is otherwise completely identical to the regular Super Clodbuster. However, it is quite different than my standard copy since I customized that one so heavily. This therefore represents my stock Clod for historical posterity.

Attachments:
The following user(s) Liked this: caprinut, stingray-63, AndyAus, Al, 1972 LeMansGT Jim, silvertriple, jord001, Ducksnuts
|
|
|
Please Log in to join the conversation. |
")
Blakbird's 47432 Clodbuster Black Build 2 years 3 months ago #70073
|
Nice build!
Clod was my second new build as a teenager. In my case it was actually a Bullhead with Clod body. The shop I bought it from (over the telephone as that was the only option back then) did not have a Clod in stock. However he had a Bullhead and a Clod body kit in stock. So we made a deal to pull out the Bullhead body and replace it with the Clod. Since the bumpers was yellow, my body was painted in yellow. I remeber I painted that with a cheap paintgun which took air from a can or full size tire. |
|
|
Please Log in to join the conversation. |

Time to create page: 0.214 seconds