I'm using the word restore very lightly, it will be more of a strip down clean and rebuild. I don't have much to source. I believe i have everything except the correct ESC, just because i haven't collected it yet.
Here goes. The TA05 platform has always been a favorite of mine, since my first 05 V1 kit when they were first release. Luckily back then i worked in a hobby shop so i was able to preorder and get the kit at a discounted rate. This was my second Hobby Grade RC kit, still in school, working part time, life was good. I put the TT-01 aside, it was time I tried my hand at a "serious" class. I ran a full season the following year in what was called stock touring, basically a spec Johnson motor class. At this time 50% of the field were running TA05's and the other half were Pro4's and Evo's and 415's, so it was an enjoyable year of very close racing. The following year and i think this was now 2007, last year in school, I got hold of a Team Checkpoint 9x2. This lasted all of two months of trying to get to grips with modified in a plastic chassis, and the time involved, comm lathes, and foam tire trimming, it was a lot. I eventually settled for the "Superstock" class which then was a brass bushing 27T spec class. With it being the last year in school it got a bit crazy so i didn't put as much time into racing as I would have liked to. Most matric students wanted to sneak out and go drinking with mates, nope! I was at the track. The end of that year, I learnt of the release of the TA05 MS. I had to have it, but, it never happened, part time jobs were not making me "TRF money" and my parents were not the best off. I did pickup an already "old" TB-Evo IV at the end of that year when a friend retired it. My first TRF! But that's another story. The 05MS eluded me for years, many many years. As time went by they became very hard to come by, most MS chassis end up on shelves(where they should be). It was only in the last few years since moving to a different province years that i have managed to get my hands on two of them! One very rough one, with a cut upper deck make shift parts, heavily worn drivetrain, covered in spray paint, it looked to have gone through the highest level of undeserved abuse. I will try locate before and after pictures of it as I did a basic rebuild shortly after i got it, with no means and audience to tell the story to. The one i will be rebuilding isn't in amazing shape, but it's a heck of a lot better than the first one i found. The blue ally parts are all good, no major scratches or discoloration. Unfortunately someone opted to drill holes for some other manner of battery mount/strap. I may cut carbon plugs from an old lower deck to correct them. The chassis has been used, so the underside is not good. I am also contemplating giving it a go over with water paper, and then possible a thin resin coat to make it look a bit better. I'll see how far i take this once i have everything stripped. To use the blue screws or not.? I have a number of bags of Ti screw sets from various models, but only two sets of blue TB Evo V sets. Bluegoodness
Attachments:
The following user(s) Liked this: stingray-63, AndyAus, Al, 1972 LeMansGT Jim, Scanox, Ducksnuts, GToddC5
|
|
Please Log in to join the conversation.
Last edit: by Deekay777. Reason: Subject adjustment with model number
|
I haven't made much progress, hopefully this week will be quieter. I have everything apart and ready for cleaning!
At this point I am very much leaning towards the blue screw set, at least the upper side of the chassis. This morning i printed out a fresh manual, turns out a few more items are incorrect. A 1XA toe block which i do not have in the Uno V1 version, only V2, which has a slightly different geometry. I believe they are wider, and the box lettering is not correct to the kit original parts. I may just use the V2 for now until i can locate a V1. Next up is the rear ball diff, i believe the outdrives are the same as a 416, which i have spares of. Definitely need to change it out as the current one is VERY tired. Lastly, rear diff pulley should be a wide pitch(skip tooth) which i think i may have from a TA05. So i have a few things to find. Also decided to not do any work on the lower deck in the hopes that i can find a replacement. Bluegoodness
Attachments: |
|
Please Log in to join the conversation. |
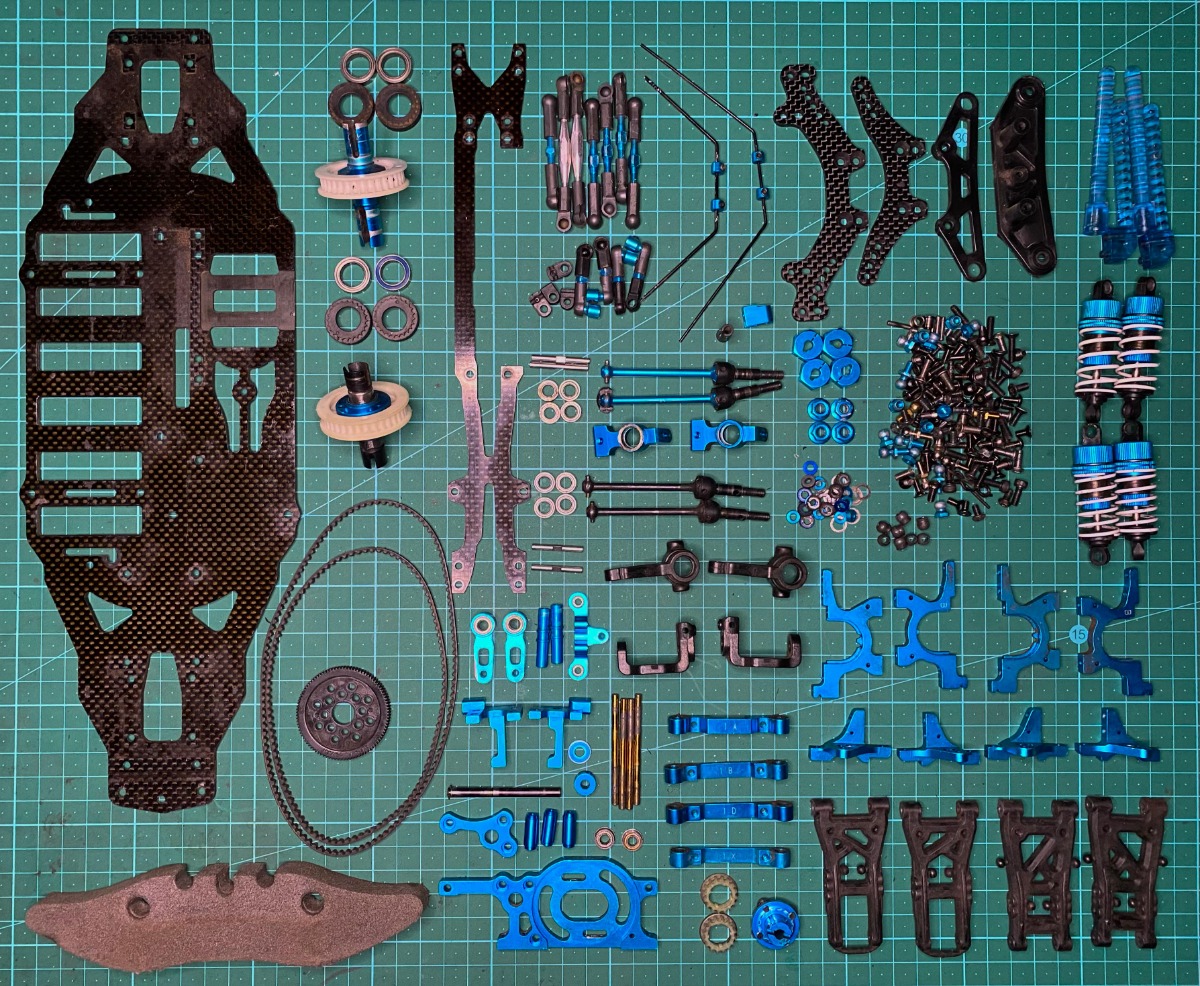
I finally go to some building last week and the weekend. Just cleaning the parts has already made the chassis look good as new, other than the few scratches and dents. I have resorted to not cleaning up the underside of the main deck as it will be mounted to a wall and will never be seen. But I know it looks horrible, so it will bug me, I will likely have a wobbly and tear it all apart again at some point. I will post about it when it happens.
First off, main deck cleaning. I'm not sure if this is a worldwide product, Mr.Sheen? It's an aerosol furniture cleaner. I had my concerns if it would be suitable on carbon or anodized parts. So as to not risk damage or discoloration of good parts, I tested spraying a generous amount on an old damaged main deck and some unused Tamiya anodized uprights. Left for a half hour. I wiped off the Mr.Sheen with a micro fiber cloth and was left with perfectly shiny and new looking carbon and anodizing. Confirmed, it worked better than expected with no harm to the surface of the carbon and precious anodized blue. 
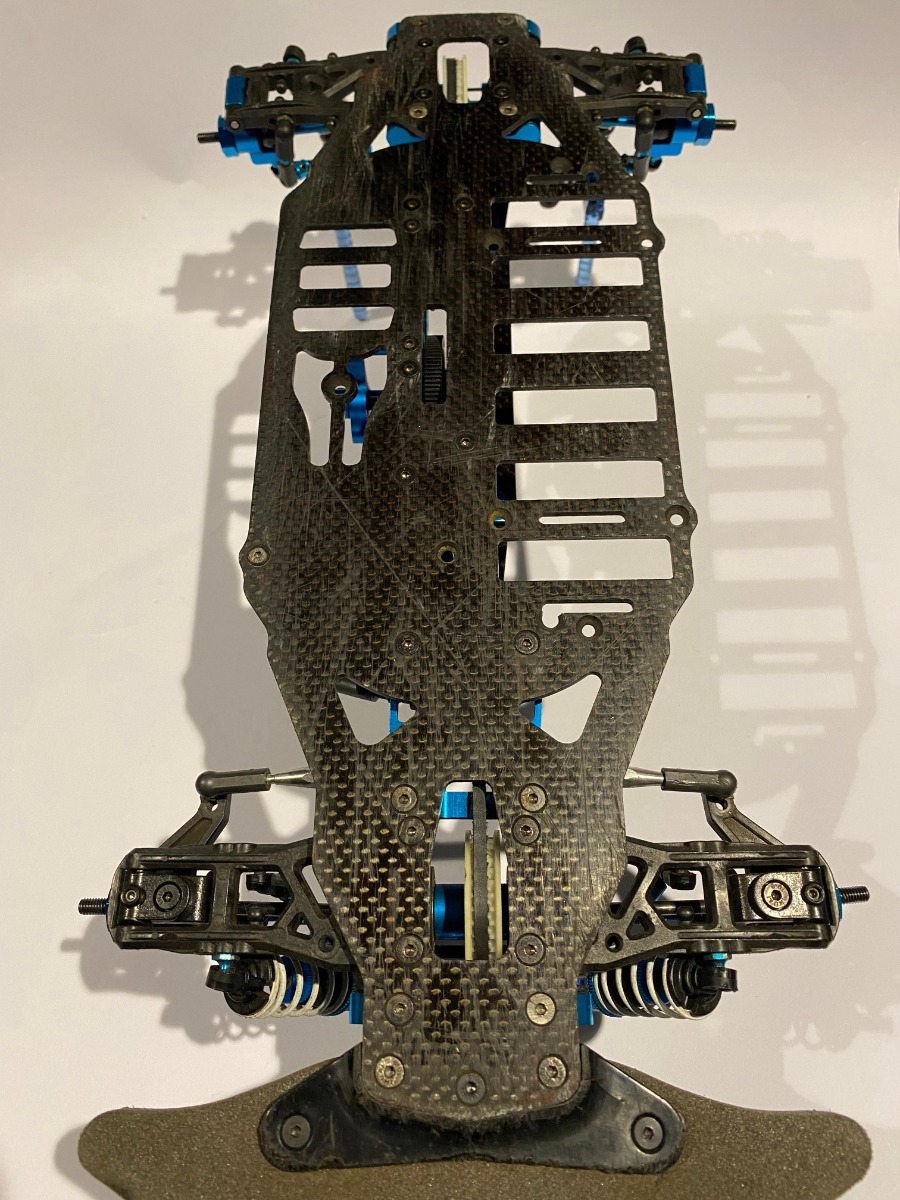
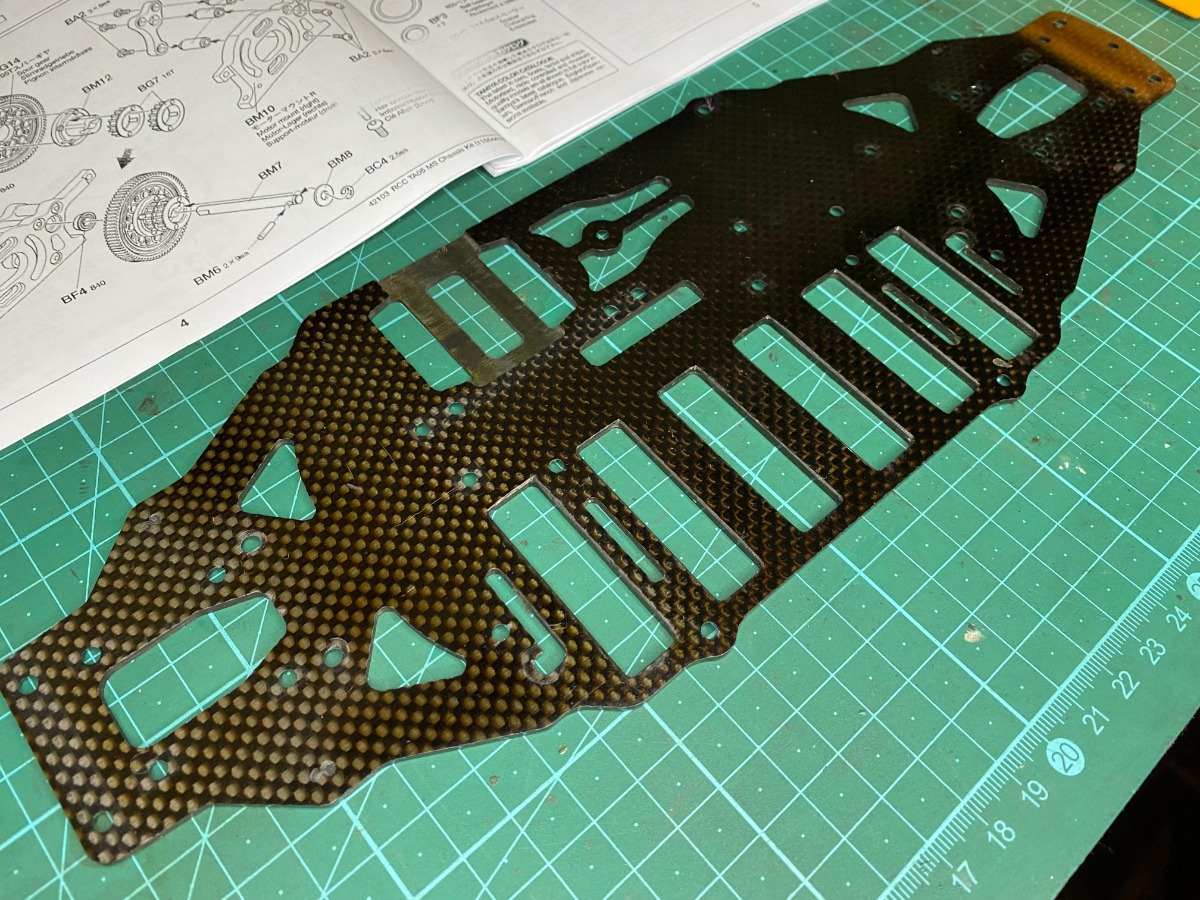
As shiny as i could get it. 
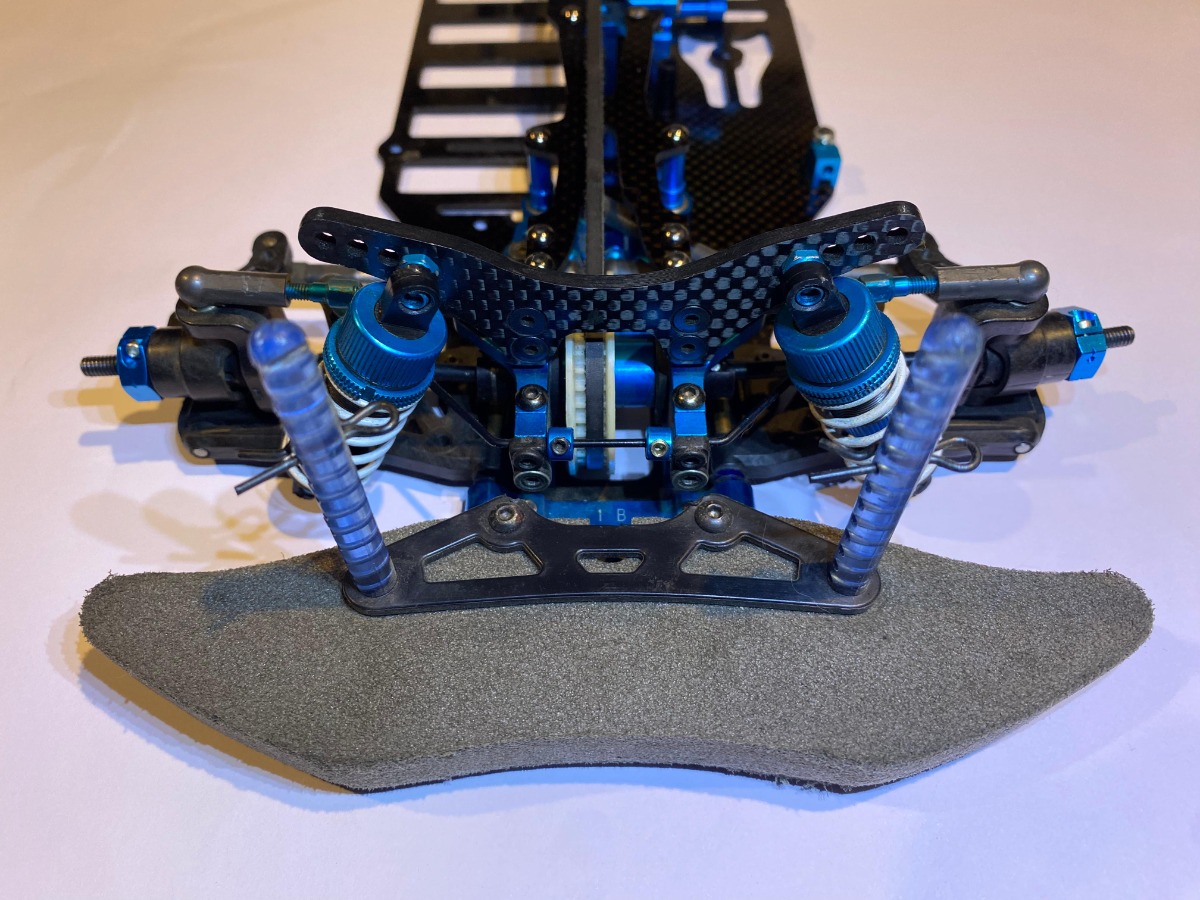
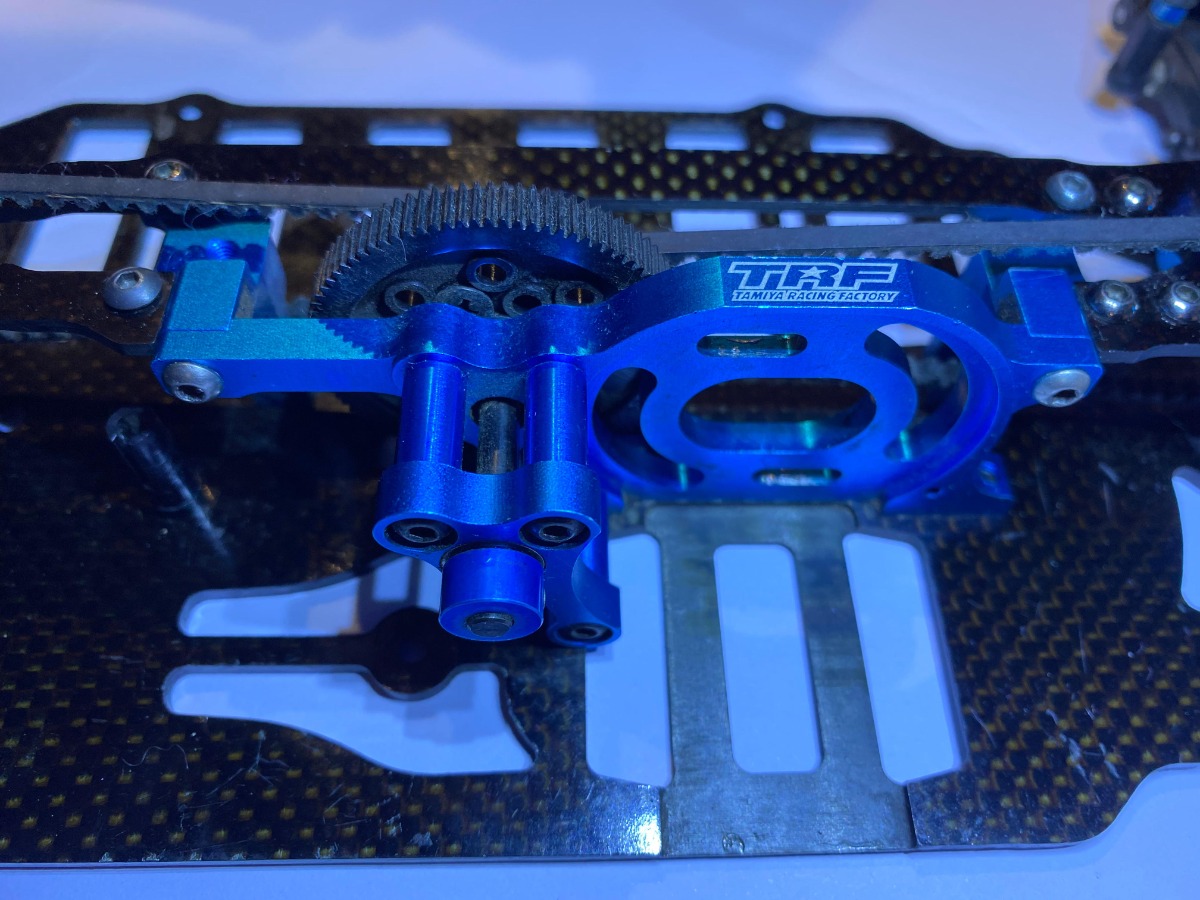
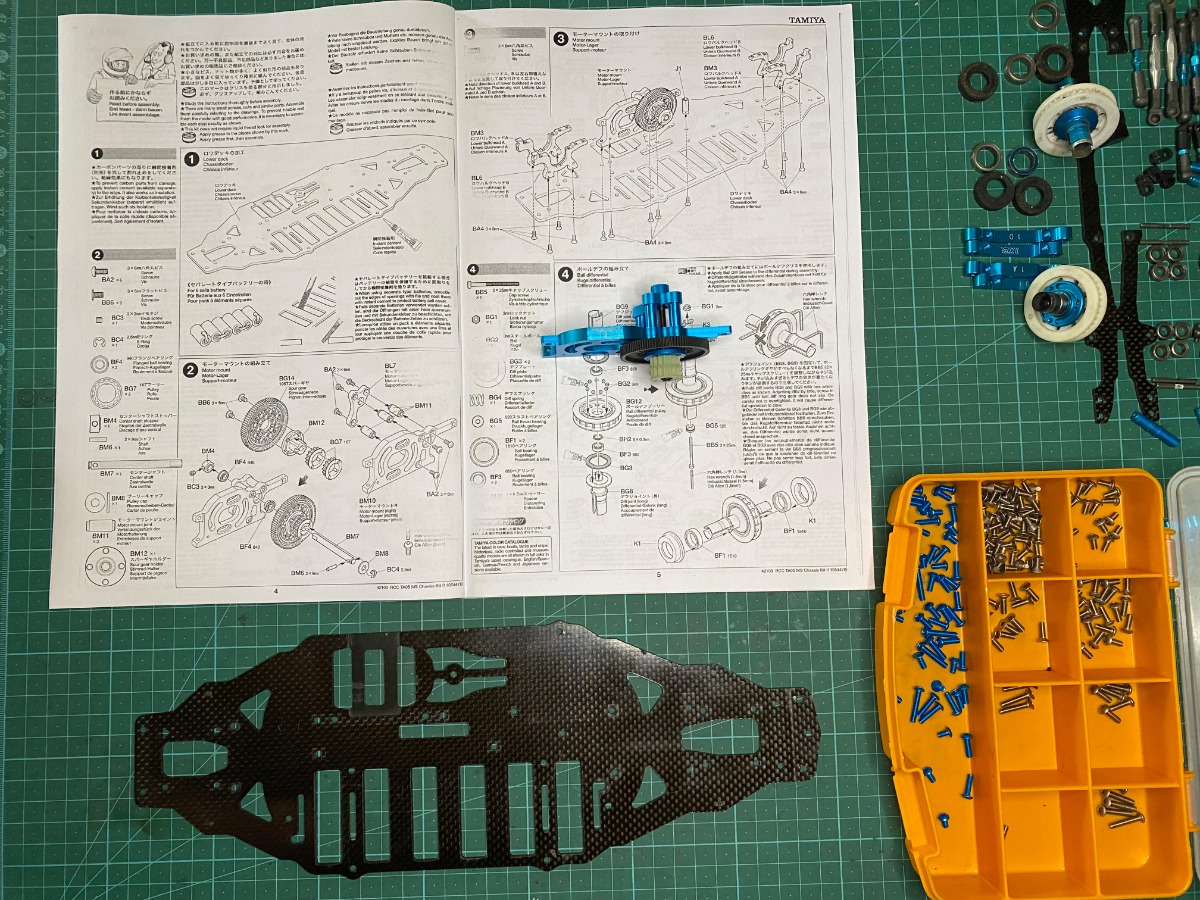
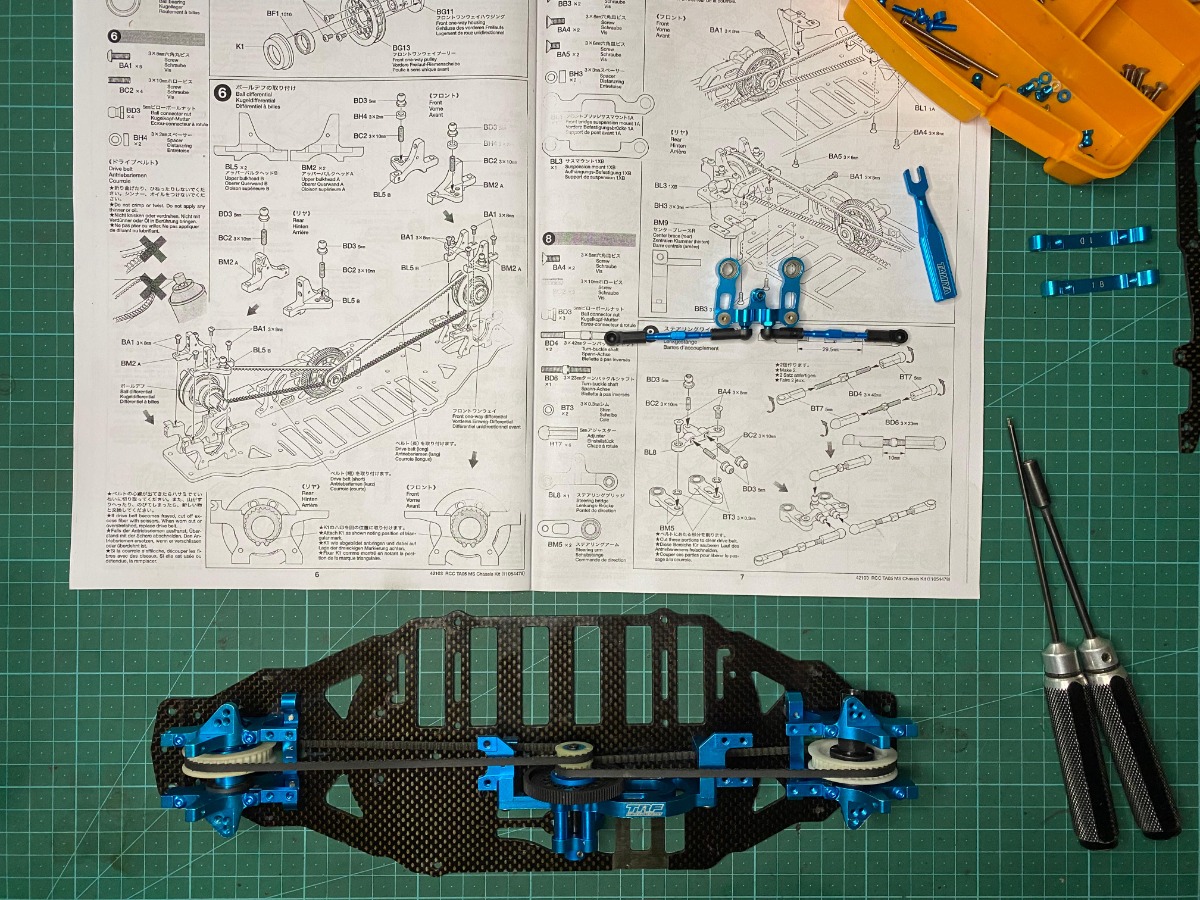
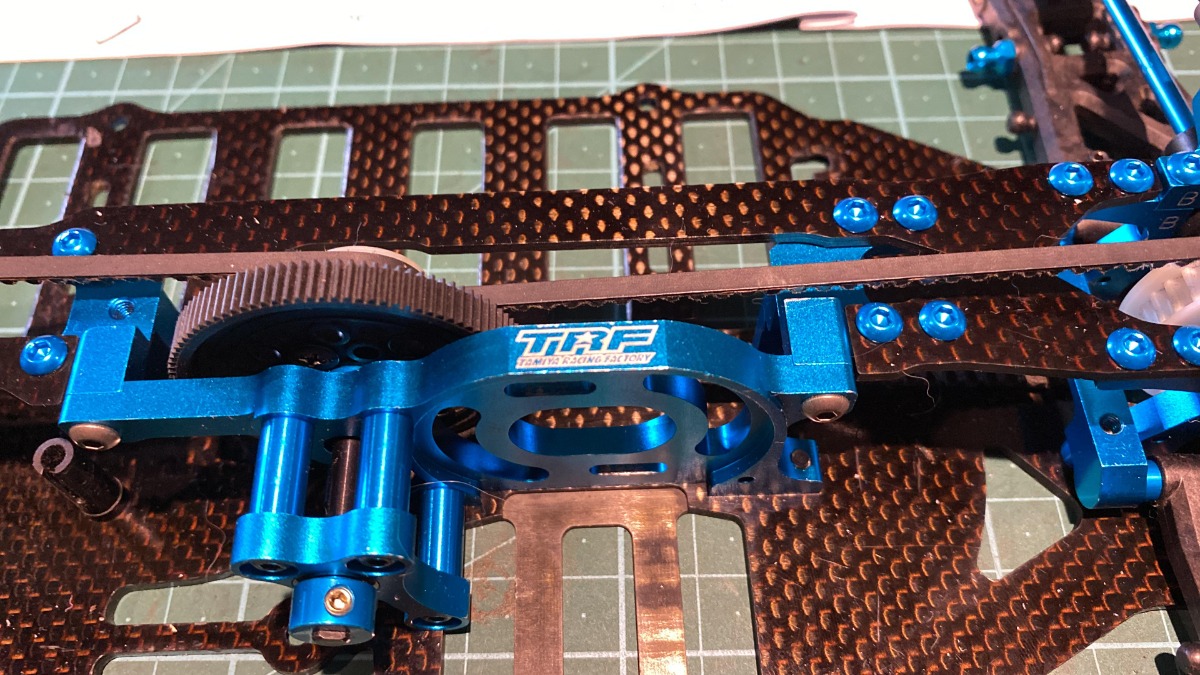
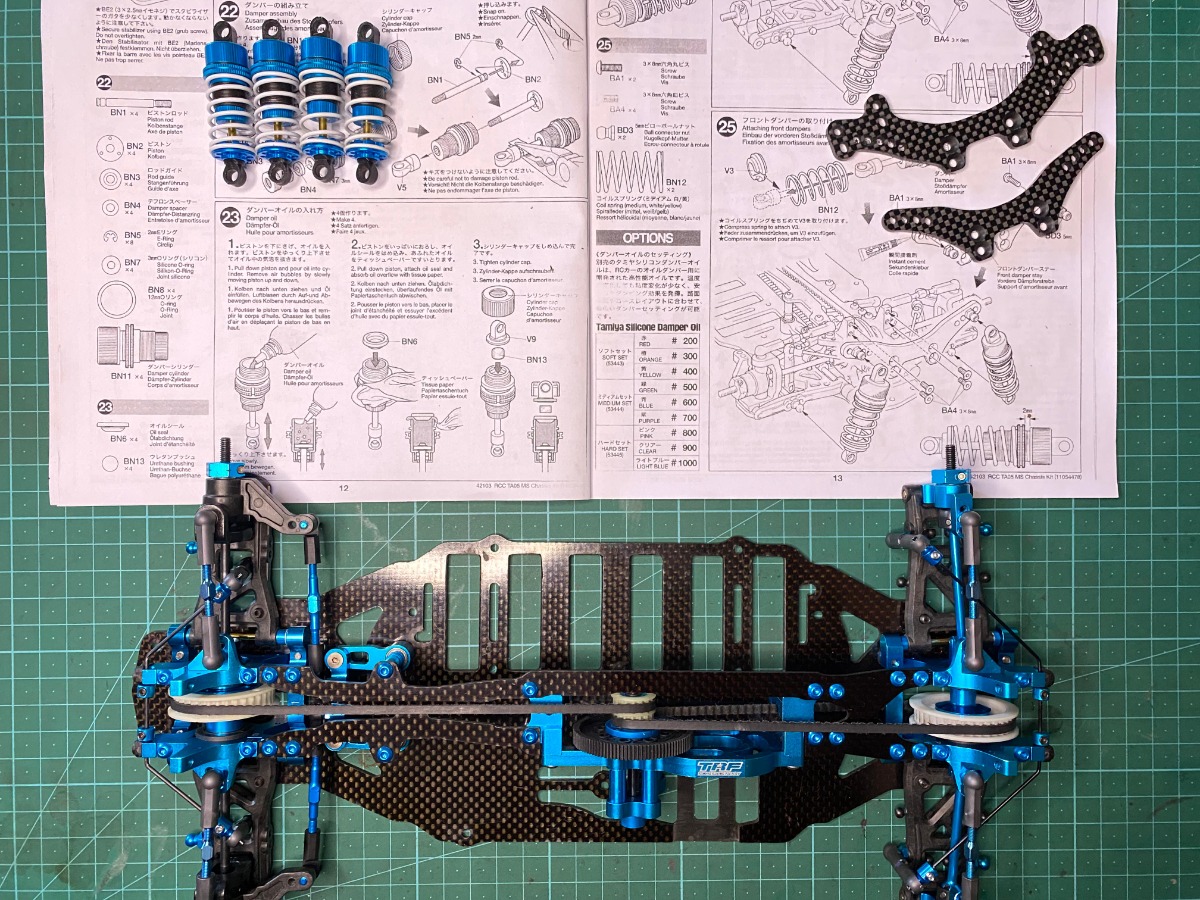
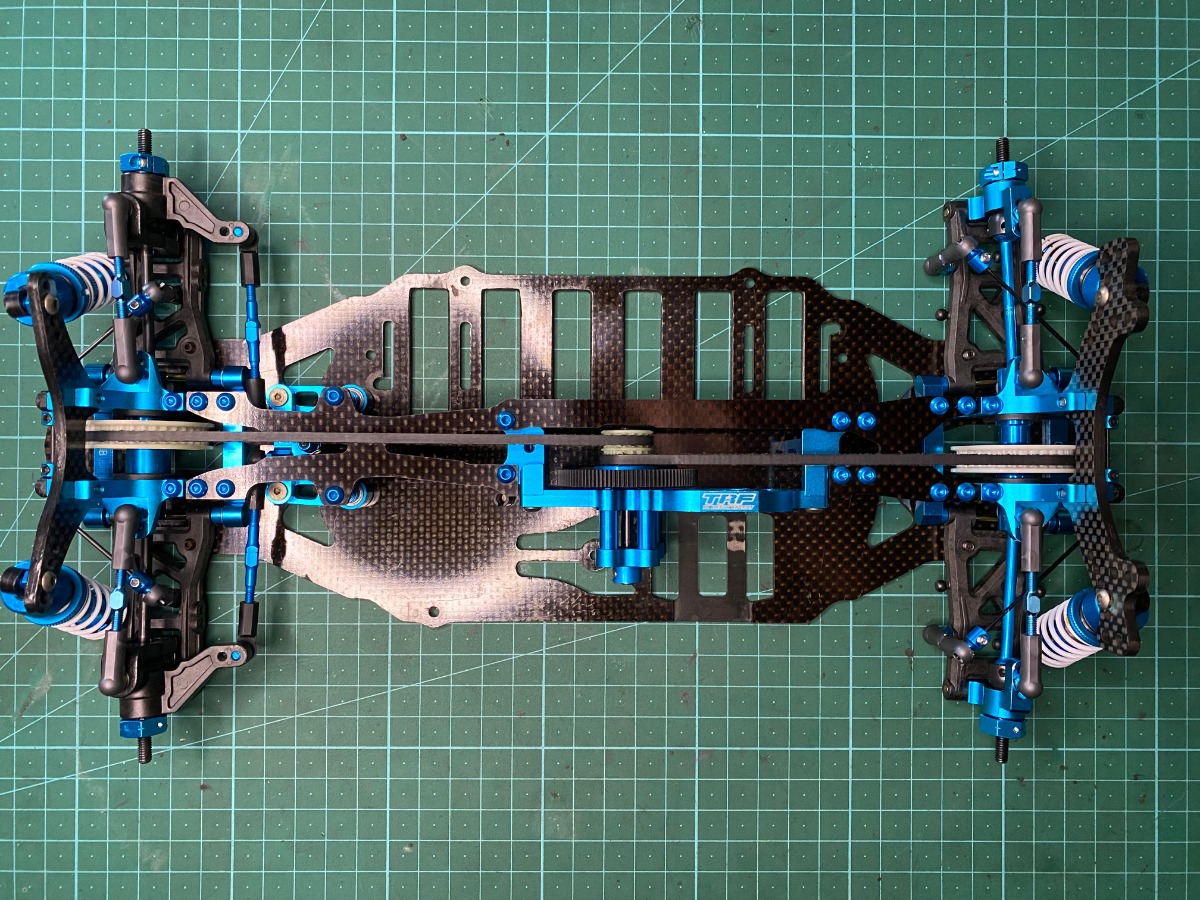
Centre layshaft assembly. Followed by a large progress gap until the next steps. 
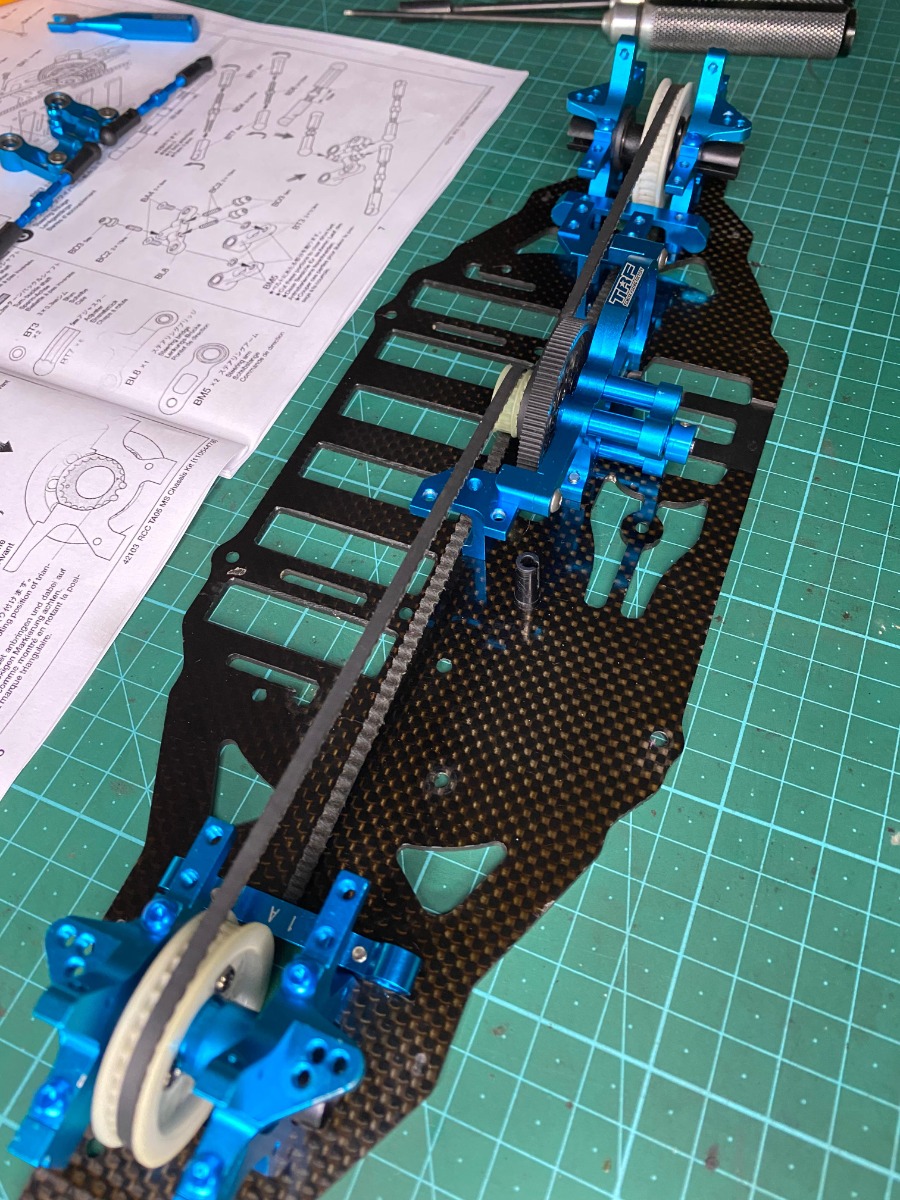
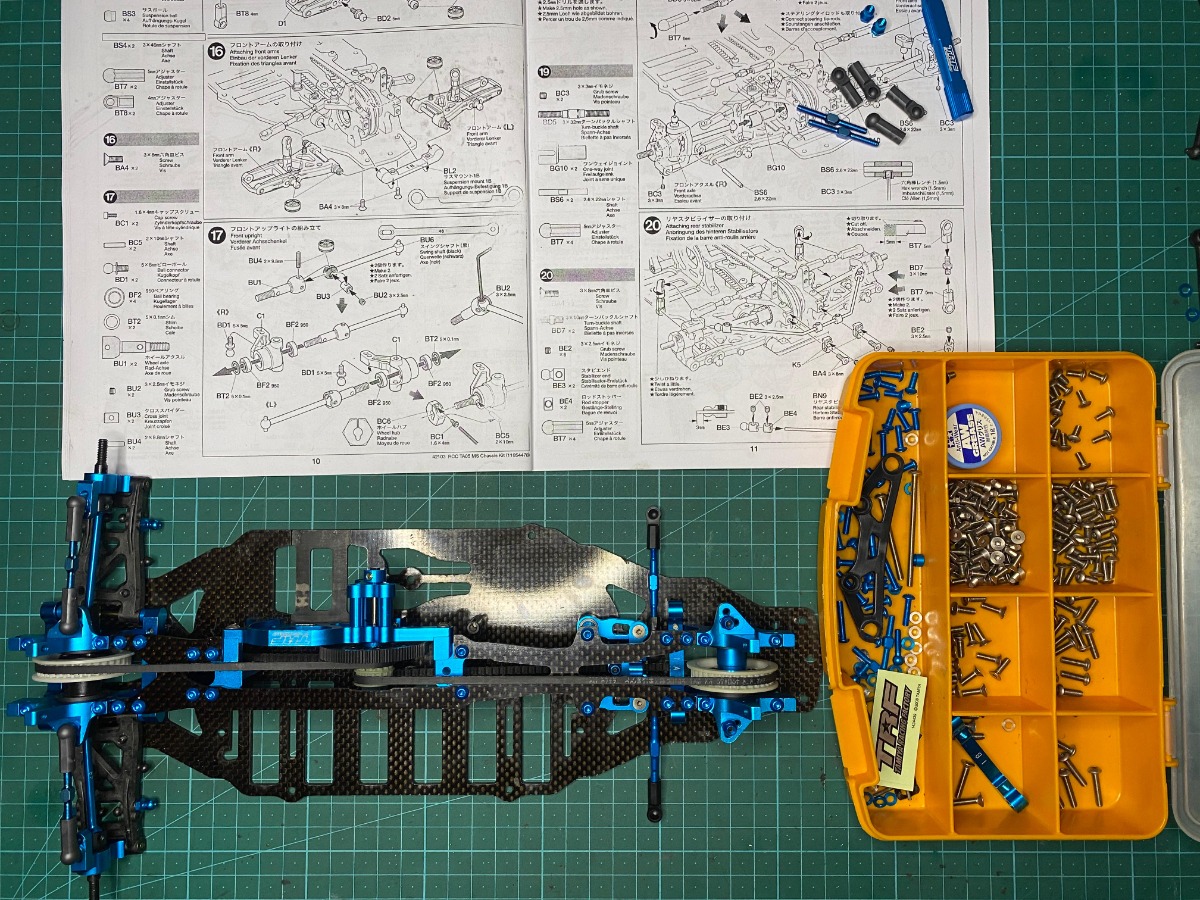
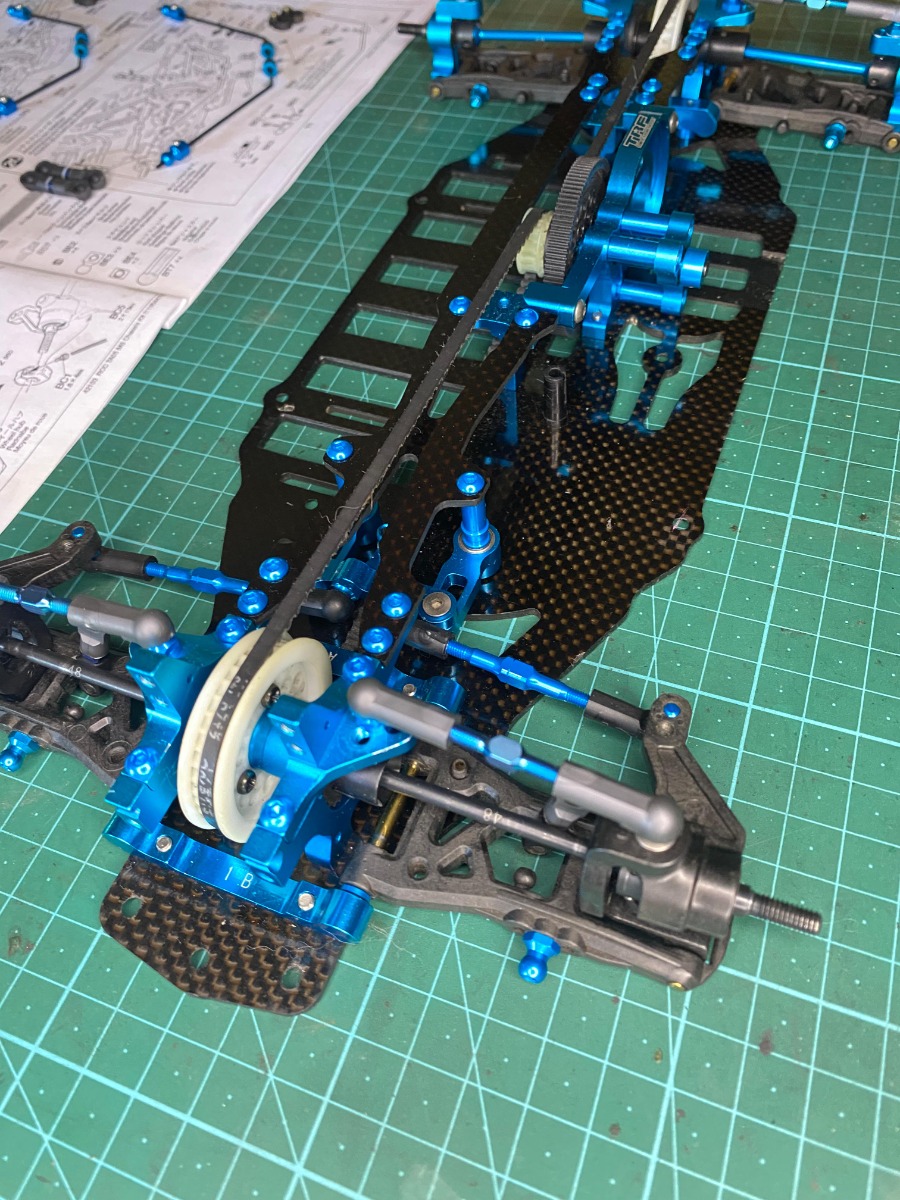
Poof! Many steps ahead. I was enjoying the build far too much at this point to take pictures of rebuilt diffs. Unfortunately this was a parts substitute section, incorrect pulleys, and incorrect rear ball diff outdrive cups. The outdrives on the chassis were blue and very much dead. I went with a temp set of stock V1 plastic outdrives, the worst versions i could find to ensure i make the effort to locate the correct diff set. Incidentally, i have found a brand new rear diff with the correct wide pitch pulley that came off a unused 05MS, but its in the UK, so getting it to SA is going to be fun. 
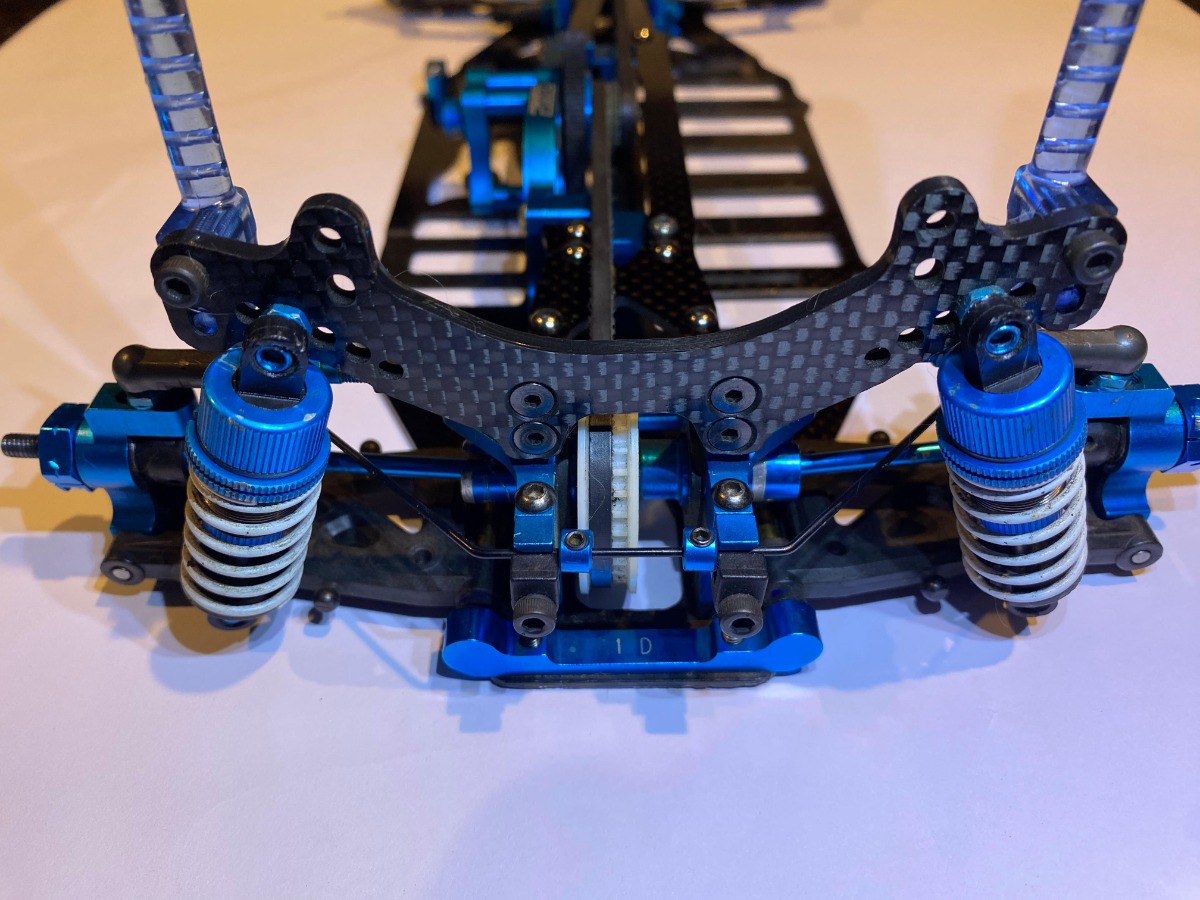
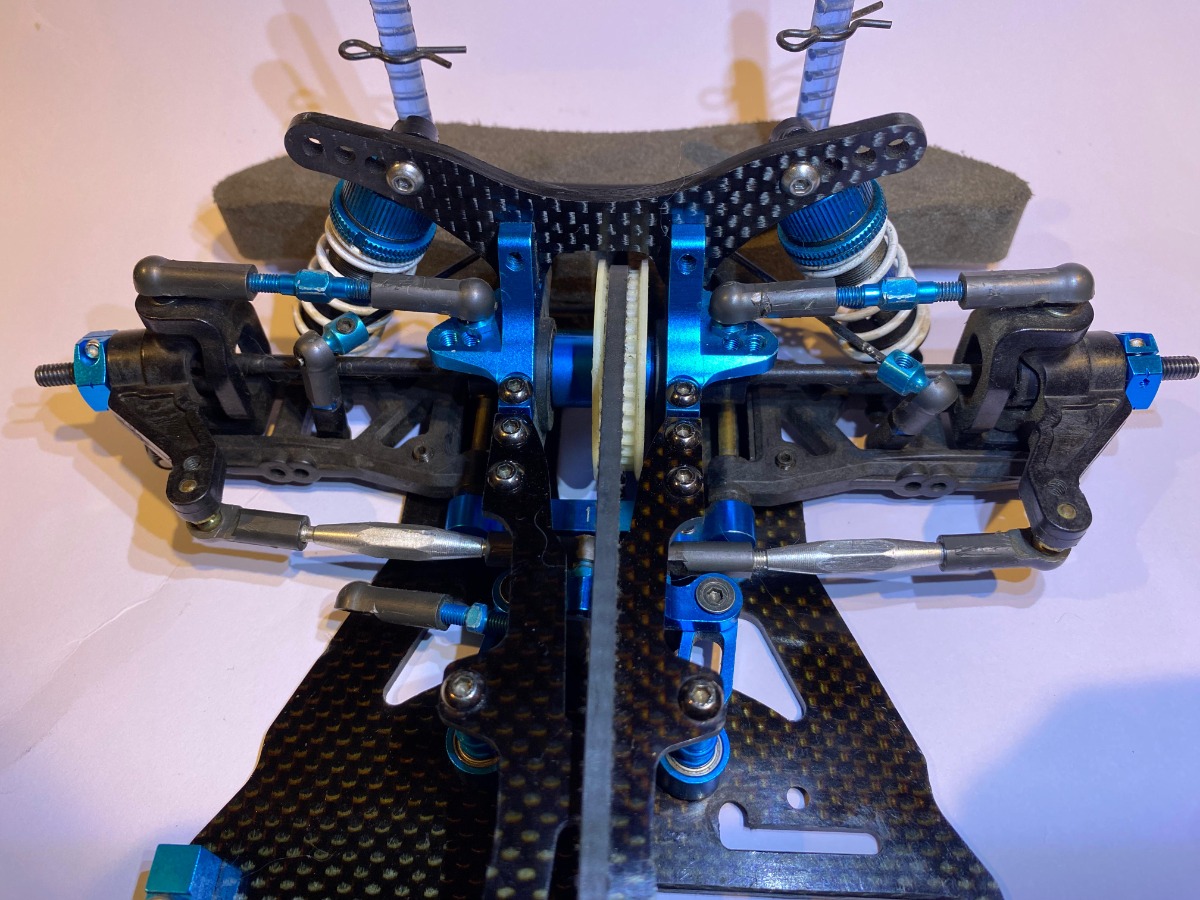
Steering assembly now has new kit correct shims. It felt very much like a slightly well used TT-01 steering at first. Not great. New sets of 5mm ball connectors and adjusters were very much needed. There was barely any blue left on the old ones. The adjusters had a half a mm of slop each.:/ 
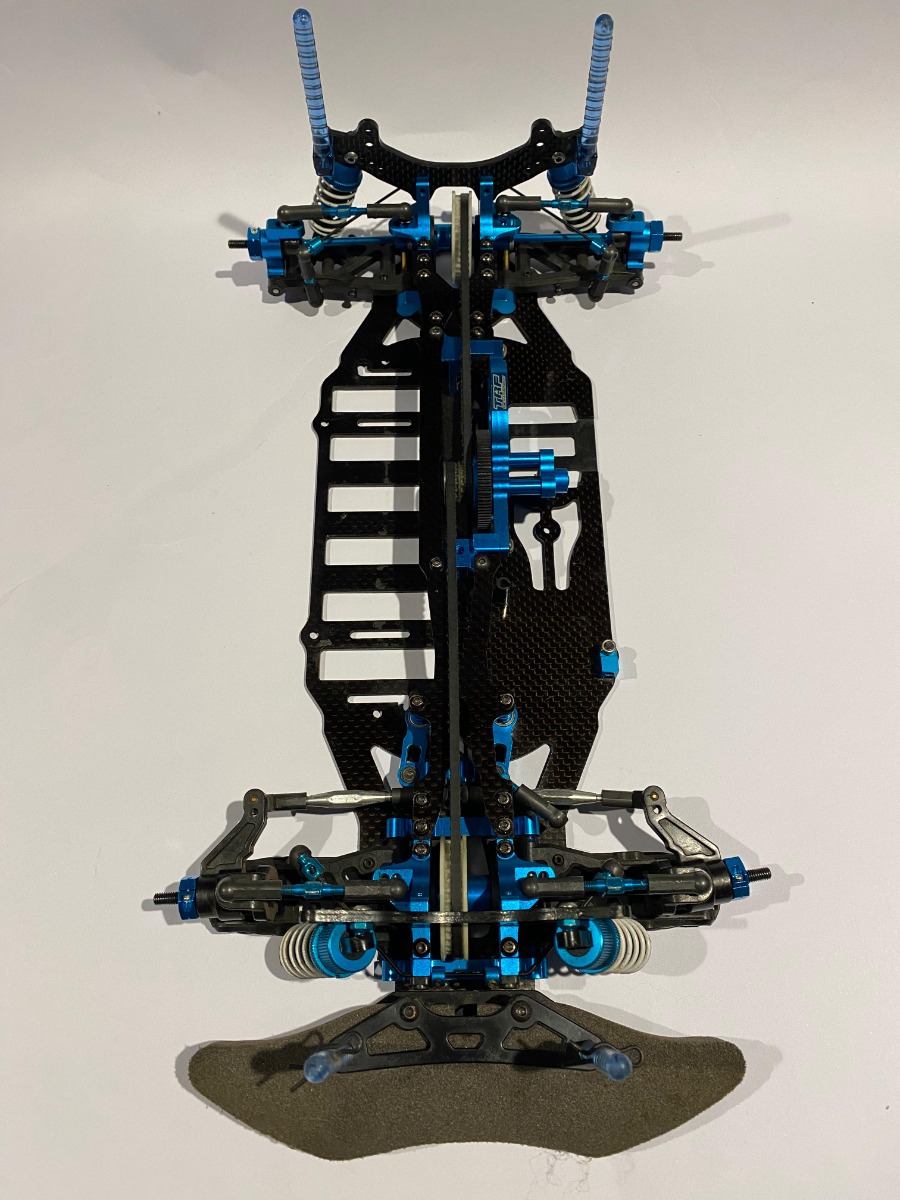
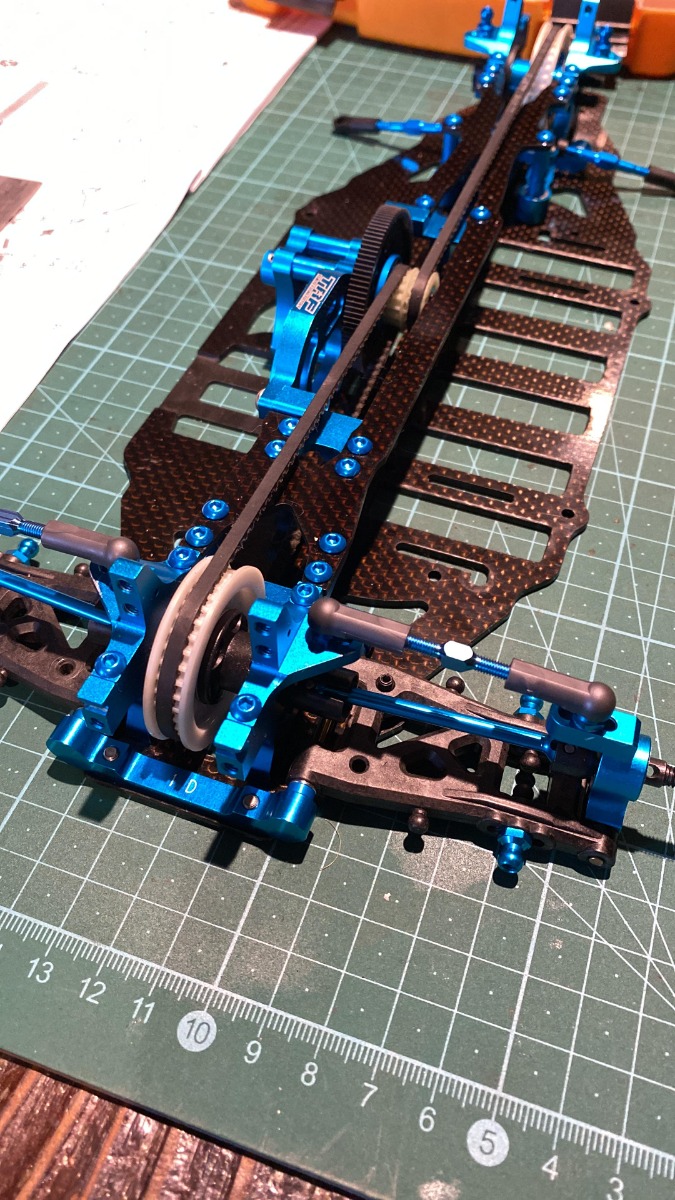
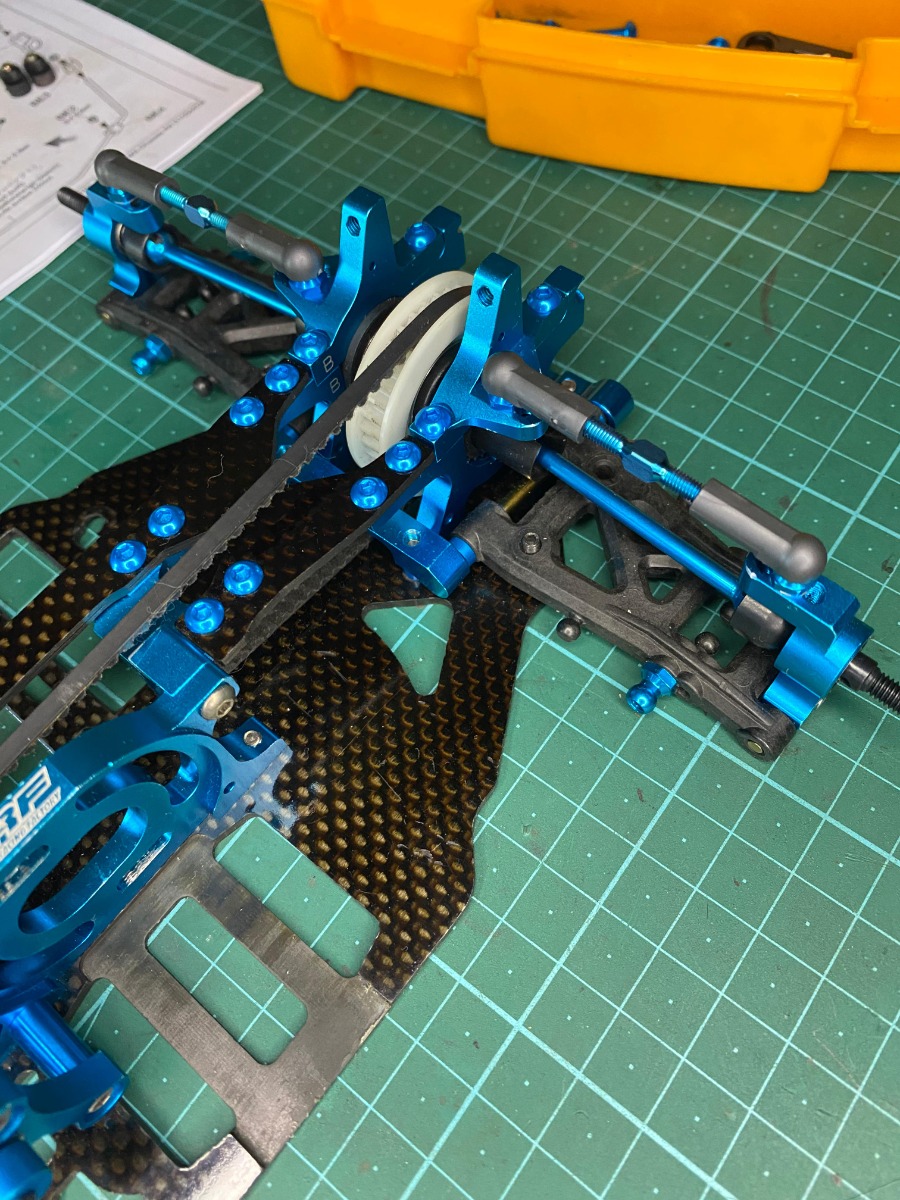
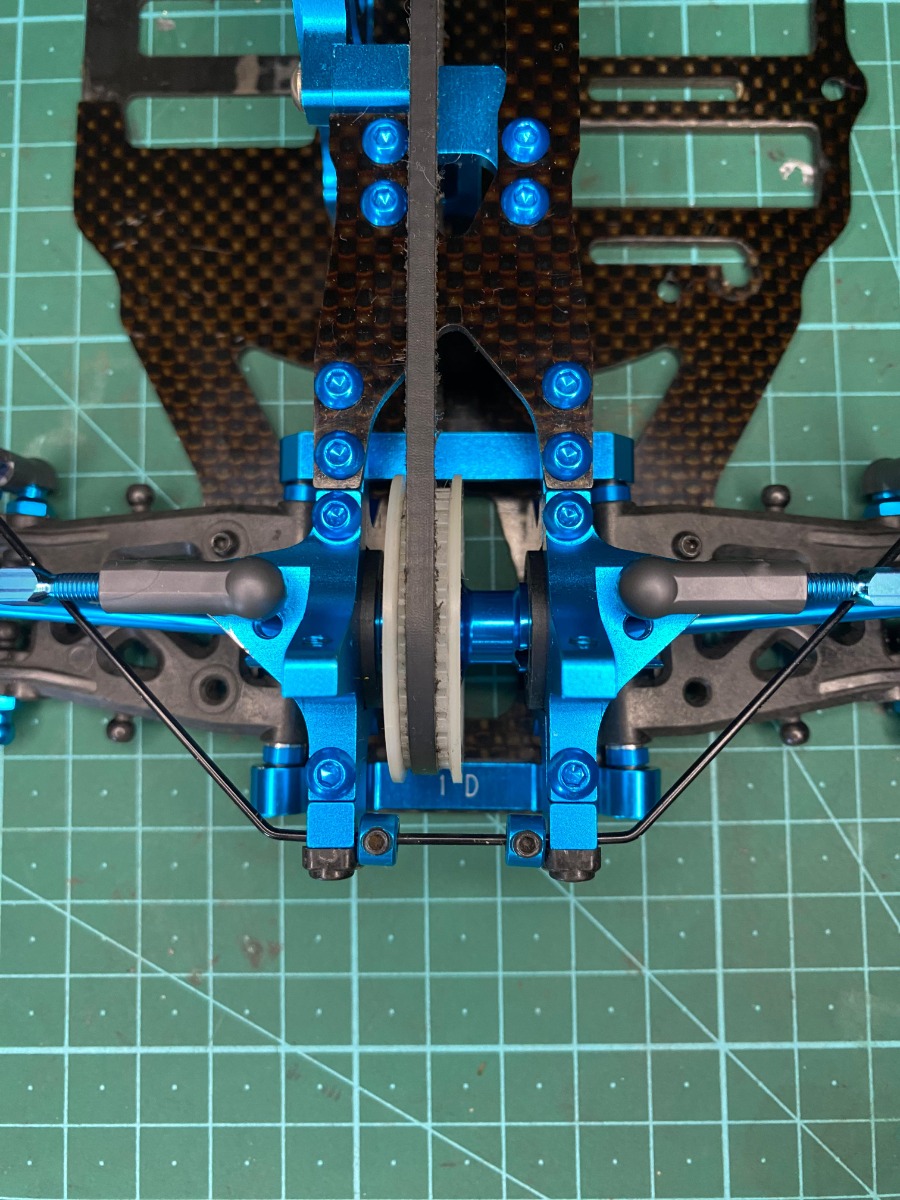
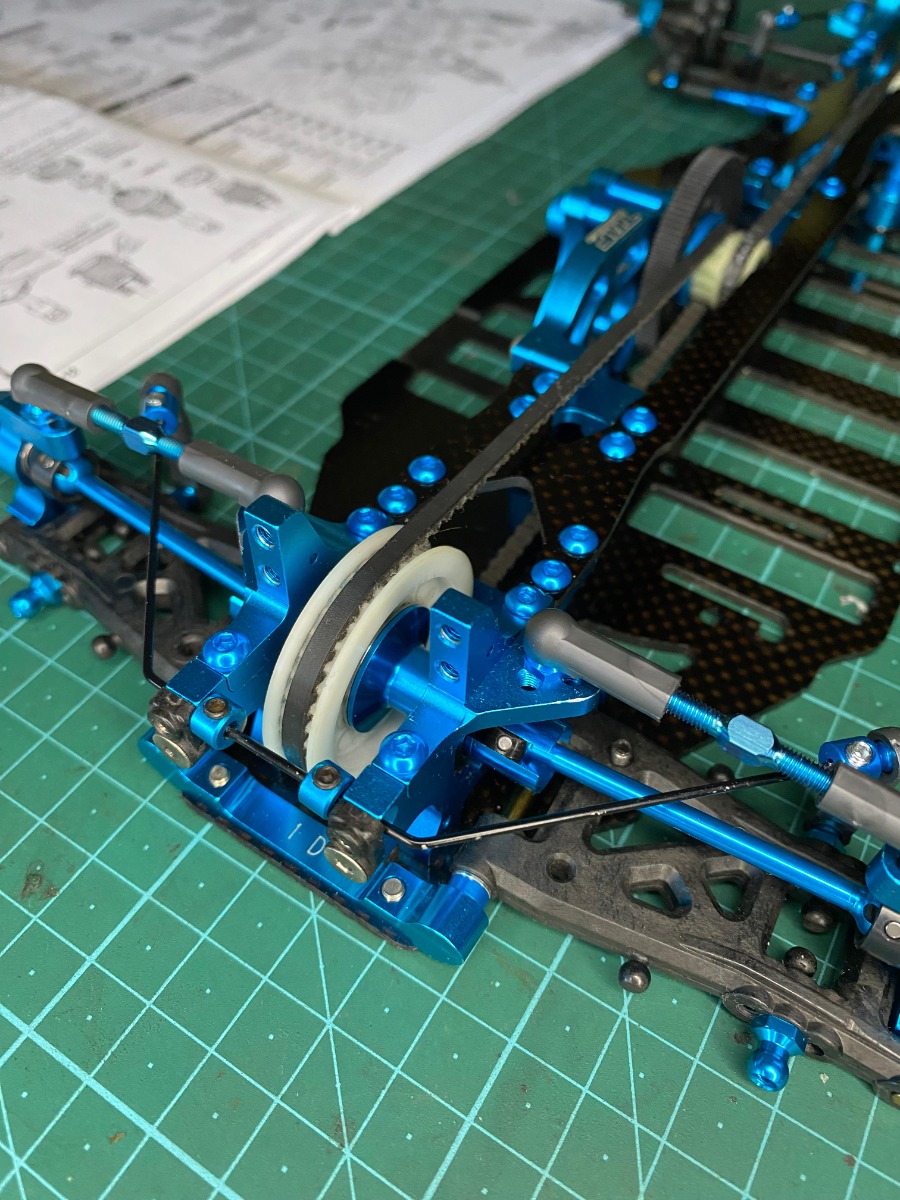
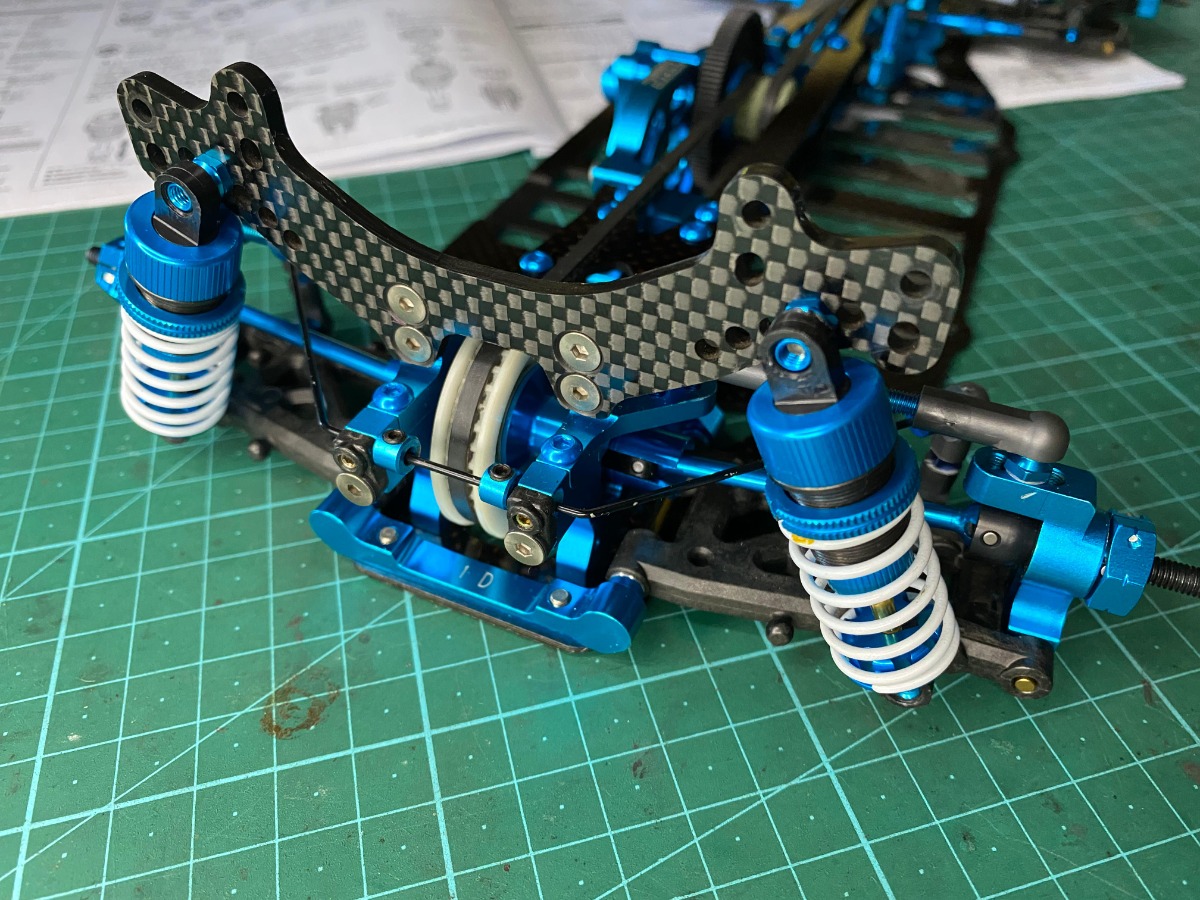
I'm not very good at progress photo's. Another jump forward. Rear arms cleaned with Mr.Sheen, which to my surprise works just as well on reinforced plastic parts. I opted to re-use the inner hinge pins as they were fluorine coated and in good shape, once i scraped off the unnecessarily large amount of hardened anti wear grease (I really don't like AW grease). This chassis will never be run again, so no grease or oil was used anywhere other the rear ball diff. The outer hinge pins were stainless, so i replaced them with new fluorine coated ones (because spares wall). All the suspension ball cups were replaced, they never last with normal use of any Tamiya chassis. I always preferred the delrin replacements. The rear blue CVD's were a bit rough, luckily i had a barely used pair from a 415MS so the length and blue tone were correct. Then came the uprights which put me into a flat spin. After fitting new bearings into the one upright I found the CVD would not turn smoothly. Strange as the bearings were new and perfectly smooth when not in the upright. This was when i learnt that too much cold aerosol furniture cleaner is probably not good for aluminium parts with tight tolerances. I believe the coldness had shrunk the upright just enough to crimp the bearings to a point where they had issues with binding. I came to this conclusion after stepping aware from the build for an hour or so, and when i returned, the bearings felt fine. Temperature was the only thing that made sense. Has anyone else experienced this? 
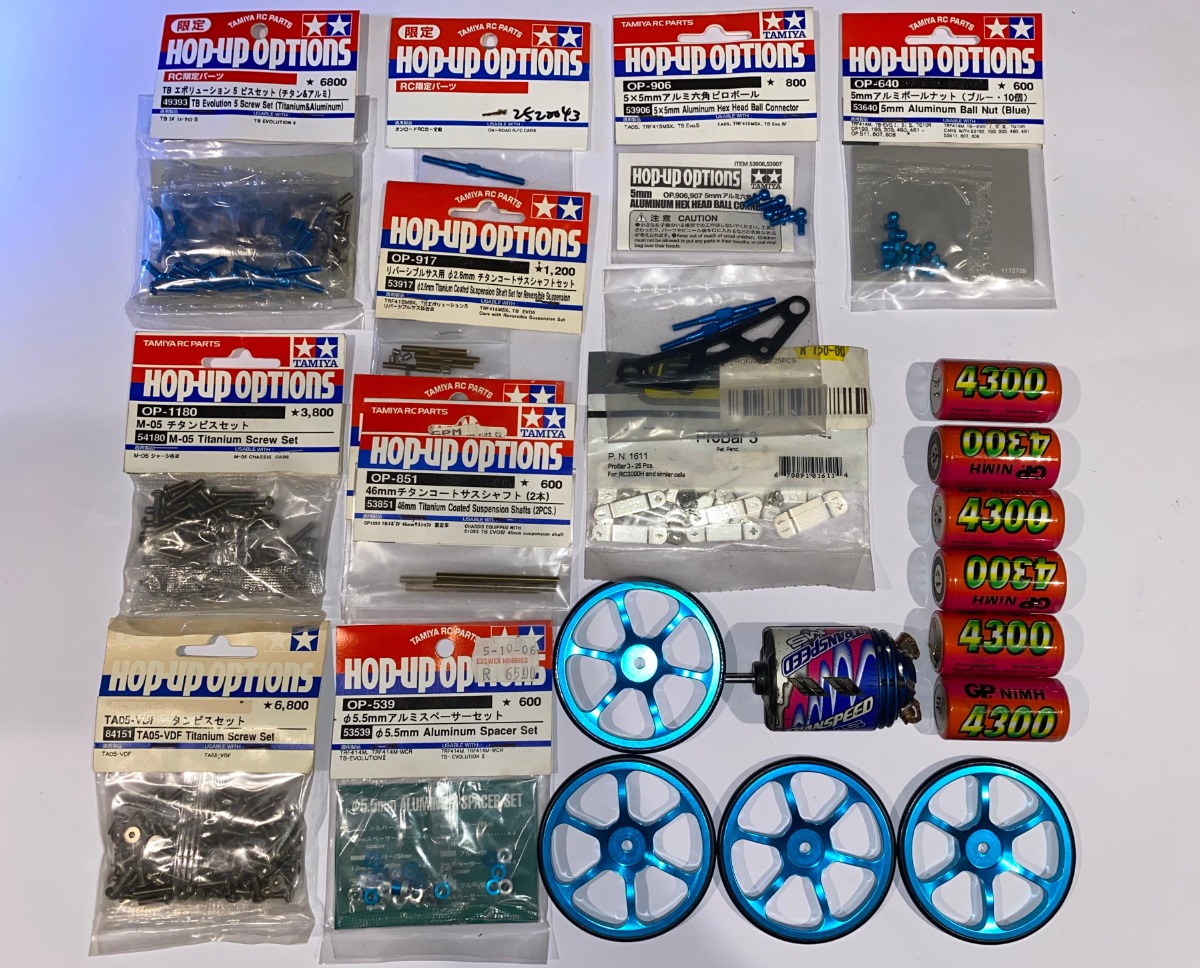
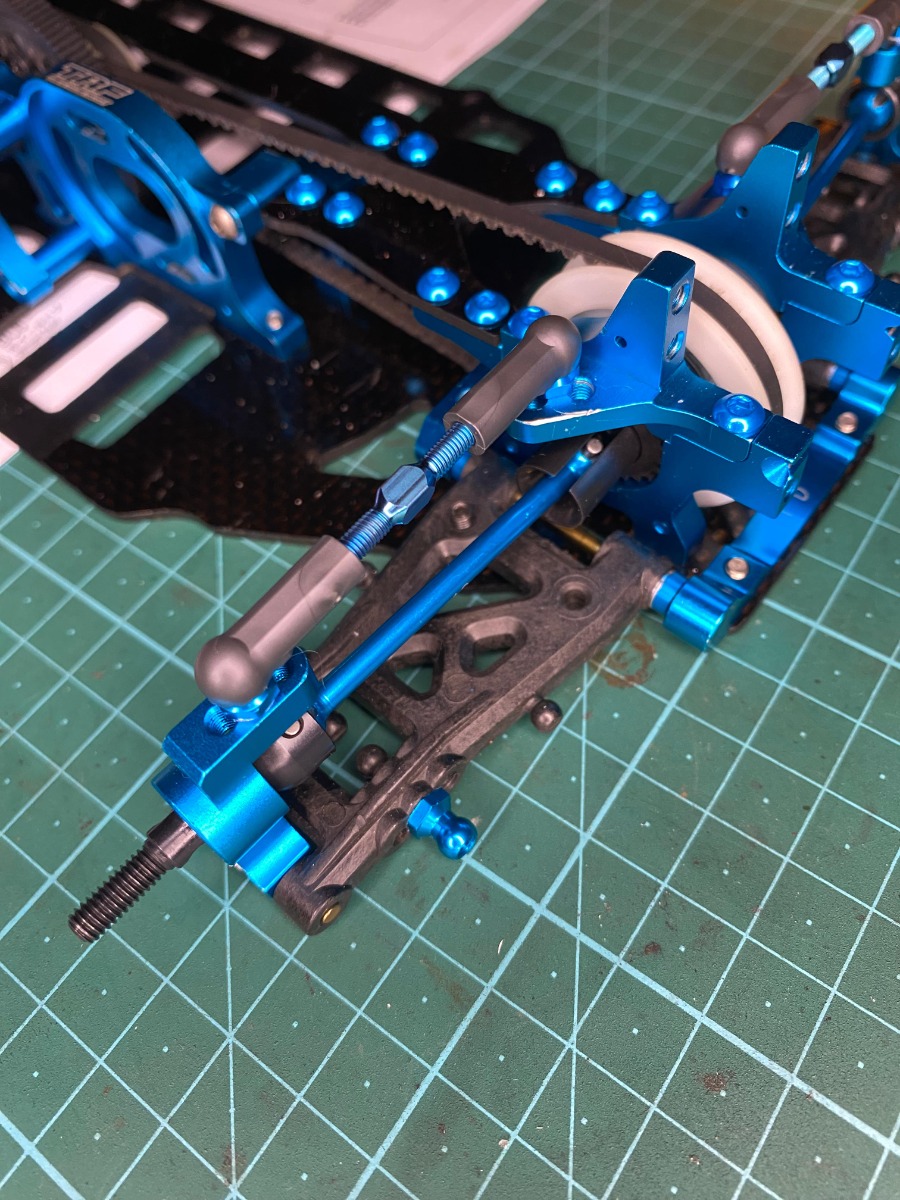
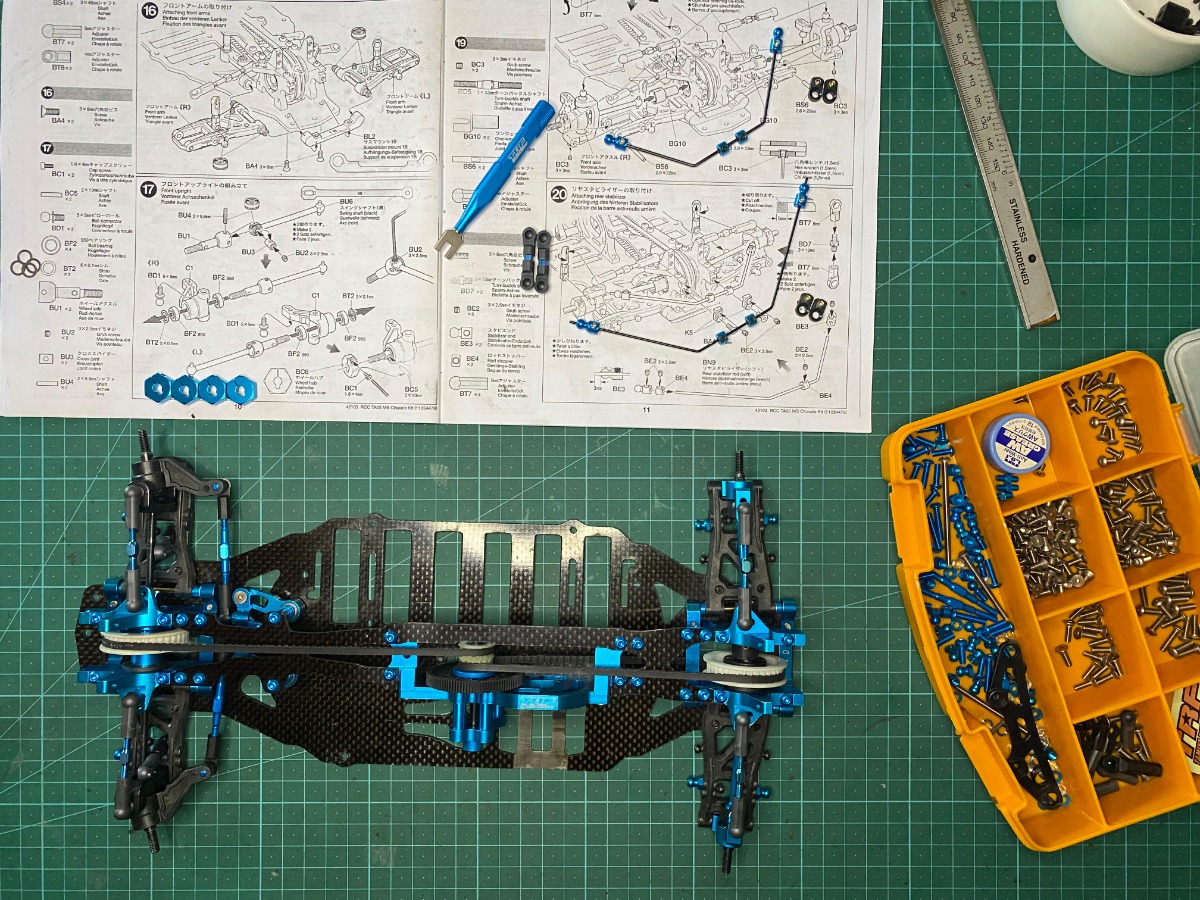
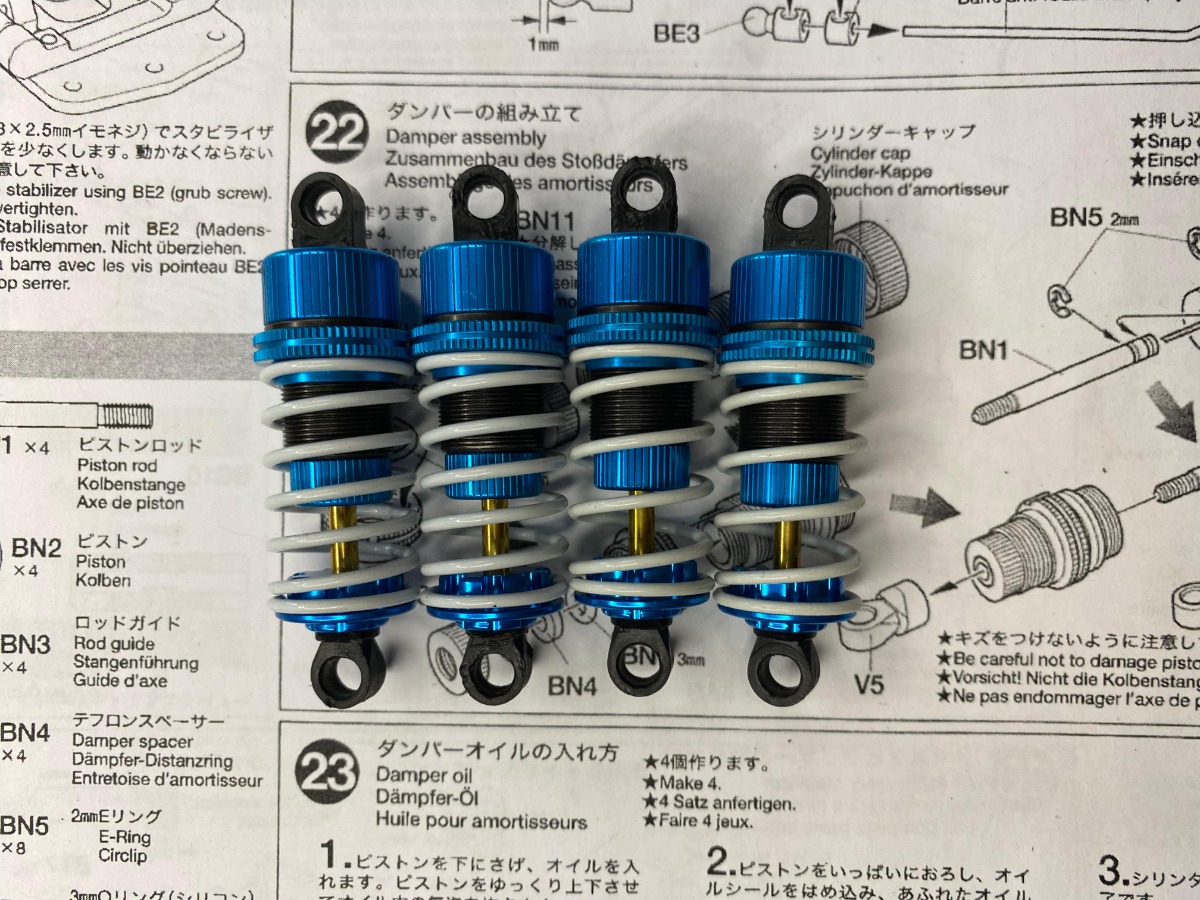
I topped off the rear end with a new pair of 32mm TRF titanium turnbuckles, by far the prettiest turnbuckles I've ever used on a chassis. They are very hard to scratch, and the blue is more of a rainbow blue. And of course I went with the TB Evo 5 screw set to for the extra blue, only for the top deck and bulkheads, titanium for everything else. I ended using three separate sets of Ti screws to make up for the quantities of certain size. 4mm countersunk Ti screws are not common, the 05MS required seven of them if i recall correctly. This last picture I sent to a friend i was speaking to over the weekend who insisted the TA05 MS is not a real TRF chassis. Well, it says it right there does it not. And it is believed to be the base for most future TRF platforms, so in my opinion this is the MOST TRF of TRF chassis. Bluegoodness
Attachments: |
|
Please Log in to join the conversation.
Last edit: by Deekay777.
|
Maybe your friend would like to read this excerpt from the TA05 MS Chassis page here!
"The TA05 MS is the first full-blown chassis kit of the TRF Series. With a motor position optimized to balance both high-speed and handling performance, the TA05 MS combines the TRF415's excellent throttle response with the TA05's stable handling. Double deck structure features 2.5mm lower and 2mm upper carbon fiber decks, and the drivetrain is equipped with such special parts as front/rear wide pitch pulleys, front one-way, and aluminum motor mount for sharp, accurate response. As if that wasn't enough, 3mm front/rear damper stays, aluminum steering arms, and front/rear aluminum bulkheads are all standard equipment, making the TA05 MS the strongest TA05 chassis in existence." IG_tamiyaddiction
The following user(s) Liked this: Deekay777
|
|
Please Log in to join the conversation. |
|
Everyone knows Mr Sheen - he makes umpteen things clean
The following user(s) Liked this: Deekay777
|
Please Log in to join the conversation. |
Exactly! I will be sure to pass on the link. Bluegoodness
|
|
Please Log in to join the conversation. |
Fantastic, i did not realize there was a catchy slogan as well. Bluegoodness
|
|
Please Log in to join the conversation. |
Back with more progress on the 05MS. Nearing the finish line. I just need to get the Volac ESC, and then locate a suitable period correct servo(I'm a bit lost with this one).
I did end up jumping ahead again, front suspension assembled and fitted. There is something that is bugging me, the arms all have a bit of slop at the hinge pins. I have a new full set, but the car is going on the shelf. I may leave this issue as another one of those i know about it but it isn't a visible issues. Stay tuned for another rebuild on the chassis I've basically just finished rebuilding! At this point i noticed my pile of Hop-Up tags had grown, will definitely show what I've used for this build. This image triggered something i have been on the fence about since i started the build. That rear diff.... I have located a kit diff, but with the amount of non-kit blue additions i felt it would be alright to go ahead and use a TA05 V1 ball diff outdrive set. I am very pleased with how it looks. I would like to get some white nylon drive shaft pucks. But for now this will do. More Ti bits! Sway bar links have joined the rainbow blue titanium party. The sway bars are not the correct stiffness as per the manual, but these were the cleanest ones i could find without paint chips(and its going on the shelf). Note the blue aluminium diff cups as mentioned above. It had to be done. Bluegoodness
Attachments:
The following user(s) Liked this: 1972 LeMansGT Jim
|
|
Please Log in to join the conversation.
Last edit: by Deekay777.
|
Now onto the towers and shocks. I had planned to crack open a new TRF damper box. But, i had another Hard Black Coated set that i had just rebuilt and it was in mint condition. No shock building content unfortunately. I will be sure to document the process with the next rebuild. The 05MS rear towers with two rear body post position options. I could never find a clear reason why they did this, outer positions for more or less roll, weight in a different area. The inner mounts are identical to the TA04 towers. #42102 TRF Special Damper (Hard Black Coating). Same part number as the dampers without the Hard Black Coating. Perhaps a more pronounced shock body finishing method? Beautiful shocks regardless of the coating. The fluorine coated shafts really do compliment the white, blues and carbon. Topped off with blue retainers(is it possible to have too much blue?) As per the manual, the next step is electronics, not the front bumper as you would expect. So that will follow with a bit of a delay, i should get the ESC this week. Bluegoodness
Attachments: |
|
Please Log in to join the conversation.
Last edit: by Deekay777.
|
Or you could give him the link to the source of TB: www.tamiya.com/...index.html Signature now gets correct formatting if you edit it in your Profile. Use normal BBcode if you want.
www.tamiyabase.com was formatted automatically.
The following user(s) Liked this: Deekay777
|
|
Please Log in to join the conversation. |