TOPIC:
Restoring a Road Wizard 9 years 2 months ago #33432
Thanks, but the restoration is actually done. I'm just too slow in posting the result -Lars Signature now gets correct formatting if you edit it in your Profile. Use normal BBcode if you want.
www.tamiyabase.com was formatted automatically. |
|
|
Please Log in to join the conversation. |
Restoring a Road Wizard 9 years 2 months ago #33444
I think you sort of can but is very hard to do it evenly so the surface structure stays intact. Best approach would probably be to use a belt sander. A fine result here nonetheless.
The following user(s) Liked this: larbut
|
|
|
Please Log in to join the conversation. |
Restoring a Road Wizard 9 years 2 months ago #33445
|
Radio gear and MSC:
Both the rado gear and MSC came with the chassis, so only some cleaning and mounting was required. Servos before: Servos after: Not much change really, except cleaned and the wires twisted to "spec". And, I always enjoy removing the protective plastic on the name-plate. Nearly all the vintage servos I've used so far have had this protective plastic on, after so many years. The MSC, on the other hand needed som oxidation removed. After some polishing with my preferred metal polisher, Autosol: Mounted on the servo and swipe arm attached. And there you go, both servos installed in the chassis. Signature now gets correct formatting if you edit it in your Profile. Use normal BBcode if you want.
www.tamiyabase.com was formatted automatically. |
|
|
Please Log in to join the conversation.
Last edit: by larbut.
|
Restoring a Road Wizard 9 years 2 months ago #33446
|
Finishing touches on the chassis:
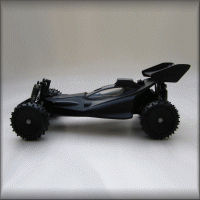
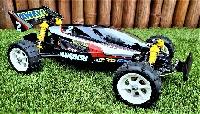
First the adjustable spoilers was mounted to the front wing. One of them was badly dented, but I managed to hammer it out somewhat.. The the receiver was installed using double sided tape, and the cabling sorted. Wheels are next, quite straight forward. Only noticeable thing is that the rear wheels don't use lock nuts for some reason. And then you have a complete Road Wizard chassis, which btw is unique, although very similar to Williams FW11-B and Lotus 99T. Please note that I did NOT glue those tyres... and I did not want to spend cash on a new set. next... the body set... Signature now gets correct formatting if you edit it in your Profile. Use normal BBcode if you want.
www.tamiyabase.com was formatted automatically. |
|
|
Please Log in to join the conversation.
Last edit: by larbut.
|
Restoring a Road Wizard 9 years 2 months ago #33448
|
to give shiny your frp, and protect it a little, after the shoe polish, you can tape transparent venillia. I made that on my xpress pro chassis and it works enough good with 3 layers. |
|
Please Log in to join the conversation. |
Restoring a Road Wizard 9 years 2 months ago #33452
Maybe just get yourself a chisel tipped maker to run over the back and even the colour out to black, Especially since the tyres are exposed Chassis looks great btw, that msc arm looks new, did it come with the car or have you found a supplier? I'm looking for 1 for my Newmans If you can't fix it with a hammer, you've got an electrical problem mate
|
|
|
Please Log in to join the conversation. |
Restoring a Road Wizard 9 years 2 months ago #33455
|
|
|
Please Log in to join the conversation. |
Restoring a Road Wizard 9 years 2 months ago #33459
No problem mate, build looks great, cheers Bullfrog |
|
|
Please Log in to join the conversation.
Last edit: by Jonny Retro.
|
Restoring a Road Wizard 9 years 2 months ago #33462
|
Eurgh, really? I think visible evidence of period glue related muppettry is better than a half arsed job of hiding it - no ink is going to be the same shade as foam tyre black. I'd turn it off myself, but appreciate a lathe (even a real tiddler) is not in everyones toolbox. |
|
Please Log in to join the conversation. |
Time to create page: 0.258 seconds


