Keyword

TOPIC:

Restoring a Road Wizard 9 years 2 months ago #33498

Nice, Edou!
The Wizard's rims inner edge being wider than the foam will complicate the procedure a bit, but, I'll have a go at it :-)


Maybe put some tape on the rim first so you don't end up scoring the rim while sanding the tyre :ohmy:
If you can't fix it with a hammer, you've got an electrical problem mate :)
The following user(s) Liked this: larbut, stingray-63

Please Log in to join the conversation.

Restoring a Road Wizard 9 years 2 months ago #33507

:)

For cleaning up the inner edges, I just held a piece of folded sandpaper alongside it. But for more control on flat areas, I put it on top of a putty-knife (and chose the rotational side 'away' from oneself).
With some finer grid and a bit of polish, any scratches on the rim are easily smoothened.

There's probably a better setup that the bits I used - that was just what was at hand. I think the most stable approach is a piece of 6mm threaded rod (assuming the further evolution kept the axle dimension of it's ancestor) and a couple of spring washers. This went flying off every now and then and wasn't that easy to center correctly.

:whistle:

I posted an incorrect image before by the way, I ended up using this (a bit more stable but still too small) :

Please Log in to join the conversation.

Last edit: by Edou.

Restoring a Road Wizard 9 years 2 months ago #33508

Edou, why you don't use 2 Belleville spacers? They will center easily.
The following user(s) Liked this: Edou

Please Log in to join the conversation.

Restoring a Road Wizard 9 years 2 months ago #33524

And now on to the feared body set..

There are four different colors to be painted. Black, blue, red and white. In addition there's painting of the driver head/helmet and the torso.

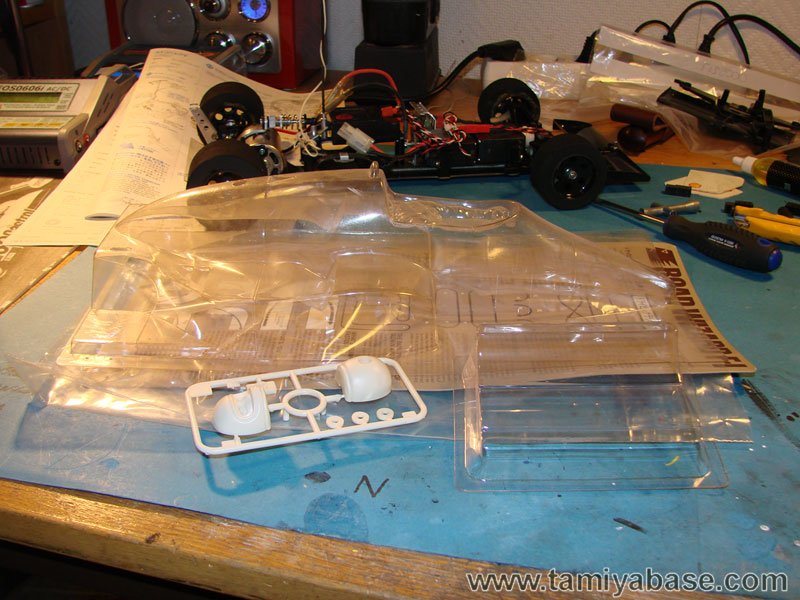
I started with a semi-NIP body set. To my surprise, the NIP set had some ventilation holes done just behind the driver's head. It's nicely done, but I would have liked to know when I bought it... :pinch:


First is the black color. As the manuals tell you, always start with the darker colors and work your way to the lightest one. You will then have no problems of darker colors shining through lighter ones.

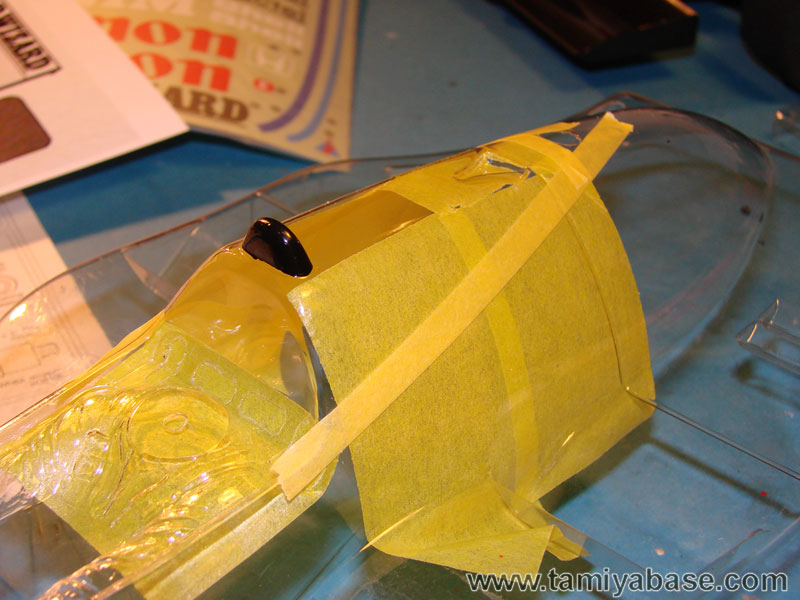
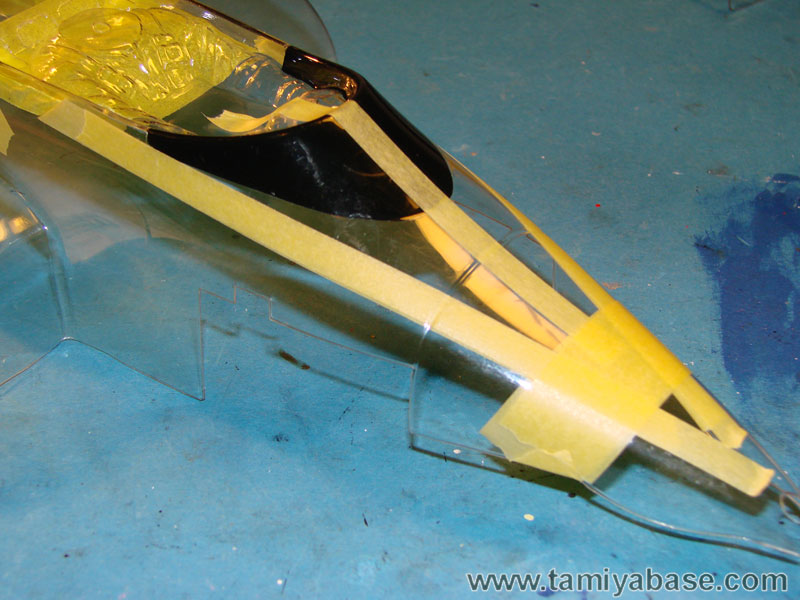
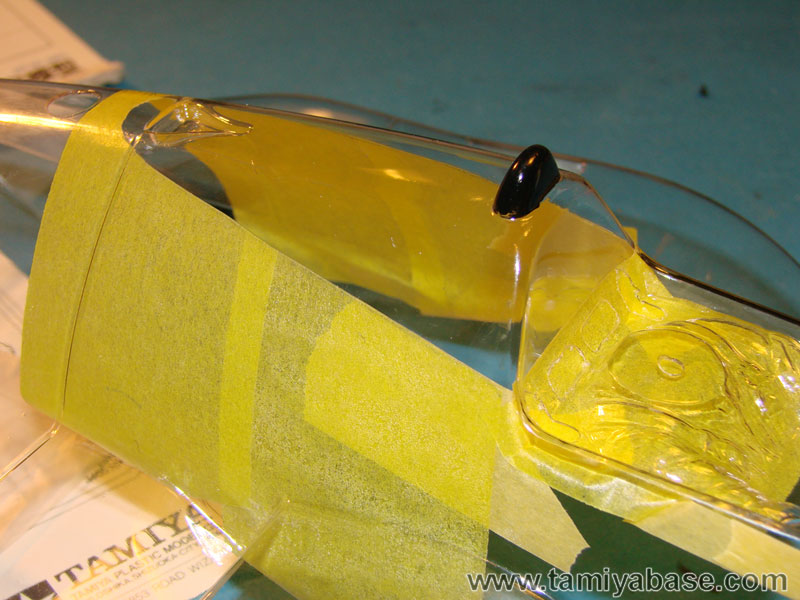
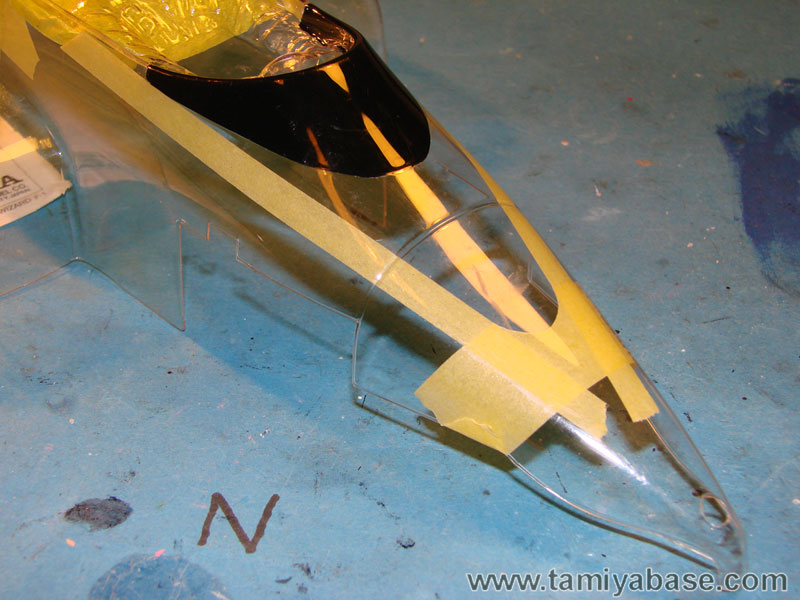
Black for the rear "floor", roll bar and for what's supposed to be the cockpit window.


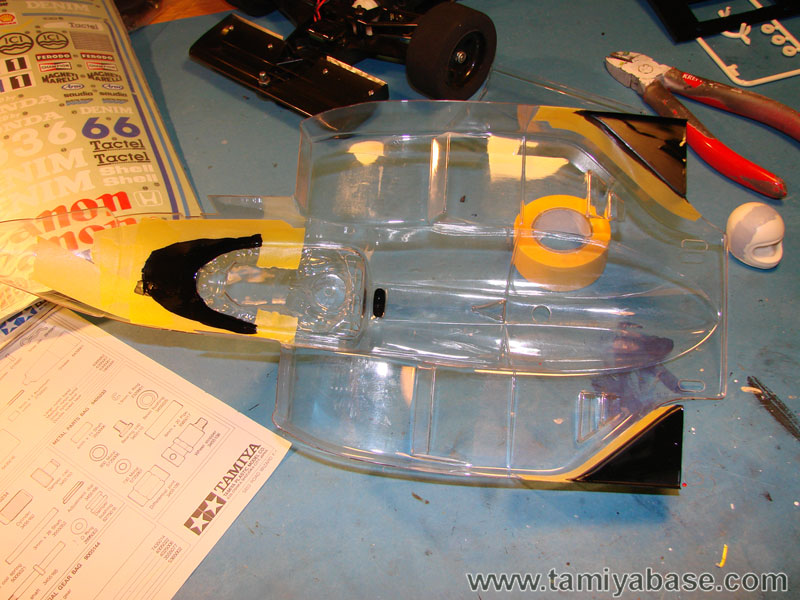
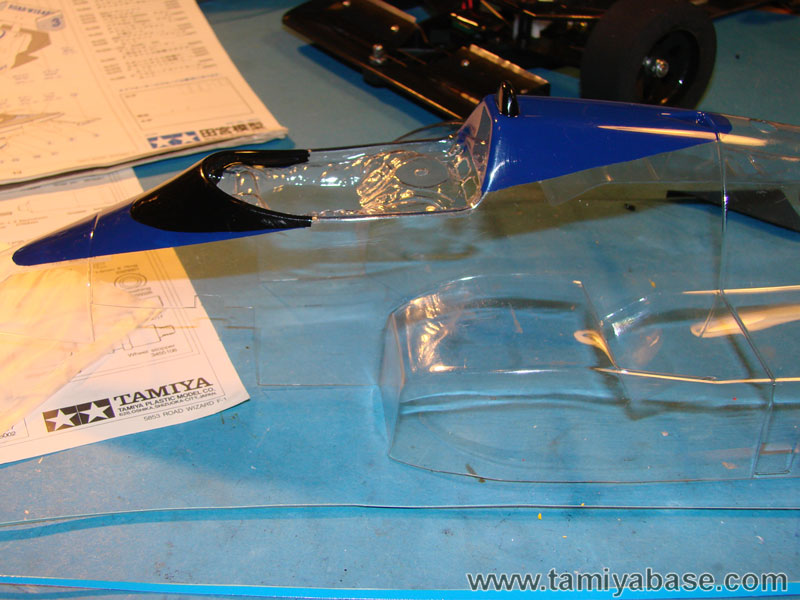
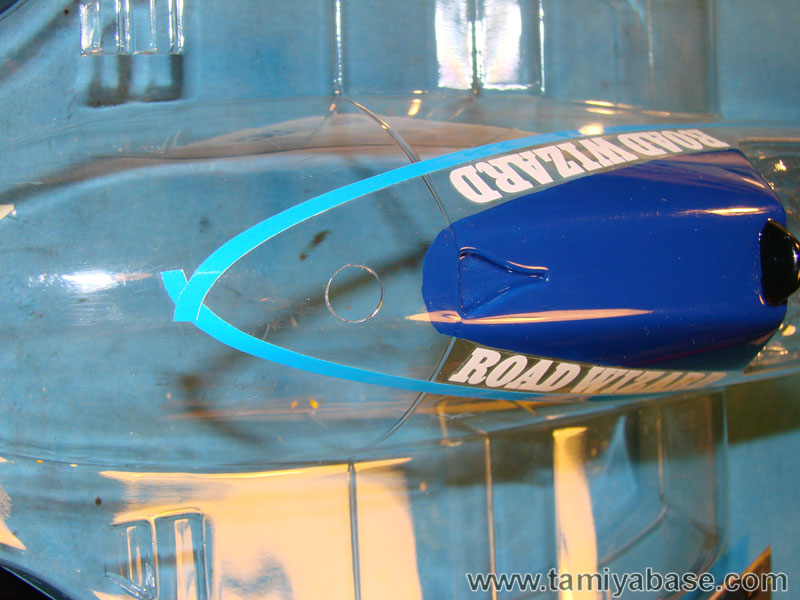
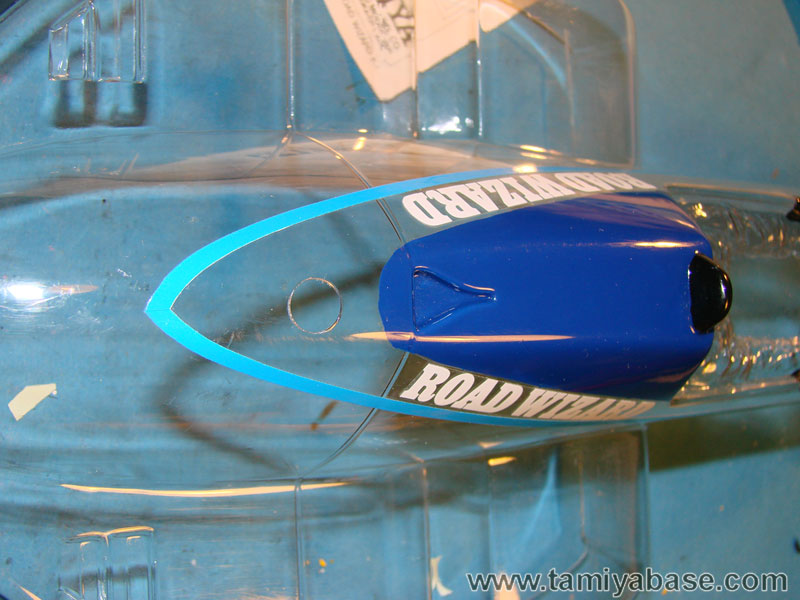
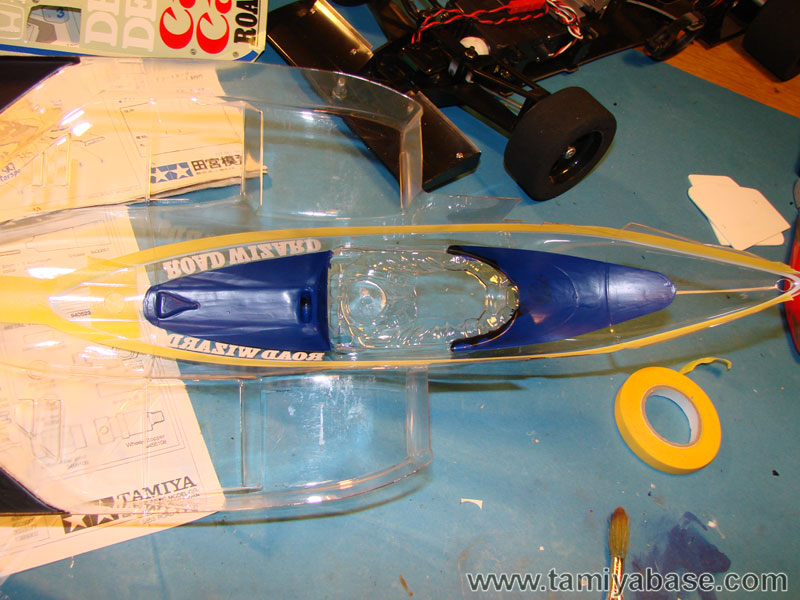
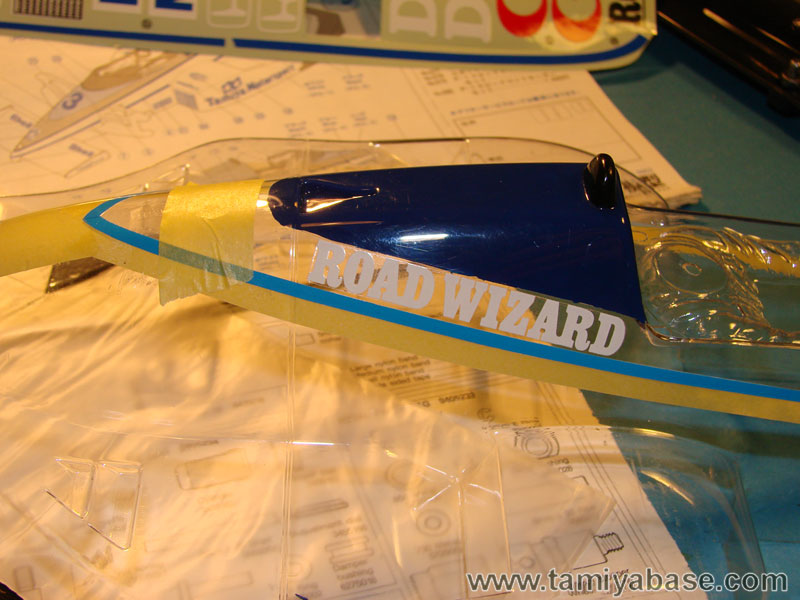
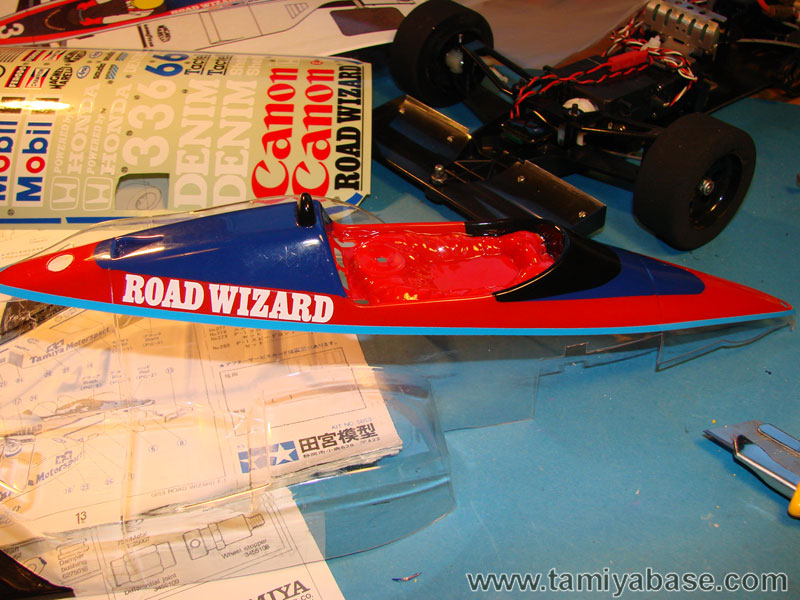
Next is the blue color. Usually in current body sets the different colors will be split by a decal. I find it almost impossible to mask a perfect line as the painting will have ripples after removing the masking tape.
In addition, the blue color on the Wizard is supposed to have some curves, and be symmetrical across the center line.
I decided to use masking tape on the outside as a guide (easier access) and then draw the curves and shapes on the outside. Then use the knife and cut the masking on the inside.


The result was like this (after some adjustments using a fine brush and a steady hand...


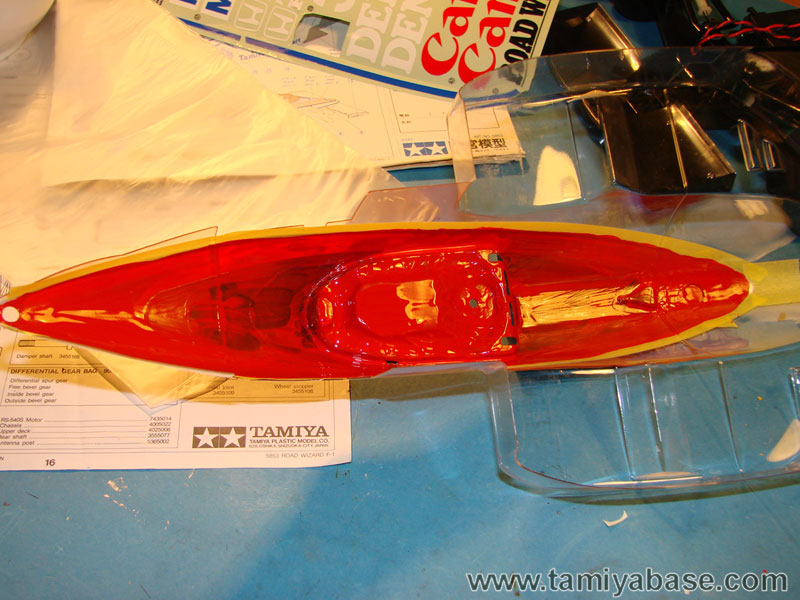
Next is the red color...
Signature now gets correct formatting if you edit it in your Profile. Use normal BBcode if you want.
www.tamiyabase.com was formatted automatically.

Please Log in to join the conversation.

Restoring a Road Wizard 9 years 2 months ago #33525

The red color has a new set of challenges...
First, you need to know how wide the red should be, as there is no markings on the body.
I decided to attach the "Road Wizard" decals on both sides just below the blue line, as it should be.


This will act as a guide for the next decals, the light-blue lines dividing the red and white.

I've always had trouble accurately positioning decal stripes on any Tamiya. I have concluded that in most cases the shape must be wrong... :blush: :woohoo:


After some adjustments using the knife:


Then I applied the inside masking along the middle of the blue decal stripes. That was surprisingly easy.


The some layers of red:


And this is what you get:


Signature now gets correct formatting if you edit it in your Profile. Use normal BBcode if you want.
www.tamiyabase.com was formatted automatically.
The following user(s) Liked this: stingray-63

Please Log in to join the conversation.

Restoring a Road Wizard 9 years 2 months ago #33529

Edou, why you don't use 2 Belleville spacers? They will center easily.


Just working with what I had lying around there. ;)
The washers aren't too bad - I glued a rubber ring on them (also use them to support on road body shells).
The following user(s) Liked this: stingray-63

Please Log in to join the conversation.

Restoring a Road Wizard 9 years 2 months ago #33530

If you use 5 mm rod with bearings for the front and a Grasshopper rear axle for the rear wheeles?

Please Log in to join the conversation.

Restoring a Road Wizard 9 years 2 months ago #33531

:) the boxart is always the best Lars.
The following user(s) Liked this: larbut

Please Log in to join the conversation.

Restoring a Road Wizard 9 years 2 months ago #33532


I'm really enjoying your skills here :y: I'm apprehensive and procrastinating about painting the bodies for Nissan and Porsche builds :whistle: Build applying decals is fun now I'm using the soapy water method :)
If you can't fix it with a hammer, you've got an electrical problem mate :)
The following user(s) Liked this: larbut

Please Log in to join the conversation.

Restoring a Road Wizard 9 years 2 months ago #33536

Nice progress indeed, Lars. :y:

I've done a few sets of tyres, Flo. But I'll definitely look into a better approach if I ever start to waste some rubber on tarmac.

:)


B)

Please Log in to join the conversation.

Last edit: by Edou.
Moderators: caprinutstingray-63AndyAus
Time to create page: 0.270 seconds
Cookies are required to make this site work. If you continue to use this site you permit us to use cookies.