Keyword

TOPIC:

Santacruz' Sand Scorcher 8 years 10 months ago #34746

I've taken on a vintage Sand Scorcher shell to repaint, it doesn't look too bad in this shot (I've already removed the nose, rear lights & door handles that were still attached) but was riddled with paint faults...


The inside is no better - badly sprayed black with a lot of white spray drift, runs, extreme tape bleed & a crusty build up of white around the window edges.

Between all the problems & not knowing what sort of paint was used, it all needs to come off.


The blue came off fairly easily, blasting with fine glass bead - it looks like the paint was laid down straight on to the bare plastic :blink:


The white was another matter - it's in two distinct layers (white primer & paint?) & both are extremely well bonded ... between that & not being able to see where I've been in the blasting cabinet, chemical stripping is goign to be needed.


The black inside (possibly with a grey primer) was also very well bonded/etched into the plastic, it took swapping out the fine beads for glass grit to get this far...


The "glass" on the other hand just needed a good going over with the 3-step Novus plastic polishes to bring back a bit of sparkle.


:)

Please Log in to join the conversation.

Last edit: by Jonny Retro.

Sand Scorcher repaint 8 years 10 months ago #34747

Moving on to the smaller parts, again I started with the least aggressive/stinky/labour intensive option - in this case caustic soda. The driver was in his original 1970s paintwork, and I think I can do a bit better.


Paint on the rear body mount spacers, wipers (which need a bit of de-spruing), two of the front indicators and the front of the number plates came off remarkably well, but the rear sides will need more work, as will the driver & rear light lenses.
Almost nothing came off the door handles & rear number plate light cover.


Attachments:

Please Log in to join the conversation.

Sand Scorcher repaint 8 years 10 months ago #34748

The remaining white came off very quickly with DeSolvIt Graffiti Remover, revealing the scalpelled edges of 3 or 4 prior 2- tone paintjobs, but the black (and there definitely was grey primer underneath) was a bit more reluctant.


Next steps will be a thorough rub down, taking the edges off the drivers arms & helmet, a bit of repairing/filler here & there, more rubbing down & then a light prime to see where more work needs doing.
Attachments:
The following user(s) Liked this: stingray-63, AndyAus

Please Log in to join the conversation.

Sand Scorcher repaint 8 years 10 months ago #34763

Driver needs work in the usual places (arm & helmet "seams"), plus a repair on the bracket:


I have a spare vintage sunroof, so I could afford to try and get the old one out to clean up the edges:


Shell looks a lot better after a rub down (pre-used 180 grit wet & dry in places, but mostly 320, 600 & 1200):


Insides are better, but everything that's gone on before has left some deep staining:


After the first coat(s) of primer there are a few edges that need some more attention, and a few tickle ups with filler will be needed, but in general it's looking very good so far:


I've cleaned up the back of the licence plate, but that left them very thin so I had to reinforce them ... also been thinking about how to repaint them. Previously they've been done by painting blue & then overpainting with yellow, that method is pretty suspect to me as the results were rubbish, so I'll spry them yellow & then fill in the background afterwards - I've been meaning to buy a magnifying lamp for some time anyway :whistle:

The following user(s) Liked this: terragni

Please Log in to join the conversation.

Sand Scorcher repaint 8 years 10 months ago #34764

Looking good mate :y: lucky owner having you restore this for them B)
If you can't fix it with a hammer, you've got an electrical problem mate :)

Please Log in to join the conversation.

Sand Scorcher repaint 8 years 10 months ago #34765

Jonny

Thanks again for sharing your detailed knowledge, tips and experience with the community, much appreciated mate.

Keep it coming

Terragni ;)

Please Log in to join the conversation.

Sand Scorcher repaint 8 years 10 months ago #34767

The one bit of fabrication I had to do for this body was a mirror bracket ... I didn't take as many photos as a I should have done TBH :whistle: but the basic process was:

- find bit of 0.5mm metal sheet. I used aluminium (this body is destined for the shelf anyway), brass would have been better (though more obvious), steel better still (but much harder to work);

- cut out 4mm wide strip, hammer back to flat/square & file edges, including one end;

- mark centre of threaded hole & make tooling - a block of metal with a shallow 2.5mm diameter hole in it, align centres & use pointed punch to make hole & form collar against inside of tooling, carefully form thread with M2 taps, file off any excess;

- work out position of blind hole, drill, bend in correct place, trim off excess from end of strip & file to finish.

:)


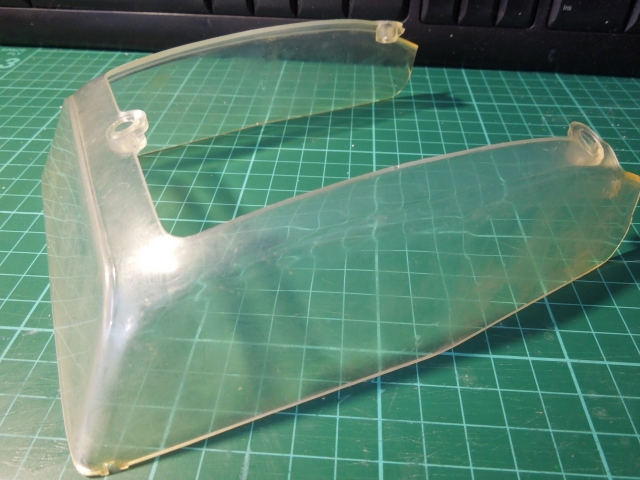
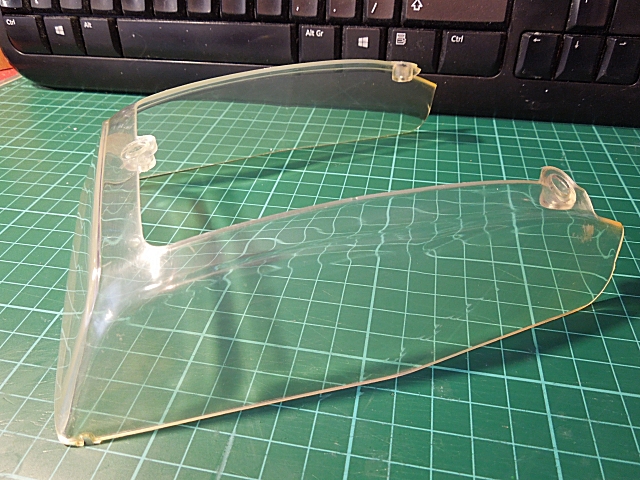
I also got a lot of the small bits painted - "chrome" paint is never as good as proper plating, so I just touched in where possible instead of overpainting the whole things ... indicators & rear lights came out nicely, though I did have to paint both inside & outside to restore the clarity.


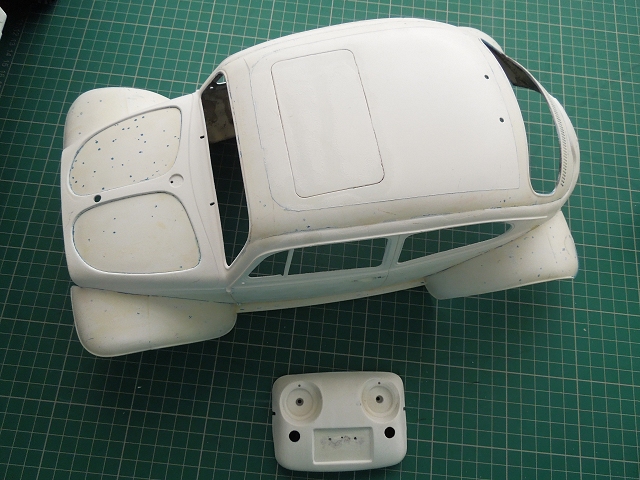
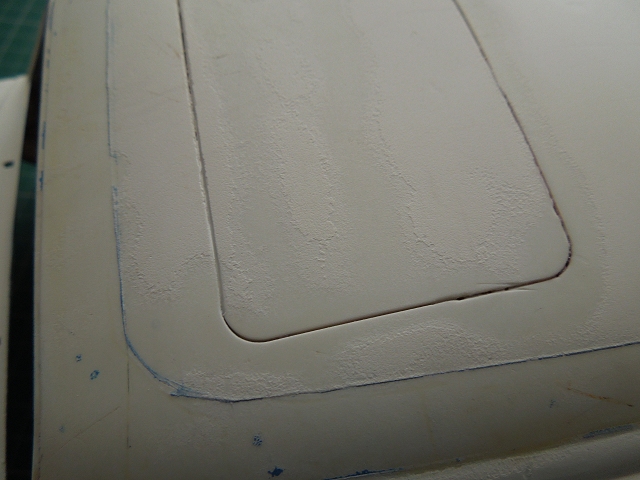
The body got quite a lot of attention yesterday, in the end I had to fill 30+ small defects. Again, inadequate photos were taken. Rubbing down was done wet with well used 320 paper, then with 1200 grit over the whole car. Rather than doing it under the tap, I used a takeaway tub full of lightly soaped (well, lemon Fairy washing up liquid) & did very small areas before wiping up with a wet cloth as I went - that way there's little danger of water running into nooks & crannies & drying time is vastly reduced.

Two more coats of white primer went on both the inside & the outside, and as there weren't any more faults I wanted to rectify, I rubbed the whole thing back again with 2000 grit paper (method as above) - it was smooth with a capital SMOO :D

Two coats of white paint followed that; I also gave the licence plates a couple of coats of (aerosol) yellow. Both will need a fair bit of curing time before I start the tricky bit(s). The driver has one coat of the basic colours on so far so obviously I can finish that in the meantime.
I didn't check the temperature/humidity indoors yesterday evening, but they must have been pretty high (and low, respectively) as a skin was forming on the surface of the paint in open jars :blink:


Inside of body is almost stain free now :)

Please Log in to join the conversation.

Sand Scorcher repaint 8 years 10 months ago #34770

This is my Sand Scorcher body Jonny is building and looking at the photo's I am absolutely delighted with the way its going :) .I was let down over 14 months by 2 "builders" with this build and to find somebody in Jonny to build it to this standard is awesome. Seeing the standard of his builds with the completed models was fantastic, I know my kits in great hands :) .
The following user(s) Liked this: larbut

Please Log in to join the conversation.

Sand Scorcher repaint 8 years 10 months ago #34793

Not one of my best results TBH, it's surprising how much the head & steering wheel already being glued on compromised things :(

Still, it looks better than it did before & that's all I'd promised ;)


Attachments:

Please Log in to join the conversation.

Sand Scorcher repaint 8 years 10 months ago #34795

Nice watch :y: is it the new i thingie? ;)

Please Log in to join the conversation.

Moderators: caprinutstingray-63AndyAus
Time to create page: 0.377 seconds
Cookies are required to make this site work. If you continue to use this site you permit us to use cookies.