so what is the ideal setup for our Tamiya's
M2, M3 + M4
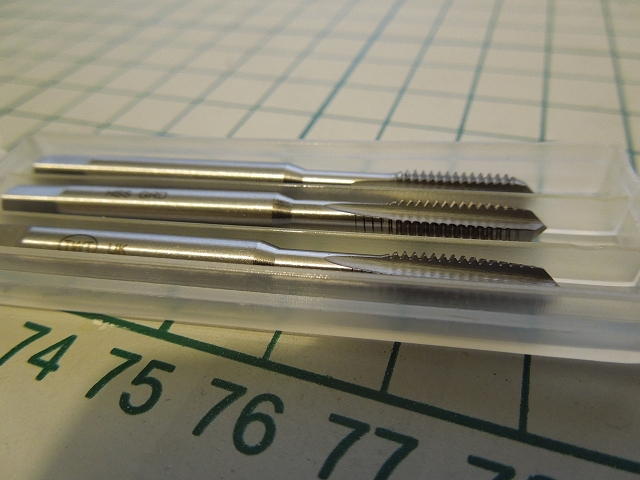
inner thread 1, 2 or 3 taps
drill sizes
dies
what kind of toolholders.
cutting fluid
all tipps welcome
maybe its usefull to make a seperate thread for the thread  and also include thread repair etc.
thx
I think you're right in saying M2, M3 and M4 are the most useful sizes for Tamiya cars, I don't think I've used any other sizes on them ... maybe M5. TBH I don't think I've really used them that much for restoration anyway - it's generally only for making custom bits that they get dusted off & used.
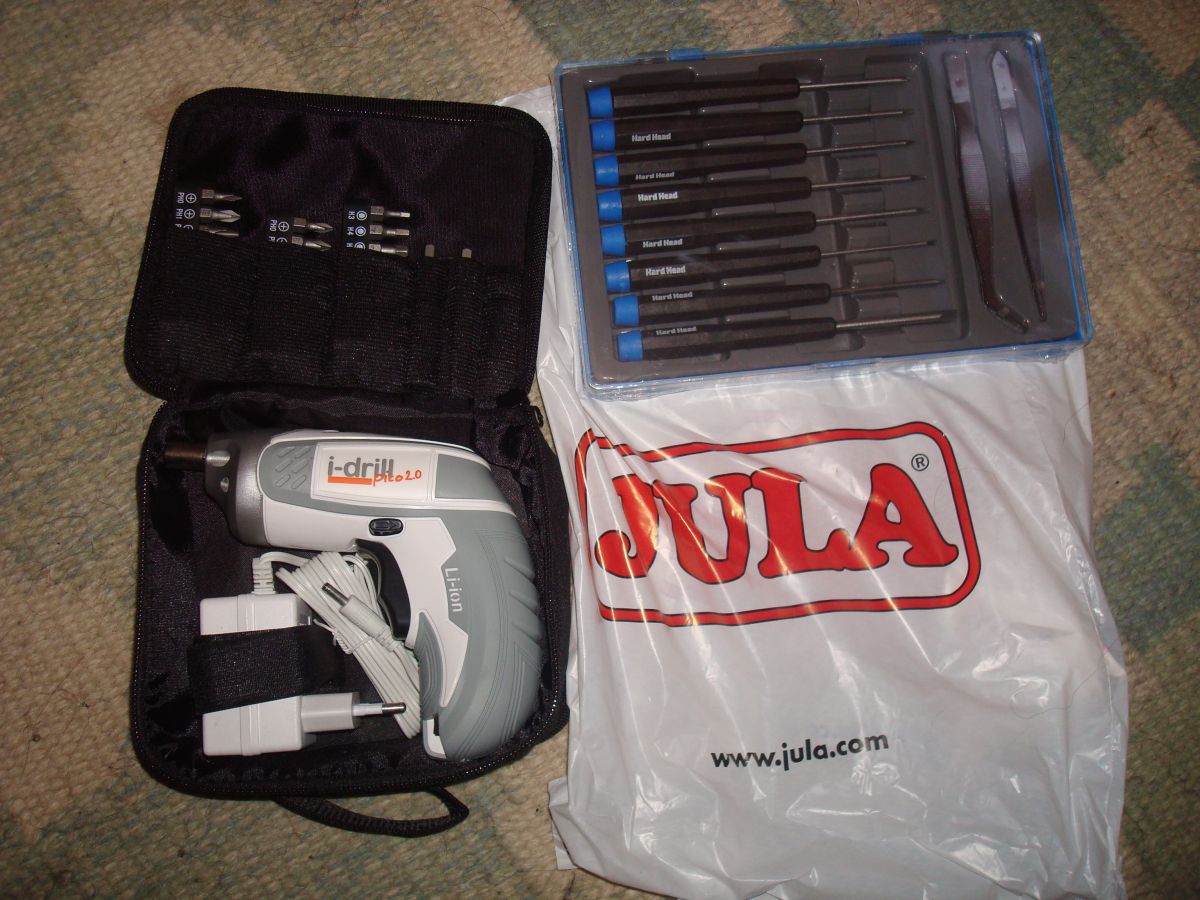
I don't know if there is an "ideal" setup, I suppose it would be just getting taps & dies in the sizes you need, nice holders for them, and a fancy toolbox to put them in. Check out
www.rdgtools.co...TOOLS.html & scroll down to the tool chest, for example. The advantage that sets have is they have all the bits you need (+ a lot you'll never use on RC) & pack away neatly. I have a M3/M4/M5/M6/M8/M10/M12 HSS set with 1, 2, & 3 taps & a die in each size + holders, folding thread gauge, that was 52 GBP 15 years ago, the only thing I've had to replace was a #3 M$ tap :blush: I also have another set for M1, M1.1, M1.2, M1.4, M1.6, M1.8, M2, M2.2 & M2.5, that has # 2 & 3 taps + dies in each size & a dual function holder.
Something I see in the way of "tips" online is that there are 3 sorts of taps - "taper", "plug" and "bottoming"... that just isn't my experience, which that there are #'s 1, 2 and 3 (#1 I guess is analogous to "taper", #3 is equivalent to a "plug" tap, and #2 somewhere in between) and a "bottoming" tap is something else entirely, and altogether rarer, it's not something you get in a set.
Drill sizes - 1.5mm for M2, 2.5mm for M3, 3.2mm for M4, 4mm for M5 ... those might not be the 100% "correct" sizes, but those sizes are freely available in packs of 10...
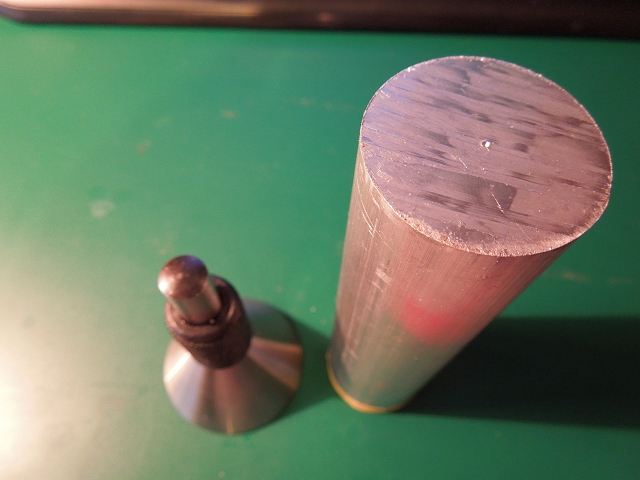
Toolholders ... what you get in the set
")
Cutting fluid ... you don't need anything on styrene & nylon, aluminium I don't tend to use anything, just be very careful to keep the thing free (small turns forwards & backwards) + keep running the taps right out to make sure nothing is getting bunged up ... mild steel I try to avoid it too (swarf is easy to hoover up off the carpet, oil less so
... this explains the broken M4 tap

), but when I do give in it's what's handy - usually 3 in 1 oil but I have used K&N filter oil, fairy liquid ....
Tips ... starting tapping in a lathe of pillar drill (with the power off, just rotate by hand) for just the first couple of turns helps get things straight to start with before relocating it to a bench vice.
Cutting an external thread (with a die) - try to taper the end of the bit to be threaded to help get things started.
The main thing is patience - tapping a thread very slowly is still a lot faster than breaking a tap & having to get a replacement, and, more than likely, having to make a new part to tap.
Turn a short way then Back most of the way - something like 120 degrees forward, 90 back ... depending of material & lubrication it could be 270 forward, 180 back.
")


 Ok! very interesting