Keyword

TOPIC:

Re: 58088 Sauber Mercedes C11 double rebuild 12 years 8 months ago #2023

the chassis is mirrored / motor+ damper
3 Old Tamiya's

Please Log in to join the conversation.

Re: 58088 Sauber Mercedes C11 double rebuild 12 years 8 months ago #2027

  • Edou
  • Edou's Avatar Topic Author
  • Offline
  • Hopping Mad
  • Hopping Mad
  • Posts: 6135
  • Likes received: 483
All true - but I discovered a difference between (black) vintage A parts and the batches that were produced later... :huh:
If you look at the front cross, you can see that there are now two "ears" missing from it.
This is only the case with a vintage part - the new one (which I had on it before) has some extra body mounts on it... :side:


Seems it's been like this with all the cars that got produced since the 58174 Street Devil...
It was kind of bugging me on this car so I put on an original cross. :whistle:

Tamiya used the pictures in the original manuals again for the rereleases.
Which leads to the conclusion that it is actually wrong in this respect.
The rerelease F40 also has black A parts but in the manual the original picture is shown. :dry:


The A4 part should be showing the extra body mounts.
I compared with the F40 because I don't have a 58351 (C11) manual...

Attachments:

Please Log in to join the conversation.

Last edit: by Edou.

Re: 58088 Sauber Mercedes C11 double rebuild 12 years 8 months ago #2095

  • Edou
  • Edou's Avatar Topic Author
  • Offline
  • Hopping Mad
  • Hopping Mad
  • Posts: 6135
  • Likes received: 483
Been doing some work on the body. Especially with tidying up the wheel arches and other lines of the car.
The previous builder did not deliver a master piece...
Picture above is the side I did not do yet and the one below is the lines after a fix up :


Here is a closer look at the wheel arches - the image on the right (of course) being the one where the blue arrow is :

[img size=300x250]www.mijnalbum.n...NL78IZ.jpg[/img][img size=300x250]www.mijnalbum.n...IOGSCO.jpg[/img]

Not a great job on the rear either :


The lines on the underside I have already straightened out here. These were quite terrible too...
But fortunately the body wasn't cut and smoothened enough rather than it being cut too much. :cheer:
The carbon fiber decals have also arrived so I'll give it a custom look. B)

Hopefully soon a next post will be one with a very interesting upgrade! :ohmy:

Please Log in to join the conversation.

Last edit: by Edou.

Re: 58088 Sauber Mercedes C11 double rebuild 12 years 8 months ago #2097

Nice work, Edou.
I love your attention to details!

-Lars
Signature now gets correct formatting if you edit it in your Profile. Use normal BBcode if you want.
www.tamiyabase.com was formatted automatically.

Please Log in to join the conversation.

Re: 58088 Sauber Mercedes C11 double rebuild 12 years 8 months ago #2105

  • Edou
  • Edou's Avatar Topic Author
  • Offline
  • Hopping Mad
  • Hopping Mad
  • Posts: 6135
  • Likes received: 483
Thanks Lars - I certainly like to look at the smaller things too. Even if the car will not go on a shelf...

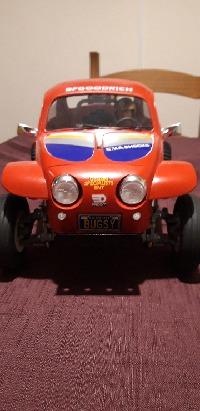
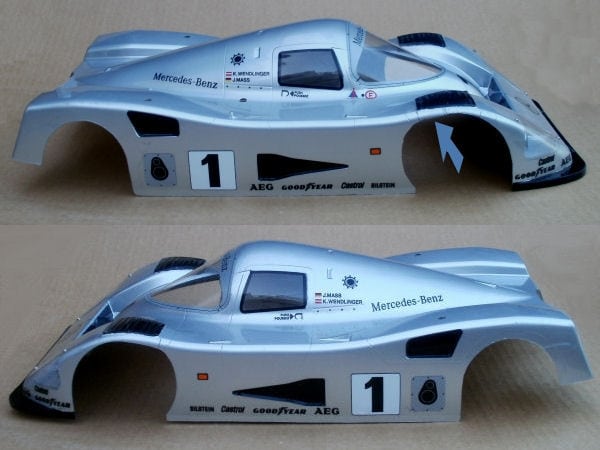
The body could use a respray but I'll postpone that for when I can maybe find an affordable airbrush. :cheer:
Having to do several bodies still, that will earn itself back a bit and the result should be very nice with this way of painting.

Since the first assembly I have done quite a few changes on the car.
First I'll conclude the part discussing the front end. It turned out I still had two issues to solve on the servo set up.

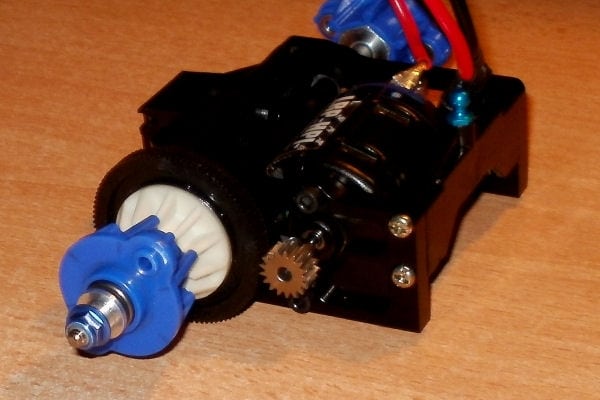
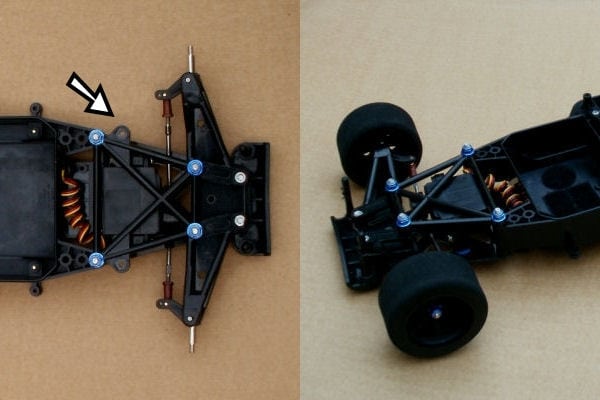
Main problem was that the ball adjusters that were connected to the servo were hitting the chasis plate.
In such a manner that it got stuck and wouldn't turn one way anymore.
This I solved by putting the servo on a (blue) 1mm washer that can be spotted on this picture :


That was enough to make the servo turn freely. :)

I also had to reattach the servo saver because I received a new transmitter as a gift.
It is the same one as I already had but in better shape. Altough it did not work at first.
My original Tx had to be fixed at some point with the steering stick not going fully neutral anymore as a result.
Making the new one functional wasn't all too difficult. I just soldered in some new wiring.

Of course the servo is mostly integrated into the front end of a Group C so disassembling everything is the only way.
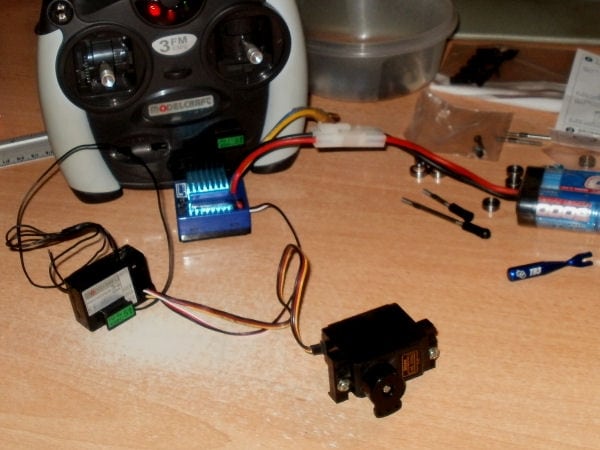
Then the electronics should be wired and put to neutral position before plugging in the battery :


The appropriate way to install a servo saver without creating offset...
That was a bit of extra work but well worth it. The steering is running very smoothly now :


Today I have also replaced the brownish (original) adjusters with some high quality black ones... :cheer:

Please Log in to join the conversation.

Last edit: by Edou.

Re: 58088 Sauber Mercedes C11 double rebuild 12 years 8 months ago #2126

  • Edou
  • Edou's Avatar Topic Author
  • Offline
  • Hopping Mad
  • Hopping Mad
  • Posts: 6135
  • Likes received: 483
Almost a disaster! :ohmy: ;)

I noticed the teeth on the optional spur were tiny to look at and a "dry run" reveiled quite some noise.
Seems it is of a different module from the normal Group C set up which uses AV pinions - 0.6 module.
This particular part is RD (Racing Developed) and uses the smaller 0.4M teeth.
Running the car like this, they would have certainly started to eat each other. :S

So that leaves two choices - put the regular spur back on or get some compatible pinions.
I have chosen the last... :)


A recipe for a small Rc disaster...

Please Log in to join the conversation.

Last edit: by Edou.

Re: 58088 Sauber Mercedes C11 double rebuild 12 years 8 months ago #2134

Edou your build threads are excellent and a real pleasure to follow with the pics you post only problem is im spending more time following your posts than i am building my own.....:laugh:
The following user(s) Liked this: Edou

Please Log in to join the conversation.

Re: 58088 Sauber Mercedes C11 double rebuild 12 years 8 months ago #2137

  • Edou
  • Edou's Avatar Topic Author
  • Offline
  • Hopping Mad
  • Hopping Mad
  • Posts: 6135
  • Likes received: 483
Thank you - good to hear. :)

Of course on my side I spent as much time (maybe more) in researching parts and talking about it in these threads.
Can't say that makes these builds go much faster. :pinch:

Most delay always comes with realizing I "need" new parts and waiting on these though.
A car that could possibly be built in one night, might take a few month because if this... :whistle:

Please Log in to join the conversation.

Last edit: by Edou.

Re: 58088 Sauber Mercedes C11 double rebuild 12 years 8 months ago #2146

Hey Edou, I was showing one of my friends your build thread and commenting on how cool the chassis was, when he told me he had a similar chassis from years back. We looking in his garage and we found it. Only difference was his is a Tamiya Street Devil 58174 from 1996. It is exactly the same except for the cross bracing plastic parts on his is green, and his didn't have a downforce wing on the back. He told me he could never drive the thing properly, and lost interest. But now he wants to get it going again. So we might post the rebuild soon. Looks like he will be putting the HPI 1969 camaro ss body on the shell.

More later.

P.S. Keep up the awesome work...

Please Log in to join the conversation.

Re: 58088 Sauber Mercedes C11 double rebuild 12 years 8 months ago #2147

  • Edou
  • Edou's Avatar Topic Author
  • Offline
  • Hopping Mad
  • Hopping Mad
  • Posts: 6135
  • Likes received: 483
Wow - that will be a very cool rebuild. B)

It's probably the rarest car around on a Group C chassis...
Of course the body is a preferred taste but I have learned to appreciate hot rods over the years.
Mostly because of the Discovery Channel! :laugh:

The shell is one of the few that were not produced by Tamiya but by Parma - the brand I have the carbon fiber decals from.


Putting on a Camaro body would be awesome... :cheer:


This one is a design by Chip Foose. Big fan of his work. Quite brilliant.
HPI makes some very nice shells - I have noticed that too.
Sticking to the original brand is also an option although it would become a Cuda then :

Parma '70 Cuda body shell

Gonna look sick either way... :sick: :cheer:

Any idea what the problem was with the set up for driving? Probably the ball diff adjustment...
I'll have some good info on that later in the thread btw.
Looking forward to the build and pictures! :woohoo:

Please Log in to join the conversation.

Last edit: by Edou.
Moderators: caprinutstingray-63AndyAus
Time to create page: 0.140 seconds
Cookies are required to make this site work. If you continue to use this site you permit us to use cookies.