A driver figure is a key part of the realism of RC vehicles - Tamiya produce probably the best in the mass market, from the simple head & shoulders seen in various buggies, to the full body Cheetah/XR311 driver, and of course the iconic Wild Willy. If your car is simply going to be whizzing about at a distance then you might get away with simply covering up the bare plastic, but if you’ve got any aspirations about it standing up to the close-up scrutiny it’ll get on a shelf, or being shown off to your mates or on t’internet, then something a little more involved is called for.
Due to circumstances beyond my control, this piece isn’t as complete as I would have liked. I’ll be concentrating on plaid shirts & jeans found on the boxart for the driver of Sand Rover (specifically last years’ “re-release”), and another re-re driver, modified for use in a re-re Bruiser. I don’t imagine you’d want to make too many drivers look like a lumberjack, but at least the technique for the jeans is transferable to other drivers - and to painting “clothing” in general.
Before we start, some basic tips:
- The standard of the finished driver will depend not only on your skill (yes, I know I have room for improvement there) and patience – but also on how much effort you put into preparing the driver figure before you touch a paint brush. Drivers are better than others, but in general on the Sand Rover driver you’ll find some nasty moulding artefacts on the knuckles, gaps on the cuffs, and poor matching of the sleeve halves – all of which need sanding and/or filling – IMO you can’t just paint it straight out of the box. Once you’ve done all that, two coats of white primer will help the paint stick. See the previous articles on paint preparation for a fuller explanation. Sand Scorcher/Monster Beetle/Blitzer Beetle drivers also need a lot of fettling, but others, like the Grasshopper/Hornet/Frog are very good to start with.
- Don’t ever use gloss paints on a driver figure (apart from on helmets) – it just looks plain wrong.
- Don’t use black – it’s just too intense at scale sizes. Tamiya produce two “off black” paints – XF-69 NATO Black and XF-85 Rubber Black – which are a very dark grey and an exceptionally dark blue/green respectively if you look at them closely, but nevertheless look black.
- Don’t use pure white on the suits on off-road drivers – clothing used like that is never that clean. A tiny bit of brown mixed in with the white will be much more convincing.
- Always put two coats of “base” colours on. You might think that one coat over bare plastic gives you a subtle shaded look, but really, no – it just looks like you only put one coat of paint on.
Note that I’ve made references to “drops” in paint mixing ratios throughout the text – a drop is obviously not a scientific measure, and will depend on how big your stirrer is, and the viscosity of the paints. I used to use cooks matches & keep on specifically for each colour, but found the way the paint was building up must have been wasting a lot. Now I have a bulk box of cocktail sticks, and use them only once or twice before binning them. Whatever you use, although the drop size may be different, the ratios should still be valid.
Plaid Shirts
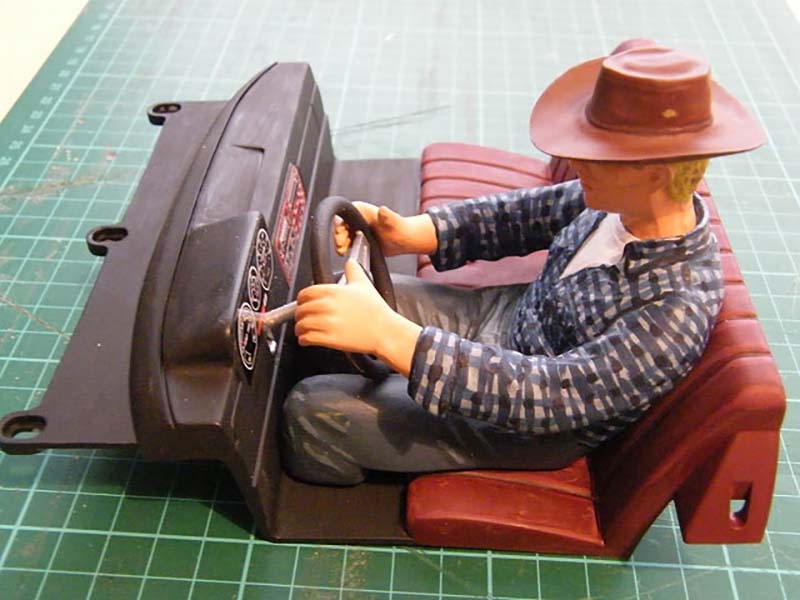
No, your monitor hasn’t developed a fault, there are two examples here. Both are re-re drivers, the red shirted went in a nearly boxart Sand Rover, the blue one has been modified to fit my re-re Bruiser :)
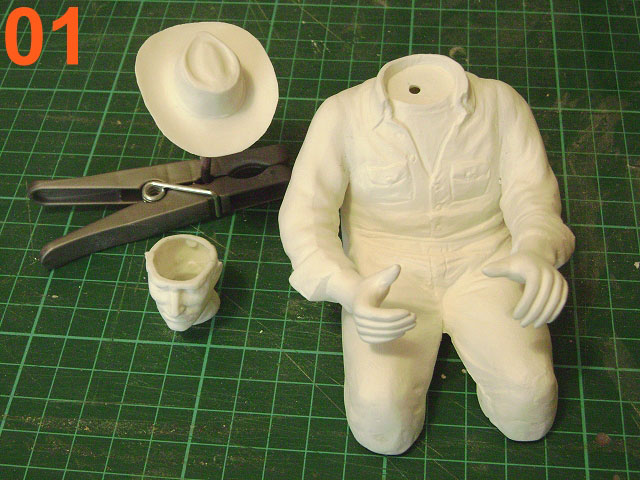
If you’ve rubbed down, filled, rubbed down again, and primed your driver, he’ll look something like pic “01”. If you didn’t, he’ll look very similar, but you’ll probably have a more frustrating time. Moving on ...
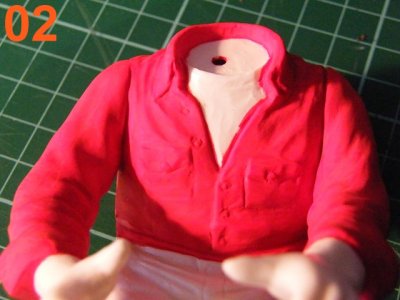
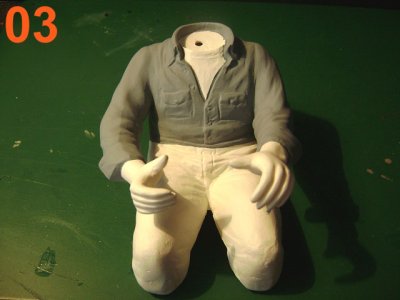
Base coats: for the “red” driver, this was simply three coats of Tamiya XF-7 Flat Red. For the “blue” driver, two coats of 4ml XF-2 Flat White mixed with 2ml XF-18 Medium Blue – this may seem like way more than you need, but you will be using it as a base for the later steps. See pics “02” and “03”.
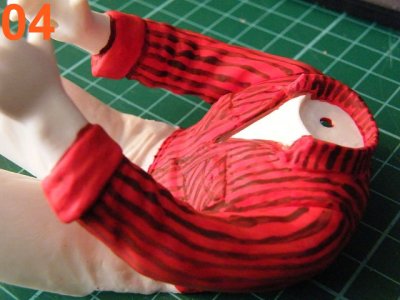
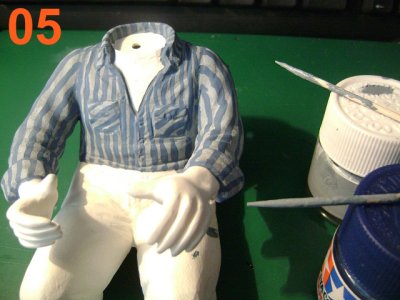
Start on the plaid by painting vertical stripes running top to bottom on the body of the shirt and from shoulder to cuff on the sleeve, remembering that the stripes need to be curved to accommodate the change in angle down the sleeve. I painted the stripes on the pockets and yoke (top back of the shirt) at 45 degrees. The paint should be more of your base colour, darkened down. For Mr Red, the recipe was 2ml XF-7 Flat Red + 6 drops XF-1 Flat Black (mixed in a pot so I could save the leftovers for the next step), for Mr Blue, I added about 10 drops of XF-8 Flat Blue to my light grey/blue base. See pics “04” and “05”.
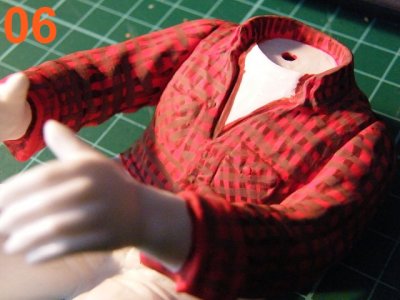
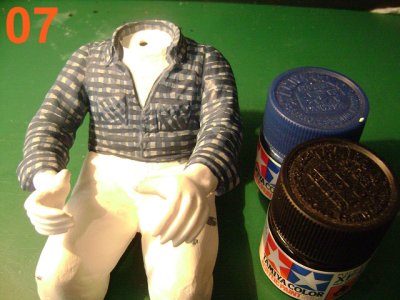
The horizontal stripes need to be even darker – “red” got some XF-20 Medium Grey added to the leftovers from the previous step, “blue” was something like 5 parts of my “base” mix to 10 parts XF-8 Flat Blue. See pics “06” and “07”.
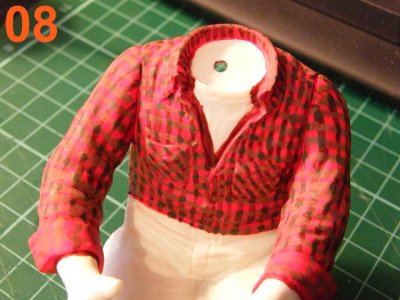
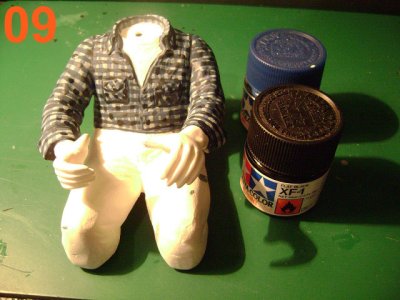
Overlaps (simulating where the weave goes over & under the other colours) need to be painted darker still – “red” got some black added to the “leftovers” pot – sorry, I didn’t record the exact colour or quantity, on “blue” I gave up on my paint from the previous steps, and instead used 10 drops of XF-8 Flat Blue & 5 drops of XF-1 Flat Black). Starting with a single horizontal line, paint every other intersection with the vertical lines – you may find it helpful to sacrifice one of your fine brushes by cutting the tip off, effectively making it a “chisel point”. On the adjacent horizontal lines, paint the pattern one intersection over. This is the key part to making the “shirt” look good ... hopefully you have steadier hands than me. See pics “08” and “09”.
Jeans
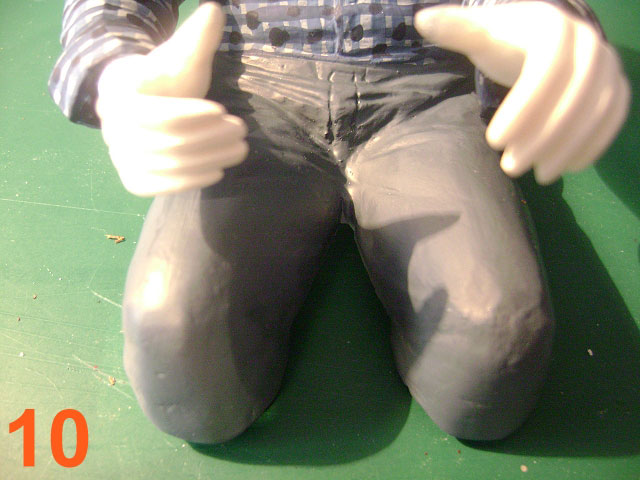
Moving on to troosers, I wanted a fairly dark denim look for my “blue” driver, so I started with 2 coats of XF-18 Medium Blue – see pic 10.
To reinforce the three dimensionality of scale cloth – remembering it will usually be seem at some distance away, you can add highlights, which are obvious enough, and “lowlights” ... which are the opposite, simulating slight shadows.
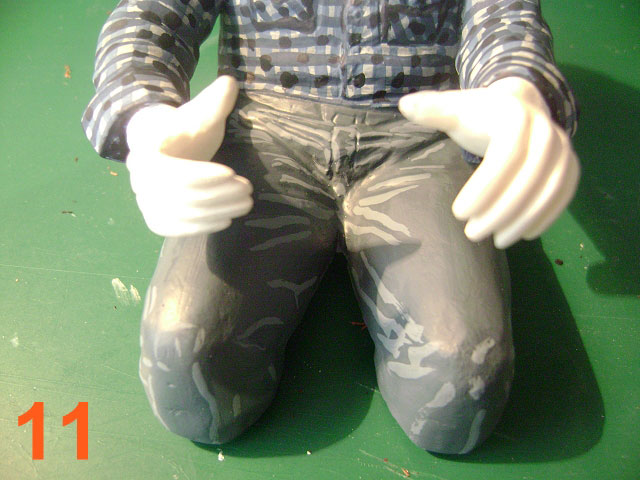
For the Highlights, mix some white with some of your base colour on a “palette” – I used 5 drops of XF-2 Flat White with 10 drops of my “base” colour, mixed on a plastic takeaway tray. Use a fine brush to paint the “high” areas – Tamiya help you out here with well sculpted figures. See pic 11 for an example – I was a bit overly heavy on the white it seems.
For the “lowlights”, use some of your “base” colour paint darkened down a bit (e.g. I used 10 drops of my “base” colour, mixed with 1 drop of XF-69 NATO Black), and paint the “low” points – generally either side of folds in the cloth, see pic 12.
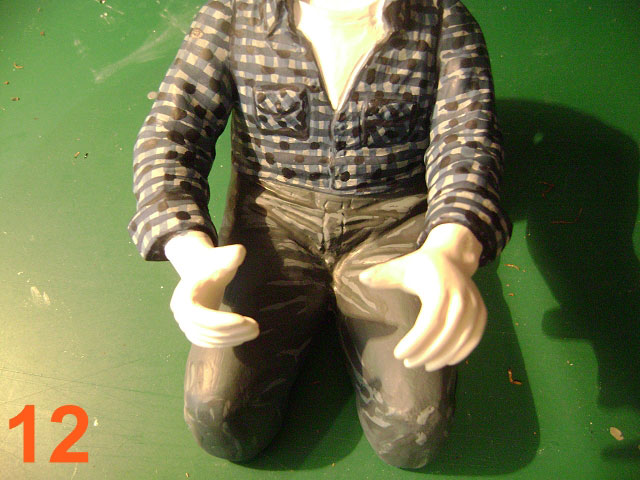
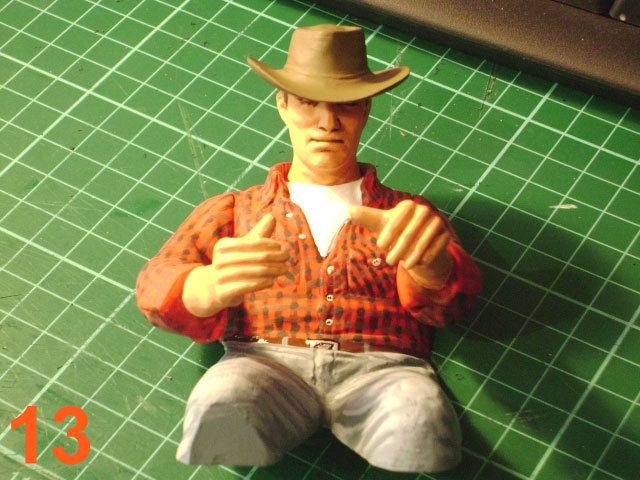
If your highs & lows looks too stark, you can try toning it down with a “wash” of your base colour – I used 5 drops of your “base” colour with 0.5ml of water, which evened things out no end, but didn’t come out that well in my photos ... so I’ll have to call on Mr Red to help me out here ... is that a “yes” Mr Red? A “maybe”? ;) (See pic 13)
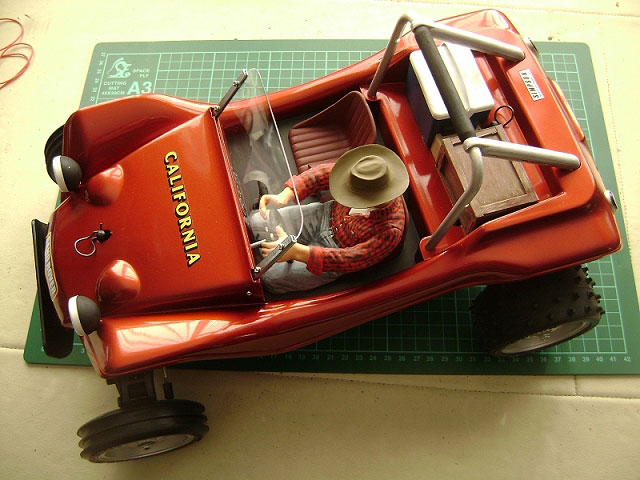
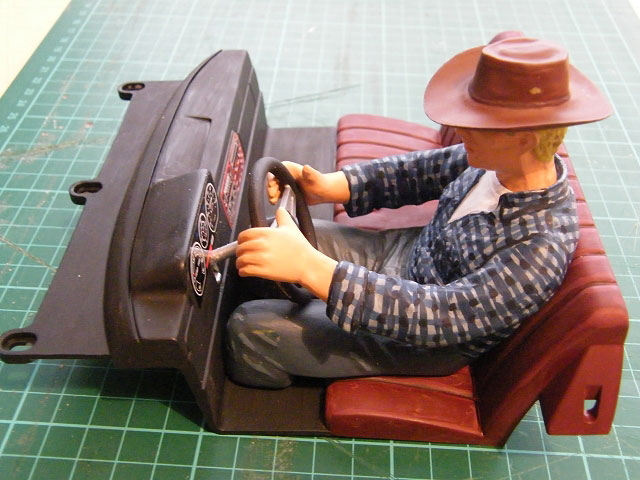
Once you’ve finished their hats, hands, hair & faces, your drivers will be ready to go ... always assuming you’ve finished their vehicle. Looks like Mr Red is off to the beach with a cooler full of beer, while Mr Blue is stuck making “Brrrmmm! Brrrrmmm!” noises in the garage :D
________________________
Written by TB member Jonny Retro


