


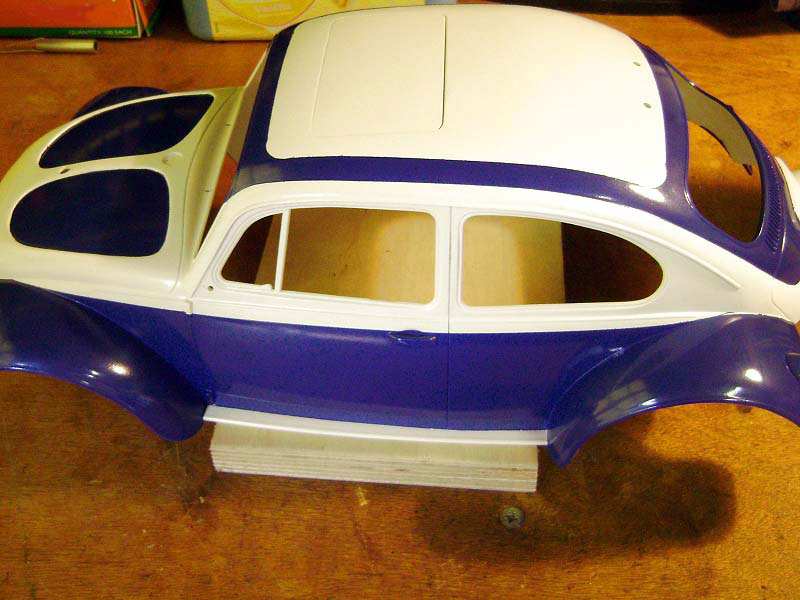
Just a quick note on which colour you should paint first: fundamentally, always put the lighter colours on first, e.g. for a box art Sand Scorcher, paint the white first, mask, then blue.
It’s much easier to cover light coloured paint with darker paint than it is the other way round: even if you can get decent coverage, it’ll be at the expense of details, and the light colour will always look darker than it ought.
This is the complete opposite of painting multiple colours on the inside of polycarbonate shells, which should always be painted dark colours first. For example, for a boxart blue & white Bigwig, you’d paint the blue first, then the white. That way, the white paint will serve to make the blue look brighter, whereas if you painted it the other way round, blue on the back of white would show up any unevenness in the paint thickness, and make the white a lot duller.
Masking
Having sprayed your first colour & left plenty of time for it to cure, apply masking tape anywhere that you don’t want to be the second colour. On the Scorcher this means the nose, the sections around the recessed “petals” on the bonnet, a section of the sides most of the way up the doors (including the windows & part of the roof), a little on the tail end, and a large area on the roof.
Easier said than done though: the Sand Scorcher (along with the FAV & the Rough Rider) has to be one of the most difficult box art paintjobs. While most of the car can be masked in gentle curves, or in multiple pieces of tape to achieve a greater angle, there are three areas that are more difficult.
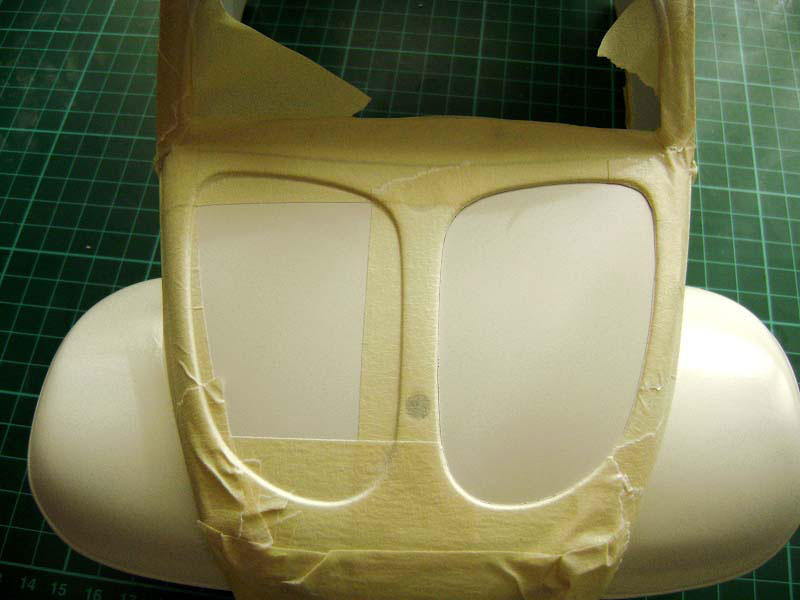
The bonnet “petals” and the engine cover area above the rear number plate I’ve found are best dealt with by applying overlapping tape over the whole area then carefully cutting in situ with a craft knife or scalpel: the next picture shows the left side already cut & the right side ready to be.
Cutting the above areas in situ makes sense, as there are edges to guide you. On the roof however, there’s no edge to make a good radius against, and any errors in the curves you make will be very obvious as it’s such a visible area. The last time I tried this, I tried masking the whole roof, sketching out the lines to be cut, and then cutting – but the ink remaining from the pen I used got remelted by the solvent in the paint when it came to spraying & ran badly.
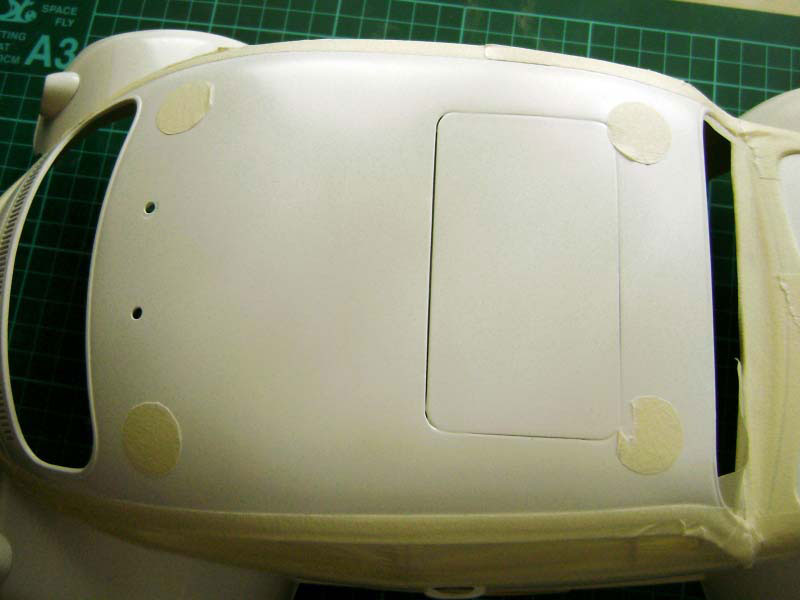

That time it didn’t really matter as the whole paintjob was a disaster, but still, time to evolve the old technique a little ... this time I precut pieces of tape using a 5p coin as a guide ( so no ink to worry about) then placed them with the “best” 90 degree sections outwards, then put on more tape to match those edges.
As I only wanted the insides of the wheel arches painted, I also masked the rest of the inside of the car, including the window apertures.

Painting a second colour like this is not really any different from a single colour, just with the additional note that there’s another good reason for putting on multiple light coats & letting them dry thoroughly: the less solvent that goes on, the less chance there is of paint bleeding under the masking. I mentioned before the possibility of spraying extra coats of the first colour to “seal” the edges, but I really was up against the clock here as in very early spring the portion of even a good spraying day is quite short & didn’t really think I had time for an extra coat or two of paint to dry.


I’ve found it’s important to get the masking tape on, the painting done & the tape off again in the one day, if not, the adhesive on the tape sets a lot harder & can pull the underlying paint off.
Lining
Getting perfect edges after masking & spraying a second colour is a skill I have yet to master, but even if you don’t need to hide a raggedy edge, lining can improve things visually, providing a lot of “pop”, as the vernacular would puit it.
The following pics are “before” & “after” examples of using Kyosho “Micron” 0.7mm black line tape, prior to clearcoating. The main points to note in using it are:
- Wash your hands beforehand: fingerprint oils will reduce adhesion.
- Unroll it very carefully, and don’t stretch it while you’re applying it: it will invariably lift from the bodywork, especially on curves, when it shrinks back again.
- Once it’s in place, put a bit of paper over the line, hold it still & rub down firmly with a thumbnail. (The paper will stop the line dragging & stretching).
- Keep an eye on it for 24 hours or so, rubbing it back down anywhere it’s lifting ... although if it’s lifting dramatically and/or regularly, consider pulling it off & reapplying it & being more careful not to stretch it.
- Clearcoating will help hold it down & hopefully prevent it getting displaced at the slightest knock.


________________________
Written by TB member Jonny Retro