


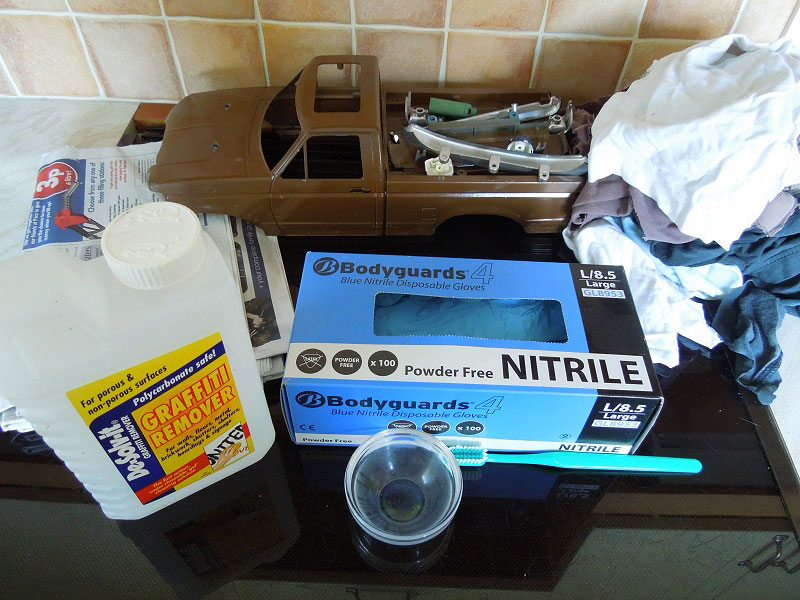
Any restoration of a hard (aka ABS, or Styrene) RC body will probably involve stripping off the existing paint. I’ve used brake fluid with unsatisfactory results, but for the last eighteen months I’ve been using “De-Solv-It” brand Graffiti Remover.
Reasons for taking off the existing finish vary - it may be damaged, have been done indifferently, or maybe the moulded details are beginning to get lost under multiple layers. If it’s a shell you’ve bought used, you probably won’t know what paint system has been used – and therefore whether it’s compatible with the new paint you’re planning to use.
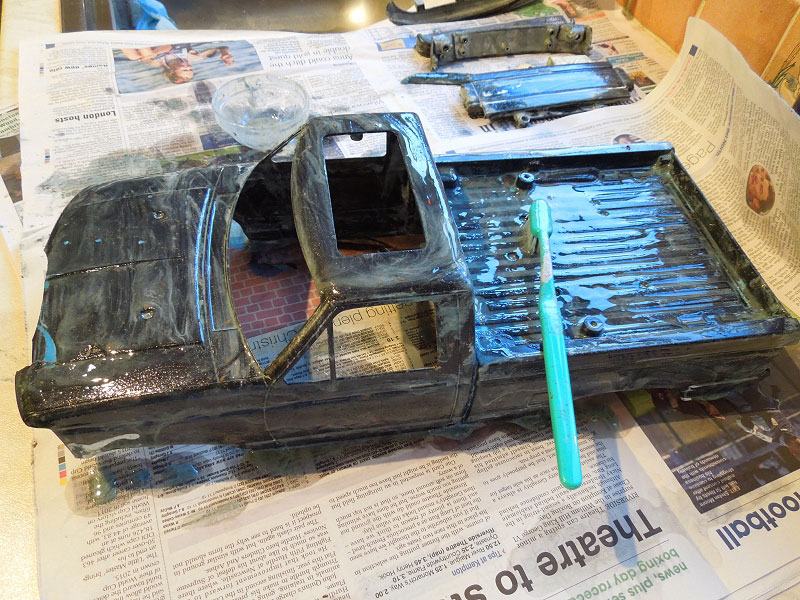
The example here is sadly not unusual – it looked ok in the eBay photos – but turned out to be white and blue, with a little sand colour all hiding under a crusty, nasty brown top coat.
After using “De-Solv-It” on several shells, driver figures and sundry scale bits, I can report that there doesn’t seem to be any adverse long term effect, either on the strength of the body or any paint applied afterwards. But please note that this applies only to De-Solv-It brand Graffiti Remover (sadly, only available in the UK, principally from Screwfix) - I can’t vouch for other brands.
I’ve found that it does take paint off polycarbonate shells – but as it also causes bad clouding, I can’t recommend it for that.
You’ll need:
- Gloves – only use blue nitrile gloves. These are impermeable to the nasties in the remover whereas latex, rubber & vinyl gloves aren’t. They won’t last long though, so plan to get through several pairs. It’s also worth doubling up, especially on the hand you’ll use to handle the bits (i.e. your left hand if you’re right handed);
- Protection for other exposed bits of skin – the alternative is to clean off any splashes once they start to sting – or forget about them & find a zit-like chemical burn the next day;
- Eye Protection – I haven’t tested it, but I would think getting a splash in your eye would sting like all get out;
- Ventilation – this stuff really does whiff, so using it outdoors, somewhere with a through draught, or somewhere with extraction... even so, you might want to think about when you can stink the place up for several hours without getting complained at ;)
- Glass jar - to decant a bit of remover into a bit at a time;
- Toothbrush – soft/medium bristles tend to be best, as they won’t flick stuff about quite as badly as a hard brush. Tesco value brushes are fine – and cheap enough to bin afterwards. DO NOT use scrapers/anything with a hard edge, the surface of the plastic will be softened & will gouge easily;
- Newspaper – to protect your work surfaces & soak up any run off. For white shells, unused newsprint (chip wrap) or brown Kraft paper would be better, as the ink can get lifted off the paper & get etched into the plastic;
- Rags – for wiping off spent remover;
- Washing up detergent & plenty of water – to wash away any lingering remover.
Moving on to the method:
1 – thickly brush on the remover, and leave to work ... dwell time is up to you, depending on how well it works on the particular type of paint 10 minutes may be enough, or it may take more like 30 to have an appreciable result;
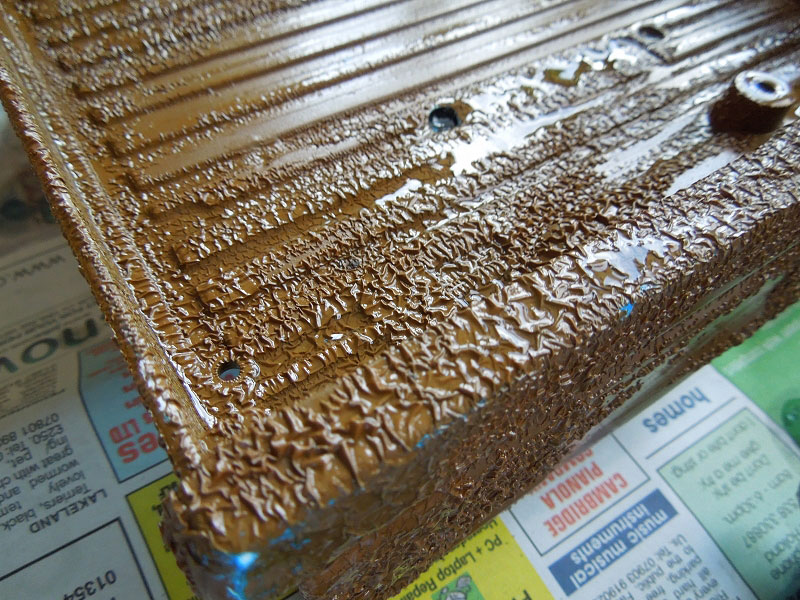
2 – brush more remover on & give the resulting mess a thorough agitation with your toothbrush, then leave to soak again;

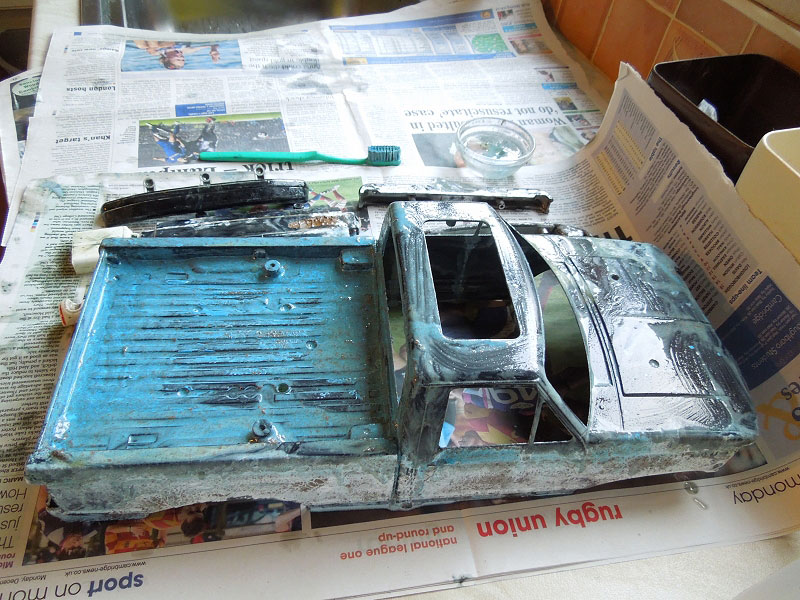
3- wipe off the spent remover & the stripped paint with rags;

4 – It possible that just one cycle has removed all the paint on the car ... if so, you can move on, but chances are you will have to repeat the apply – apply more & agitate – wipe cycle twice more to get a satisfactory result ... after that, you’re really into diminishing returns;
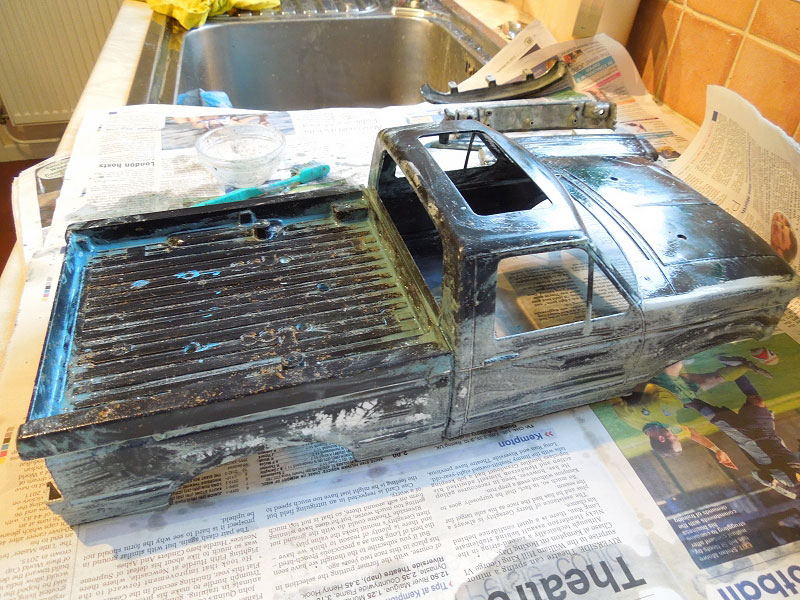
5 – rinse thoroughly, scrub with washing up detergent, then rinse again to wash off any remover still remaining;
6 – The shell will still be a little soft, and will smell of remover – so leave it to outgas & harden up for 24 to 48 hours;
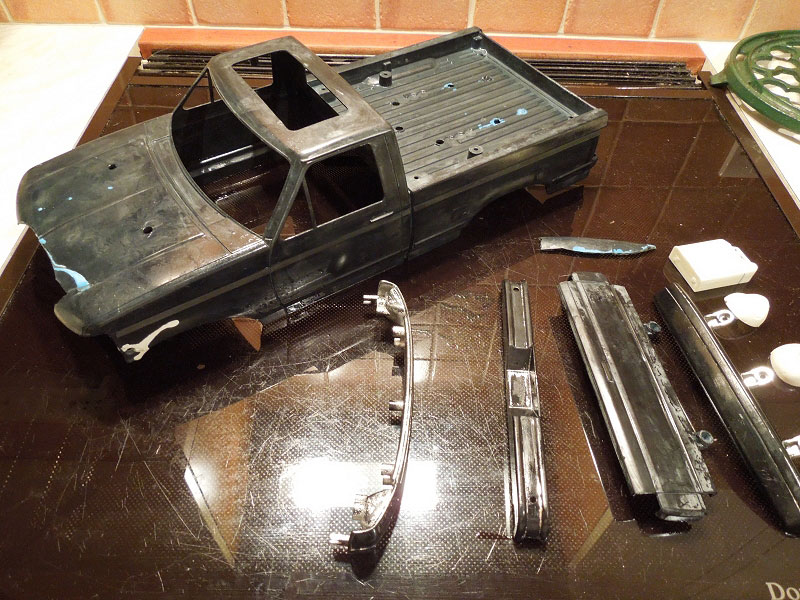
7 – Remove any lingering bits of paint (panel lines, incautious use of glue, etc) by delicate scraping/sanding.
The “stripping” part is now done – but that should only be the beginning for your bodyshell – chances are you’ll need to do some repairs & filling, before moving on to a full sand, guide coat of primer, more sanding and so on before getting on to repainting – take a look at my paint prep articles for more info. Although the example used in them is a new shell, the principles are the same for a stripped one. There’s no reason why a restored shell should not look as good as a new one, if you put the time in :)
________________________
Written by TB member Jonny Retro