

Introduction
Despite a claimed 1.4+ million examples of the real car being sold across many markets, variations and a 20-year lifespan, I don’t remember these being a common site on UK roads. My Dad, however, is very clear that my sister and I were always very keen to point out one of these as a “Fish Car” whenever we saw one. Famously, the DS was the BBC’s mobile camera platform of choice for covering horseracing (see this Blue Peter report for example) for some time before being replaced by the Citroen CX.
At the time of writing (end of May 20024) there had been very little news on the Tamiya RC Citroen DS since it first appeared in photos from the Nuremburg Toy Fair at the end of January 2024 (not even a link to a manual on Tamiyablog) so my concern that the body was pre-drilled, pretty much forcing you to use body posts and R-clips remained unanswered until I opened the box.
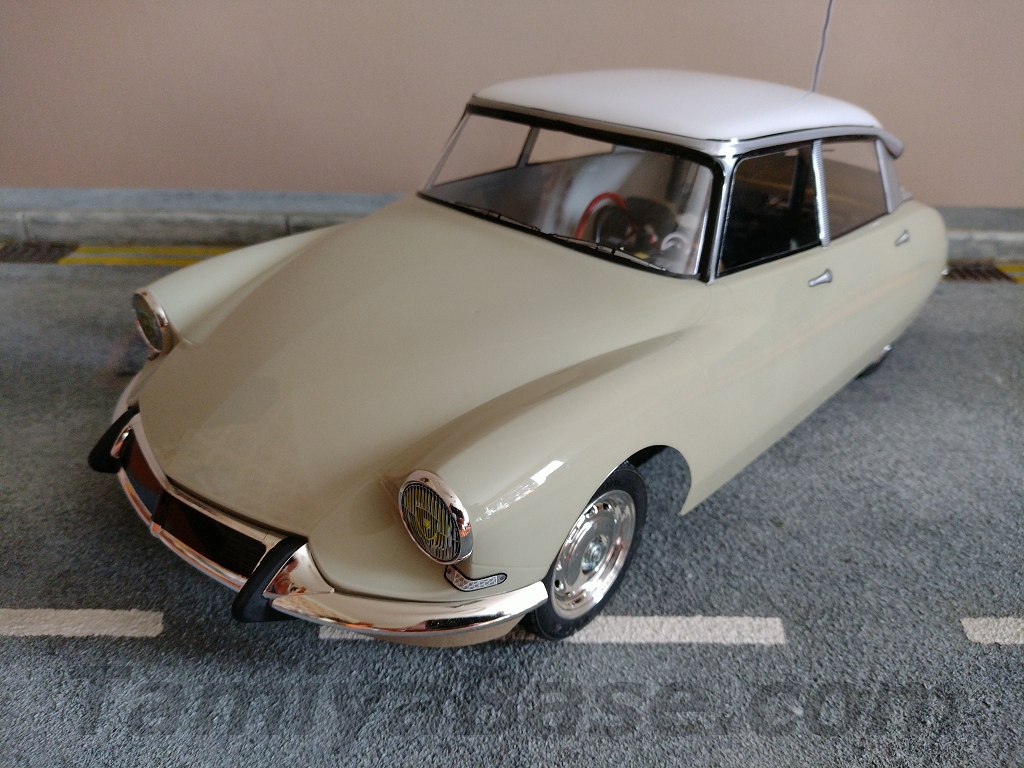
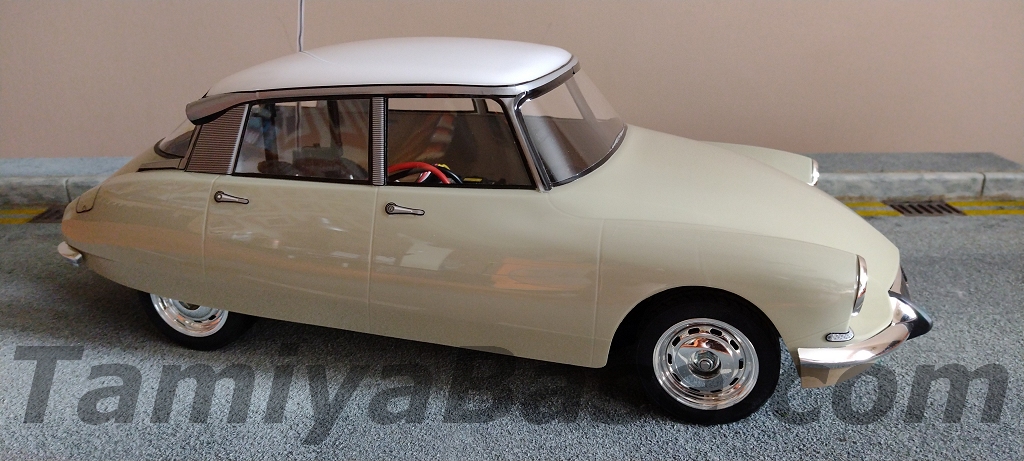
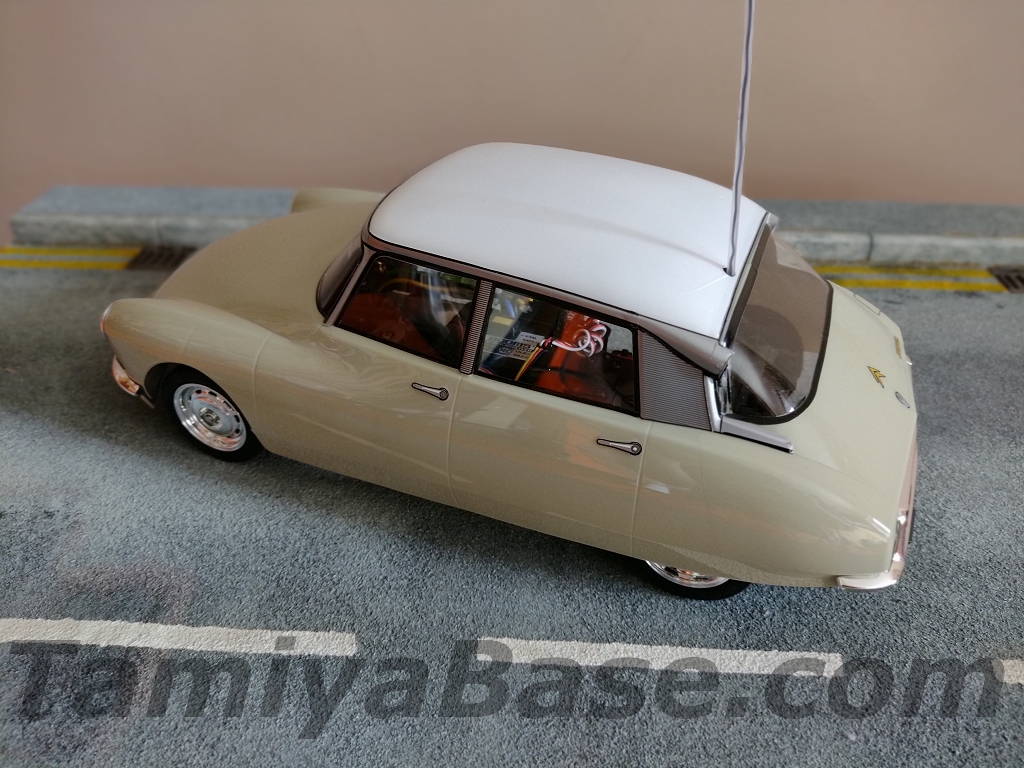
There are plenty of examples of the Citroen DS in movies and TV, for example a black DS appeared briefly in Family Guy, and John Wayne punches a checkpoint guard from the front right seat of a grey and white DS in The Green Berets (1968) – but French cinema is the natural home of the car. The white “flying” DS in Fantômas se Déchaîne (1965) is particularly notable, as is the black DS that jumps off a ramp and is then seen chugging down the Seine, but I took my inspiration from the “Beige Vanneau” and white of Momo’s car in Luc Besson’s Wasabi (2001).
There are plenty of example of the DS in Japanese anime too – this may well have had something to with Tamiya’s decision to release an RC version.
The MB-01 chassis has been used on several cars before, for the Citroen DS it should be built in the Front Wheel Drive and Long Wheelbase configuration – and there were hints that it would also replicate the wider front end of the original car.
Model Number: 58734
Official Release Date: 15th June 2024 (but showing as in stock at many UK online retailers from the 23rd of May, mine arrived on the 25th of May)
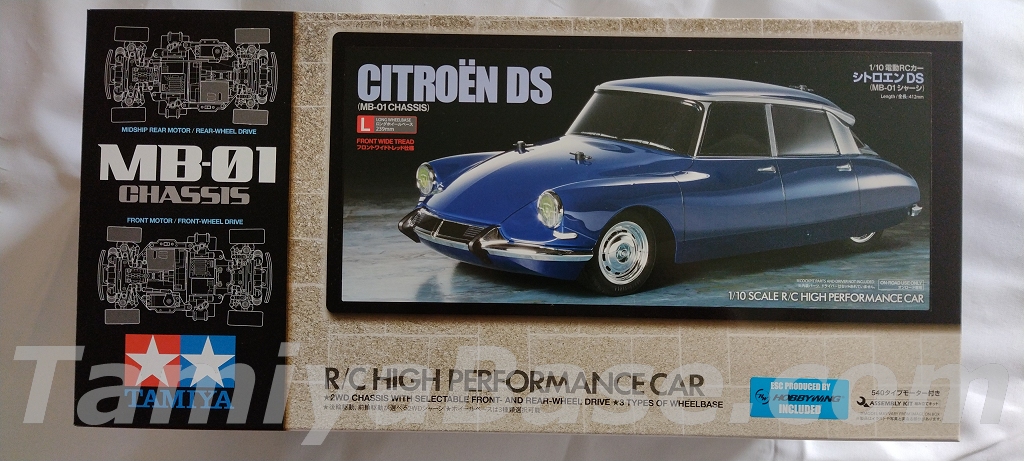
Chassis: MB-01 (in FWD, LWB configuration, with “wide track” front end)
Scale: 1:10, apparently …
Bought From: Jadlam Racing (www.jadlamracingmodels.com).
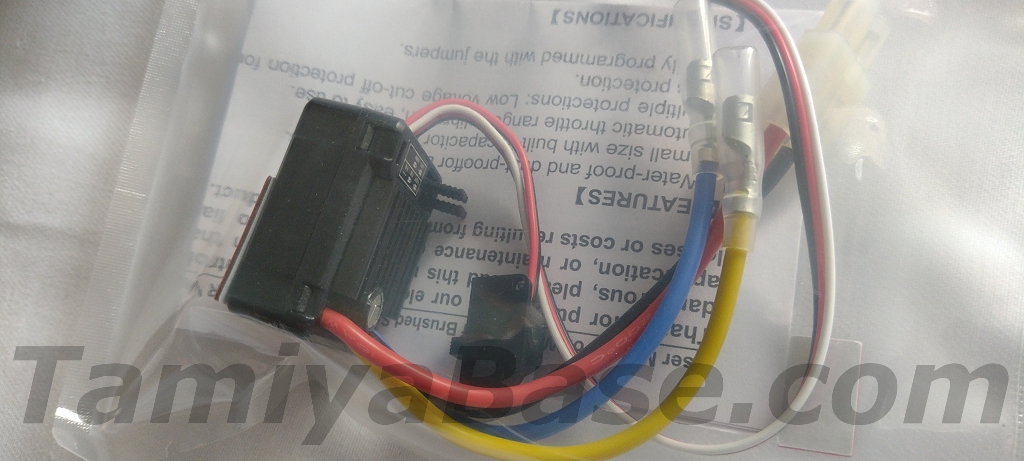
As the kit comes with a (Hobbywing) ESC, the only bits I’ll be adding are an Acoms “Think Happy” era Techniplus stick radio and as many metal bearings as I have.
Nb: citroen-ds-id.com has more technical information on the DS line than you can shake a stick at.
Nb 2: You’ll notice that I haven’t always used the diacritic (Trema - dots over the o) in Citroen – my UK keyboard doesn’t have it & a lot of my compatriots wouldn’t know the difference between a Citroën and a citron anyway ;)
The Box
The box is one of the “shoebox” types seen with M- and CC- chassis cars amongst others, has a similar type of generic / chassis based full colour print, and added stick-on panels on the top and ends showing a photo of the finished article rather than a traditional hand drawn representation.
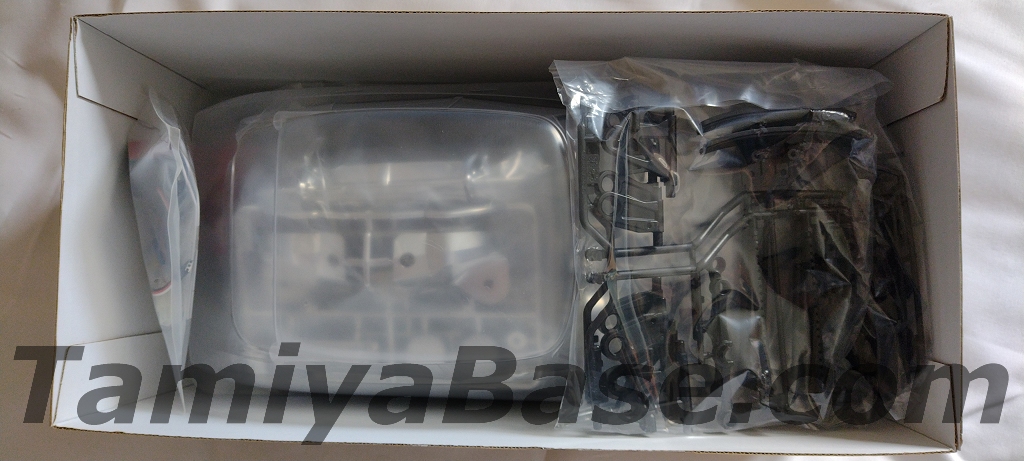
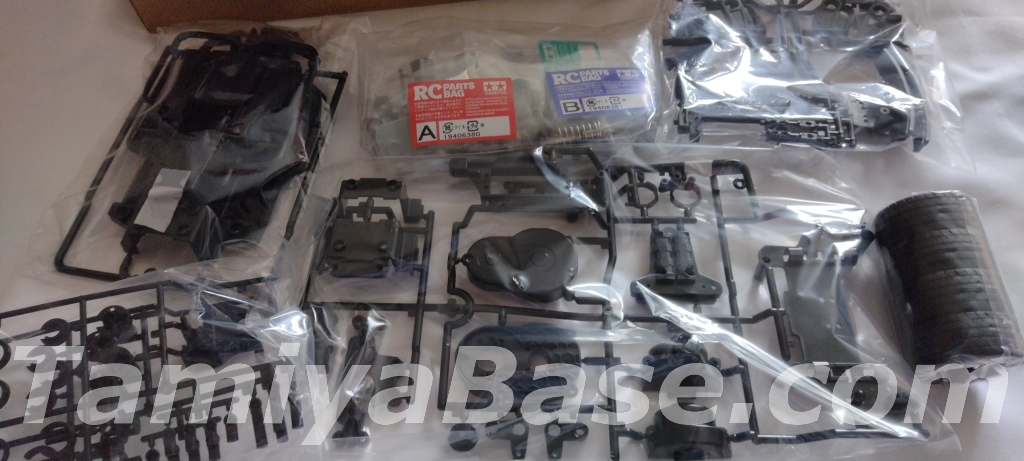
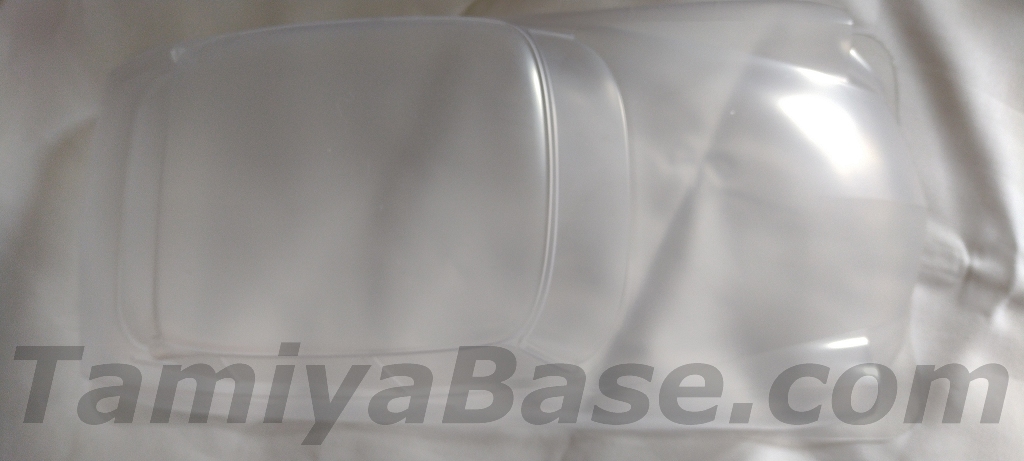
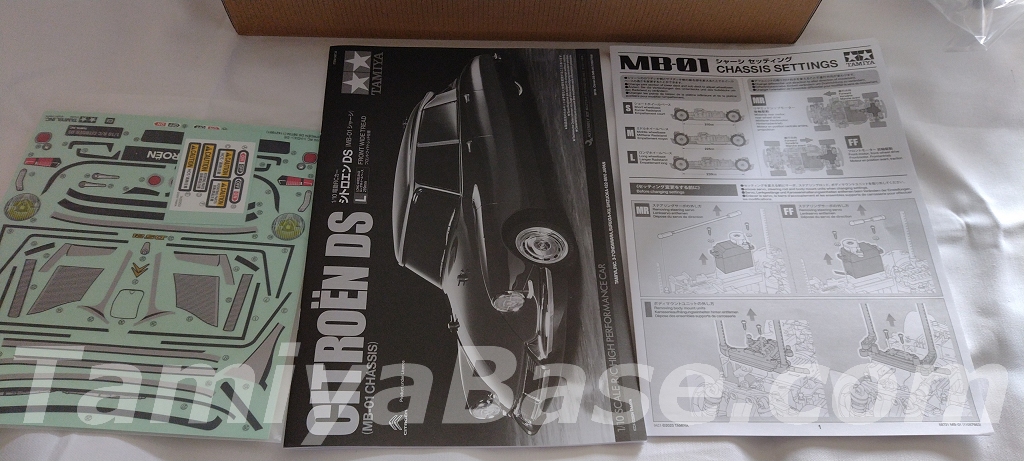
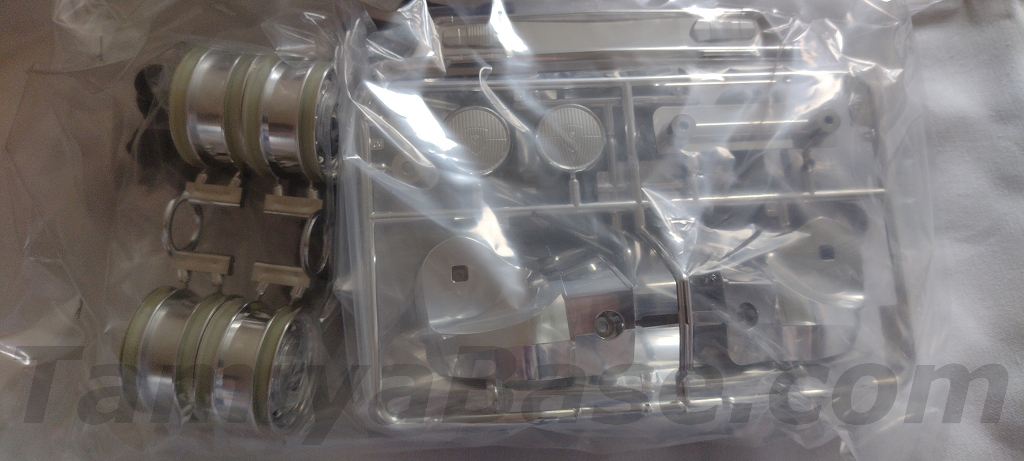
Inside are all the part frames/sprues you need, along with screw/parts bags, an ESC, wheels & tyres, uncut* polycarbonate body, sticker and window mask sheets, a manual for building the kit, and a separate thinner manual for changing setups to RWD etc. Good news – for me at least - the body post holes aren’t predrilled so I can use magnetic body mounts instead.
* See later
Chassis Build
The MB-01 chassis was first introduced in August 2023 under the 58721 Fiat Abarth 1000TCR Berlina Corsa and can be built in several configurations: MR “Midships Rear” (rear wheel drive with the motor in front of the rear axle), “High Motor” (still rear wheel drive but with the motor higher up for shorter/taller bodies), and “FF” (front wheel drive, motor behind the front axle). It can also be built in short, medium, or long wheelbases – 209, 224 or 239mm, respectively. The RC Citroen DS also has a wider track at the front – just like the rear car – the extra 9mm at the front (174mm vs 165mm) is achieved with longer front axles and thick hex hubs.
Bearings required (unless you use the bushings in the kit) are four 850, twelve 1050 and two 1280. Due to getting the kit sooner than expected and not wanting to lose the opportunity of building it over a long bank holiday weekend, I used what I had – plenty of 850s, only ten 1050s and zero 1280s :(
I don’t believe any of the part sprues have been used on previous chassis, and as I’m writing this before have hand a chance to run the car this is supposition – but the “new” MB-01 chassis seems to have been designed based solely on a drive to fewer metal parts. It certainly hasn’t got rid of the usual Tamiya bump steer issues, in face it has it on all four corners. I don’t think it can be any better balanced than its predecessors, for instance the steering servo on one side doesn’t weigh the same as the 540 motor.
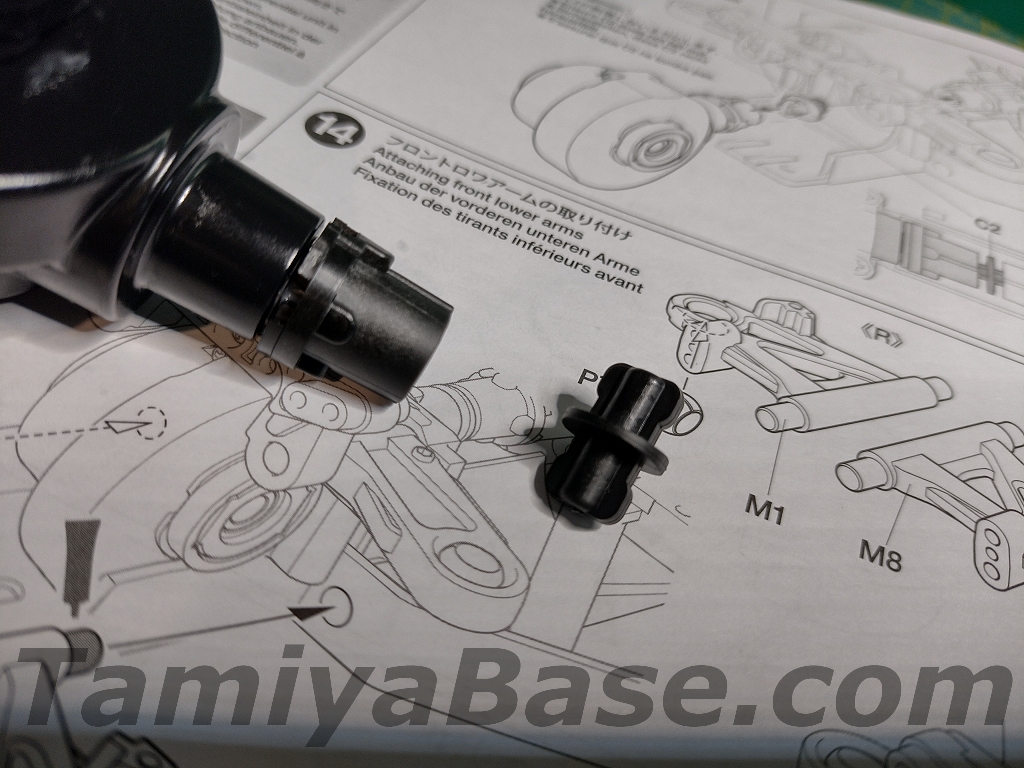
The all-plastic diff – running only on grease in a plastic housing – and the ludicrously short “driveshaft” in FWD setup look to be particularly weak points.
Things that I do like are the improved ease of adjusting rear toe-in/out, ride height adjustment on all four corners via long grub screws in the top arms, and battery retainers that flip up and remain fixed to the chassis – though you can still lose the bodyclips ;)
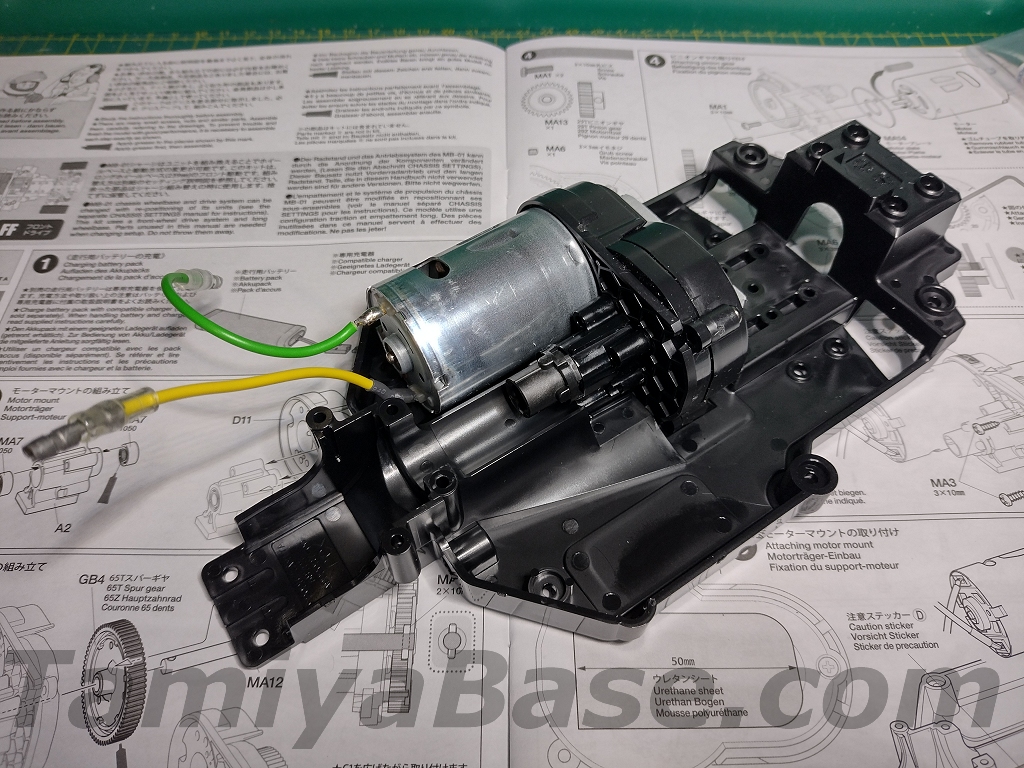
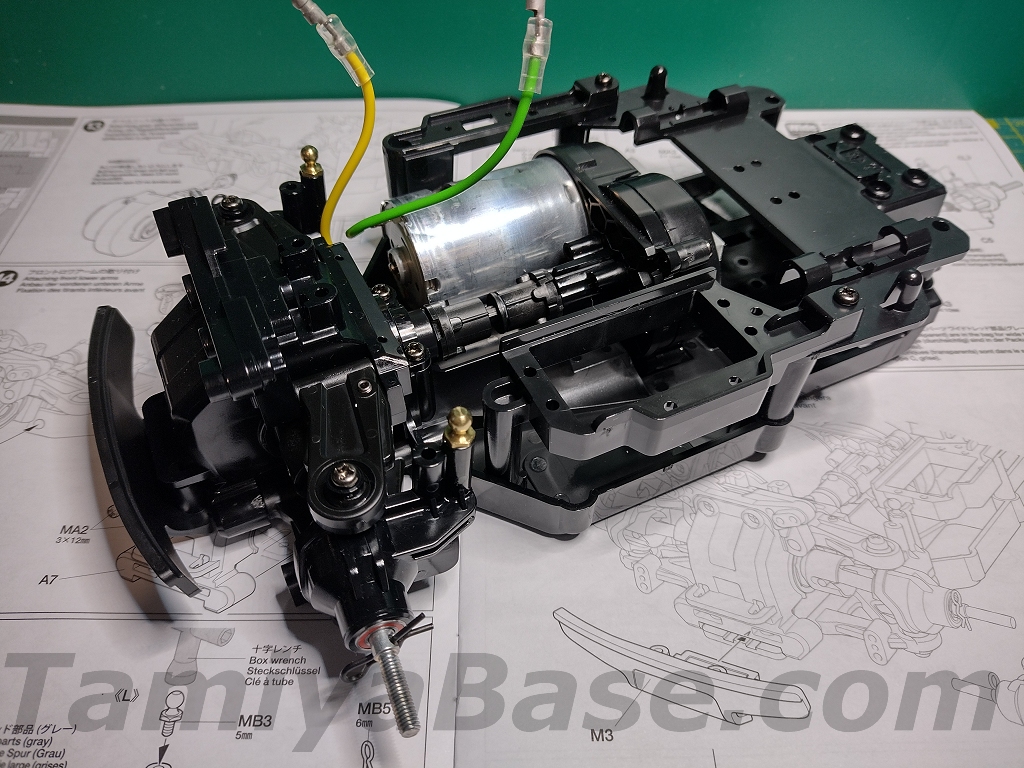
The first double page spread, steps 1 to 6, suggest putting a battery on charge, and see the primary/reduction gearbox put together and installed in the chassis lower deck.
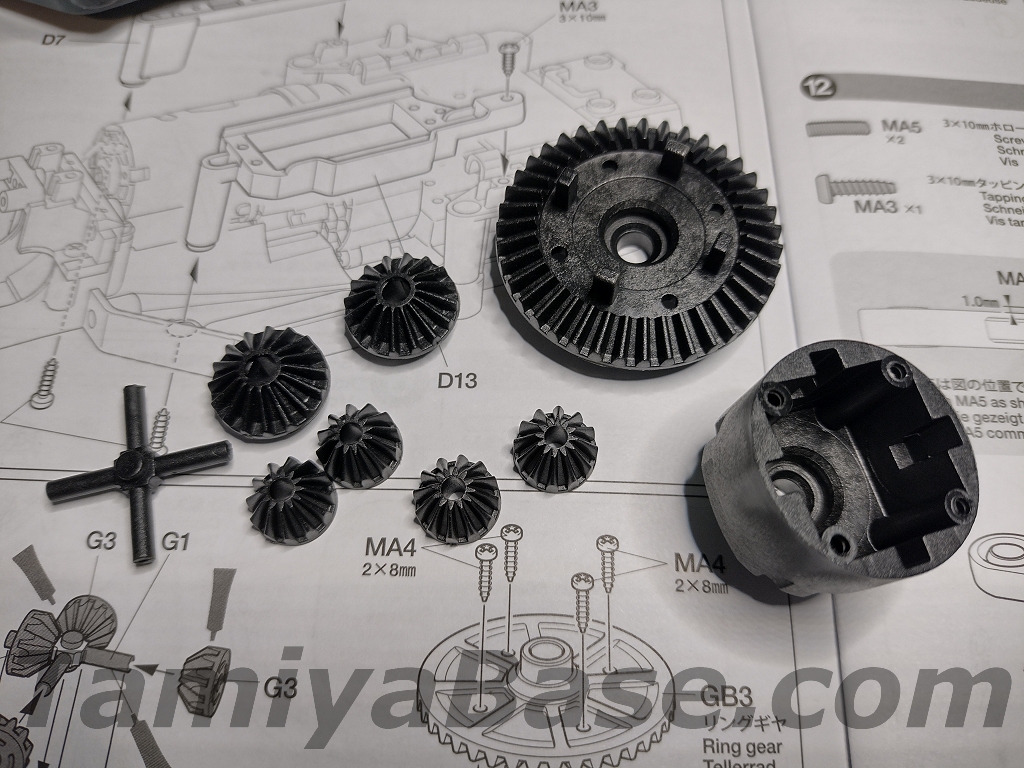
Steps 7 to 12 are fitting various mounts to the lower deck, building the all-plastic differential and housing, and starting on the front suspension.
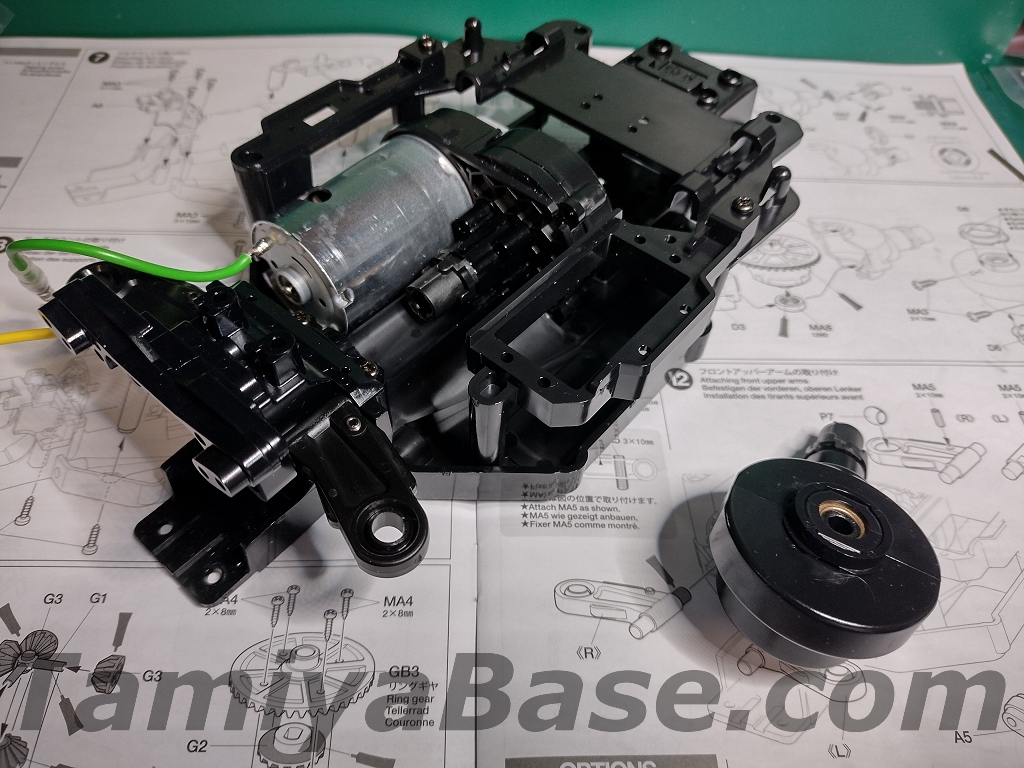
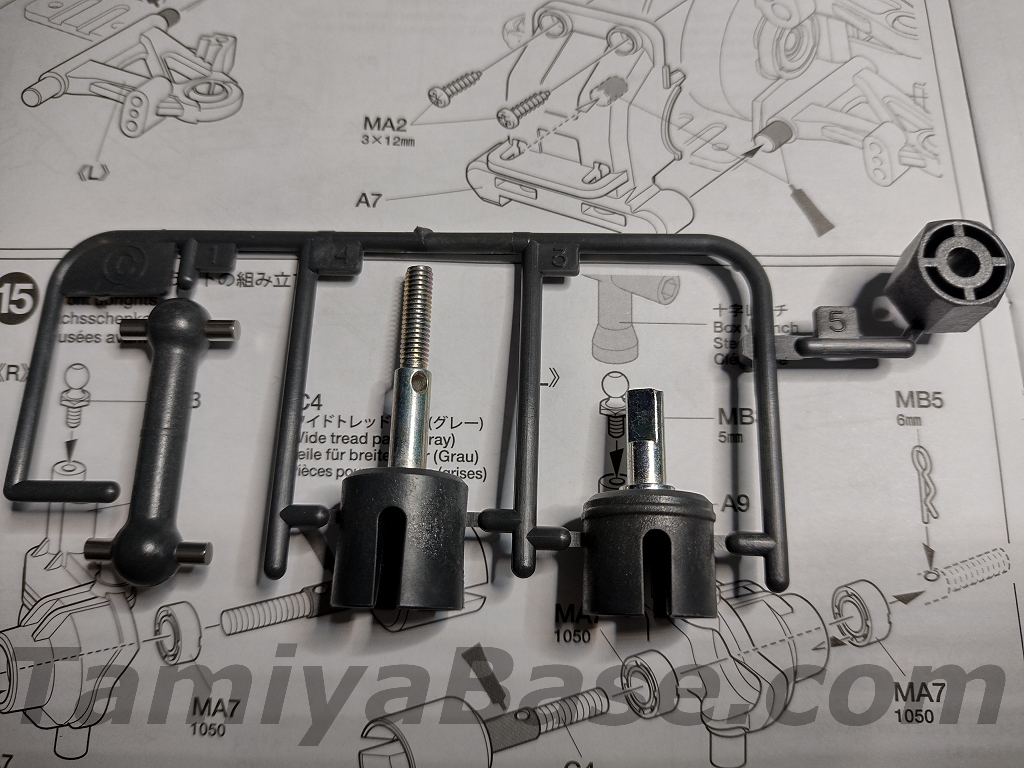
The third spread (steps 13 to 17) see the diff housing fitted (note the “driveshaft” and additional “wide track” parts), and most of the front end completed.
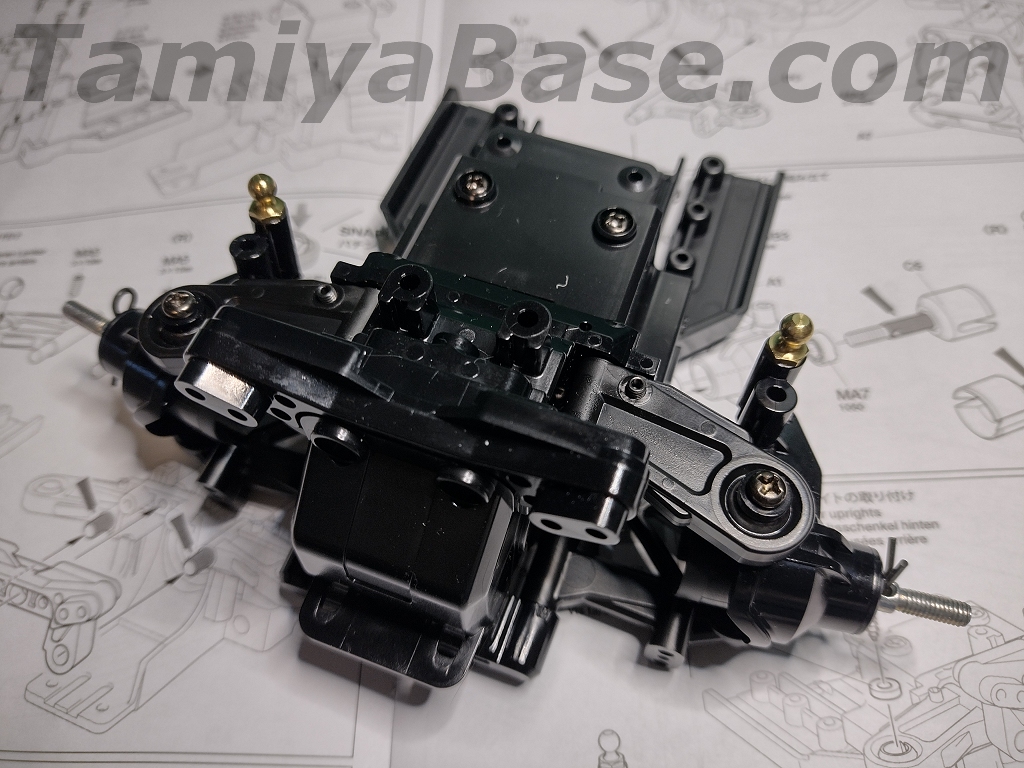
Steps 18 to 23 see the rear end built up to a similar point – but on a separate sub deck.
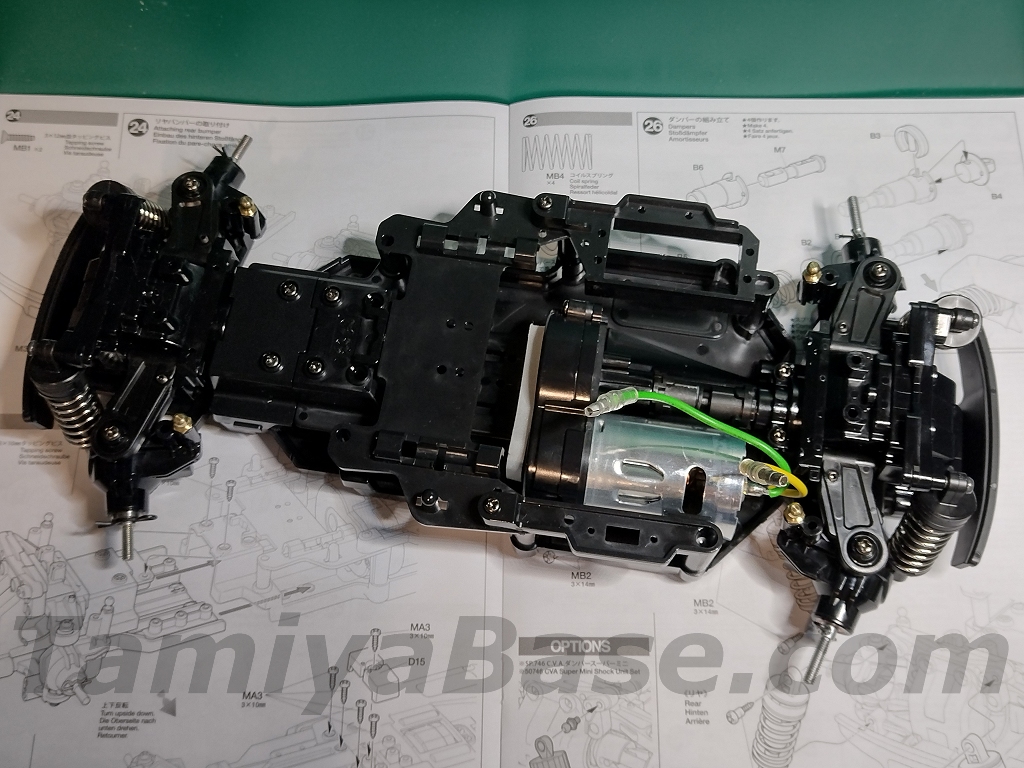
Steps 24 to 27 over the next two pages see the rear end fitted, and the undamped “dampers” clipped together & fixed to the chassis.
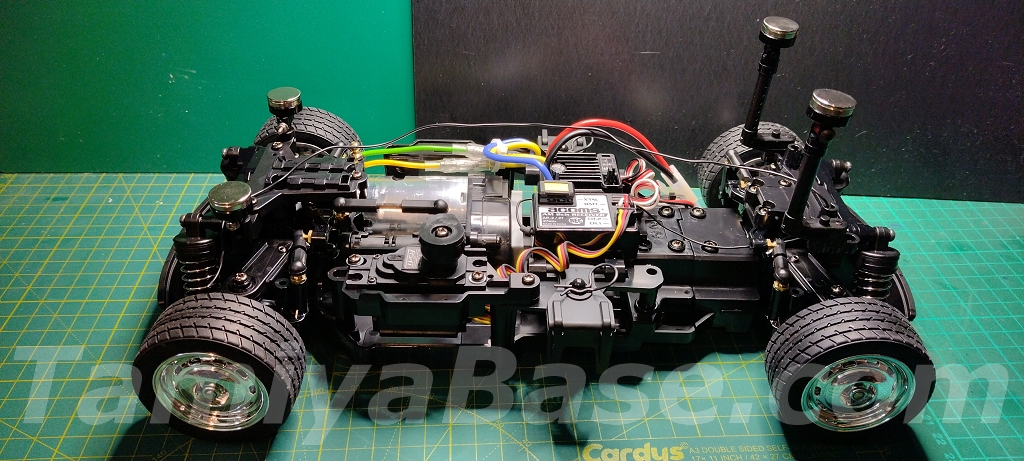
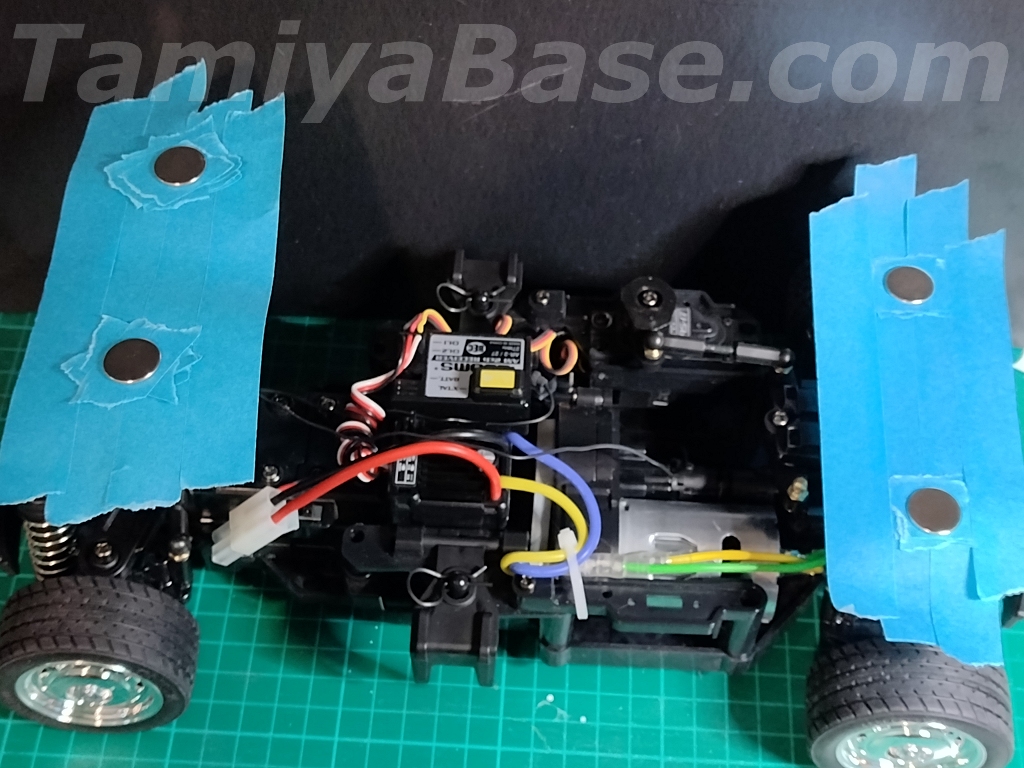
Steps 28 to 31 see the steering servo (not included) set up and fitted along with the ESC, and receiver (again, not included). Radio control receivers being powered directly by electronic speed controls has been the norm for getting on for two decades now, and many radio sets do not come with 4xAA holders and switch looms, and Hobbywing ESCs have been a standard part of Tamiya RC kits in many parts of the world for several years now, so it’s a bit disappointing to see a reference to a “receiver switch” being fitted with screws – the Hobbywing switch doesn’t have threaded fittings, and the very short lead means it can only go in a very limited number of places. Foam tyre inners are not included.
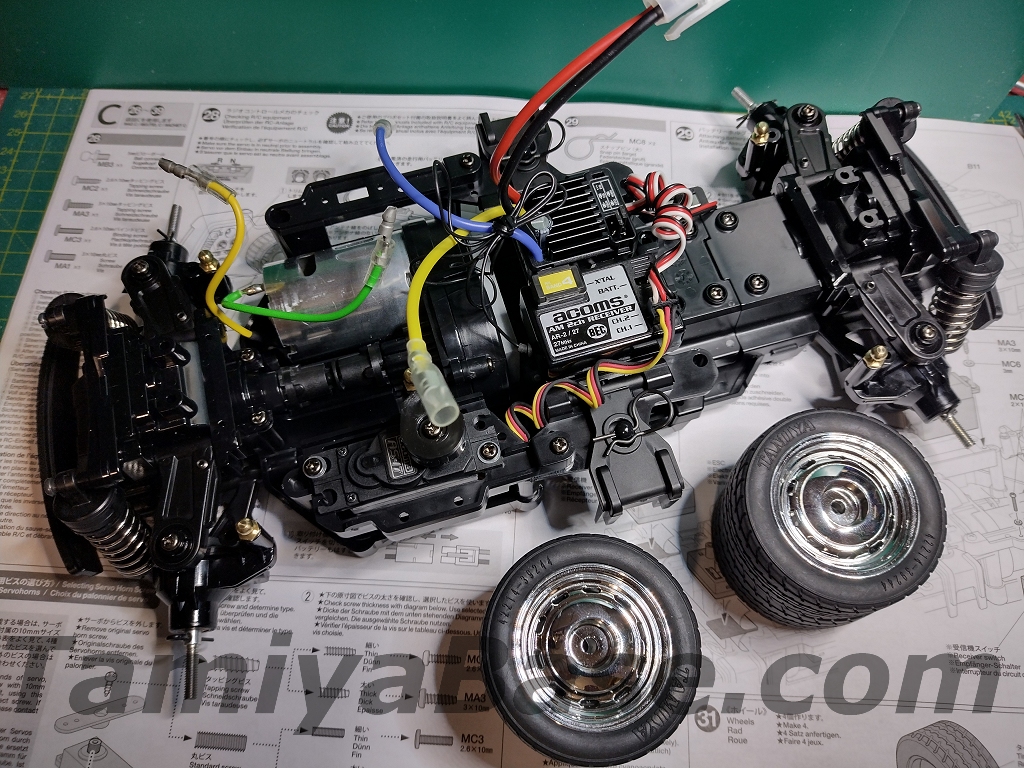
Steps 32 to 36 see the wheels fitted, cables tidied, and sub-assemblies for the front and rear steering/alignment links and body posts.
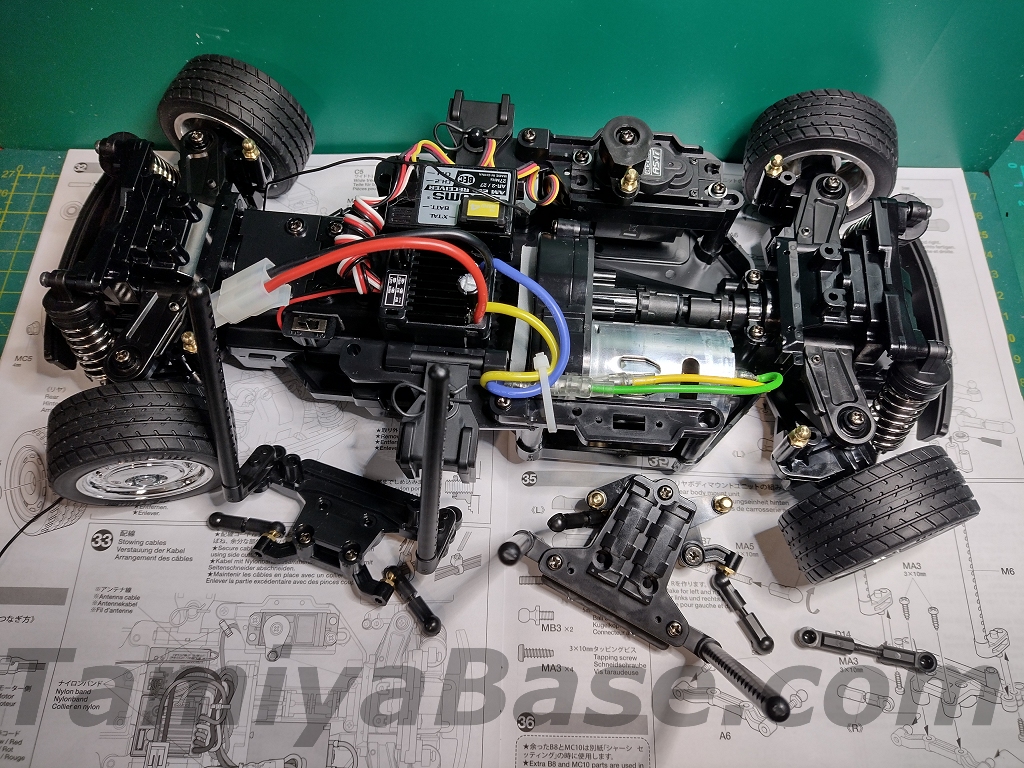
The final single page dedicated to the chassis build (steps 37 to 39) see the body mount units fitted, along with a battery, antenna pipe and transponder holder, if required.

After that, it’s all about the body.
The Body
Step 40 refers to drilling the various holes required in the body for body posts and fittings. Tamiya suggest using a pin vise to start and expanding the holes using a reamer. Omitting the body post holes, I started with a pin vise but used regular drill bits, creeping up on the required diameter (mostly 6mm) by going up one drill size at a time. A moment’s inattention saw me put a 20mm long scratch in front of the antenna hole – but luckily, I only seem to have gone through the protective film.
Step 41 is cutting the excess off the body - Tamiya suggest using scissors for cutting out straight parts of the body and a modelling knife for the curved sections.
There is a note that some bodies may be pre-painted or have other work carried out, so it’s possible that future examples of this kit may have the body cut out or have all the holes pre-punched.
I used a new scalpel blade (Swann Morton 25A blade in a #4 holder, which are now almost impossible to obtain in the UK thanks to legislation now seeing legitimate retailers and buyers as functionally equivalent to scumbags buying giant “zombie” knives for nefarious purposes from questionable sellers - whilst seemingly doing nothing to stop the latter) to very carefully and lightly score around the separation point, going over the thickest and curviest areas multiple times before carefully folding and tearing away the excess.
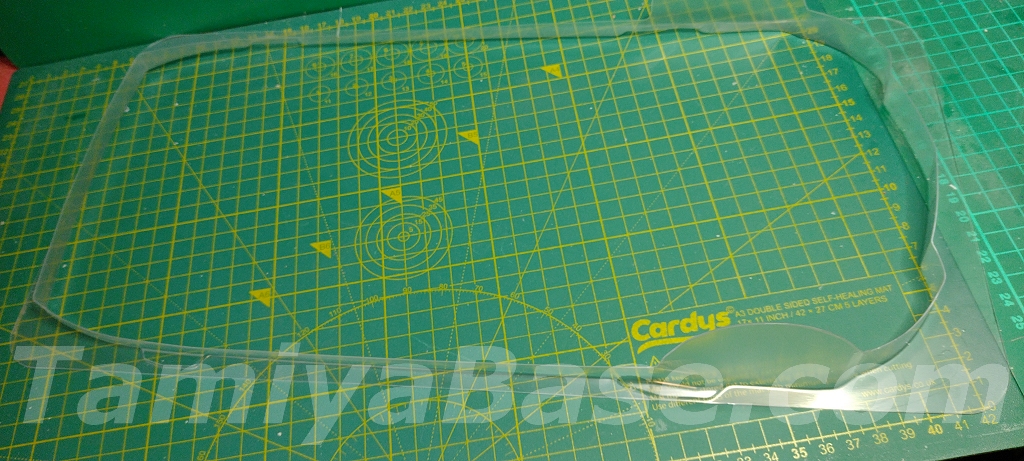
Some areas needed a bit of touching up with a sanding block and Dremel sanding drum, I then lightly sanded the edges.
An extra step for me was to fit some magnetic body mounts at the right height – this involved cutting each body post down a small amount at a time, refitting the body and measuring carefully before cutting again. In the end, I had to remove the lower part of the front mounts and fix them through the lowest body post hole with M2 fasteners – something I’ve had to do on a lot of M-chassis cars too. The rear posts were trimmed down until the straight part of the body under the doors was broadly parallel with the bottom of the chassis.
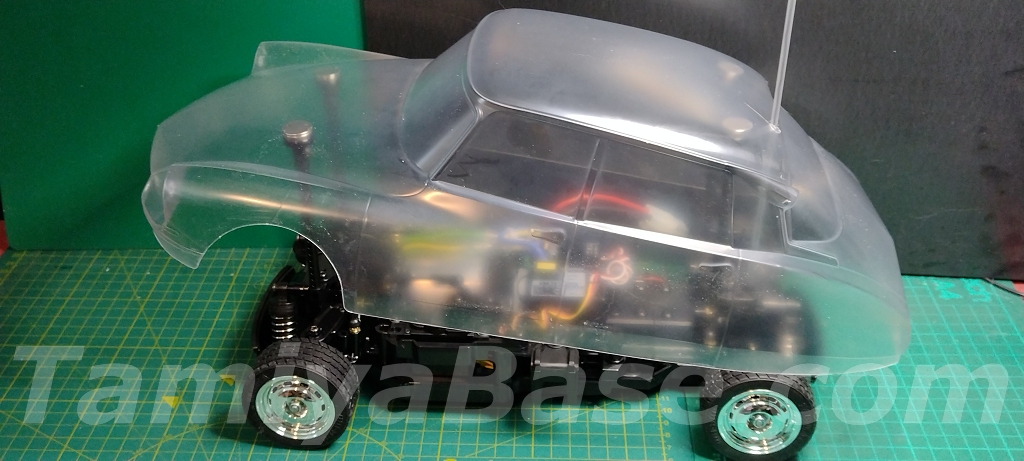
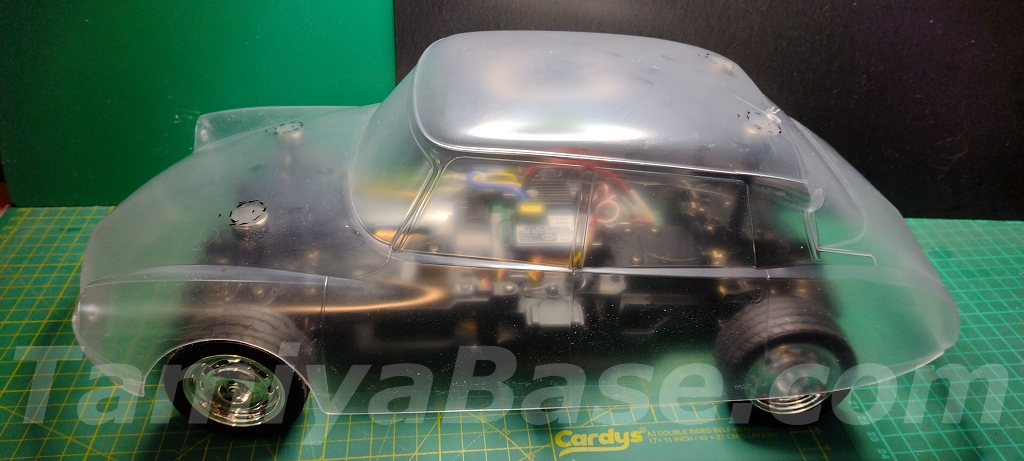
I also marked the position of the magnets on outside of the shell on the overspray film.
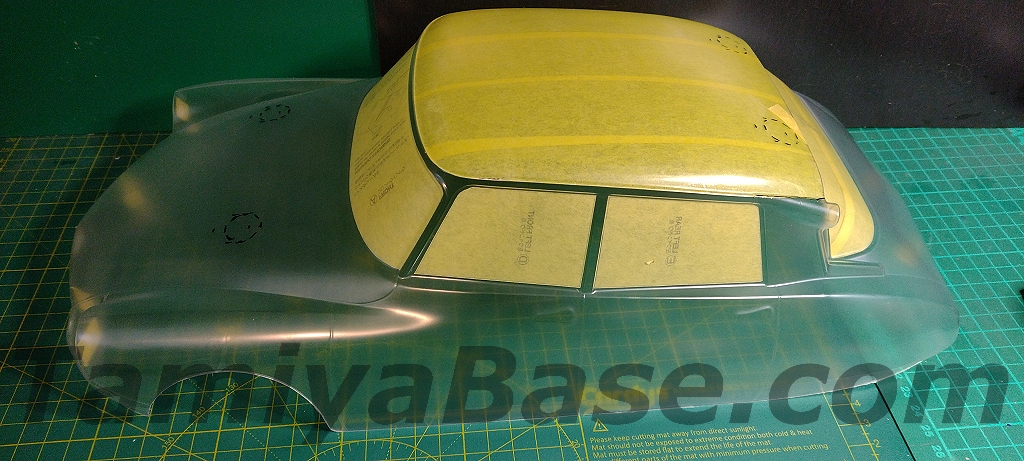
I cleaned the inside of the body, then cut/applied the window masks and masked off the roof area using Tamiya 40mm tape.
For step 42 (painting the body) suggested paints are (polycarbonate spray) PS-4 Blue for the bodywork and PS-31 Smoke for the windows, and (brush/airbrush) X-3 Royal Blue and X-18 Semi-Gloss Black for some sections of the front bumper, but I wanted to go in a different direction, as noted above.
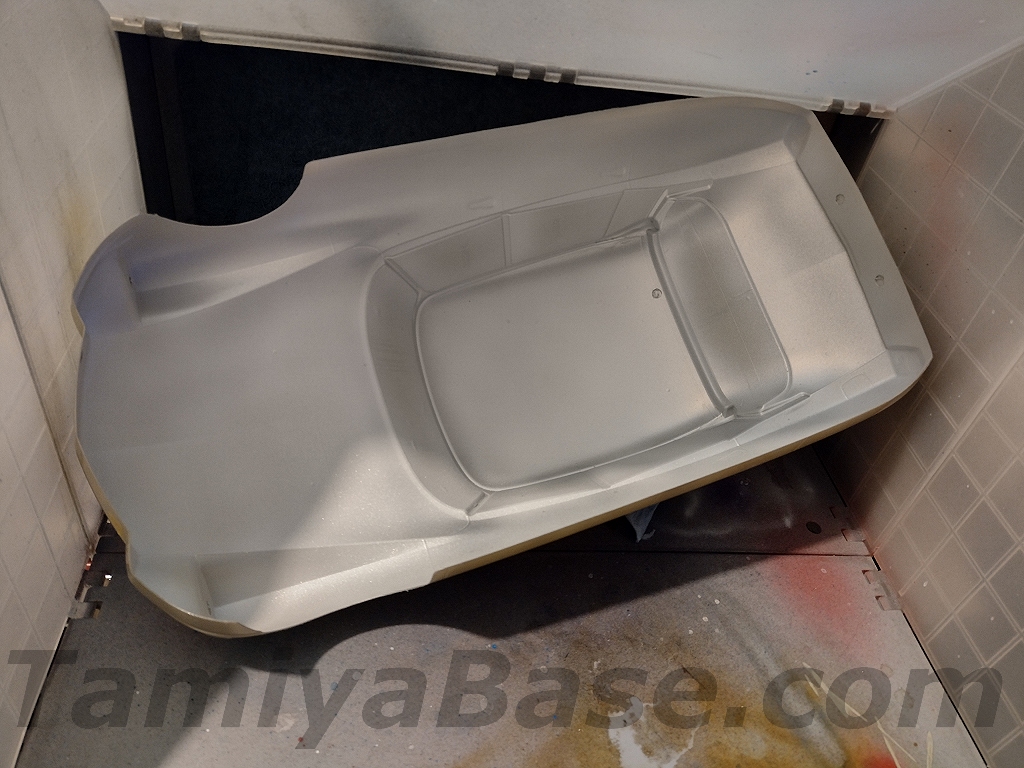
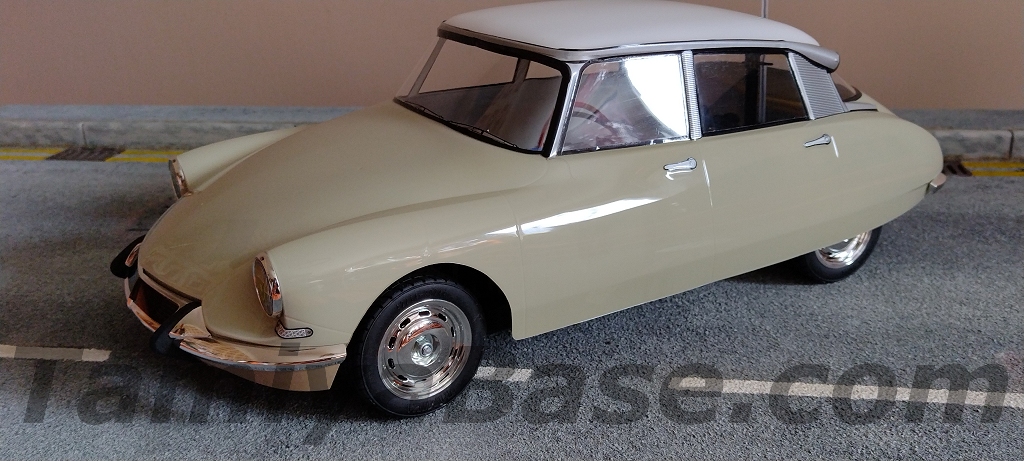
Pro-Line’s “Mojave Sand” (#6325-09) is in the same ballpark as Beige Vanneau out of the bottle, so I airbrushed six thinned coats of that. Considering the area and volume of paint required, I really should have used a siphon airbrush, but used a gravity fed one (sans cap) as it was handy and spilled some paint onto the inside of the body, but again I seem to have got away with it.
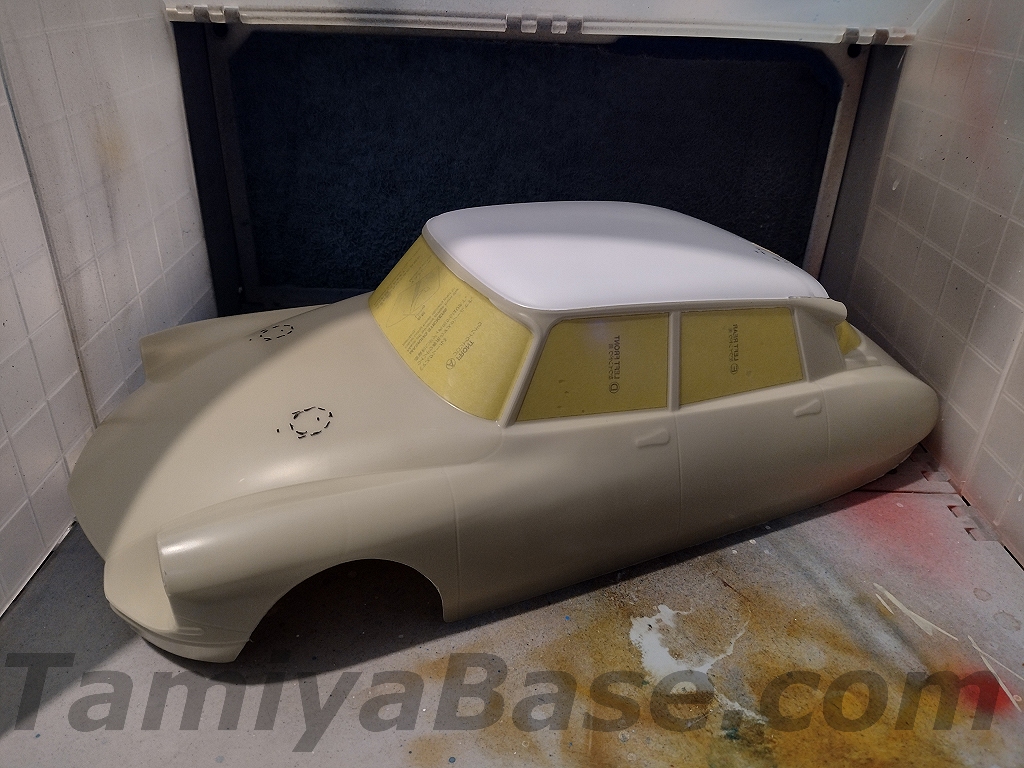
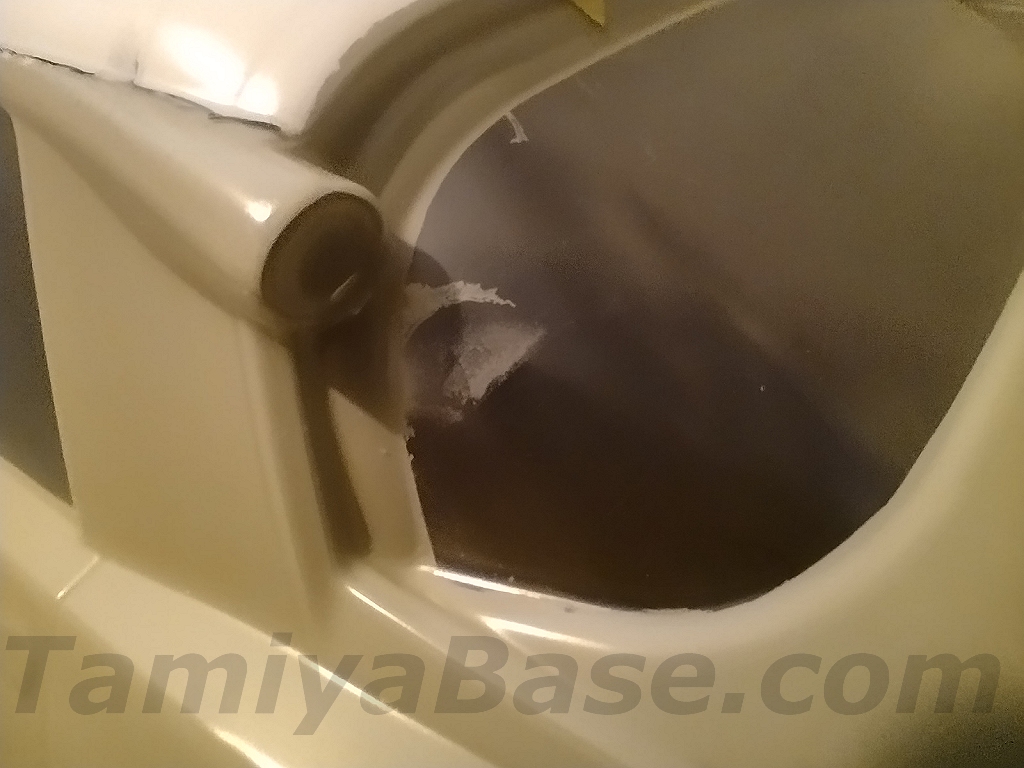
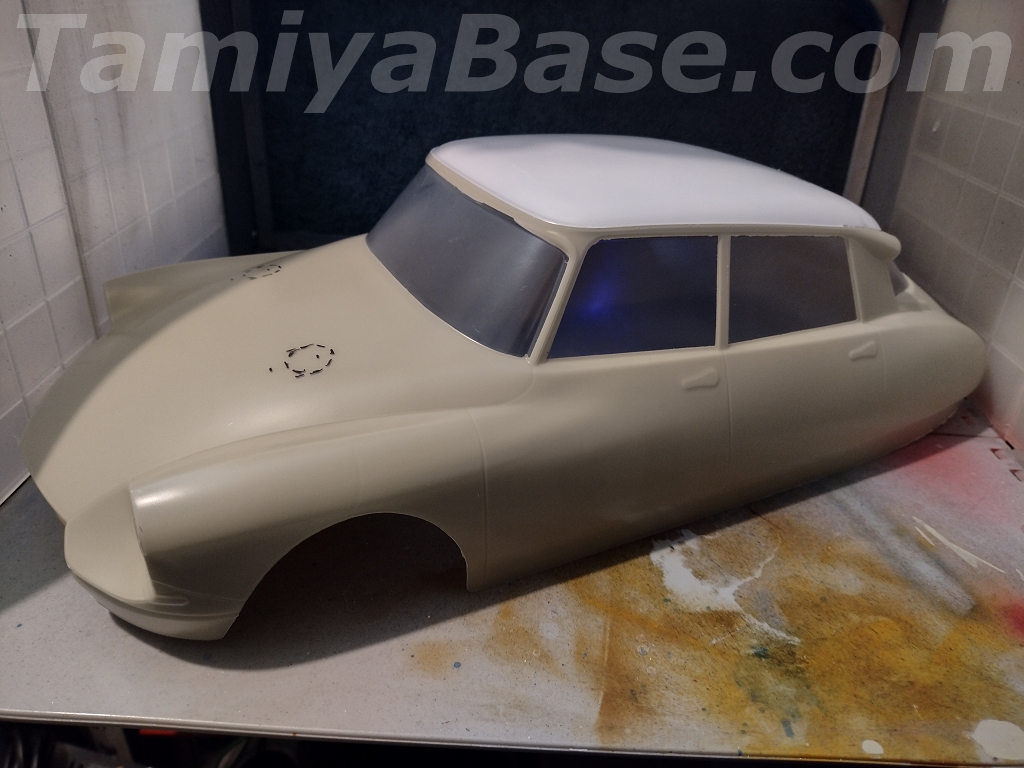
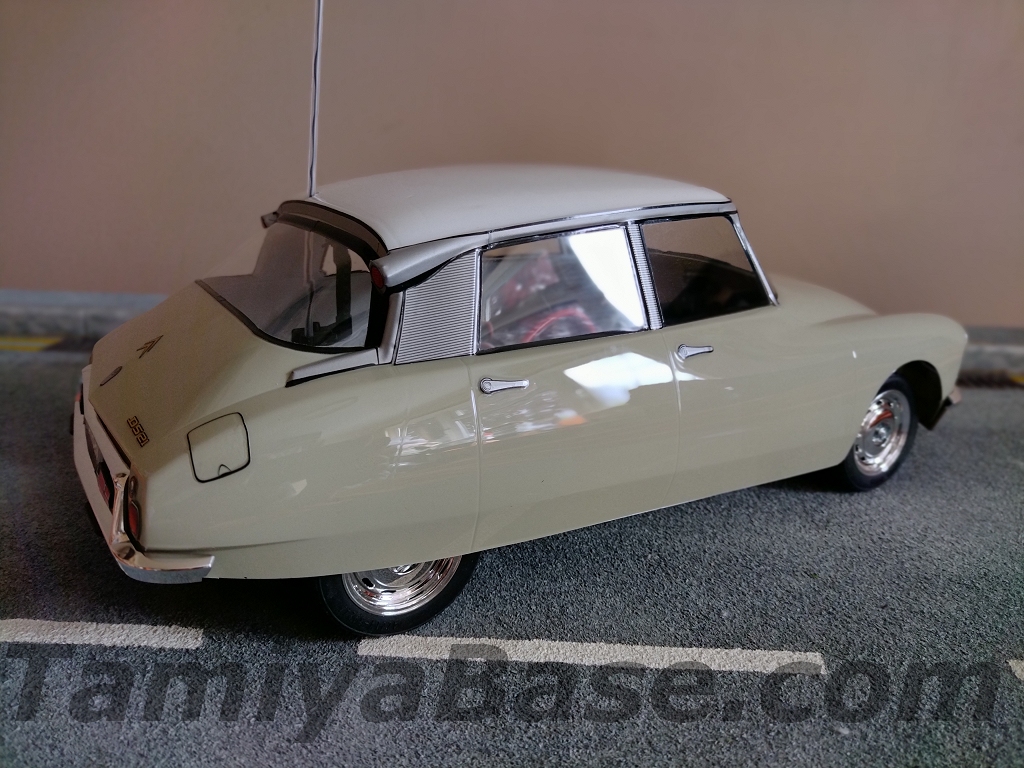
More cautiously, I added six coats of White after removing the roof masking and tidying the edges a little, then backed everything with four light coats of “Aluminum”. The rear window suffered from an area of bleed, but that soon came off with a light application of Pro-Line’s thinner, “Paint Reducer”.
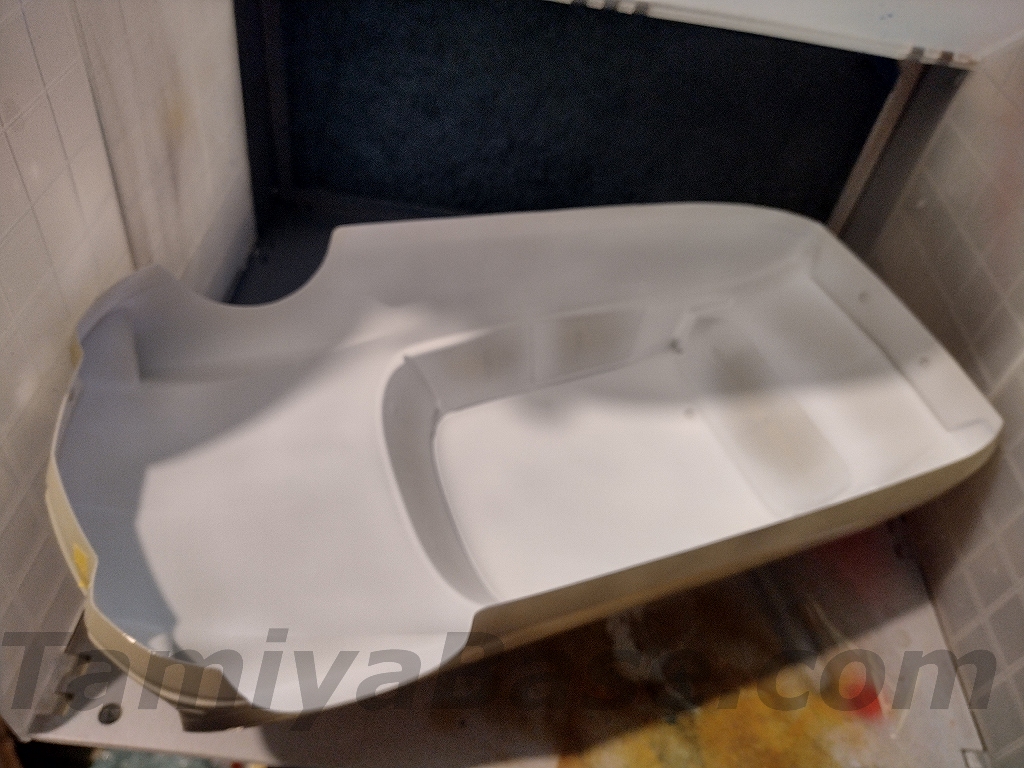
I also had to bond the magnets to the inside of the body. After taping up the chassis in case of spills (and several layers of tape over the car-mounted bases to reduce attraction, I mixed up some Araldite Rapid epoxy and carefully lined things up and left it to cure.
I’ve used pound shop type 2-part glues for this in the past, and while they are cheap and effective, they are very whiffy, and quite aggressive which can damage the paint.
As Pro-Line paint does not etch into the polycarbonate in the same way that Tamiya PS sprays do, I added two circles of carbon fibre effect self-adhesive vinyl to both the underside of the magnets and top side of the car mounted fittings. This is at least twice as much as I’d use on a body sprayed with Tamiya PS paint, but I’m a little paranoid about pulling a magnet – complete with epoxy, and paint – right off the body itself.
Part way through the process I wondered why I didn’t just use double sided foam trim tape – but in this case the curves of the bodywork would have been too much.
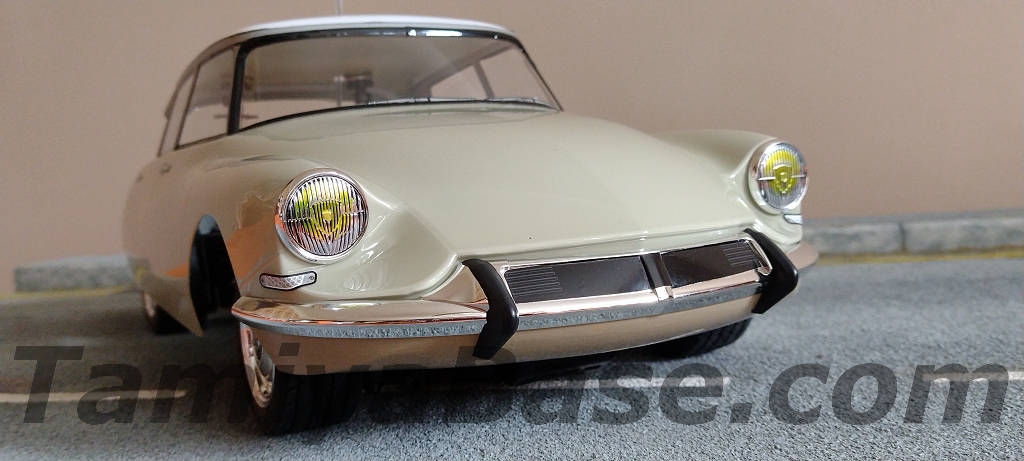
Step 43 is painting/fitting the front bumper and headlights (which sadly are not suitable for LEDs). I used three coats of Tamiya XF-57 Buff (followed by X-22 Clear) – it’s not a great match but was the closest appropriate out of the bottle match that I had. I rarely have satisfactory results with Semi-Gloss Black no matter how or how much I stir/shake it, so used XF-85 Rubber Black for the overriders instead.
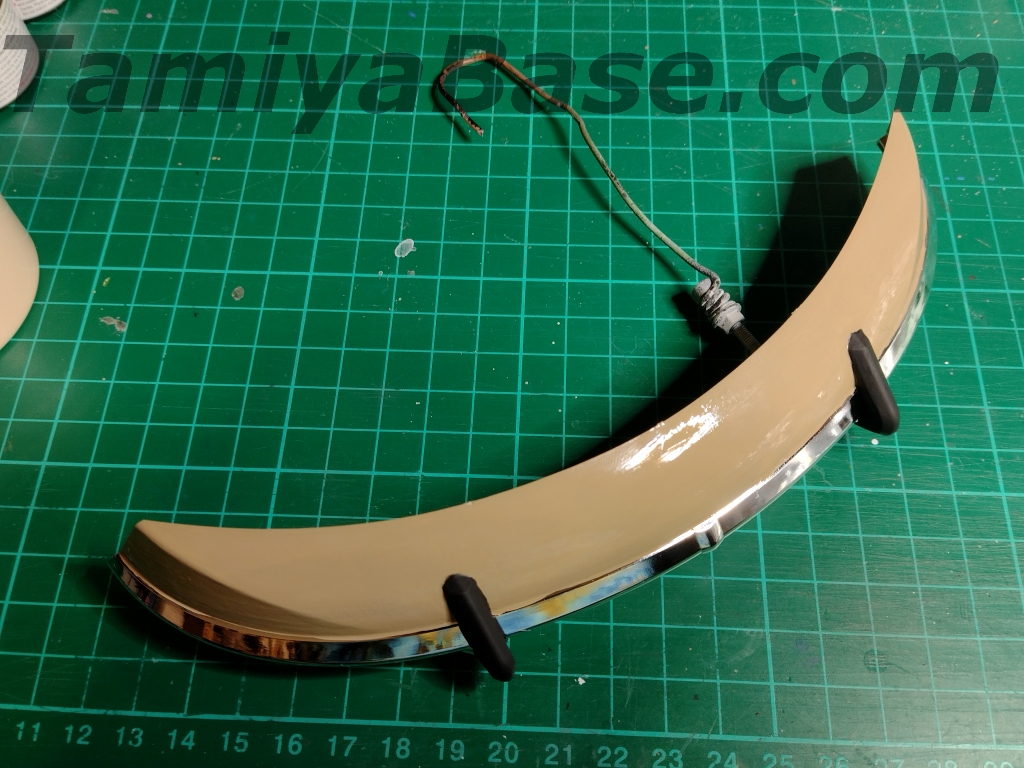
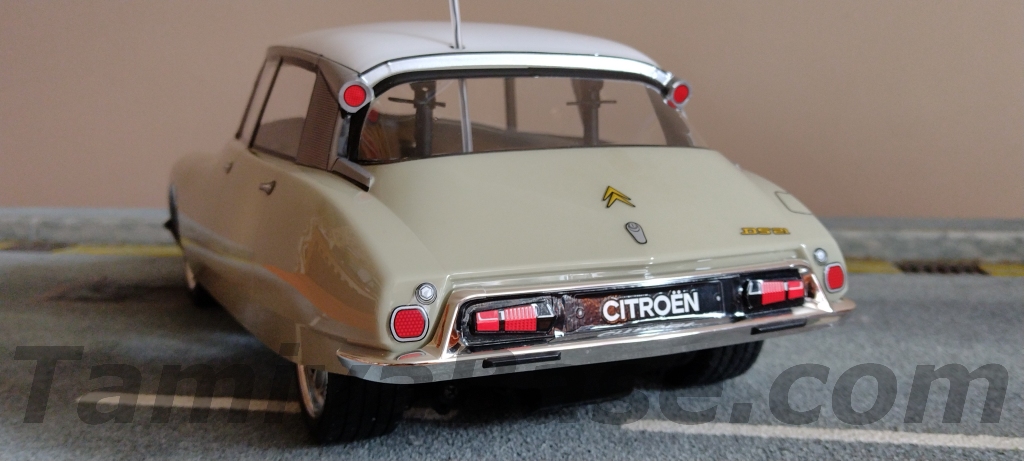
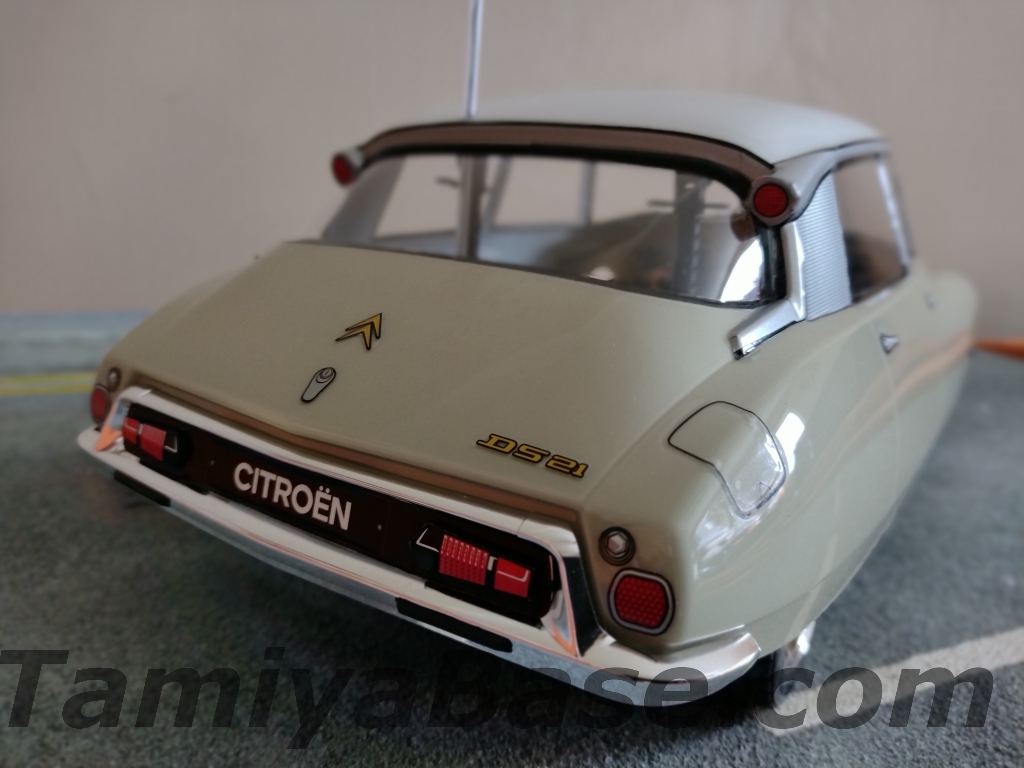
Step 44 is fitting the rear bumper, which also turned out to also need some details in black.
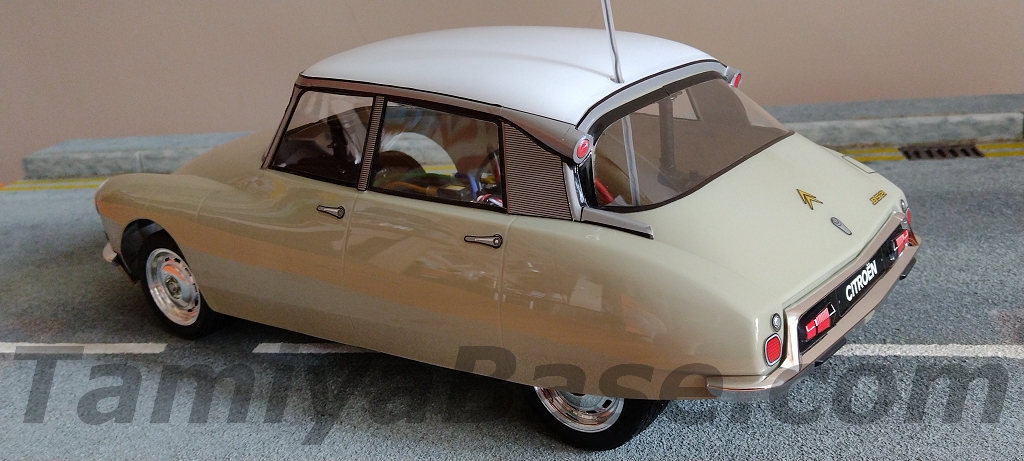
Step 45 is applying the decals. I’ve always found it better to make the cutting out of the decals (and taping them to a copy of the sheet made beforehand) one session, and the actual sticking on another, rather than rushing it. There are a total of sixty decals here, more if you use the warning labels called out during the chassis build.
Step 46 is fitting the body (using the kit supplied body posts), the remainder of the manual gives a very brief overview of alternative setups of the chassis using the optional parts in the kit – and upgrades for the driveshafts and shocks. There are also the usual drawings of the parts, and a part number list.
Overall
The MB-01 chassis seems like a bit of a duplication of effort while the odd numbered (front wheel drive) and even numbered (rear wheel drive) M-chassis’ still exist, however we can expect to see it used for a lot of small on-road Tamiya RC releases in future. The mid motor and reduction gearbox won’t do much for scale reproduction, handling, or longevity of the chassis in my opinion. It’s no harder to build than any other M-chassis, but I do have questions over the suspension.
Given the near-legendary capabilities of the DS suspension, it’s a bit of a shame the kit features double wishbone suspension and undamped shock absorbers all round.
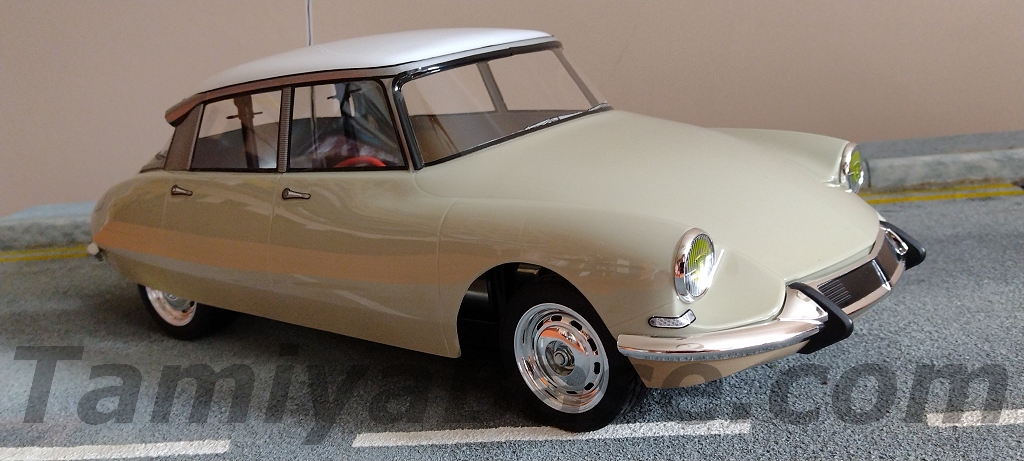
The treatment of the body seems a little off (especially the roof slope, rear end of the roof, c-pillars, and upper rear lights), though it is nice to see separate chrome plated bumpers and headlights. Sadly, no mirrors are included. The suggested smoked windows to hide a non-existent interior is also a bit of a shame, I prefer it with clear windows and the addition of a vacformed scale, elbow height interior with a small driver head would improve things no end.
I think the car suffers from Tamiya not being clear on what the likely market for the car is. I’m sure it was intended as another “cheap” car for car park bashers/fun “racers” to use as is, but I question how much a “weird” French car, possibly from before their grandparents were born is going to appeal.
Serious indoor carpet racers could upgrade the chassis, but I suspect they’d want to buy something more suitable in the first place.
The scale is a claimed 1:10, but the 419mm overall model length compared to 4,826 to 4,874mm (15’10” to 16’) of the real car (depending on model & year) means it’s more like 1:11.5 or 1:11.6 – or 1:12 with rounding. A model width of 195mm compared to a real 1,791mm (5’10”) equates to 1:9.18. I’ve made similar fudges to make something look right, or at least the best balance of compromises when scratchbuilding and arbitrarily using a particular chassis, and maybe this will grow on me. After all, the Sand Scorcher is both wider and shorter than it should be (not to mention the sticky-out wheels), but it’s so iconic that it’s the 1:1 tributes that look compromised.
“Serious” model makers are going to see the slightly odd (and polycarbonate) body, lack of interior, unrealistic chassis configuration, and odd scale as turn offs. It’s not “cheap” either, costing so much more than, say, the pre-Covid and pre cost of living “crisis” NSU TT Jägermeister on the M-05 chassis, which could be had for (IIRC) 109 GBP, or 99 GBP without ESC a few years ago while seeming to offer a lesser chassis.
So, just who is the market for the Tamiya Citroen DS? Well, me, at least. I don’t know how many other modestly Francophile (or at least somewhat Europhile) but very pro “old” and “odd” car customers Tamiya has, but let’s hope it’s lots – maybe that way more “odd” French (and possibly former Warsaw pact countries) cars might be given an RC release. If Mr Tamiya is listening, I’d love to see a Renault 12 (which later became the Romanian built 1300 aka the “Denem”) & things like the Lada Riva and Niva, and the Skoda Estelle and “Rapid” coupe.
Sometimes I like to do a “quick(er)” build, and an M-type chassis certainly gives that. I also appreciate how a polycarbonate body - especially one with added chrome furniture - can give a shiny (and two-tone) result with far less time and effort than a “hard” body.
Overall, it has flaws, but the Citroen DS is interesting choice, and I liked it enough to spend my own money on one. It will be shelved quite some distance from my 1:10, M-chassis 2CV to hide the slightly odd dimensions/scale differences though.
__________________________
Written by TB member Jonny Retro