

Length Warning
This piece was always meant to be more of a review than a how-to, but some issues with certain plastics meant quite a substantial detour into compatibility testing – and quite a long article overall.
For anyone wanting a very quick read instead, I’ll offer the following TL;DR – safe on everything I tried except ABS, use PPE, and test a small area first. Also, CTRL-F on “list” :)
Introduction
It’s been ten years since I last wrote anything on stripping paint from “hard” (ABS, styrene, styrol etc) RC bodies. At that time, De-Solv-It Graffiti Remover gel in 1 litre bottles (sold as Screwfix) was the thing to use in the UK (see tamiyabase.com/articles/54-painting/145-paint-stripping) but the gel disappeared from sale after a couple of years.
The (sort of) replacement – a product of the same name, but in a 200ml aerosol, available from B&Q – was as effective (if much poorer value). The thing is, it’s not available for home delivery, it’s not available in my local store, and the website function that should let me find out what other stores it’s available at doesn’t work. I’m just not interested in a product that makes me play silly beggars like that, and there’s not a universally available, safe, effective alternative.
All the current “graffiti removers” on closer inspection are aimed at getting pen ink or crayon marks off things – I can’t just see them working on 50-year-old Humbrol enamel, multiple layers of hobby spray paints, or auto 2K paints.
I’ve been using my last dregs of De-Solv-It very sparingly, and using Caustic Soda (Sodium Hydroxide, or Lye) crystals dissolved in water. That’s very effective across a lot of paint types, even more so if used in an ultrasonic tank. However, it’s not something I’d want to freely recommend when it has so many drawbacks – you can’t use it on aluminium, disposal can be a problem, and proper personal protective equipment (gloves and eye protection at a bare minimum) is essential due to the risk of chemical burns. It’s also become increasingly difficult to buy in the UK over the last few years.
I’ve also used media blasting (recycled glass grit in a small cabinet, powered by a 24L compressor) on some particularly nasty multilayered paint on occasion, but it’s a lot of faff setting up, a lot of noise, and the resulting surface can need more preparation before painting than other methods.
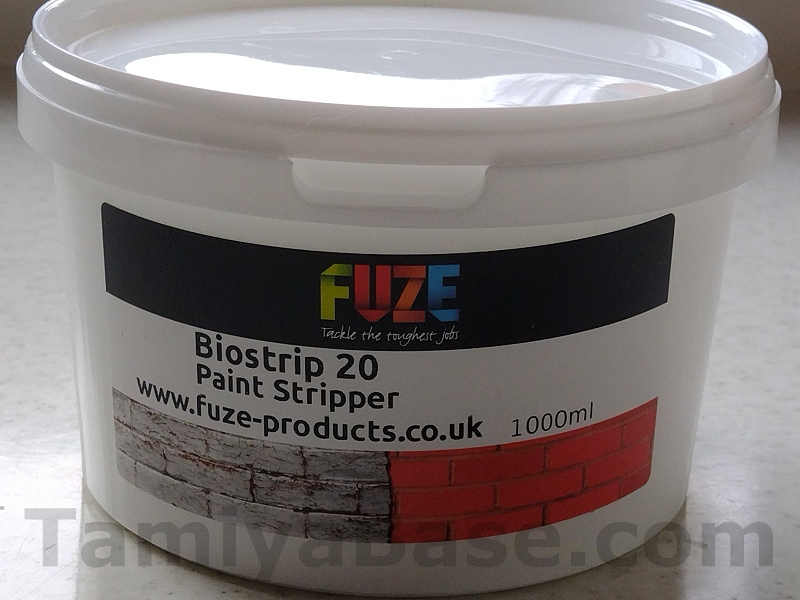
The Product
Recently, I’ve been hearing (and seeing) good things about Fuze Biostrip 20 over the last few months. It’s available in their eBay shop at ebay.co.uk/str/fuzeproducts or direct on their website at fuze-products.co.uk as well as a number of other online retailers and eBay shops, and comes as a gel in 500ml, 1 litre, 2.5 litre and 5 litre tubs, and a (presumably thinner formulation) in a 750ml trigger spray.
Smaller quantities get hit proportionally harder on postage costs so the 5L tub is the best value on a per ml measure, but the price is a bit eye watering. Even after considering that it’s made in the UK, the inflation between now and the De-Solv-It of ten years ago, the pricing still feels a bit like all the traffic will bear. However, it’s a comparable price to another niche hobby liquid – nitrocellulose sanding sealer – and buying that always makes me suck air through my teeth.
The price tag on the 1L tub is much more palatable - I bought one for 17.99 GBP, posted, as it seemed a good balance between getting enough to do a couple of projects if it worked, but not spending so much on the larger sizes if it didn’t. And yes, I did have to make a graph to confirm the kink in the pence per ml at that size/price point ;)
Its supposedly water based, safe for family* & the environment*, can be used in unventilated* and even confined spaces*, and is ok on a variety of surfaces, including metals* and plastics*. Models are also specifically mentioned – though with the recommendation of testing a small area first.
* That’s a whole lot of caveats, so read on …
It arrived the next day, and I popped the tab to have a quick look and sniff – it’s semi-opaque white, fairly thick (a bit like partially watered down PVA glue) and has a whiff of Play-Doh about it. I also looked at the warning label …
Safe As?
The label on the back of the tub says that it’s harmful if swallowed or inhaled, causes serious eye irritation, and should be kept out of the reach of children. That would seem to go against the claims that’s it’s safe for family & the environment and can be used in unventilated and even confined spaces, so I dug a little deeper.
I was unable to find an MSDS (Material Safety Data Sheet) for the product. There are situations where one is not required - no hazardous content, use in commercial environment would not involve exposure greater than that to the average consumer - which I don’t believe can really be applicable here. In any case, I would have liked to see one.
I also saw that it shouldn’t be used on car alloy wheels. They are typically made with an aluminium / nickel mixture (hence “alloy”), or, more rarely magnesium, or an aluminium/magnesium alloy.
It’s not clear which metal is the problem, but this could be a bit of an issue for RC cars, with a lot of vintage models having aluminium, “pot metal” (also known as Zamak or Mazak, depending on the proportions of zinc, aluminium, magnesium and copper, or kupfer in German, so K) an plated steel parts.
The “water-based” label – and the mention of washing off parts in water once they’ve been stripped might make you think that residues can go down the drain – but on further reading, they are supposed to be soaked up, sealed in a bag, and sent for landfill. Remind me how “safe” it’s supposed to be again?
Initial Tests
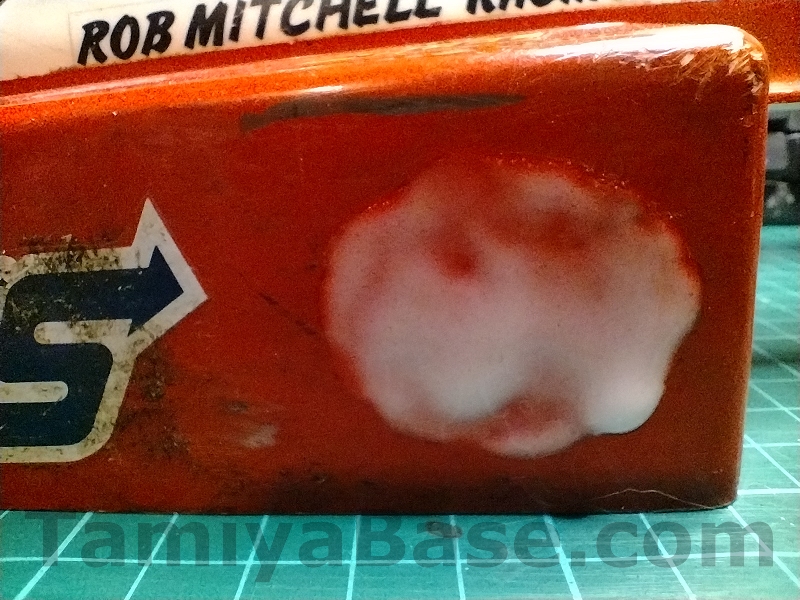
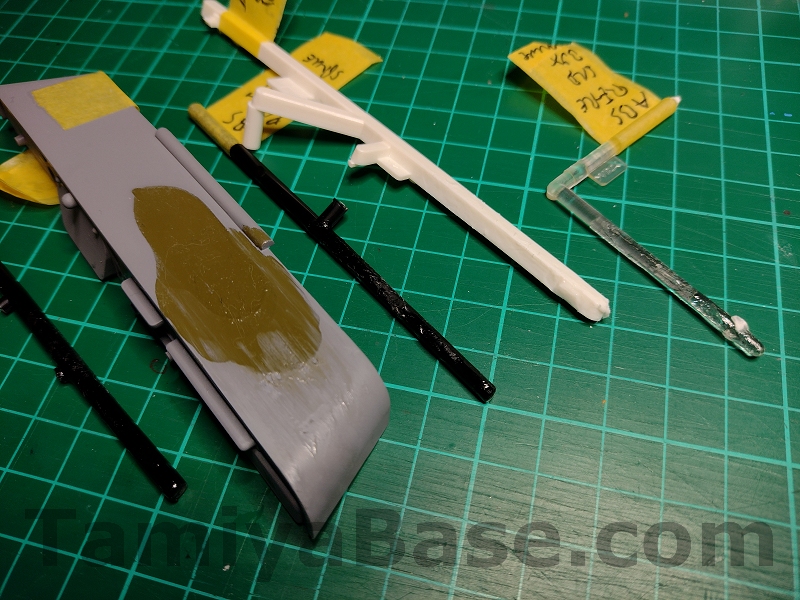
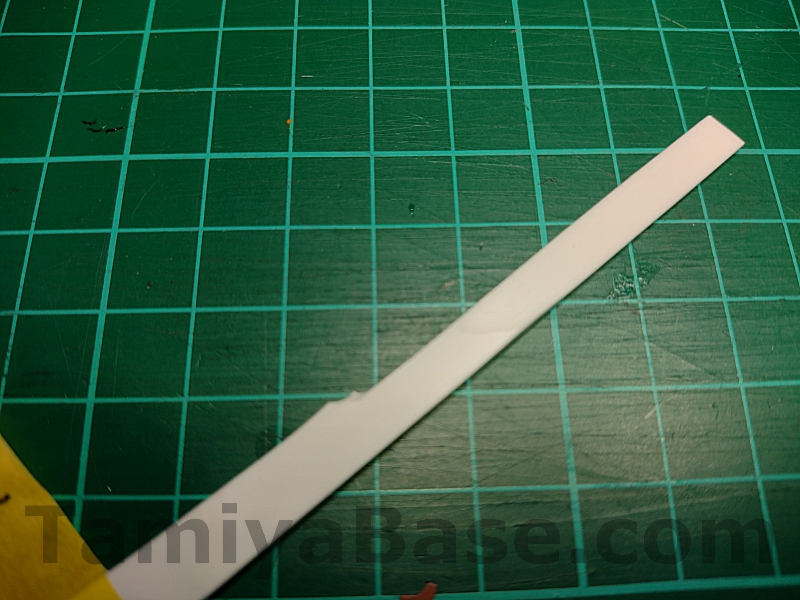
To start, I decanted a tiny amount (like 3ml) into a Polypropylene (<PP>) paint (or medicine) cup, then used a disposable brush to apply a thick coat onto the area left by removing an oval Auto Haus decal from the side of the (rather scrappy) Rough Rider body, which is made from “High Impact Styrol” (<PS> on the re-release Buggy Champ 2009).
Due to the questions about its suitability on aluminium (and its alloys) I was keen to test that too – but not on my Wheeler wing just yet – so tried a smaller blob on the end of an empty Coke can.
After 15 minutes, there was clear evidence of wrinkling of the paint, significant thinning and clearing (and some separation) of the liquid from the outside in suggesting that drying out was occurring. The use by date ink on the coke can seemed to be dissolving and blurring, but there was no fizzing (like you’d get with caustic soda).
Due to no change in scent, I had to conclude that the paint was not in fact Humbrol enamel, but some sort of acrylic. Although there were just two thin coats of paint brushed on, no primer and no evidence of any prep work on the previous owner, after wiping off the product and cleaning up with a baby wipe, there’s no doubt it’s very effective. If I’d been able to apply it a little thicker and up to the edges, there might not have been any need for a second pass.
To use up the remains of what I’d decanted I moved onto a Willy’s Wheeler rear wing. Again, I thought it had Humbrol enamel brushed on, but due to there being no additional smell when stripping it off, I must conclude it was also an acrylic. No fizzing or damage though.
The brush and paint cup also survived 2 hours of contact with no ill effects. Blue nitrile gloves however quickly began to wrinkle where they had contact, then weaken and split. That suggests there are ingredients that could get into the skin, and I’d want to double glove in future.
I will also try clear vinyl gloves to see if they fare any better. Nb – they did.

Although I had no accidents or splashes in my initial tests, I think there’s a proportionally higher chance of that happening when stripping anything bigger than will fit in a 500ml or 1L takeaway tub. I don’t really think Biostrip 20 is suitable for use in the average hobby room - for whole 1:10 or 1:12 RC bodies I’d really want multiple layers of cardboard and/or newspaper set down in the kitchen where I have a hard floor, the option of extraction, and a clean water supply.
Full Body Testing
I felt safe to proceed on whole car bodies but did move to the kitchen – which meant some delays due to wanting to wait for exclusive access.
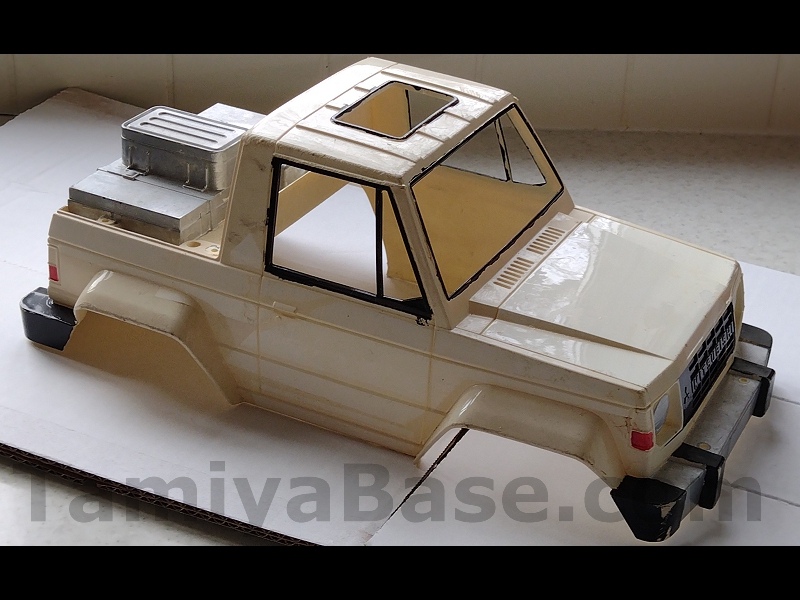
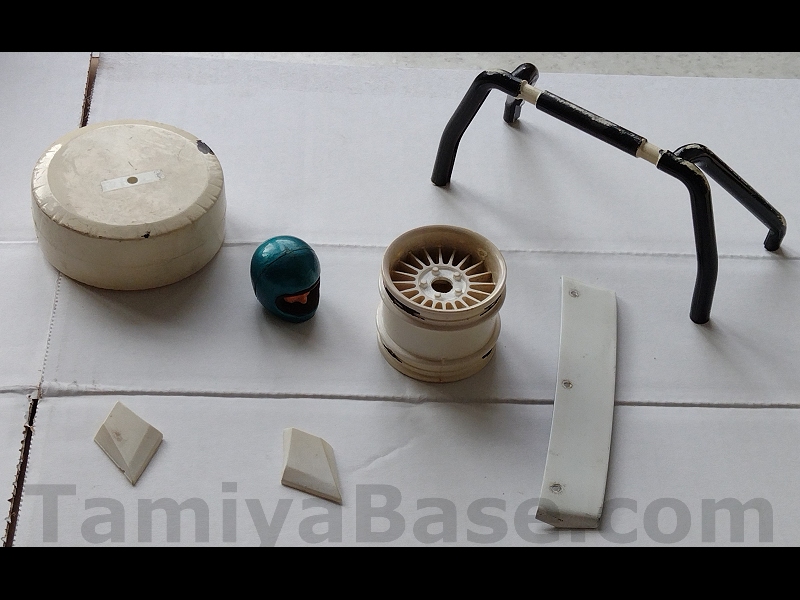
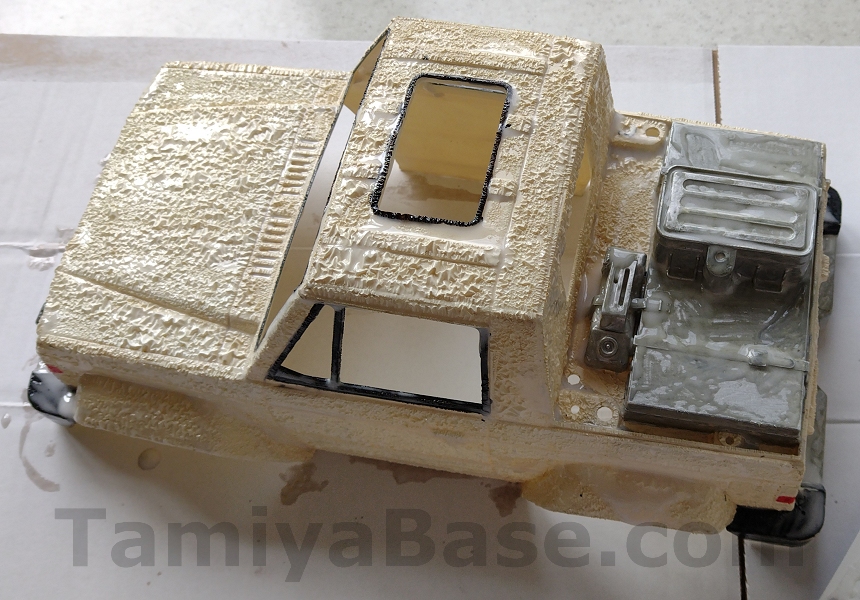
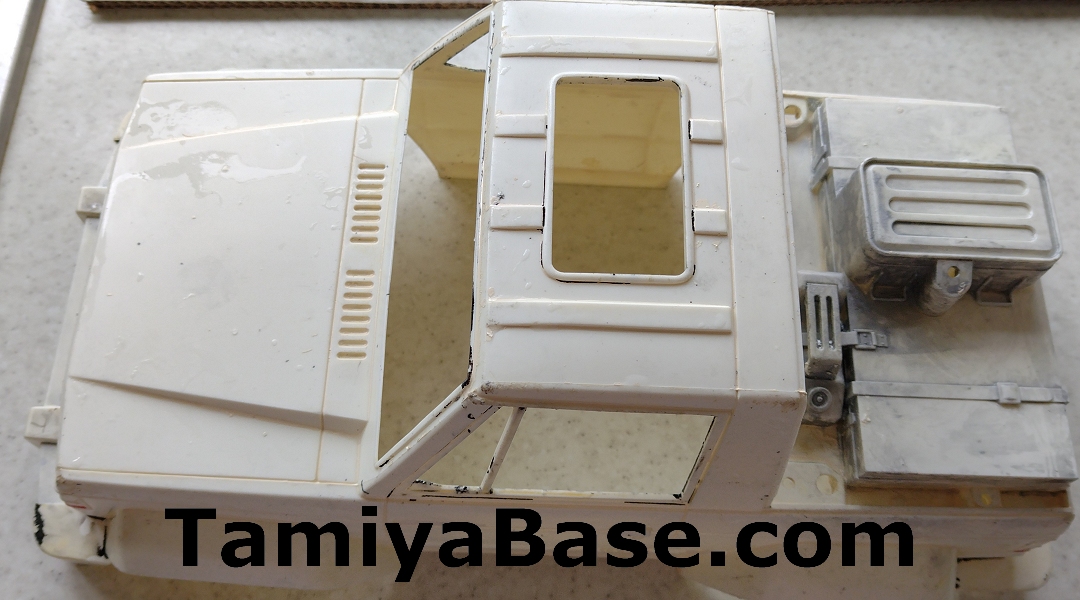
My test subjects this time were a vintage Pajero wheelie body, rollbar and spare wheel cover painted (I think) in Tamiya X/XF acrylics, a vintage Rough Rider driver head (probably in Humbrol enamel), and a vintage Wheeler body, one wheel and another aluminium wing, aa painted in what I believe was Tamiya TS spray.
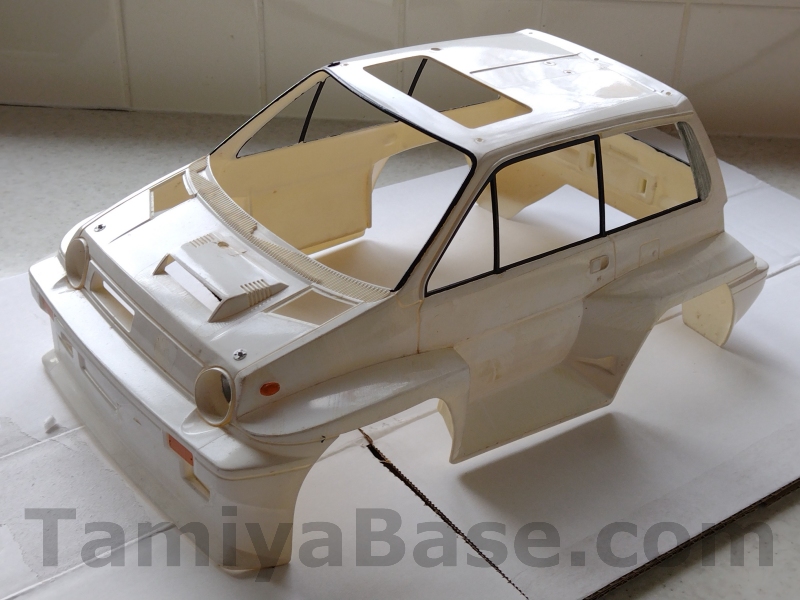
The (58040) Pajero wheelie main body is made from “High Impact Styrol” according to Tamiya and didn’t seem to suffer at all from using Biostrip 20. It was very effective on the white (brushed on Tamiya X acrylic, I think) after 30 minutes, but a bit less so on the red, black, and silver. A second, short pass (I was running out of time) took more off, but a third and longer application is going to be needed, especially on the fiddly recesses of the front grille.
Most of the paint came off the Rough Rider driver head (which I believe is made of the same “High Impact Styrol” as the body, and I know is <PS> on the re-release Buggy Champ), however there was a band around the glue joint that remained blue. From the damage (and period “repairs”) on the rest of the car, I think it’s highly likely it had been re-glued at some point, and that glue had melted the paint into the surface of the plastic.
Due to time constraints I only got to try Biostrip 20 on a small area of the vintage Willy’s Wheeler body (made from “dense polystyrene”) and the bonnet vents which I assumed were the same material (but are <ABS> and <PS> respectively on the re-release). Neither the vintage body nor the vents showed any adverse reaction.
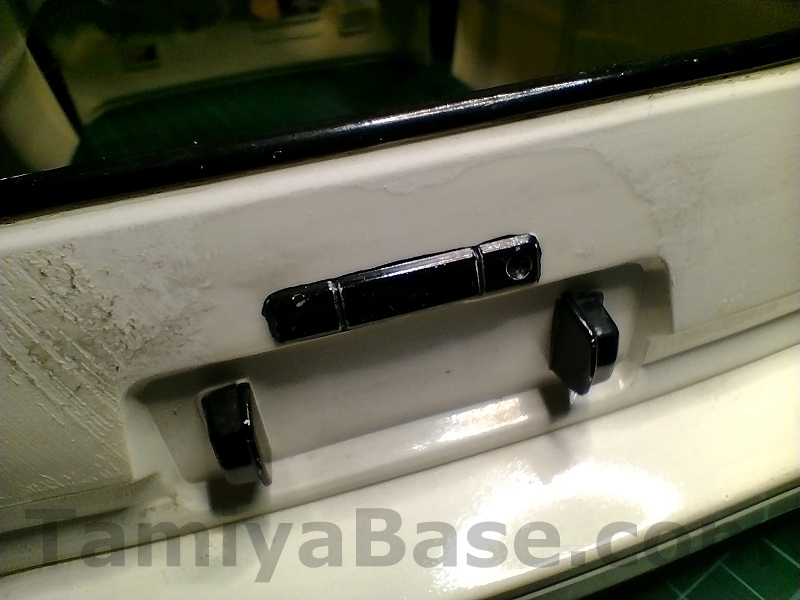

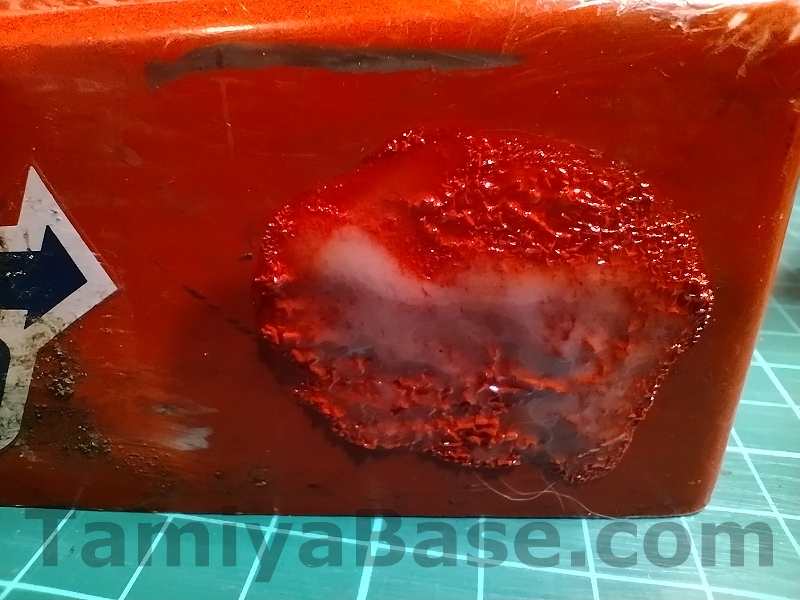
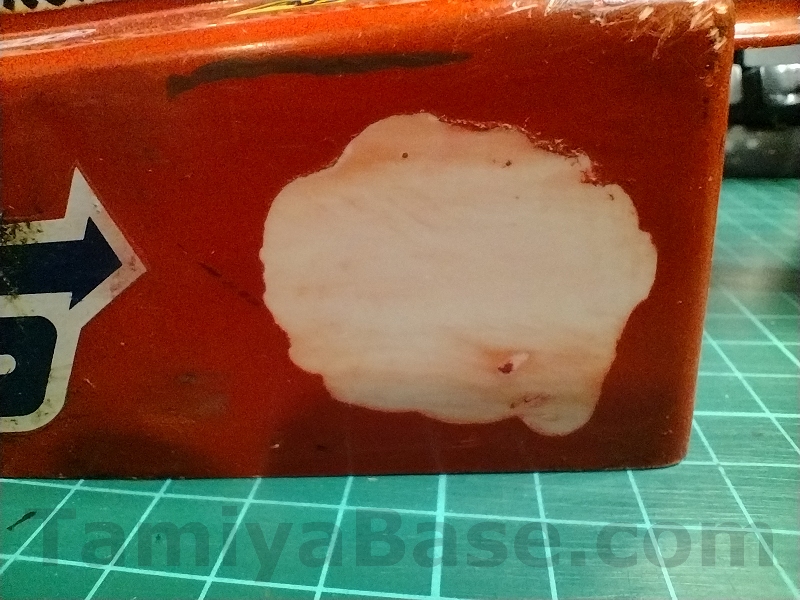
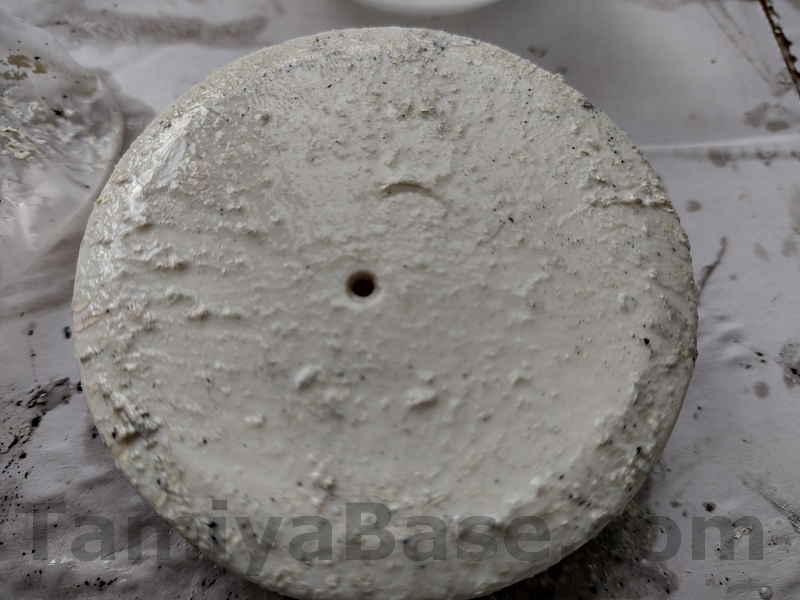
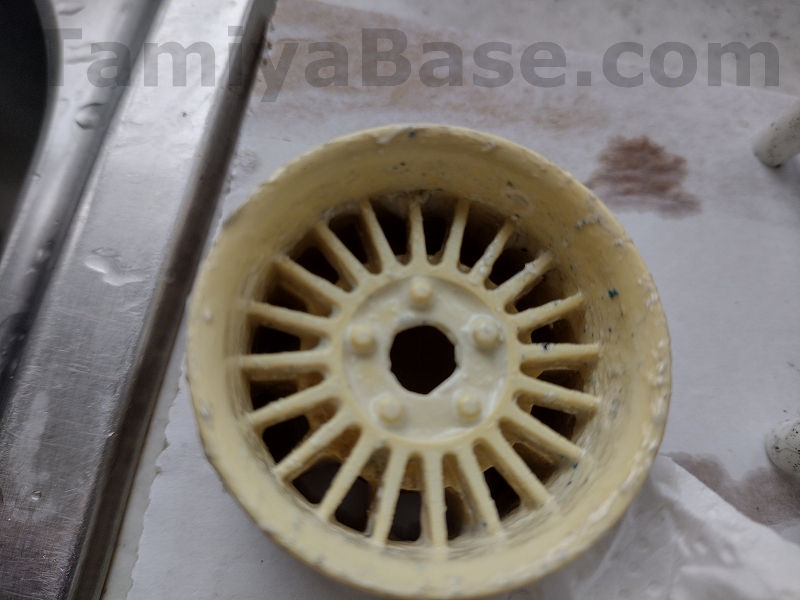
The vintage Pajero Wheelie rollbar, spare wheel cover (from the “C” parts sprue), and the vintage Willy’s wheeler Wheel I tested all went very badly, suffering various degrees of surface melt.
The rollbar may be salvageable as it did harden up after 48 hours, but as I don’t want to use it on that project, I don’t think I’ll go to the bother of all that sanding (at the very least). The Wheeler wheel is too intricate to be worthwhile saving and would have only gone in the spares box if it came out ok anyway. The Pajero (fake) spare wheel cover now has a look very much like if you put several thick coats of varnish on an 80-grit sanding belt.

In the past, I hadn’t paid that much attention to exactly what flavour of styrene (see next section) was in use on a particular body or part. Here though, it’s clear that anything made specifically from ABS (or can be inferred to be)
The re-release Honda City Turbo wheel sprue is marked ABS, and in general Tamiya seem only to change details of the designs (if anything) rather than the material.
There’s no information on what the material of the Pajero wheelie spare wheel cover (or the rollbar), but the modern equivalent is the 19000272 C sprue for the semi-rerelease Montero Wheelie and 58727 Pajero CW-01, marked <ABS> and is moulded in black rather than the original white.
Melt Test Materials & Method
The more thorough testing (above) raised a lot of questions about using Biostrip 20 on vintage plastic parts I inferred were ABS. If we can’t use it on certain vintage plastic parts, what about all the new, clearly marked / known ABS parts?
Tamiya cars that most would think of a thoroughly modern could well be getting on a bit now, a Wild Willy 2 might be 25 years old for example, and some examples of the Buggy Champ (re-released in 2009) could now really stand a thorough restoration, including media blasting the pot metal parts – so it’s important to know how safe this stripper is on ABS
It’s worth noting that although the terms Styrol, Styrene, Polystyrene (PS), Acrylonitrile Butadiene Styrene (ABS), and HIPS (High Impact Polystyrene) are sometimes used interchangeably, they’re not necessarily the same thing – and some are more different than others. ABS can have significantly different proportions of each basic component to change its properties (principally rigidity vs ductility – or stiffness vs rubberiness) and it’s not unusual to see fibre reinforcement, UV protection and dyes added too.
If we look at some modern Tamiya parts, all marked <PS> (sometimes just on the sprue), we can see a lot of variety in appearance:
- Wild Willy 2 rollbar (black, shiny)
- Wild Willy 2 small body parts (olive green)
- Pajero CW-01 spare wheel/rollbar sprue (black, satin)
- Honda City Turbo wheels (white, shiny, slightly more flexible than bodywork?)
- Re-release SRB mechanism box (clear and colourless to start, though older ones (even NOS, “New Old Stock”) are beginning to take on a “vintage” brown tinge)
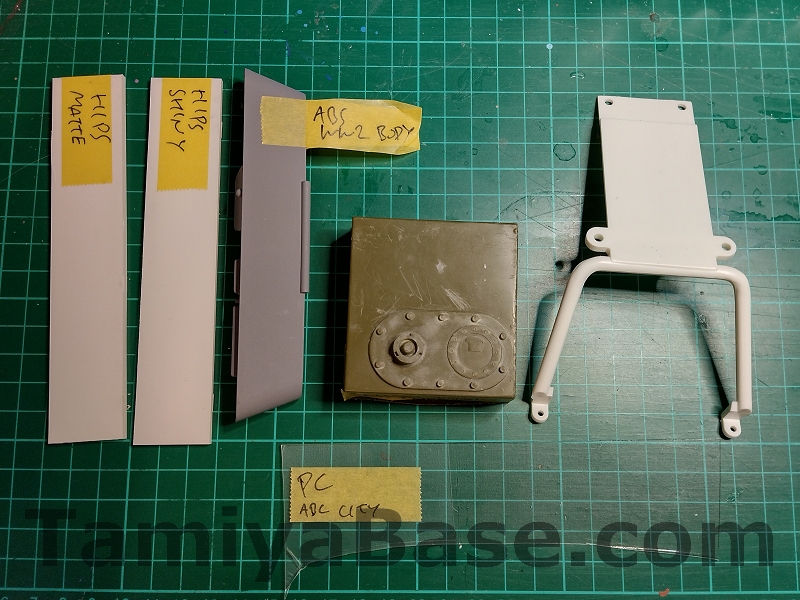
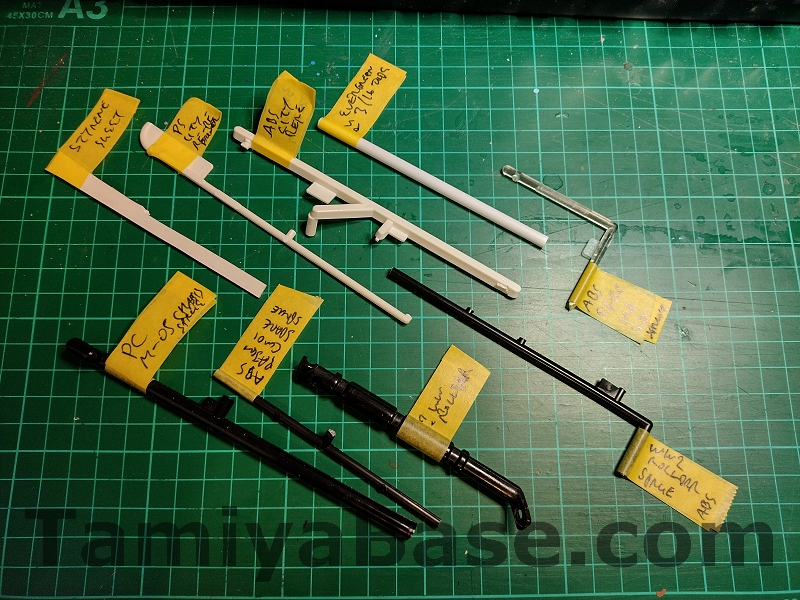
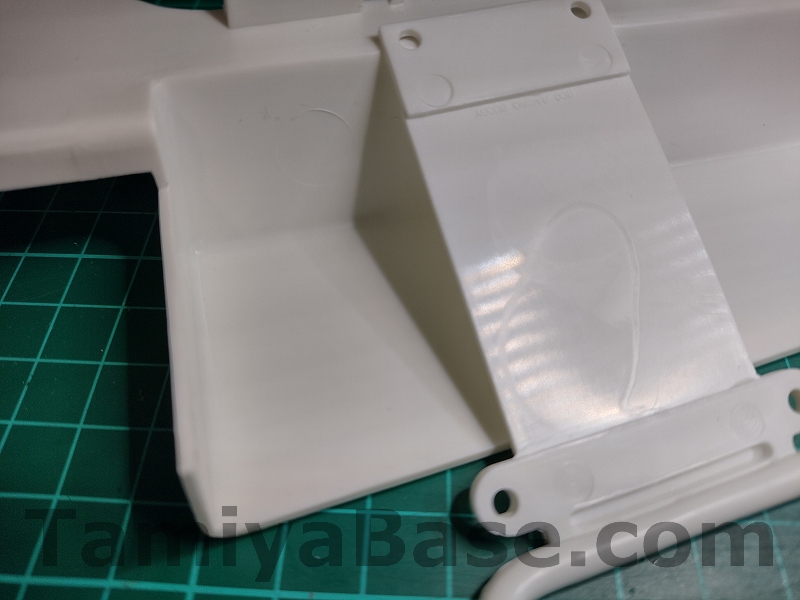
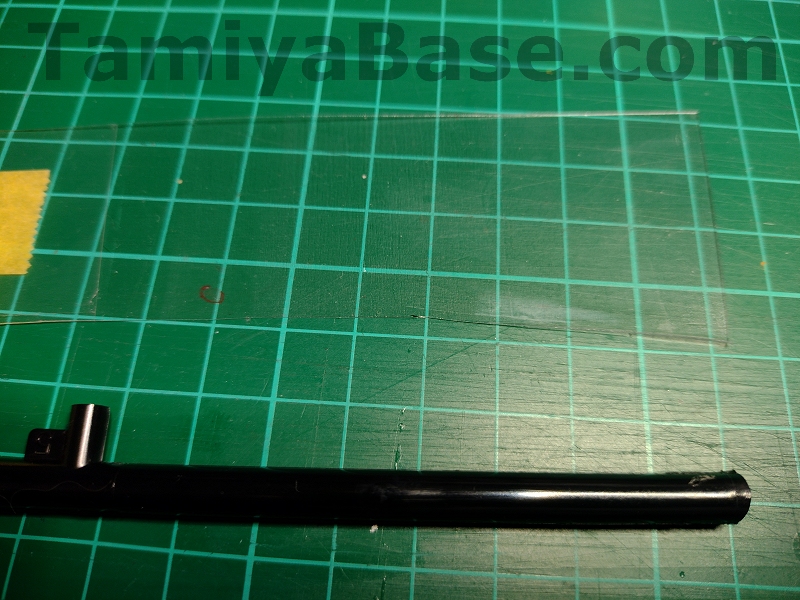
In most cases, I’m going to be testing a part of the sprue or unneeded part instead of stripping actual paint off – I also have a section of Honda City Turbo driver sprue <PS>, some cutoff from a vacformed polycarbonate body, and as I have the sprue from a set of M-05 A parts (main chassis) moulded in polycarbonate<PC>, I’ll test that too.
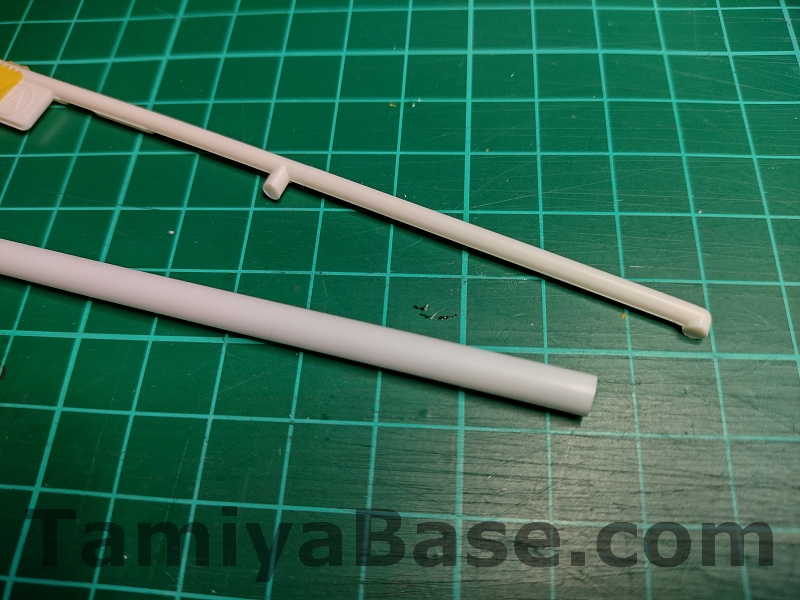
While preparing for these tests I also though of / found a section of vintage Wild Willy rollcage, part of a vintage Wild Willy body (which Tamiya referred to as “High Impact Styrol”, Evergreen Polystyrene 3/16” tube, and 1.5mm Plasticard/Styrene Sheet as supplied by Station Road Baseboards & featured heavily in my scratchbuilds. I also had some 3mm HIPS (High Impact Polystyrene, a “modified” form of PS) so will try that too – both shiny and matt sides.
This adds up to seven spot tests and nine partial immersion tests (due to the varying shapes of the material).
Melt Test Results
ABS (by inference) Vintage Wild Willy rollbar: significant surface melt after 30 minutes.
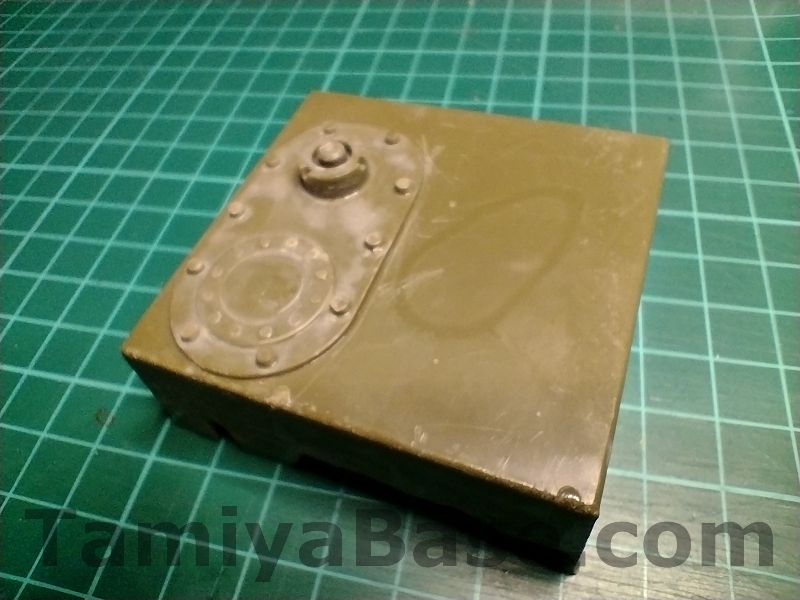
“High Impact Styrol” (Vintage Wild Willy body, which I would infer to be HIPS or PS, but was replaced by ABS on the Wild Willy 2): fine after 30 mins, outline after 120.
<ABS>
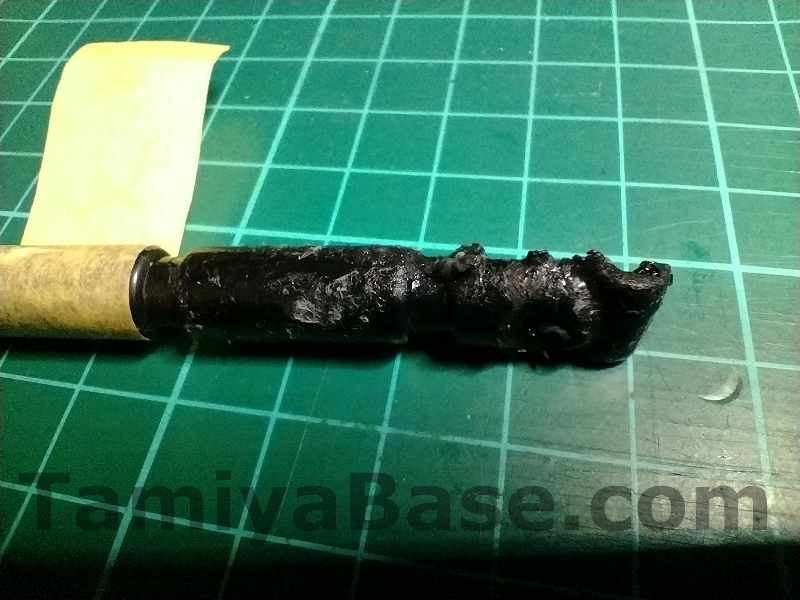
Wild Willy (2) rollbar sprue: significant surface melt after 30 minutes, irrecoverable IMO after 120.
Wild Willy 2 dashboard/scuttle parts: significant surface melt after 30 mins, deeper after 120. Remained tacky for a long time after. As this was on the flat surface of the top It could be sanded & filled, but if I’d applied the Biostrip all over it would have ruined the parts.
Pajero CW-01 spare wheel sprue: significant surface melt after 30 mins, worse after 120. Not a real part so no loss, but otherwise unusable after.
Honda City Turbo wheel sprue: significant surface melt after 30 mins, worse after 120. Other comments as for WW2 dash/scuttle & Pajero spare sprue.
Re-release SRB mechanism box sprue: significant surface melt after 30 mins, worse after 120. Other comments as for WW2 dash/scuttle & Pajero spare sprue.
<PS>
Honda City Turbo (re-release) driver sprue: fine after 30 mins & the whole two hours.
Evergreen 3/16 tube: fine after 30 mins, possible slight softening/flaring/distortion to cut end after 120.
Buggy Champ roof: fine after 30 mins, outline after 120
Buggy Champ body (test spot inside): fine after 30 mins, hint of outline after 120
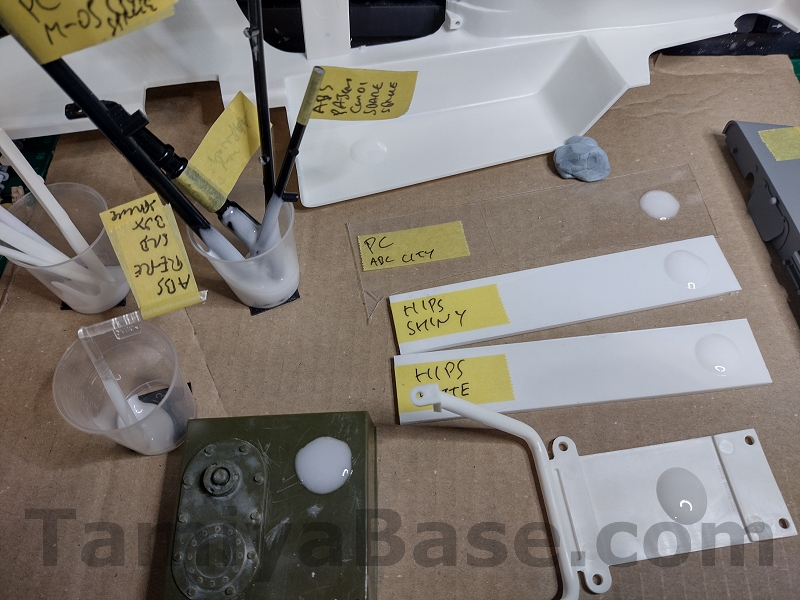
PC:
ABC Hobby polycarbonate body trimming: fine after 30 and 120 minutes, but after washing some slight cloudiness could be seen (but not photographed) next to the area treated, and there was a slight change in feel to the surface where it had been treated.
M-05 Chassis sprue: looked fine after 30 and 120 minutes, but after washing the treated area seemed to have lost some colour, and some shine had gone from the edge of the treated area.
HIPS:
Shiny side: fine after 30 mins, outline after 120
Matt side: fine after 30 mins, outline after 120

Styrene (“Plasticard”): fine after 30 mins, tide mark on one side after 120.
I think from this we can see that ABS is a problem, but other forms of Styrene / Styrol / HIPS / polystyrene aren’t. Clear polycarbonate may have an issue. To combine it all into a list with my previous findings:
| <ABS> (black) | X |
| <ABS> (clear) | X |
| <ABS> (white) | X |
| ABS* (white, vintage) | X |
| ABS* (black, vintage) | X |
| Aluminium | OK |
| HIPS (High Impact Polystyrene) | OK |
| “High Impact Styrol” (vintage) | OK |
| Nitrile Gloves (blue) | X |
| Polycarbonate (clear) | POSSIBLE ISSUES |
| <PC> | SOME ISSUES |
| <PP> Polypropylene (clear) | OK |
| Polystyrene sheet (Plasticard, white) | OK |
| Polystyrene forms (Evergreen | OK |
| <PS> Polystyrene (white) | OK |
| Vinyl Gloves (clear) | OK |
Another Mention of PPE (Personal Protective Equipment)
Although the “safety” of Biostrip 20 is much touted (see earlier), even the manufacturer points out some of the hazards in the small print.
Obviously, I can’t say I used the same degree of rigour you’d find in a double blind clinical, however I would stand by my observations of short-lived issues:
- irritation of the skin (3 out of three uses, some stinging/burning, worst being itchy/red hair follicles of the uppermost section of my left pointy finger & small area of peeling on side of same finger).
- nausea & bowel irritation (2 out of three uses).
- minor eye irritation (2 out of three uses).
- headache (1 out of three uses).
- recurring taste like product smells (1 out of three uses).
It goes through blue Nitrile gloves very quickly, and wrinkling of the innermost pair when double gloving with clear vinyl suggests that something is passing through the outer glove, and therefore likely through the second and potentially into the skin.
Nb. I don’t keep disposable latex gloves and didn’t want to risk the only pair of Marigolds, though it’s possible that they would offer greater protection.
This is not to say you shouldn’t use it – I still think Biostrip 20 is safer than the De-Solv-It Graffiti Remover I used a decade ago, and a lot safer than the Caustic Soda I’ve been using as a fill-in since then – just be cautious about what plastics you use it on, test an inconspicuous area first, and use proper PPE in a ventilated environment.
Overall
Plus Points
- Way less stink than De-Solv-It Graffiti Remover.
- Much less residue in the plastic than De-Solv-It, and none of the crazing or surface melting on most* plastics (* not ABS).
- Appears to be safe on polycarbonate, based on my limited testing.
- Much safer than Caustic Soda and can be used on aluminium.
- No additional damage as with media blasting.
- Effective.
- Good cling/ anti-run properties.
Neutral Points
- Prices are at a point where the value feels a bit questionable.
- Not as safe as the rather “daisies and roses” marketing claims suggest.
- Some side effects from my use suggest a mask, vinyl gloves, ventilation and eye protection are all required.
- Not sure about US/European/RoW supplies – though they do seem to be trying with the US and appear to already have some European suppliers.
Negative Points
- Not safe on all Tamiya plastics – especially ABS – and not always clear what will be a problem.
- Unable to find an MSDS (Material Safety Data Sheet). There are situations where one is not required (no hazardous content, and/or use in commercial environment would not involve exposure greater than that to the average consumer) but I don’t believe that applies here.
- Not safe with Nitrile gloves.
Rolling The Dice
I found that Biostrip 20 is not safe on ABS plastics (or nitrile gloves). However, on the plastics it doesn’t melt, it’s an effective, available, and comparatively safe paint stripper - though I’d suggest gloves, eye protection and ventilation are needed, as is cautious disposal.
It feels a touch pricey but does seem to go a long way. It’s not as family friendly as first suggested but is significantly better than my previous “champion” (and the alternatives) in most regards.
As the materials used in older Tamiya plastics are not always known, that could lead to some vintage parts being irreparably damaged. For that reason, in the context of RC cars it can only be a three out of six from me.

__________________________
Written by TB member Jonny Retro