Keyword

TOPIC:

Re: (Mostly) Mk.1 Sand Scorcher 12 years 1 month ago #8486

Been busy clearcoating - not so good on the original shell - the hycote clearcoat has remelted both the fresh blue paint (most evident on the left door) & the white paint that's been on for a month ... I used Halfords clear on the "spare" shell & had no problems at all :whistle:


Attachments:

Please Log in to join the conversation.

Re: (Mostly) Mk.1 Sand Scorcher 12 years 1 month ago #8488

I swear this shell is jinxed ... the Hycote lacquer seems to be really porous - I went badly over the edge while painted the windscreen surround & tried wiping it off, it wasn't having any of it so I tried a bit of thinners (the correct stuff) ... & smeared it all over the A post & corner of the bonnet :blink: :sick: :pinch:

I was all for stamping on it & using the spare full time instead, but had a couple of rollups, a bit of lunch & then came back to it - tiny bits of used 800 grit followed by 2000 grit wet & dry fetched it right off :)

It's a little fuzzy round the edge & the white isn't quite as shiny as it should be, but I'll polish & wax that area once I'm done with the decals - they'll have to wait as I want to give the details a couple of days to harden off.


Attachments:

Please Log in to join the conversation.

Re: (Mostly) Mk.1 Sand Scorcher 12 years 1 month ago #8490

Evidently I have itchy fingers :whistle:

Before and after pics of the chassis:


Please Log in to join the conversation.

Re: (Mostly) Mk.1 Sand Scorcher 12 years 1 month ago #8491

... and some of the whole:


It's taken far longer than I expected, but I'm fairly pleased with it ... something's still bent on the front right suspension & the decals aren't 100% accurate as I had to use leftovers.

:)

Please Log in to join the conversation.

Re: (Mostly) Mk.1 Sand Scorcher 12 years 1 month ago #8497

JR, there is only one problem with your builds. When I've started to follow them, I find myself at the point of wanting to buy every model you've bought and restored. I have always wanted a Sand Scorcher, now I want one even more. Please, I beg of you, stop buying used Tamiya models and restoring them... Hahahaha just joking, keep up the good work. Can't wait to see the next wreck to masterpiece coming from your shed...

Edward

Please Log in to join the conversation.

Re: (Mostly) Mk.1 Sand Scorcher 12 years 4 weeks ago #8513

Wow! those look fantastic. What a great way to rescue a slightly ragged edge. I just painted my sand scorcher 2010 and have a similar problem. That line tape is hard to get now that kyosho discontinued it.

Was looking for an alternative and it looks like craftpak make various color graphic line tapes at 1/16 and 1/32 for indoor and outdoor use. Metallics too. Anyone know if these are any good?

Please Log in to join the conversation.

Re: (Mostly) Mk.1 Sand Scorcher 12 years 4 weeks ago #8516

Once again JR, a complete rag to riches post :woohoo:

As like the other guys, can't wait for the next relic to rise from the ash's to shelf queen.

Mark

Please Log in to join the conversation.

Re: (Mostly) Mk.1 Sand Scorcher 11 years 6 months ago #14410

long time fan of your work
I have a mostly restored Mk 1
Roughrider-I Retained the inner bearings on the rear arms by drilling right through the shock hole intothe bearing appature & tapping all the way to the bottom
A small amount of locktite & a grub screw ,srewed in before the shock is attached
solves the problem without having to deform the arm
Original-set up was a piece of steel tubeover the shaft sandwiched between bearing
& universal joint -
I lost both of mine 20 plus years ago havent got one to make replacements from
:)
The following user(s) Liked this: Jonny Retro

Please Log in to join the conversation.

Re: (Mostly) Mk.1 Sand Scorcher 11 years 6 months ago #14414

Nice, real top job as always :cheer:
If you can't fix it with a hammer, you've got an electrical problem mate :)

Please Log in to join the conversation.

Last edit: by AndyAus.

Re: (Mostly) Mk.1 Sand Scorcher 11 years 2 months ago #17991

long time fan of your work
I have a mostly restored Mk 1
Roughrider-I Retained the inner bearings on the rear arms by drilling right through the shock hole intothe bearing appature & tapping all the way to the bottom
A small amount of locktite & a grub screw ,srewed in before the shock is attached
solves the problem without having to deform the arm
Original-set up was a piece of steel tubeover the shaft sandwiched between bearing
& universal joint -
I lost both of mine 20 plus years ago havent got one to make replacements from
:)


Sorry Len, I completely missed your post :blush:

Drilling & tapping the rear arms for a grub screw does sound like the proper engineering solution :y: 
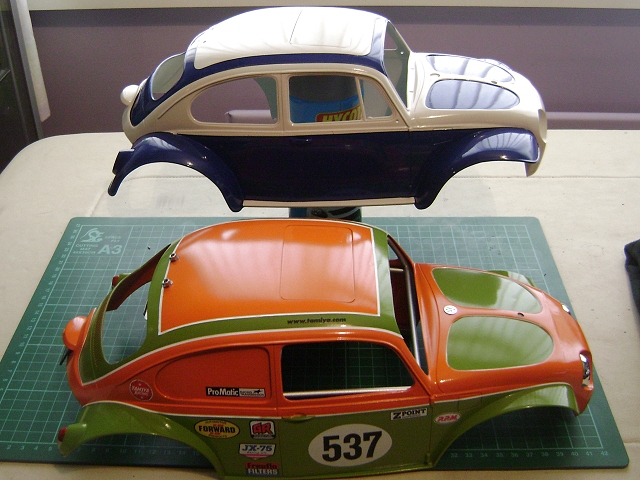
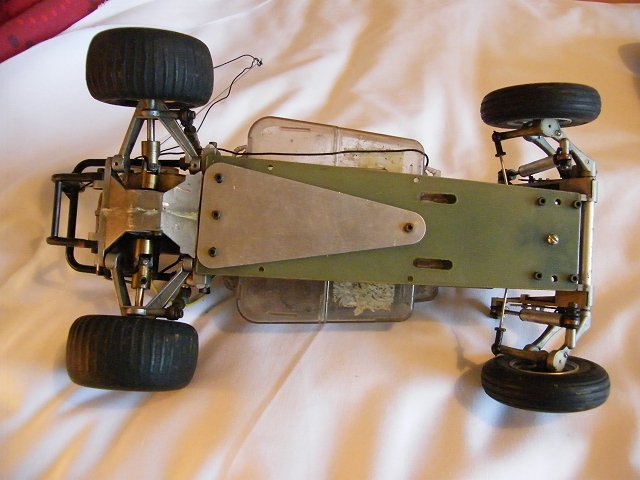
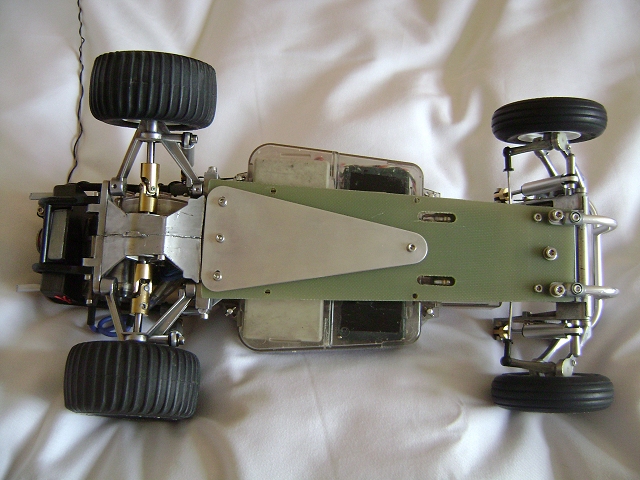
... but is more invasive than I wanted - when I posted about "deforming" the rear arms, I was talking about a couple of very small dinks on the inside, little bigger than what would polish out :)


Attachments:

Please Log in to join the conversation.

Moderators: caprinutstingray-63AndyAus
Time to create page: 0.194 seconds
Cookies are required to make this site work. If you continue to use this site you permit us to use cookies.