Keyword

TOPIC:

Re: (Mostly) Mk.1 Sand Scorcher 12 years 4 months ago #4693

Got the white plastic primer on today - weather wasn't ideal, only 6 celcius, but low humidity & little wind - it's as good a spraying day as you'll get for this time of year ... hoping it holds for tomorrow so I can give the shell a quick tickle with the wet & dry then hit it with the white gloss ...

I also did the final bit of polishing - the underguard/chassis brace thing (used 800 grit, used 2000 grit, then autosol), so I hope that between coats I can make a start on rebuilding the chassis :)

Please Log in to join the conversation.

Re: (Mostly) Mk.1 Sand Scorcher 12 years 4 months ago #4716

Got one coat of white on today - the weather really wasn't the best - and even though I was really careful to only make it a light coat, I still got a small run ... I _hate_ spraying white paint :sick:

Anyway, it did mean I had a bit of time to spend on the chassis ...


Lots of clean shiny bits ready to be put back together (and new fasteners) ...


Manual page 3 - gearbox, arms & torsion bars ...


Page 4 - more on the gearbox, rear cage ...


Page 5 - rear dampers (cheated & used all the new bits) ...


... thought I might as well use the second bearing space that each rear wishbone of the mk.1 has - but they wouldn't stay in, so I very gently deformed the casting slightly with a very sharp punch ...


Manual page 6 - front end ...


Page 7 - servo saver ... bumper should have also gone on, but it wouldn't fit - I wonder if it shrunk?


page 8 - installing servos & MSC ... one servo is fubar & insists on a neutral postion 45 degrees out, even after poking about on the inside ... wouldn't matter on a round/splined top servo, but on a square one it's a problem that'll stop me running it until I think of something else ...


page 9 - finishing mechanism box ...


page 10 - wheels. I know that the "correct" period way of joining the MSC wires the motor is twisting & heatshrinking, but I used bullet connectors anyway :D


Time to start on the driver & exhaust I guess :)

Please Log in to join the conversation.

Last edit: by Jonny Retro.

Re: (Mostly) Mk.1 Sand Scorcher 12 years 4 months ago #4739

Got the final coat of white gloss on today, it'll be a few days before I want to tackle the masking up & spraying the contrast colour ... but I have been thinking about what that second colour should be & I'm leaning towards not quite boxart - VW "Jazz Blue", which is a _pearlescent_ paint. I'm such a rebel :whistle:

I do have two more scorcher bodies to paint at some point, one is a complete re-re body set that I'm thinking of doing the alternative boxart (red & yellow, in slightly different places to the blue/white); the other is a re-re scorcher shell, no glass, and various other beetle bits to make it more or less whole ... it's going to be a bit of a Frankenstein's Monster whatever I do to it, so I thought about what the most extreme colour combo I could do would be ... and came up with Rover Applejack Green and Ford Signal Orange ... which should look disgusting, but oddly, doesn't. Is there any colour that _doesn't_ work on a Scorcher?


Attachments:

Please Log in to join the conversation.

Re: (Mostly) Mk.1 Sand Scorcher 12 years 4 months ago #4740

VERY nice job on the chassis. It looks stunning!

The servo issue sounds weird, does it turn equal amounts both ways? If not, it's probably because someone has disassembled it once and not found the correct position for the final cog.

I remember that my bumper also seemed like a tight fit after the boiling, but I managed to get it on. Maybe you boiled it longer than me causing it to shrink more ??

-Lars

Oh, the Lime/Orange looks great! go for it!
Signature now gets correct formatting if you edit it in your Profile. Use normal BBcode if you want.
www.tamiyabase.com was formatted automatically.

Please Log in to join the conversation.

Re: (Mostly) Mk.1 Sand Scorcher 12 years 4 months ago #4744

stickers should get the herbie stickers from here
:) :laugh:

Please Log in to join the conversation.

Re: (Mostly) Mk.1 Sand Scorcher 12 years 4 months ago #4748

...
The servo issue sounds weird, does it turn equal amounts both ways? If not, it's probably because someone has disassembled it once and not found the correct position for the final cog.
...


I did some more investigating & it's not the servo - that is, either servo has a neutral position 45 degrees out when plugged in to the left stick channel, and a normal neutral on the other channel. On both channels both servos have an even range of motion.

If it's not the servo it can only be the transmitter or receiver. I'll have a go at isolating it further ...

...
I remember that my bumper also seemed like a tight fit after the boiling, but I managed to get it on. Maybe you boiled it longer than me causing it to shrink more ??
...


Could be ... it's easy enough to fettle it to fit, but I'm not sure I want to - it kind of lets the side down. Maybe I'll spray it first.

...
Oh, the Lime/Orange looks great! go for it!


But there are aso many possibilites ... ;)


Attachments:

Please Log in to join the conversation.

Re: (Mostly) Mk.1 Sand Scorcher 12 years 4 months ago #4754

More great progress there Jonny,
Chassis looks great and very tidy, great job.
Where did you get the conectors from for the MSC-Motor?

Good to see some very differant paint schemes and loving the Fruit Salad version, reminds me of my youth (long time ago) :woohoo:

GING

Please Log in to join the conversation.

Re: (Mostly) Mk.1 Sand Scorcher 12 years 4 months ago #4757

...
Where did you get the conectors from for the MSC-Motor?
...


Vehicle Wiring Products, formerly known as Merv Plasstics: www.vehicle-wir...ullets.php - they're "Japanese" 3.9mm bullet connectors - you have to buy the males & females & the insulation parts for each separately in 50's, and pay postage on top of that _and_ VAT on top of everything - AND you'll need a tool to crimp them too (see their ref. MP71) - so it's not cheap, but should keep you going for a while :D

Please Log in to join the conversation.

Re: (Mostly) Mk.1 Sand Scorcher 12 years 4 months ago #4758

...
If it's not the servo it can only be the transmitter or receiver. I'll have a go at isolating it further ...


I tried different transmitters and they all behave the same - channel 1 for steering, channel 2 for speed control, and "normal" neutral position - it's only that particular Acoms mk.1 transmitter that's "wrong" - channels reversed & throttle channel neutral 45 degrees out ...

It's easy enough to swap the channels over (open the back & swap the gimbal assemblies over), one pot on the PCB is 45 degrees "out" to the others, so I'll give that a tweak & see what happens.

This isn't the transmitter that came with the car - even after swapping the antenna for a complete one it was so twitchy it would have been useless :(

Please Log in to join the conversation.

Re: (Mostly) Mk.1 Sand Scorcher 12 years 4 months ago #4774

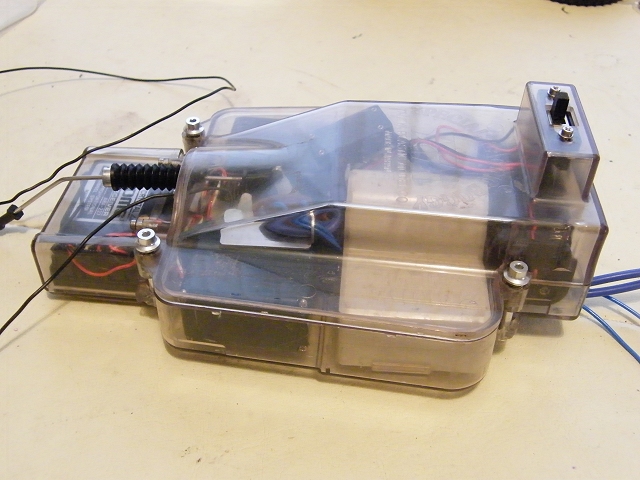
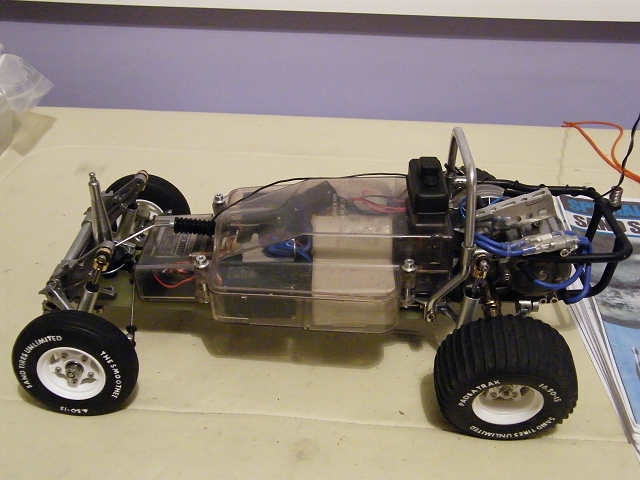
Gave up on the TX issue - the other Acoms mk.1 set I have that works reliably has the same "faults", but the mk.3, mk.4, mk.5 & mk.7 all work fine :blink: so I'll just have to use one of those instead if I every drive the thing ...


The shell still needs another coat or two of white as it's a bit patchy - there are areas that look like shadows ... until you move it, and they stay the same. THey don't show up in photos & you have to look for them, but I think they'll wind me up in future if I don't do soemthing about it. Spraying indoors just isn't an option, so this will have to wait until the weather improves - I'll push my luck with spraying conditions, but any time you can see your breath is too cold.

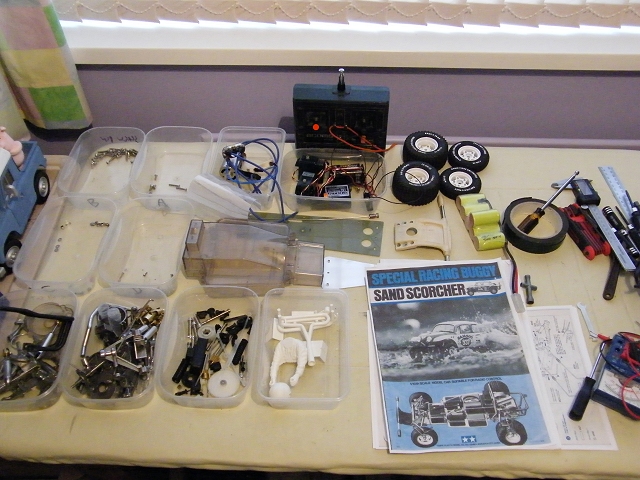
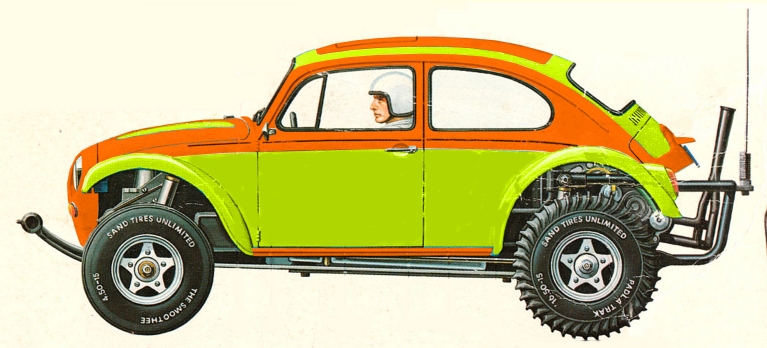
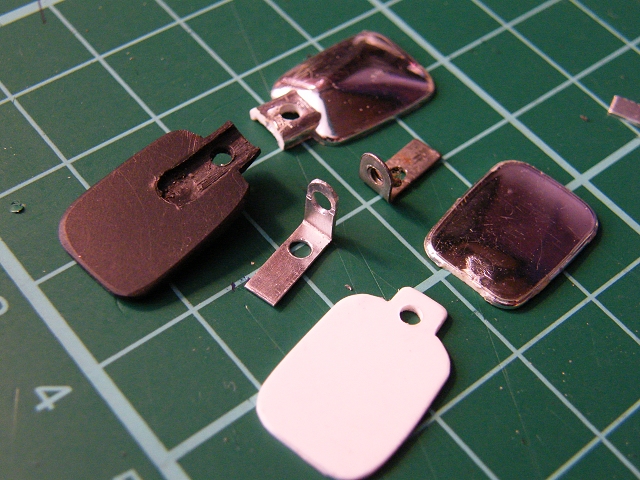
The shell that came with the car was devoid of fittings apart from the VW badge, the bit that goes over the rear licence plate, and most of one mirror ... a re-re body kit has donated most of the needed parts, and I made some door handles ... the mirrors that come with the re-re are quite different though, so as I had most of an original one to use as a pattern I thought I'd have a go at fixing that & making a whole new one.


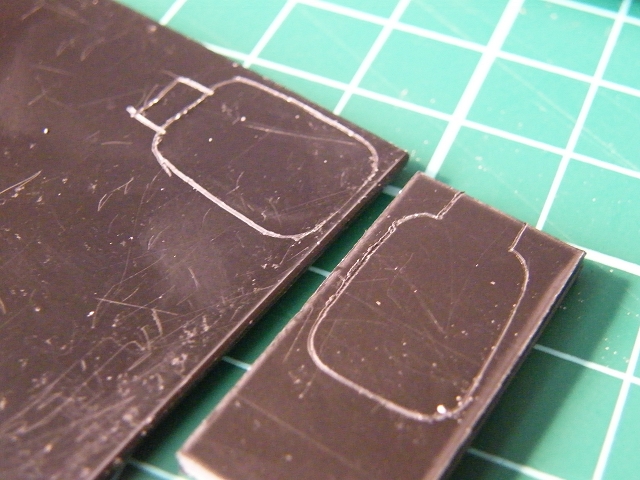
Marked out a bit of 3mm styrene for the "back" side, 1mm for the "lens" side ... which i discarded as I'd done a poor job of scribing it & it was too thick anyway :whistle:


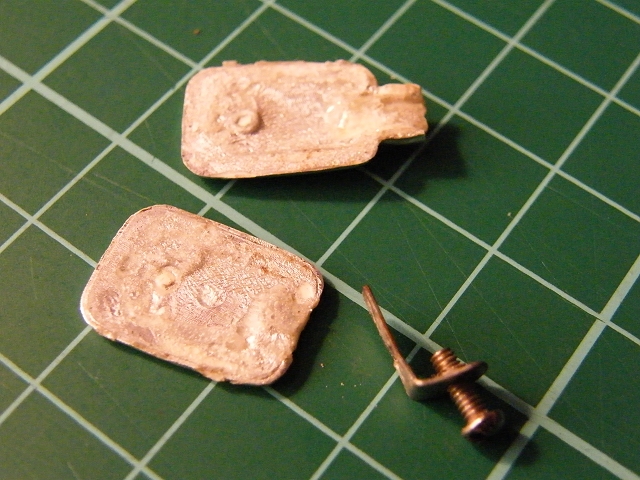
"back" side filed/sanded to shape ... part where the "stalk" meets the body was impossible in one piece - if I ever do this again I'd do it in two sections; point where the angles meet should also be further into the car side ...


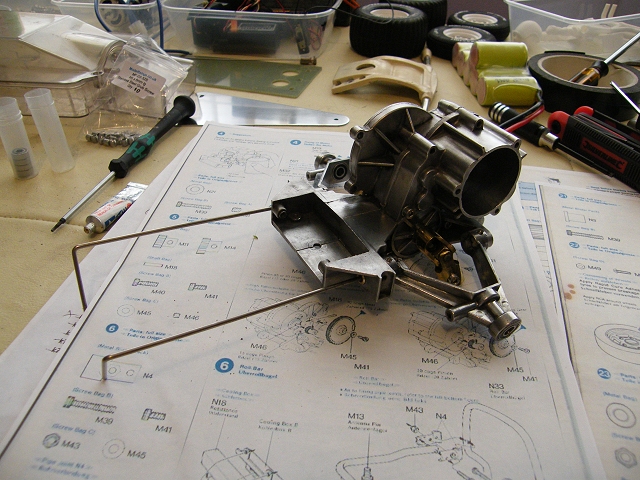
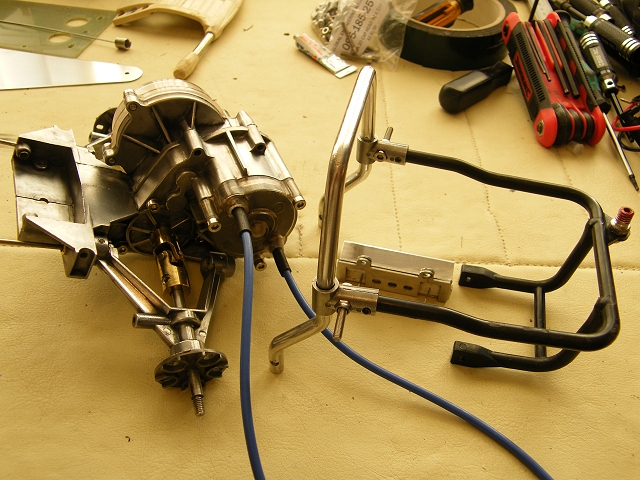
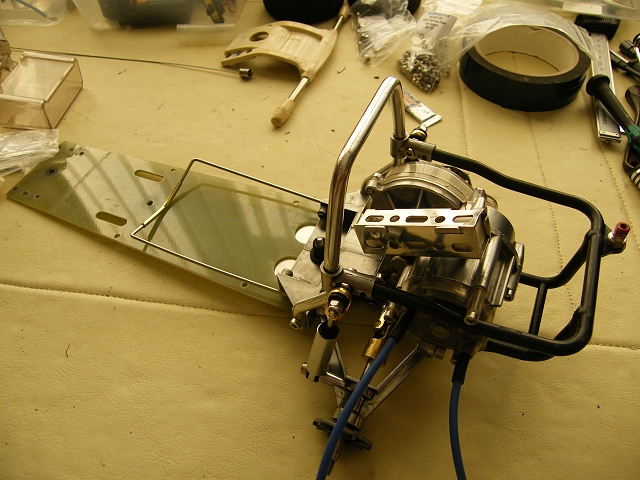
Dremelled out a channel in the "back" & made my own bracket out of 0.5mm aluminium sheet - it's really delicate in pieces this small, I had to start with a 1mm drill bit, followed by 1.5mm & then a round needle file ...


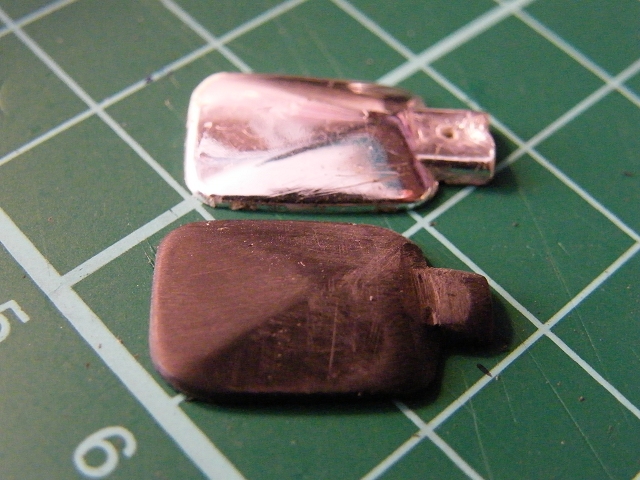
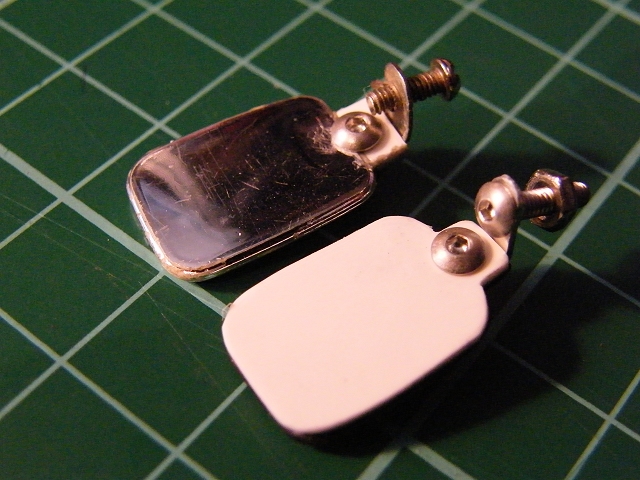
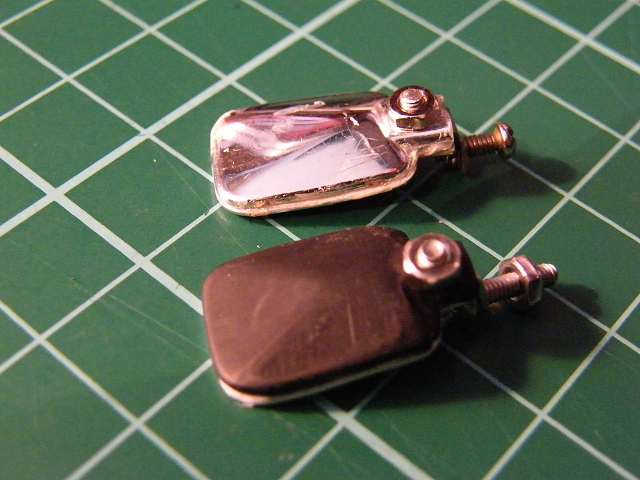
Machine screw & nut are a bit chunky even in M2 size, but I thought they needed the extra help to stay together. Still need a bit of sanding before painting ... obviously I'm not going to get anywhere near the chrome plated finish, but my attitude towards homemade replacement is that they should look a bit different & be obviously hand made - no-one should be able to pass them off as originals - but on the other hand I hope they show I cared enough to make a reasonable effort :)


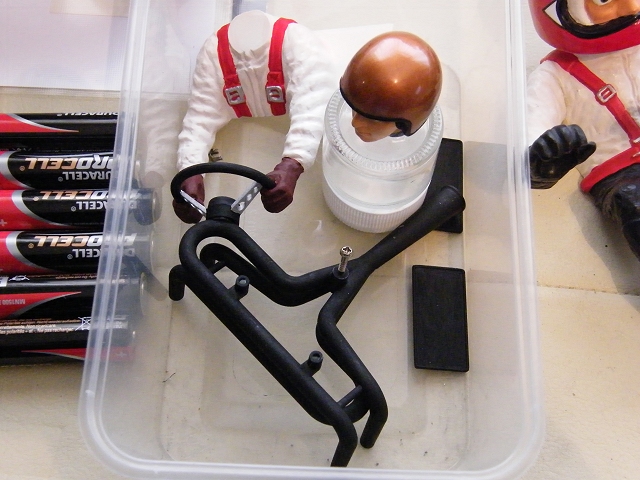
I've also painted the 'zorst & driver ... no attempting at weathering them yet though.

I aplogise that my Willy is visible in the top right corner of the picture ;)

Please Log in to join the conversation.

Moderators: caprinutstingray-63AndyAus
Time to create page: 0.259 seconds
Cookies are required to make this site work. If you continue to use this site you permit us to use cookies.